
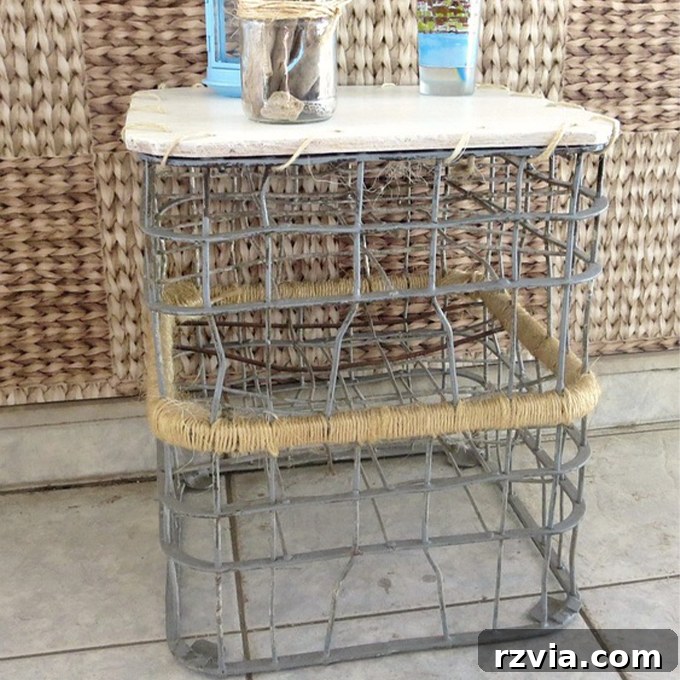
DIY Upcycled Milk Crate Table: Revitalize Your Outdoor Space with Vintage Charm
Are you searching for a creative, budget-friendly way to enhance your outdoor living area? Look no further than the humble vintage wire milk crate! These often-overlooked treasures possess incredible potential for transformation. With a touch of creativity and a few simple steps, you can upcycle an old crate into a beautiful, functional piece of outdoor decor. This detailed guide will walk you through giving a beloved DIY milk crate table a fresh lease on life, proving that even well-loved items can be revitalized into stunning, resilient additions for your balcony, patio, or garden.
The Journey of a Vintage Milk Crate: From Storage to Stylish Outdoor Table
My spacious balcony has always been a canvas for my DIY passions, constantly inspiring me to repurpose and transform everyday objects into unique outdoor furniture. Its generous size demands ample furnishings, making upcycling a perfect solution. Last year, a fruitful delve into my trusty basement yielded a treasure trove of vintage metal milk crates. These robust and characterful crates immediately sparked ideas for enhancing my outdoor aesthetic.
While a smaller one was cleverly transformed into a charming milk crate stool, two larger crates presented an exciting opportunity to create a more substantial centerpiece for my outdoor space: a DIY outdoor table. This project exemplifies how readily available vintage items can be given a new purpose, contributing to a truly personalized and inviting atmosphere.
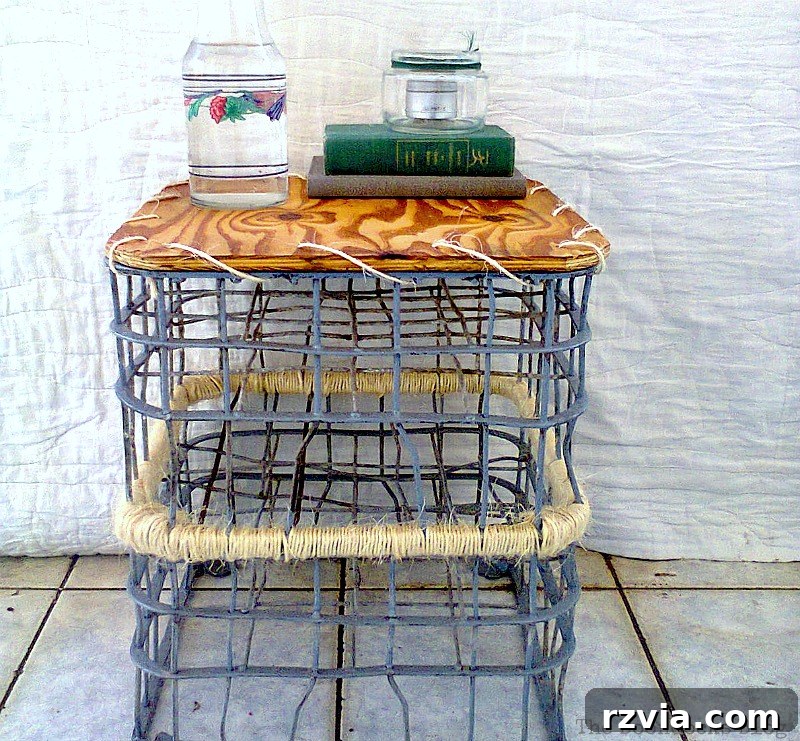
This image captures the original rustic charm of the milk crate table before its recent upcycle. It served its purpose beautifully for a season, embodying a raw, industrial aesthetic. The initial design involved binding two sturdy wire crates together and topping them with a simple wooden surface, ready to hold drinks, books, or decorative items. For those interested in the initial construction and how these vintage milk storage crates were first assembled, you can see the full tutorial here. This foundational project laid the groundwork for the revitalized piece we’re focusing on today.
Why an Upcycle Was Needed: Battling the Elements
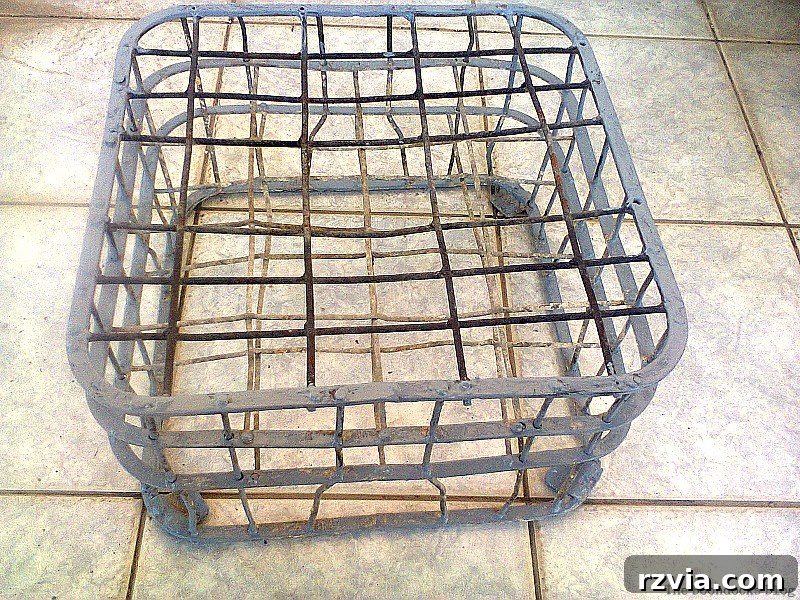
Despite its initial beauty and my immense satisfaction with its functionality, a crucial oversight led to the need for a refresh: the table was inadvertently left outdoors all winter long. The relentless assault of rain, wind, and accumulated dust took a considerable toll. The once-charming rustic finish began to show significant signs of wear and tear, including noticeable rust spots on the metal crates and fading and discoloration on the wooden top. It became abundantly clear that this beloved outdoor furniture piece deserved a second chance, prompting a new upcycling project not only to restore its former glory but also to enhance its resilience and protective qualities against the harsh outdoor elements.
Gathering Your Materials and Tools for the Upcycle
Before diving into any DIY project, proper preparation is paramount. To successfully upcycle your vintage wire milk crate table, gather the following essential materials and tools. Most of these can be found readily around your home or at a local hardware store, keeping this project both accessible and affordable:
- Original Wire Milk Crate Table: Your existing piece, ready for a well-deserved refresh.
- Sandpaper or Electric Sander: Various grits are recommended (e.g., 120-grit for initial removal of old finishes, followed by 220-grit for achieving a super smooth surface).
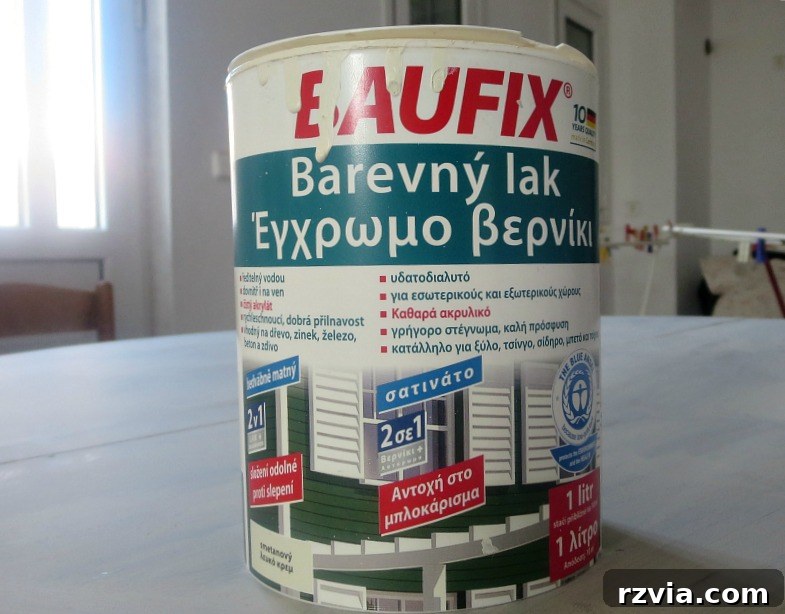
- Protective Paint/Varnish: A high-quality, durable exterior-grade paint with integrated varnish or a separate top coat for robust weather protection. (The specific product used here was a colored varnish from Lidl, which conveniently offers both vibrant color and long-lasting protection).
- Paint Brushes or Rollers: Choose sizes suitable for achieving even and smooth application on both the top surface and edges.
- Clean Cloths: Essential for wiping away dust, debris, and for any cleaning prior to painting.
- Twine or Rope: To securely bind the crates together. Opt for a weather-resistant type if you plan on replacing the existing twine.
- Gloves and Safety Glasses: Crucial for personal protection during sanding, painting, and any cleaning tasks.
- Optional: Mild detergent and water for a thorough cleaning of the crates if they are particularly soiled.
Step-by-Step Guide to Renewing Your Outdoor Table
1. Disassembly and Initial Cleaning
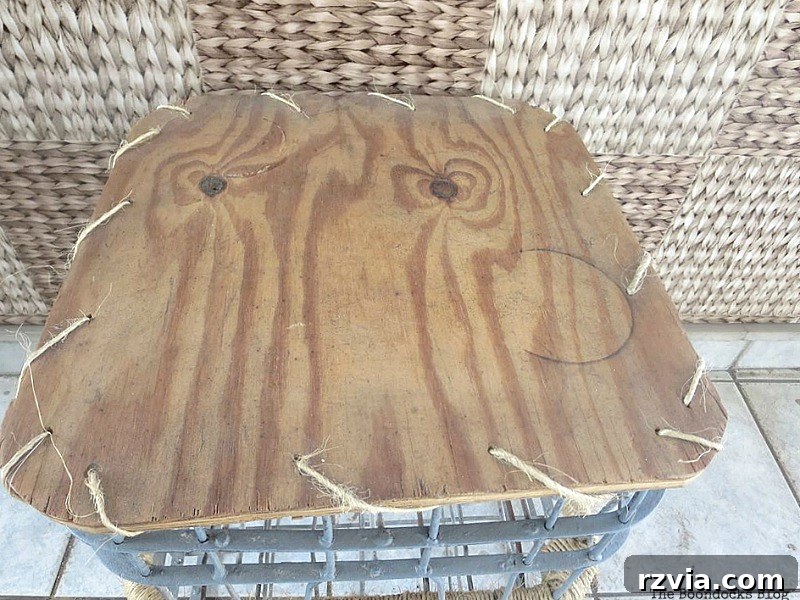
The very first step in any successful revitalization project is meticulous preparation. I carefully removed the twine that securely bound the wooden top to the wire crates. This strategic separation allowed for easier, unhindered access to both components for comprehensive cleaning and subsequent treatment. I then proceeded to give both the wooden top and the metal crates a thorough cleaning to remove accumulated dirt, dust, and any loose rust. A damp cloth combined with a mild detergent can work wonders here, ensuring a pristine surface that is perfectly prepared for the upcoming painting and finishing steps.
2. Sanding for a Smooth Canvas
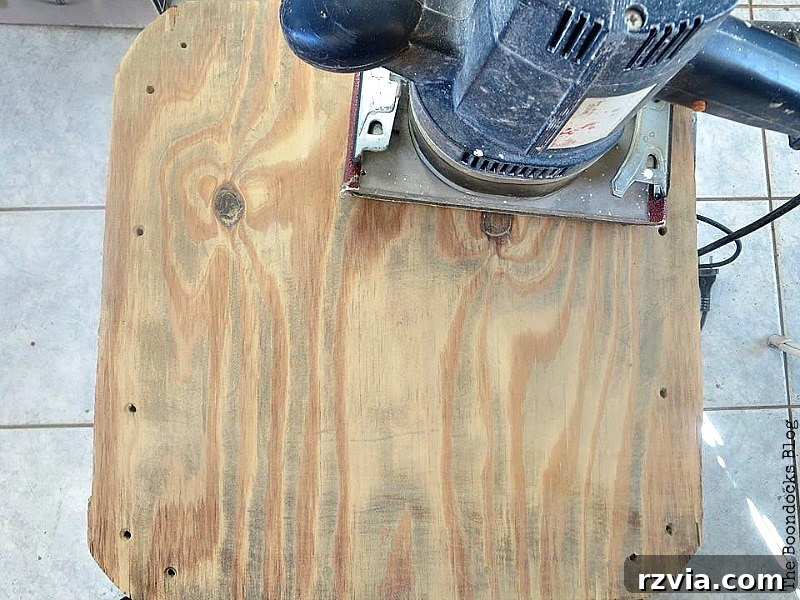
With the components thoroughly cleaned, it was time for the critical process of sanding. This essential step prepares the surface meticulously for paint, ensuring optimal adhesion and contributing significantly to a smooth, professional-looking finish. Using an electric sander, I meticulously sanded the plywood top, aiming to remove all traces of old varnish, any rough spots, and imperfections that had accumulated due to prolonged weather exposure. For the metal crates, a wire brush or fine-grit sandpaper can be effectively used to gently remove any surface rust and loose paint, creating an ideal base for either potential rust-inhibiting primers or direct painting, depending on the specific paint product chosen. A good, thorough sanding ensures that your new coat of paint will adhere beautifully, providing a durable and long-lasting finish.
3. The Magic of Colored Varnish: Painting for Protection and Style
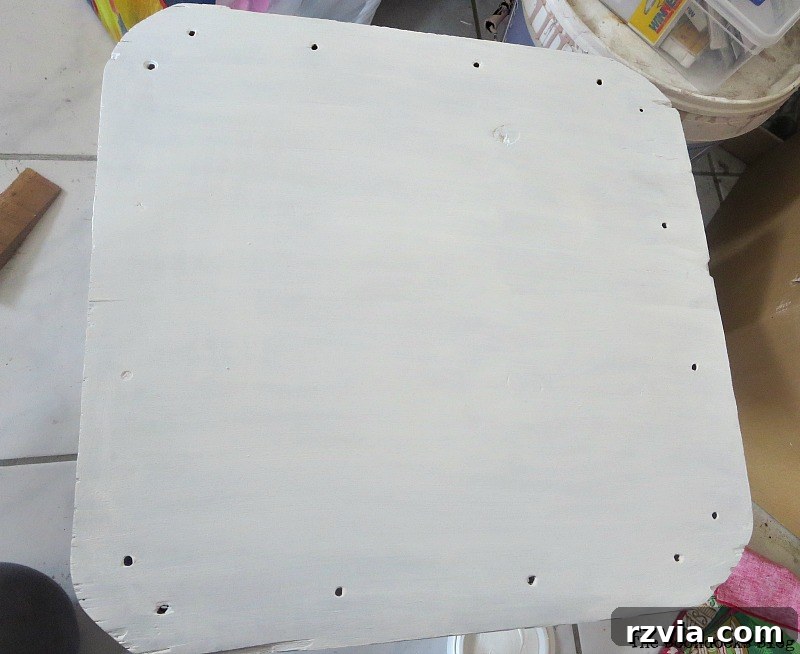
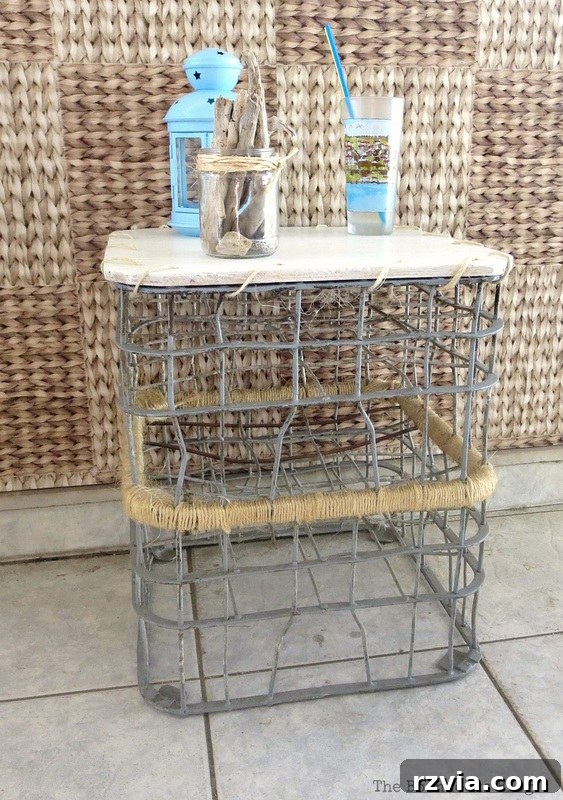
After the thorough sanding process, the real transformation began with the application of paint. I opted for a fantastic product I discovered during a shopping trip at Lidl: a colored varnish. This innovative product offered the best of both worlds – vibrant, crisp white color and robust protective qualities – all efficiently delivered in one single application. The choice of white paint instantly brightened the wooden top, imbuing the entire table with a fresh, clean, and subtly modern coastal vibe, which is absolutely perfect for outdoor settings. It’s truly a remarkable product that significantly simplifies the painting process, effectively eliminating the need for separate sealant coats. While I am not being compensated for this product mention in any way, I wholeheartedly believe it is a great find. If you have a Lidl near you, I highly recommend keeping your eyes open for such versatile and high-performing products, as they can significantly streamline and enhance your DIY efforts.
I applied three generous coats of this combined paint/varnish to the wooden top, ensuring to allow ample drying time between each application as per the product instructions. This layering strategy not only deepened the pristine white color but, more importantly, meticulously built up a strong, highly weather-resistant barrier, crucial for outdoor furniture. For the metal crates themselves, if you choose to paint them, a rust-inhibiting primer followed by an exterior metal paint would be the ideal approach, or a direct application of a combined paint-and-primer product specifically designed for metal. The overarching goal is to ensure both superior aesthetics and exceptional longevity for your beautifully upcycled outdoor furniture.
4. Reassembly and Decorative Binding
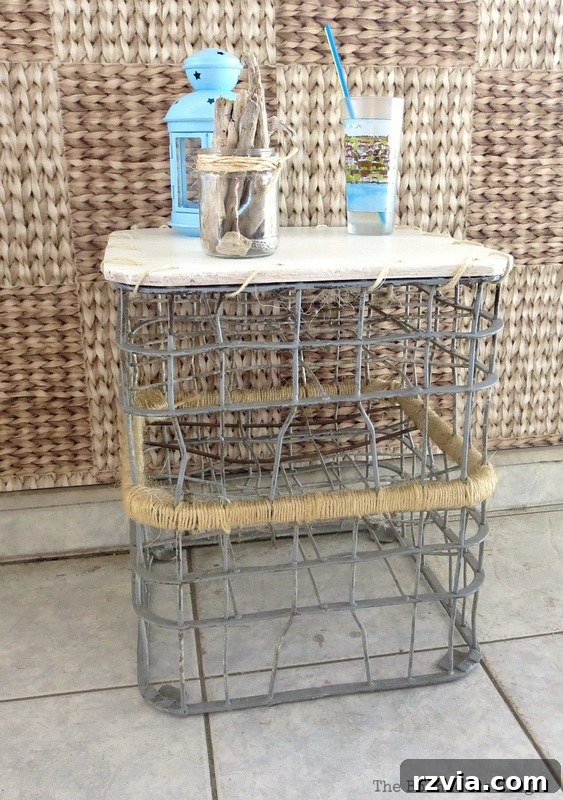
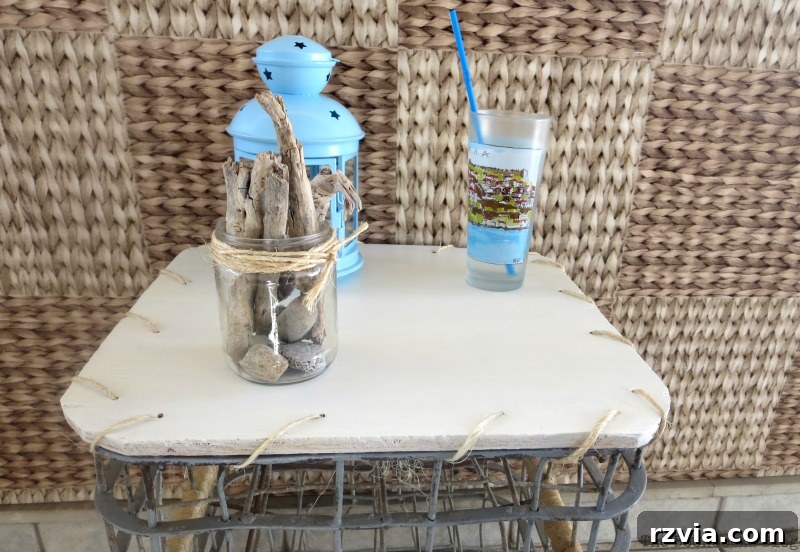
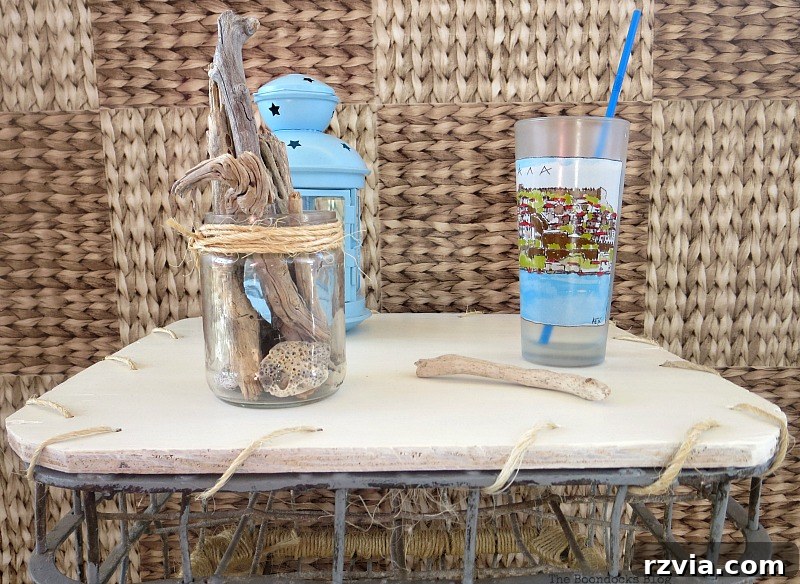
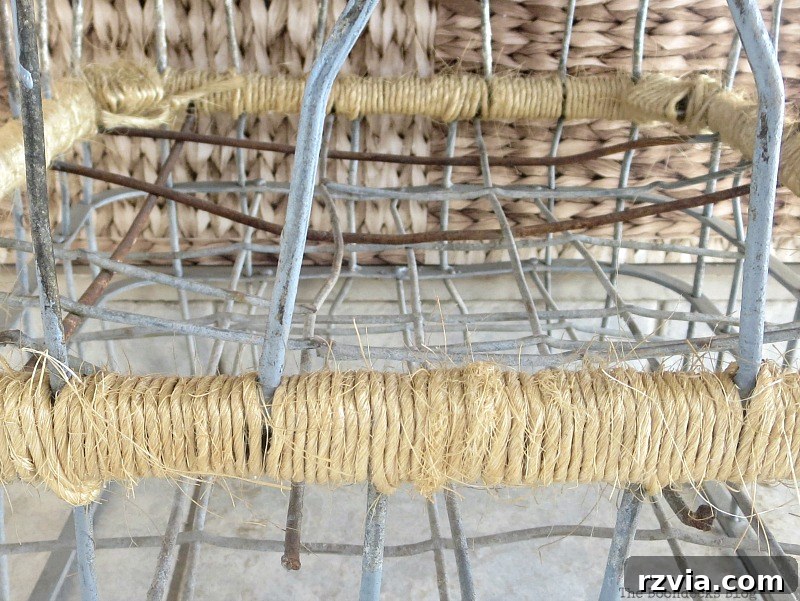
Once the paint was thoroughly dry and sufficiently cured, it was finally time to meticulously reassemble the table. I carefully placed the freshly painted wooden top back onto the two sturdy wire milk crates, ensuring it was centered and stable. The final, yet crucial, touch was re-wrapping the crates with twine, just as they were originally. This step is not merely structural, providing stability; it also adds a charming, rustic-nautical detail that beautifully complements the clean white top. Interestingly, the intricate process of carefully threading the twine through the crate openings actually took longer than the entire sanding and painting phases combined! This highlights how even the simplest, most decorative details can sometimes be the most time-consuming to execute, but are ultimately immensely rewarding for the unique character and personalized touch they impart to the finished piece.
The Multifaceted Benefits of Upcycling: Beyond Just a Table
This upcycled milk crate table is far more than just a renewed piece of furniture; it’s a testament to the powerful potential of repurposing and sustainable living. Upcycling offers a multitude of tangible and intangible benefits, making it an increasingly popular and impactful trend in home decor, personal projects, and environmental consciousness:
- Environmental Friendliness: By transforming existing items into new, functional pieces, we significantly reduce the amount of waste sent to landfills. This process also decreases the demand for new manufacturing, which in turn conserves valuable natural resources and reduces energy consumption.
- Cost-Effectiveness: Upcycling projects typically involve utilizing materials you already own or can acquire very cheaply from thrift stores, flea markets, or even your own basement. This approach offers substantial savings compared to purchasing brand-new furniture.
- Uniqueness and Personalization: Each upcycled piece tells its own story and carries a unique character that mass-produced, off-the-shelf items simply cannot replicate. It allows for complete personalization, ensuring the finished product perfectly matches your individual style and taste.
- Creative Expression: Upcycling is an excellent and fulfilling outlet for creative expression. It challenges you to look at everyday, discarded objects with a fresh perspective, envisioning their hidden potential and bringing your unique vision to life through hands-on work.
- Durability and Quality: Often, vintage items like these wire milk crates are constructed with higher quality, more robust materials than many modern counterparts. When properly refurbished and protected, these pieces can easily outlast newly manufactured furniture.
Preparing Your Outdoor Oasis: A Fresh Look for the Season
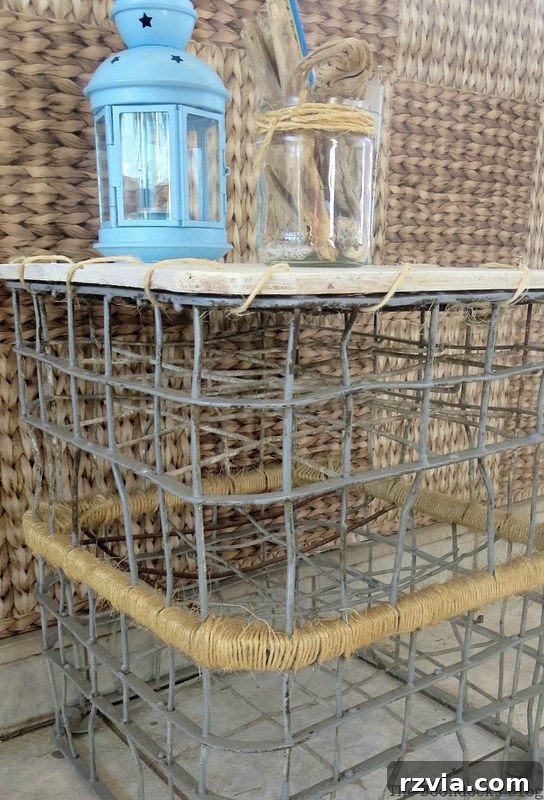
With its fresh new look and a vibrant blue lantern adding a delightful pop of color, this upcycled milk crate table is now perfectly poised to anchor my outdoor space. It’s a delightful reminder of how much impact a simple refresh can have on an entire area’s ambiance. As the warmer months approach, many of us start dreaming of long, leisurely evenings spent outdoors, enjoying the fresh air and sunshine. Have you started preparing your outdoor spaces for the season? Whether it’s a sprawling patio designed for entertaining or a cozy balcony nook perfect for quiet contemplation, every outdoor area benefits immensely from a little love and attention. Consider what small (or even large!) DIY projects could truly transform your exterior space into a true, comfortable, and stylish extension of your home.
Essential Tips for Maintaining Your DIY Outdoor Furniture
Learning directly from past experience, proper and consistent maintenance is absolutely crucial for ensuring the longevity and continued beauty of any outdoor furniture, especially cherished DIY pieces. Here are a few invaluable tips to help ensure your upcycled milk crate table (or any other outdoor project you undertake) successfully withstands the test of time and the rigors of the elements:
- Seasonal and Regular Cleaning: Make it a habit to regularly wipe down your furniture to remove accumulated dust, pollen, leaves, and other environmental debris. A gentle wash with mild soap and water can work wonders in preventing grime buildup and maintaining a fresh appearance.
- Invest in Protective Covers: Whenever possible, invest in high-quality, waterproof outdoor furniture covers. Utilizing these during prolonged periods of harsh weather, or when the furniture won’t be used for an extended period (such as over the winter months), can significantly extend its lifespan and preserve its finish.
- Reapply Sealant/Varnish Periodically: Depending on your specific climate and the level of exposure, consider reapplying a protective sealant or varnish to all wooden and painted surfaces every couple of years. This crucial step replenishes the protective layer, preventing moisture damage and UV fading.
- Address Rust Promptly: For any metal components, regularly inspect for any new rust spots, no matter how small. Treat them immediately with a rust converter product and then touch up with an appropriate exterior metal paint to effectively prevent further spread and damage.
- Consider Indoor Storage if Feasible: If you have adequate space, storing smaller outdoor furniture pieces indoors during the off-season offers the absolute best protection against extreme weather conditions, vastly extending their life and preserving their condition.
Ready to Transform Your Space?
This project beautifully proves that upcycling doesn’t have to be overly complicated or excessively time-consuming to yield truly impressive and impactful results. It’s a fantastic, accessible way to inject unique character and enhanced functionality into your home while simultaneously embracing highly sustainable and environmentally friendly practices. I sincerely hope this detailed guide inspires you to look at your old, forgotten items with a fresh, creative perspective and encourages you to embark on your very own rewarding upcycling adventure!
If you’re eager to explore more of my outdoor decor projects and find further inspiration for transforming your own exterior living spaces, feel free to click here and navigate directly to the Summer section of my blog. You’ll discover a diverse variety of innovative ideas and practical tips designed to help you make the absolute most of your exterior areas, creating inviting and beautiful extensions of your home.

You may also like: