
DIY Room Makeover: Transforming a Crib Rail into a Stylish Hanging Corner Organizer
You might have noticed a flurry of activity in my house lately, and yes, you’d be right to assume I’ve been covered in paint! My older daughter’s bedroom was long overdue for a refresh, and she had a very specific vision in mind: a beautiful blue sanctuary. So, out with the old peachy-pink hues that once adorned her walls, and in with a calming, vibrant shade of blue that perfectly reflects her personality. A room makeover is more than just a fresh coat of paint; it’s an opportunity to rethink functionality and aesthetics, especially when it comes to notorious problem areas.
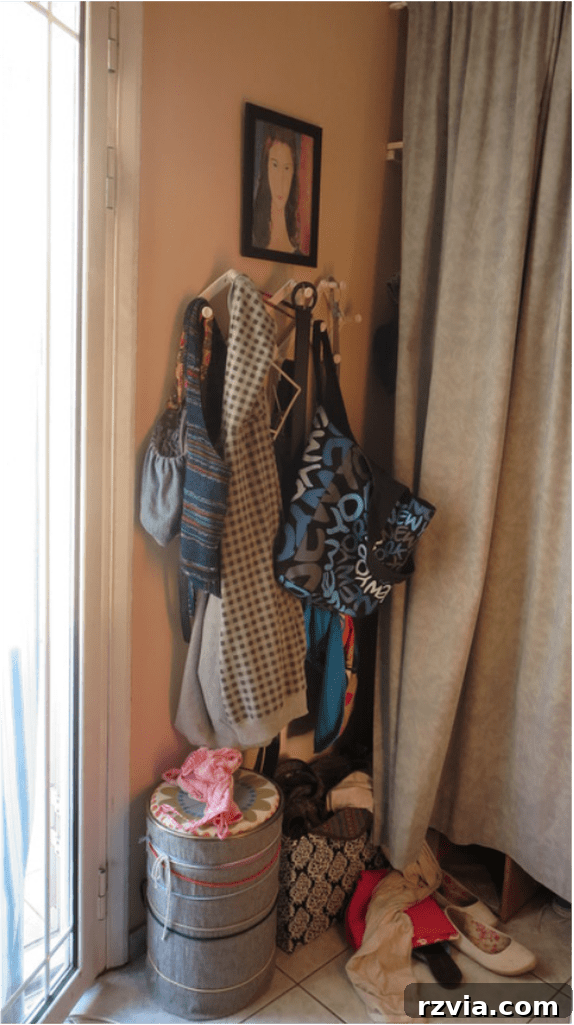
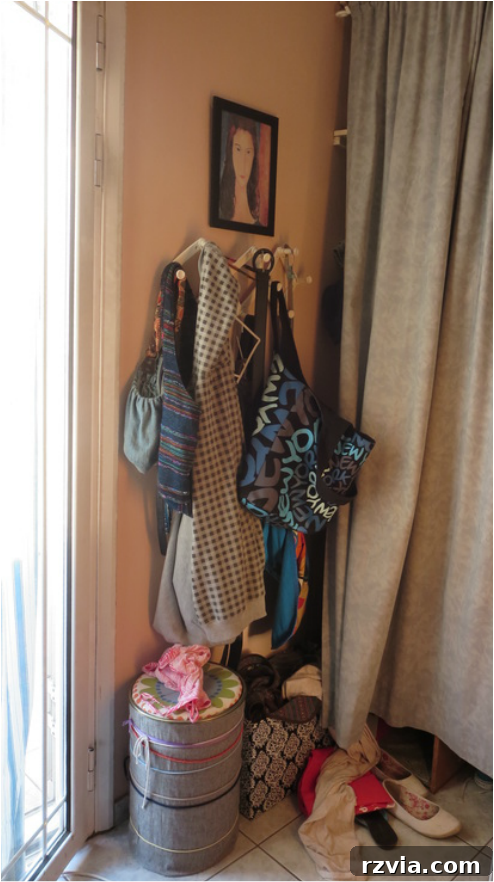
Every room seems to have that one spot—a particular corner or wall that inevitably becomes a magnet for clutter. For us, it was what we affectionately, or perhaps despairingly, called “The Hanging Corner.” This was the designated zone where my daughter’s collection of bags, belts, scarves, and various other accessories would congregate. While convenient for quick access, it often resembled less of an organized display and more of a lovely, chaotic mess. The previous system, a rather flimsy plastic accordion hanger, was barely holding on, a testament to its less-than-sturdy construction. Honestly, I’m amazed it lasted as long as it did, perpetually threatening to give way under the weight of her treasures.
Before the Transformation: The Flimsy Accordion Hanger
Before diving headfirst into the blue paint and aesthetic upgrades, it was crucial to address the structural issues of this “Hanging Corner.” The plastic accordion hanger had seen better days, far better days in fact. It was lightweight, easily warped, and incapable of truly supporting the ever-growing collection of accessories. Instead of providing an elegant solution, it merely contained the chaos in a barely functional manner, making it difficult to find items and presenting an untidy appearance even when “organized.”
This room makeover presented the perfect opportunity to finally bid farewell to that rickety organizer. My goal was not just to replace it, but to implement a solution that was not only robust and functional but also visually appealing and integrated seamlessly into the newly painted blue room. The challenge was to find a creative, budget-friendly, and sustainable way to manage her accessories, transforming the “Hanging Corner” from an eyesore into a stylish organizational hub.
The Spark of Inspiration: Repurposing a Crib Rail and an IKEA Idea
As I pondered the perfect solution for the “Hanging Corner,” my mind drifted to a previous DIY project. A few months prior, I had embarked on a creative endeavor, transforming an old crib into a functional desk. You can check out the full story of that transformation here. What remained from that project was one perfectly usable side of the crib, lying in wait for its next purpose. It was sturdy, made of solid wood, and had a lovely slatted design – perfect for hanging things.
The missing piece of the puzzle clicked into place during a recent visit to IKEA. While browsing their inspiring displays, I stumbled upon a simple yet brilliant idea: a wall-mounted slatted panel used to display flowers and small decorative items. It was an instant “aha!” moment. I snapped a quick photo, knowing immediately how I could adapt this concept. Why buy a new organizer when I had a perfectly good, free piece of furniture waiting to be repurposed?
The inspiration was clear: use the leftover crib rail, mount it to the wall, and instead of delicate flowers, we could hang all her accessories! This idea checked all the boxes: it was sustainable, cost-effective, and offered a unique, custom solution. The crib rail’s robust structure and evenly spaced slats provided a perfect framework for attaching hooks and creating an organized display that could handle the weight and variety of her belongings. It was a true testament to the power of seeing potential in overlooked items and giving them a new life.
Bringing the Vision to Life: The DIY Process
With the concept firmly in mind, it was time to put the plan into action. The process was surprisingly straightforward, proving that impactful DIY projects don’t always require complex steps. First, we prepared the crib rail. It was already a natural wood finish, which complemented the new blue walls beautifully, so no painting was required. If your repurposed item needs a fresh look, a coat of paint or stain would be the initial step.
The next crucial step was securely mounting the crib rail to the wall. We chose a spot in the corner where the previous flimsy hanger resided, ensuring it was at an accessible height for my daughter. Using appropriate wall anchors and screws, we fastened the crib rail firmly in place. Stability was paramount, as it would be holding various items. Once the rail was secure, the fun part began: customizing the hanging options.
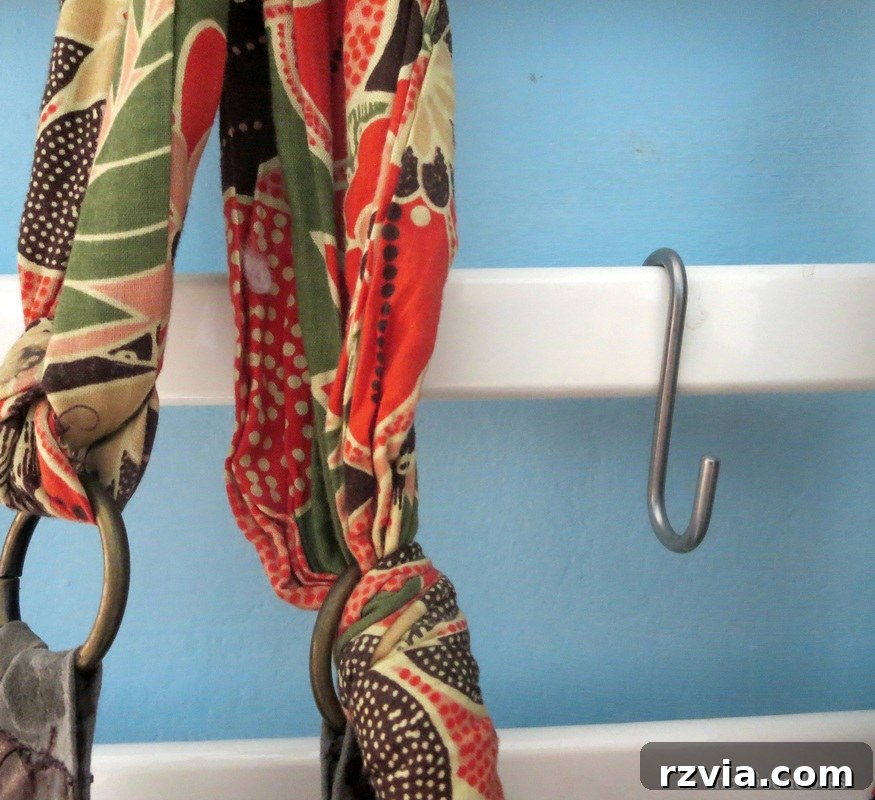
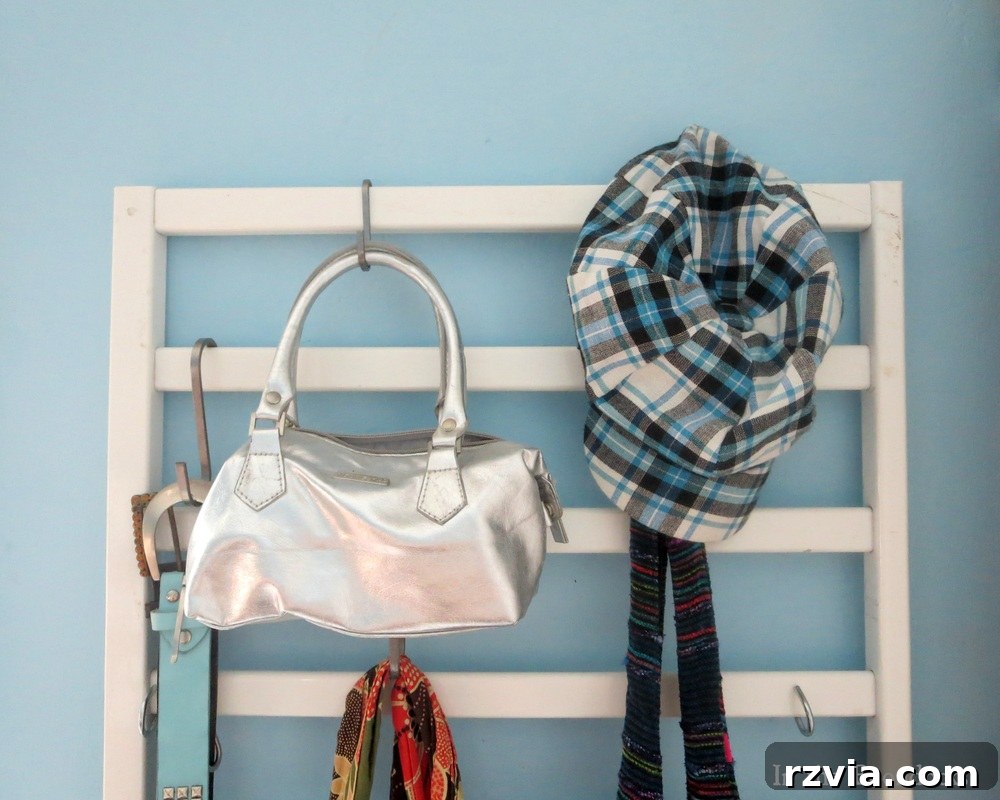
To accommodate her diverse collection of accessories—from handbags and backpacks to belts and hats—I sourced a variety of hooks, many of which were practical and stylish finds from IKEA. The beauty of the slatted crib rail is its versatility; hooks can be moved and rearranged as needed, offering flexible storage solutions. We used different types of hooks: single hooks for bags, double hooks for belts or scarves, and even some smaller clips for delicate items. This modular approach allows for adaptation as her collection evolves, ensuring the organizer remains functional for years to come.
We carefully arranged the hooks to maximize space and accessibility. Heavier items like bags were placed on sturdier hooks lower down, while lighter items such as hats and scarves found their place higher up. The open design of the crib rail means everything is visible at a glance, eliminating the need to rummage through drawers or boxes. It transformed the once-cluttered corner into a highly efficient and visually pleasing display, making daily selection of accessories a breeze.
The selection of hooks was also a key element. I opted for a mix of finishes and styles that complemented the overall aesthetic of the room while ensuring functionality. From simple silver hooks to more decorative options, each played a role in enhancing both the utility and the charm of the organizer. This small detail helped elevate the repurposed crib rail from a mere functional piece to a deliberate design element.
The Grand Reveal: A Transformed and Tidy Corner
The transformation of “The Hanging Corner” was truly remarkable. What was once a haphazard collection of items clinging precariously to a flimsy plastic contraption is now a beautifully organized and accessible display. The repurposed crib rail, painted or left natural to match the room’s decor, blends seamlessly with the walls, creating a custom look that feels intentional and stylish. All the bags, belts, and accessories are neatly arranged, making it effortless for my daughter to find what she needs.
We even added a small storage box at the bottom for items that couldn’t be hung, further enhancing the functionality of the space. This thoughtful addition provides a home for bulkier items or those that are less frequently used, maintaining the overall tidiness of the corner. The visual impact is significant; the room immediately feels calmer, more spacious, and decidedly more grown-up, reflecting her evolving tastes.
The top section of the organizer also remains accessible, allowing for even more creative storage possibilities in the future. There’s plenty of room to grow and adapt this system as her needs change. This project not only solved a practical problem but also added a touch of personalized charm to her newly decorated room. It’s a testament to how simple, repurposed items can become key elements in a well-designed space.
Before & After: A Visual Comparison
Sometimes, seeing is believing. The side-by-side comparison truly highlights the dramatic improvement achieved through this simple DIY project. It’s a powerful illustration of how a little creativity and a willingness to repurpose can completely transform a space.
From this:
To this:
The contrast is striking. There’s still plenty of room to expand her collection or reconfigure the layout if needed. Most importantly, it looks immeasurably neater and more purposeful than before. The fact that I was able to repurpose a leftover crib side makes this project even more satisfying. But the absolute best part? She genuinely loves it. Her enthusiasm for her new, organized space makes all the effort worthwhile. All in all, I’d say this was a pretty successful repurposing adventure, proving that sustainable living can also be stylish and practical.
Pin It for Later!
Love this idea? Don’t keep it to yourself! Share it with your friends on social media or save it to your favorite Pinterest board for future inspiration. Repurposing is a fantastic way to add character and functionality to your home without breaking the bank.
If you’re inspired by creative solutions and sustainable living, consider subscribing to my blog! You’ll receive my latest adventures and DIY tips twice a week directly in your mailbox. My subscription form is conveniently located on the sidebar, and rest assured, your email address will always remain private and never shared with third parties.
More DIY Inspiration You Might Enjoy
If you loved this repurposing project, you might find these other articles equally inspiring. Dive deeper into transforming everyday items into extraordinary home solutions: