
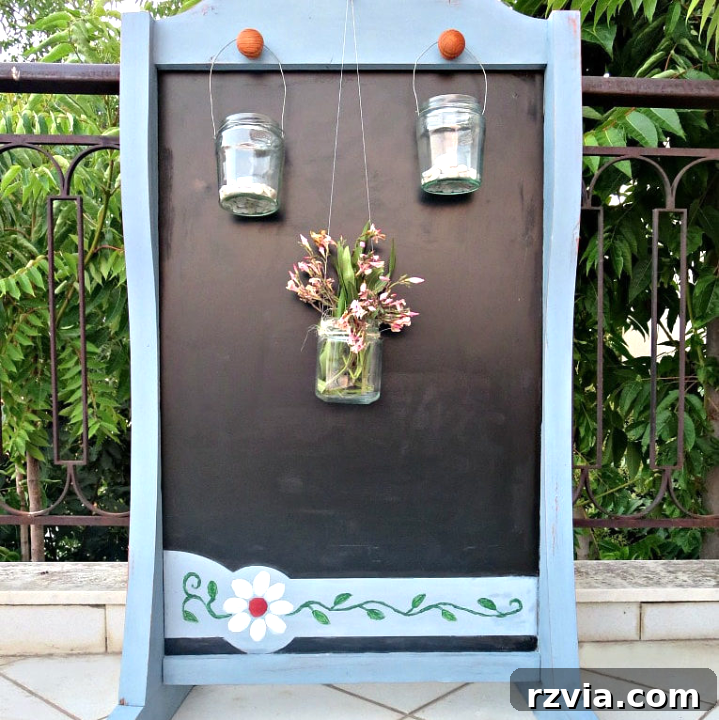
Summer has arrived, bringing with it the perfect opportunity to revitalize our outdoor living spaces. As the days lengthen and the sun shines brighter, many of us find ourselves drawn to projects that transform patios, decks, and balconies into inviting havens. My own balcony, a generous expanse yearning for character and charm, has been my latest canvas for creativity. Amidst the recent heatwave, I embarked on a mission to infuse it with warmth and personality, and the centerpiece of this transformation was the delightful task of upcycling a vintage chalkboard stand. This project was not just about aesthetics; it was about giving new life to a forgotten item, breathing fresh purpose into its aged wood, and crafting a unique piece that tells its own story.
Giving New Life to a Vintage Chalkboard Stand: A DIY Balcony Makeover
My outdoor area, while spacious, felt somewhat bare and lacked the cozy ambiance I desired. Having already tackled my super easy pallet couch, which added much-needed seating, I knew the next step was to introduce decorative elements that would tie the whole space together. A unique, character-filled piece was essential to elevate the mood, and that’s where this vintage chalkboard stand came into play. Today, I’m thrilled to share the complete journey of how I took a neglected, dated item and transformed it into a charming, functional piece of outdoor decor. This upcycling project not only adds a touch of rustic elegance but also embodies the spirit of sustainable living, proving that with a little creativity and effort, almost anything can be given a beautiful second act.
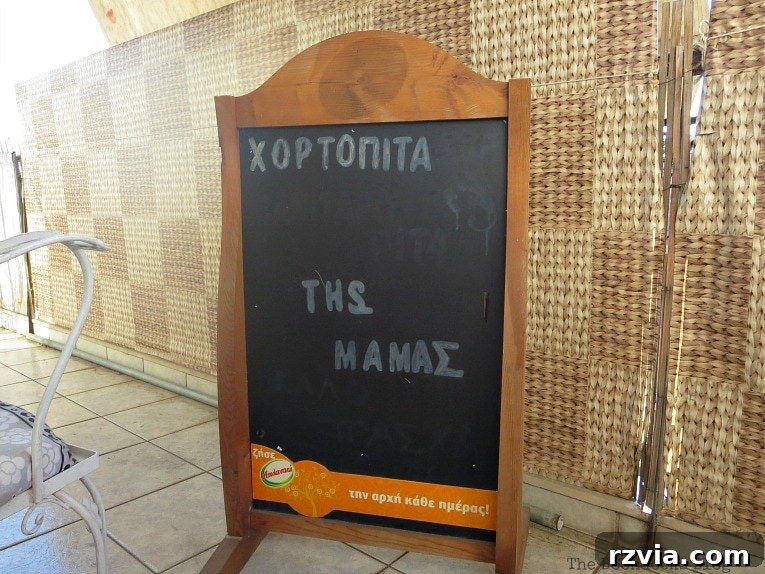
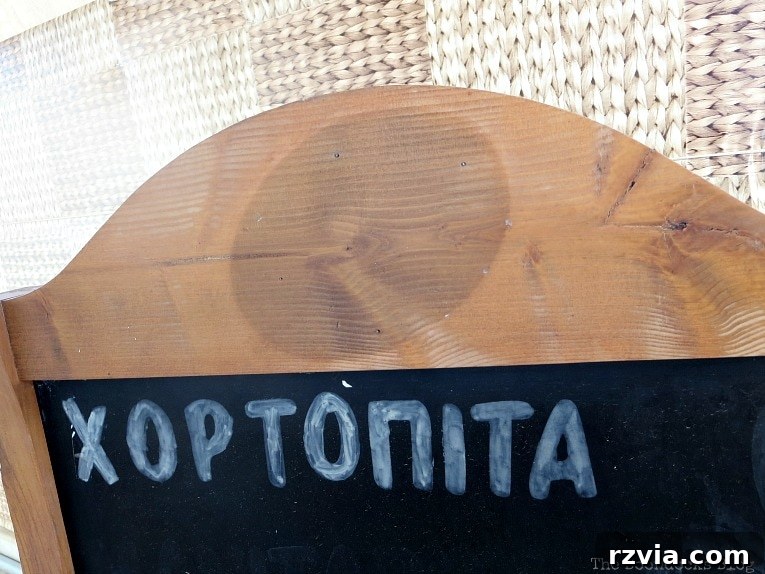
This particular wooden vintage chalkboard stand was in dire need of an intervention if it was ever going to grace my carefully curated balcony. Its original condition left much to be desired. The most immediate issues included a prominent sticker on its top surface, which, upon removal, left behind a noticeable area of discoloration on the wood. This ghost of a past advertisement was a stark reminder of its former life. Even more challenging was a stubborn orange plastic piece embedded at the bottom, an advertisement for an orange drink that seemed permanently fused to the stand. It was clear that these elements needed to be addressed, not just covered up, to truly transform the piece. The goal was to erase its commercial past and pave the way for a more charming, personal future.
Funnily enough, this chalkboard stand was another unexpected “gift” left behind by my former tenants, a rather unconventional substitute for rent. While some might see such cast-offs as junk, I view them as hidden gems, opportunities for creative repurposing. My philosophy has always been to let nothing go to waste, and this project was a perfect testament to that belief. This resourceful approach extends to other elements of my outdoor space, including the lattice from the colorful fence, another upcycled find that added vibrant character to my garden. Embracing these hand-me-down items not only saves money but also allows for the creation of truly unique and meaningful decor that can’t be found in any store.
Essential Materials for Your Chalkboard Stand Makeover
Disclosure: This post contains affiliate links for your shopping convenience. If you purchase any of these products through the links, we receive a small commission at no extra charge to you. You can find our full disclosure here.
Gathering the right materials is the first crucial step in any successful DIY project. For this vintage chalkboard stand transformation, I carefully selected items that would ensure durability, beauty, and a smooth, enjoyable crafting experience. Here’s a detailed list of what you’ll need to embark on your own upcycling adventure:
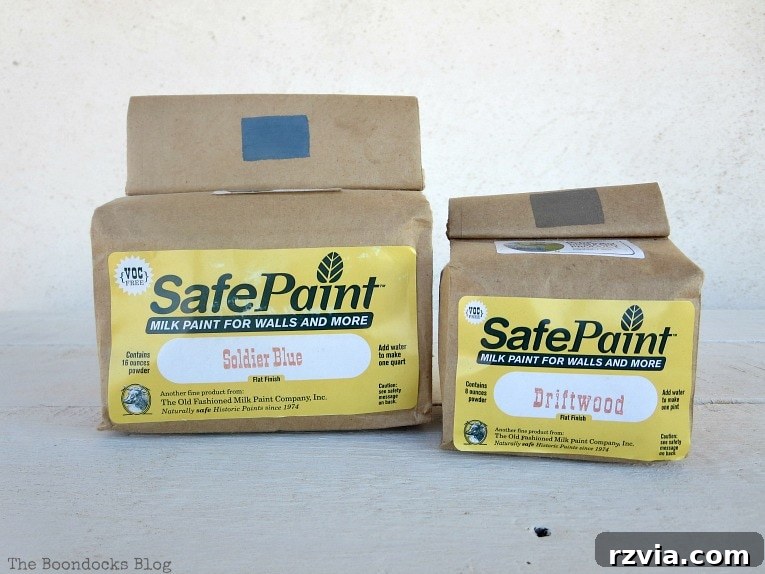
- Old Fashioned Milk Paint in Soldier Blue: Chosen for its authentic, matte finish and its ability to adhere beautifully to wood, providing a classic, timeless look.
- Old Fashioned Milk Paint in Driftwood: Used to subtly lighten the Soldier Blue, creating a custom, softer shade that adds depth and character.
- Acrylic Craft Paint in White, Green, and Red: Perfect for adding delicate, hand-painted floral designs and vibrant accents to personalize the stand.
- Daddy Van’s Lavender Beeswax Furniture Polish: An all-natural polish essential for sealing the milk paint, enhancing its durability, and imparting a luxurious, smooth finish and a subtle, calming scent.
- Sandpaper (various grits): Indispensable for preparing the wood surface, smoothing out imperfections, and achieving that desirable distressed look.
- Blackboard Paint: Crucial for renewing the chalkboard surface, ensuring it’s ready for fresh messages and artwork.
- Masking Tape: Essential for protecting areas you don’t want painted, ensuring clean lines between different surfaces.
- Paint Brushes (various sizes): A selection of brushes will allow for broad strokes on larger surfaces and fine details for artistic elements.
- Two Knobs and Two Hooks (optional): These additions dramatically enhance the stand’s functionality, offering hanging spots for lanterns, wreaths, or other decorative accessories.
Step-by-Step Guide: How to Upcycle Your Vintage Chalkboard Stand
Transforming this vintage chalkboard stand was a rewarding process, breaking down into several manageable steps. Follow along to see how you can achieve a similar charming makeover for your own neglected pieces.
1. Preparation and Cleaning
The first and most critical step was to thoroughly clean this dirty chalk board stand. Years of outdoor exposure, grime, and residual chalk required a deep clean. I opted for a simple yet effective mixture of vinegar and water, a natural cleaning solution that effectively removes dirt without harsh chemicals. Using a damp cloth, I meticulously wiped down every surface, paying close attention to any sticky residues or built-up grime. Once the stand was pristine, I allowed it to air dry completely to ensure optimal paint adhesion. Following the cleaning, I carefully taped off the blackboard portion using masking tape. This crucial step ensures a clean, crisp line between the painted wooden frame and the chalkboard surface, protecting the latter from accidental paint splatters and preparing it for its own dedicated refresh.
2. Mixing and Applying Milk Paint
With the stand prepped, it was time to bring in the color. I used Old Fashioned Milk Paint, specifically the SafePaint version. I chose this particular type of milk paint because it’s designed to give a smooth finish, rather than the traditional chippy look often associated with milk paint (though that can be charming too!). To achieve a custom, softer blue hue that would complement my outdoor space, I mixed a small amount of the Driftwood shade into the Soldier Blue. This created a unique, slightly muted blue that felt both fresh and timeless. I applied three thin coats of this beautiful blend, allowing ample drying time between each application. Multiple thin coats build up a durable, even finish, resulting in a professional-looking result that truly showcases the depth of the color.
3. Sanding and Distressing for Rustic Charm
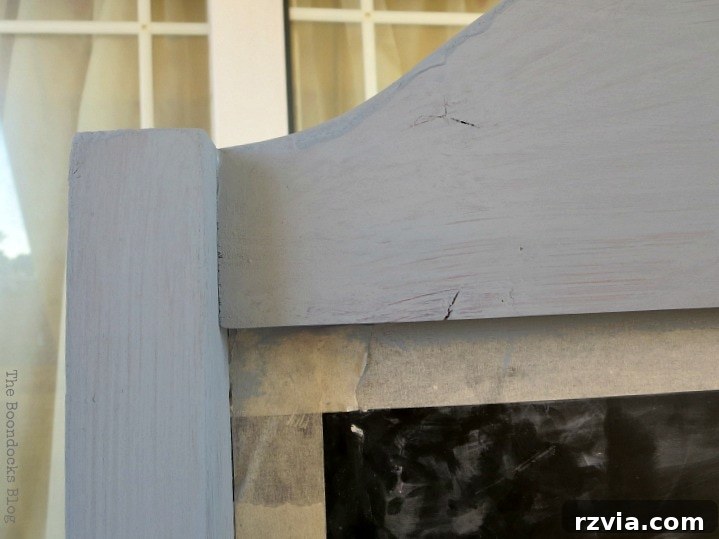
Once the final coat of paint was completely dry, I moved on to sanding. This step served a dual purpose: first, to create a wonderfully smooth texture that’s pleasant to the touch, and second, to strategically distress the wood. As you can see from the “before” photos, the stand was full of natural imperfections – dents, dings, and rough spots that told a story of its past life. Instead of attempting to hide these character marks, I decided to embrace them fully. Using sandpaper, I gently but deliberately sanded back some of the paint, particularly on edges and raised areas where natural wear would occur. This technique highlighted the existing imperfections, turning them into desirable features that contributed to a beautiful, rustic, and authentically aged look. A bit of distressed charm instantly transformed the piece, giving it an undeniable antique appeal that adds warmth and personality to any setting.
4. Sealing with Beeswax Polish
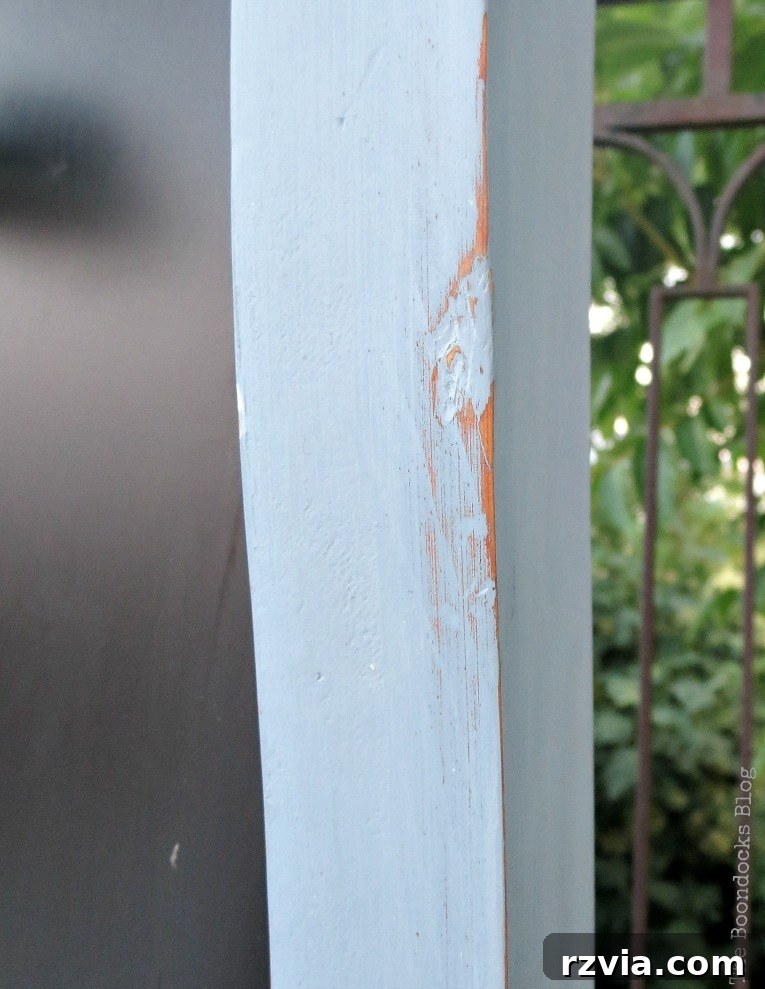
To protect the newly painted and distressed surface and to achieve an incredibly luxurious feel, I applied Daddy Van’s all Natural Beeswax and Lavender Furniture Polish. This step is a game-changer for any painted furniture project. The beeswax not only seals the paint, making it more durable and resistant to moisture, but it also imparts a wonderfully soft, supple finish. The subtle hint of lavender is an added bonus, making the piece a delight to interact with. After buffing it in, the wood achieved an unparalleled smoothness, literally feeling as smooth as a baby’s bottom! I often find myself proudly showing it off to friends, inviting them to feel the incredible texture – it’s that satisfyingly soft and smooth.
5. Refreshing the Chalkboard Surface
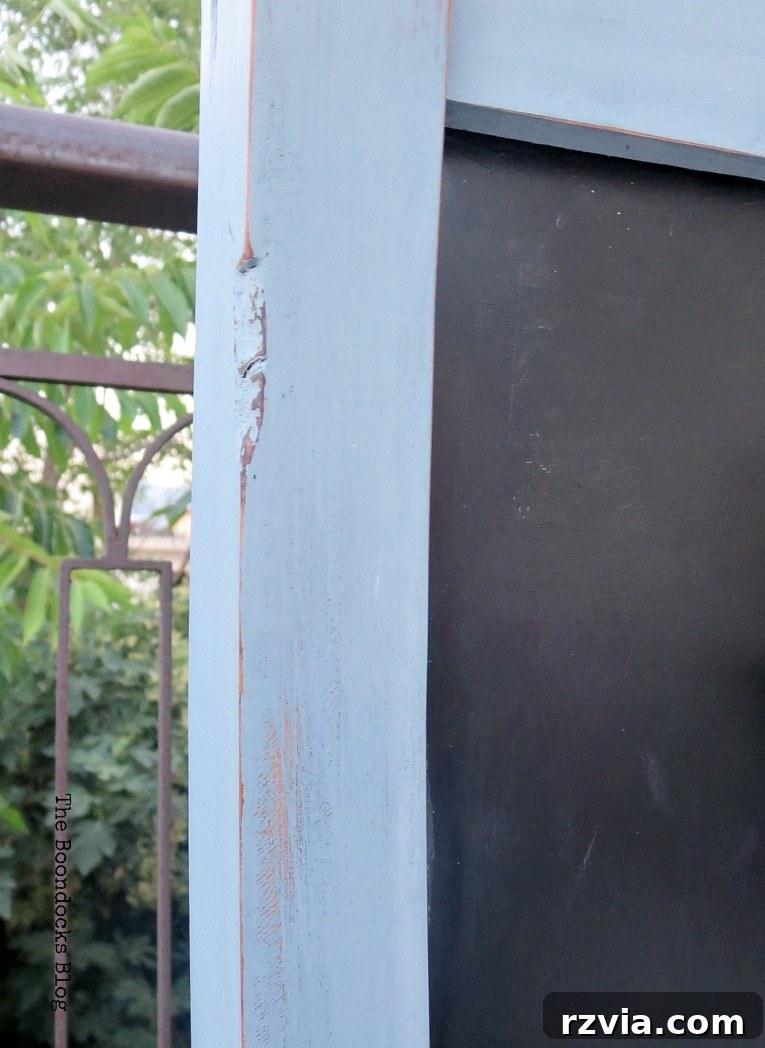
The original chalkboard surface was riddled with what appeared to be permanent chalk marks and general wear and tear, rendering it less than ideal for its intended purpose. To ensure a fresh, usable writing area, I applied a couple of coats of high-quality blackboard paint. This instantly revitalized the surface, transforming it into a clean slate ready for new messages, seasonal greetings, or decorative drawings. A truly functional chalkboard needs a pristine surface, and this step ensured just that.
6. Concealing the Orange Ad
One of the most vexing challenges was the stubborn orange plastic ad piece at the bottom of the stand. It resisted all attempts at removal, proving to be more embedded than anticipated. Instead of continuing a losing battle, I opted for a creative solution: simply painting over it. Using the same custom blue paint mixture I had used for the rest of the frame, I meticulously covered the orange plastic. This clever workaround effectively erased the unsightly advertisement, seamlessly integrating the base into the overall aesthetic of the newly upcycled stand. No more jarring orange drink ads – just cohesive, charming blue!
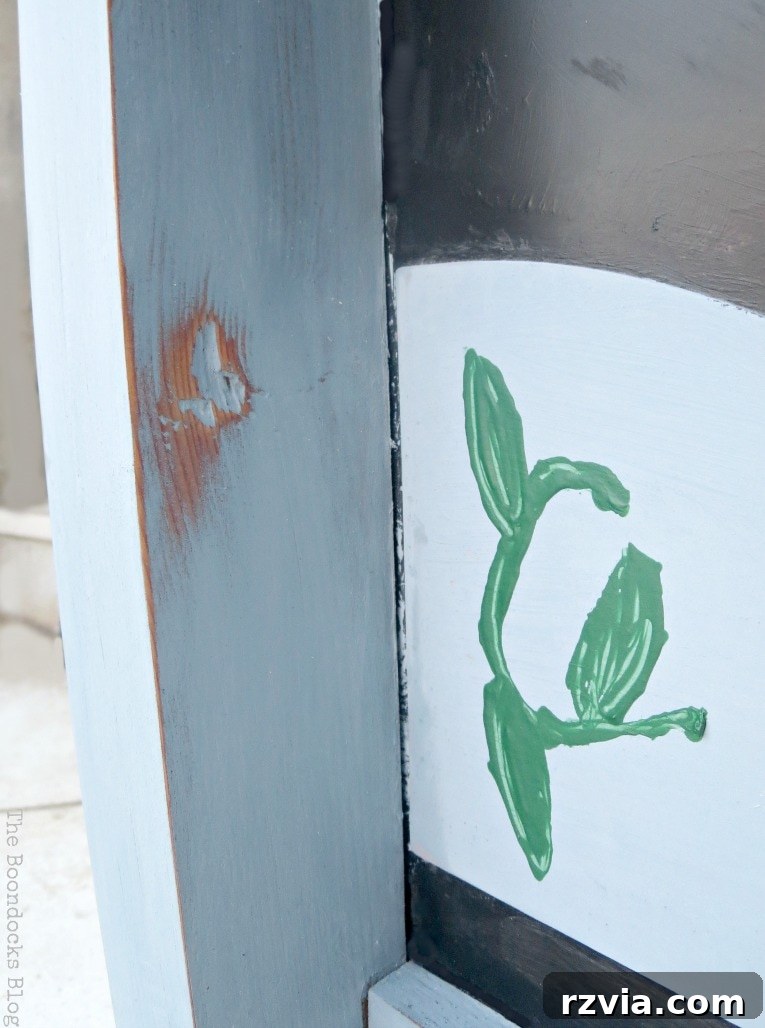
7. Adding Artistic Flair: Hand-Painted Details
To infuse the stand with even more personality, I enlisted the help of my talented daughter. Collaborative projects are always the most fun and result in truly unique pieces. She took on one side of the stand, bringing her artistic vision to life. Her design featured a charming white and red flower intertwined with delicate vines, adding a whimsical touch. This personal artwork truly transformed the painted-over orange sections into beautiful, intentional decorative elements. On the other side, I painted my own version of a floral design, ensuring both sides offered a delightful visual surprise. We used acrylic craft paints for these details, as they offer vibrant colors and excellent coverage for small, intricate work. The painted flowers beautifully tie into the overall outdoor theme, making the stand feel even more at home on the balcony.
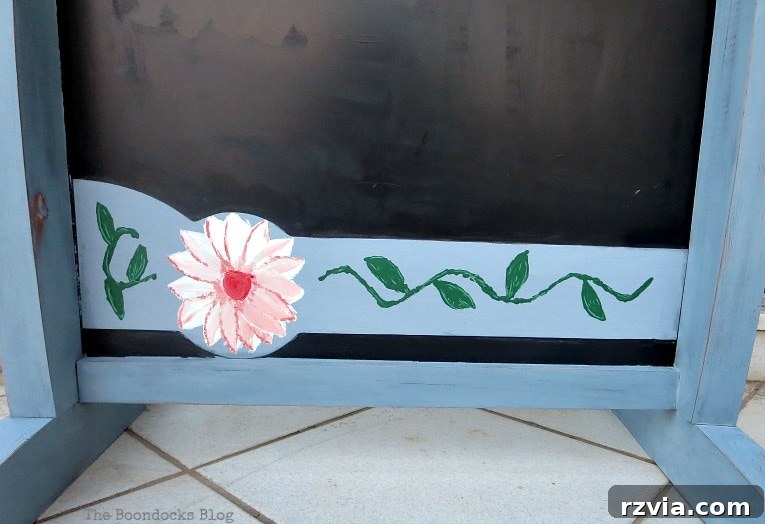
Her rendition of a white and red flower and vine on one side perfectly captures a lighthearted, natural aesthetic.
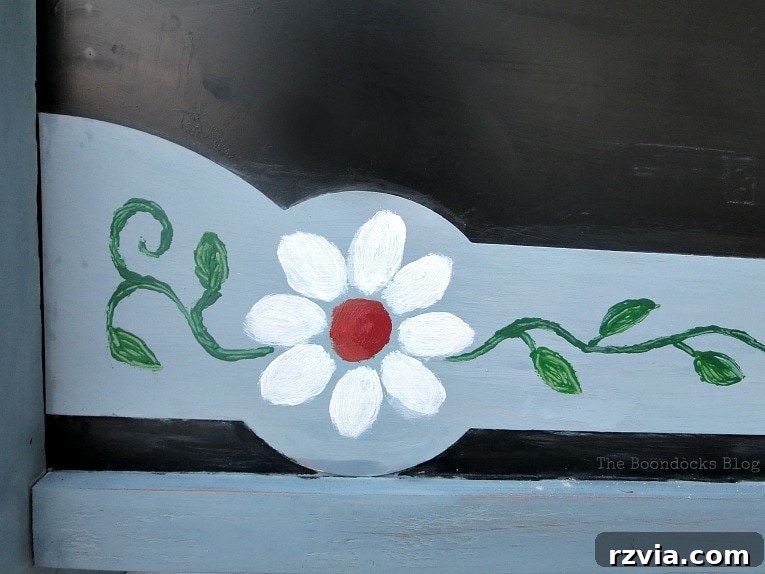
And on the other side, my version of the painted flower added a complementary, yet distinct, artistic touch. These hand-painted accents, crafted with acrylic craft paints, truly elevated the stand from a simple painted piece to a personalized work of art.
8. Adding Functional Embellishments: Knobs and Hooks
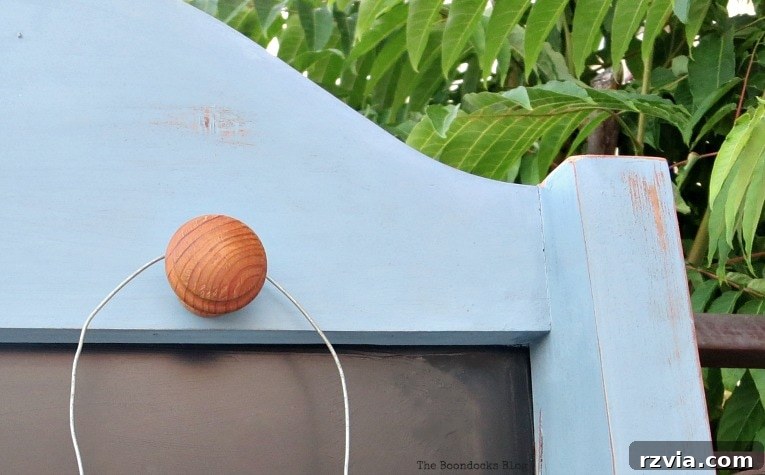
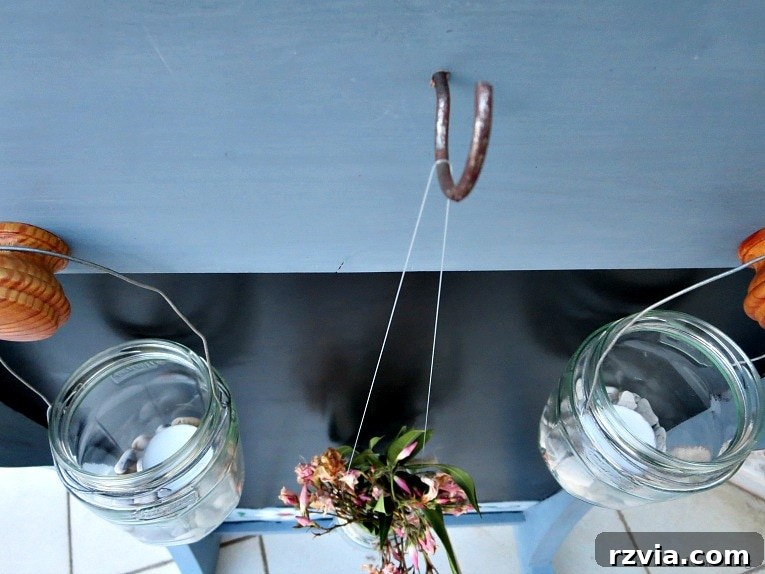
The final touches were both decorative and highly functional. To maximize the stand’s utility and charm, I added two elegant knobs to the top corners. These aren’t just for show; they serve as perfect hanging points for my simple tea light lanterns. Seeing how seamlessly these elements integrate with the overall design truly highlights the thought put into every detail. Furthermore, a rustic, rusty hook was added to the center, providing yet another versatile hanging spot for larger items like a wreath or even gardening tools. These additions transform the chalkboard stand from a static display into a dynamic, adaptable piece of outdoor furniture, capable of holding various decorative and practical items depending on the season or occasion.
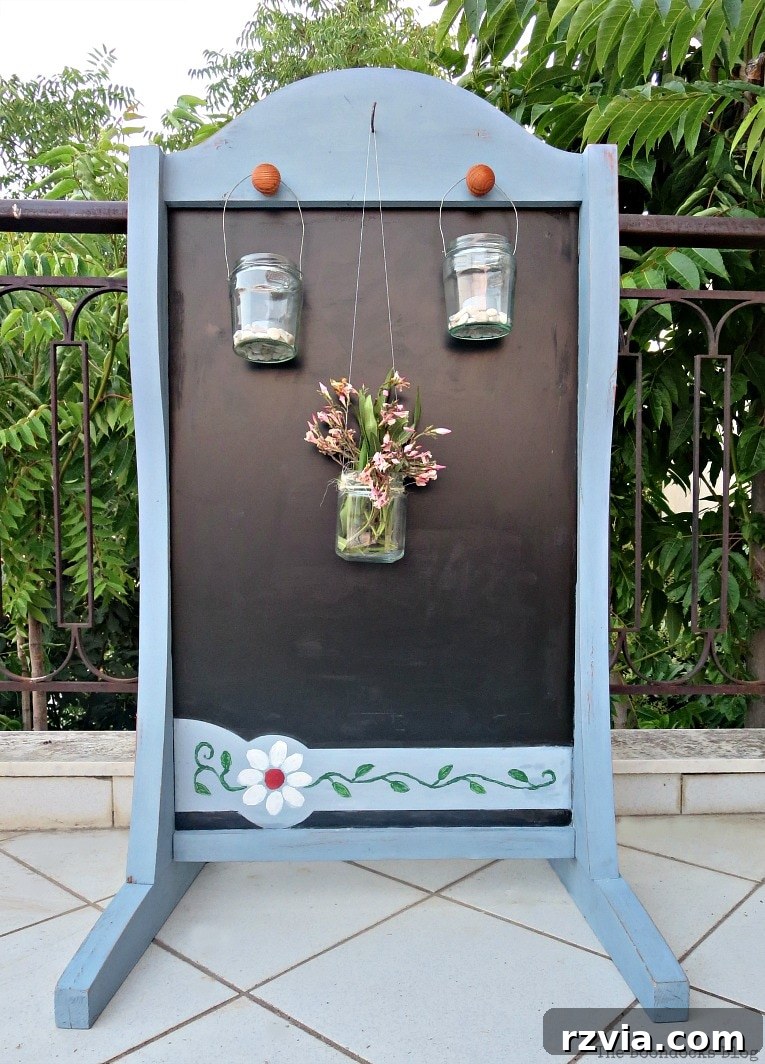
The Transformed Vintage Chalkboard Stand: A Balcony Showcase
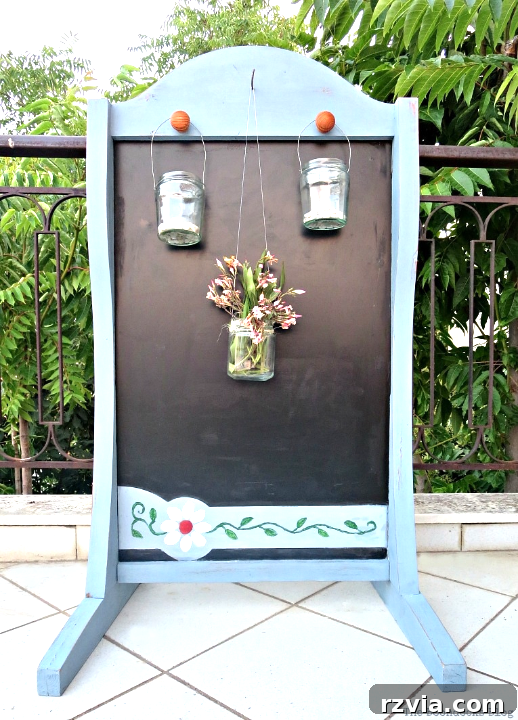
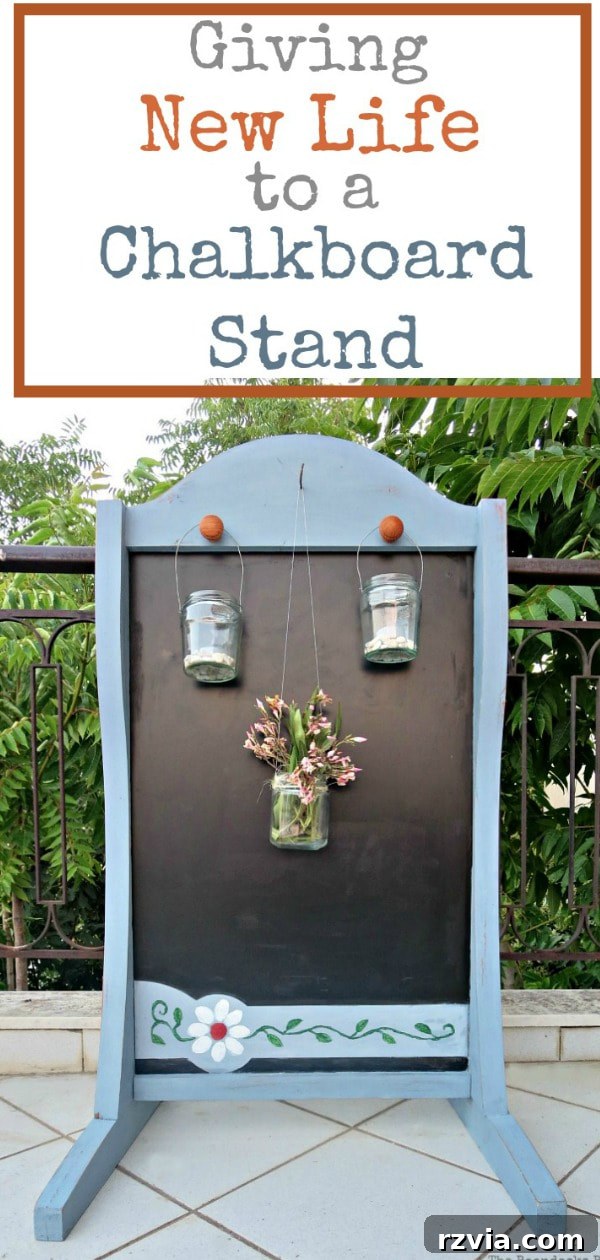
And there she stands, in all her renewed glory! The vintage chalkboard stand has been utterly transformed, ready to serve as a versatile and charming accent on my balcony. Every detail, from the distressed paintwork to the hand-painted flowers and the added functional hardware, contributes to its unique character. It’s truly a testament to the power of upcycling and how a little imagination can turn something old and forgotten into a treasured possession.
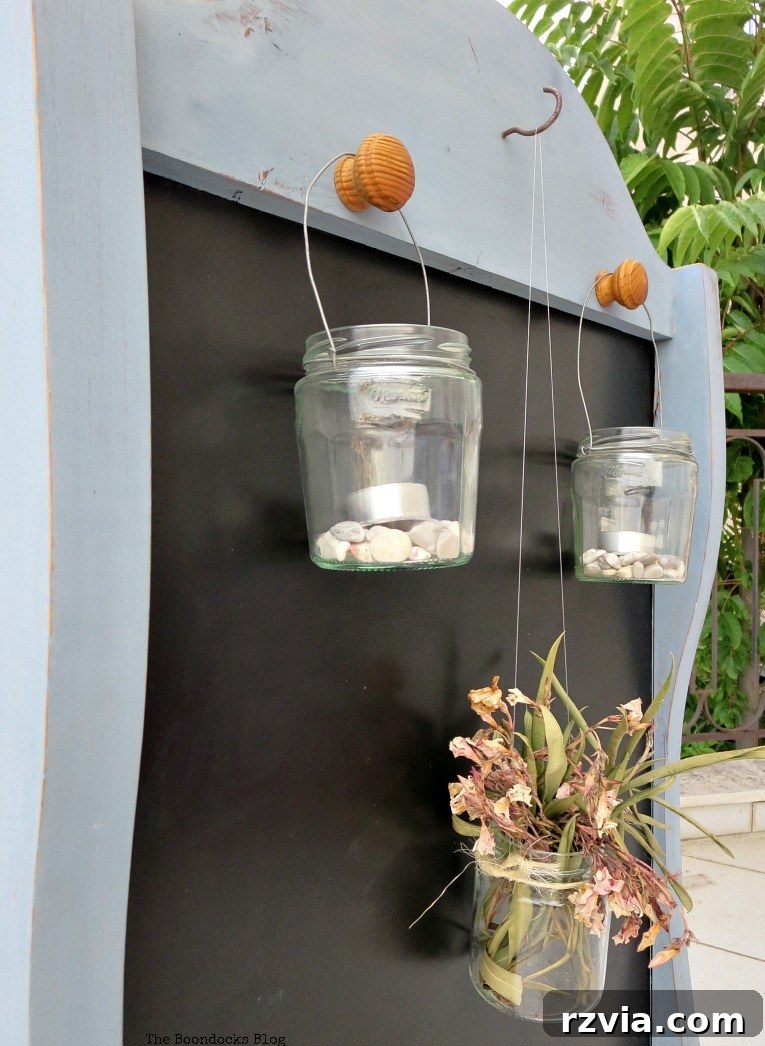
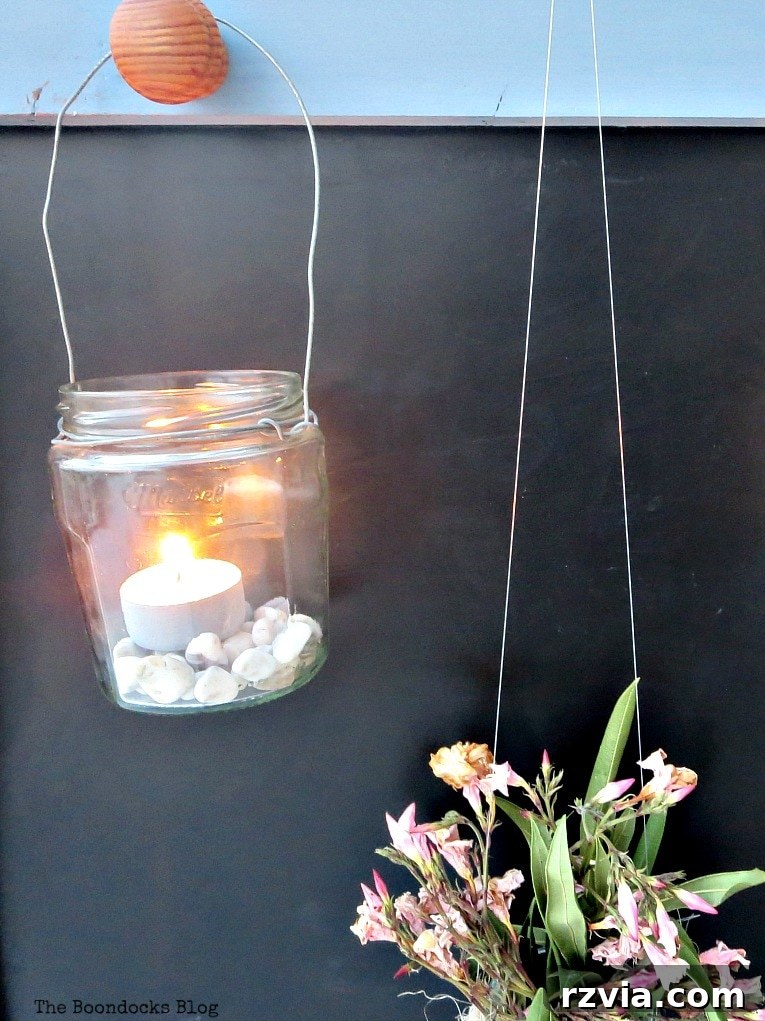
Let’s take a closer look at the different facets of this revitalized piece. This is one side, beautifully adorned with two of my homemade lanterns hanging gracefully from the newly installed knobs. The soft blue paint provides a soothing backdrop, allowing the lanterns to subtly glow against it. These simple additions bring a welcoming warmth and an inviting glow to the outdoor setting, especially as dusk settles.
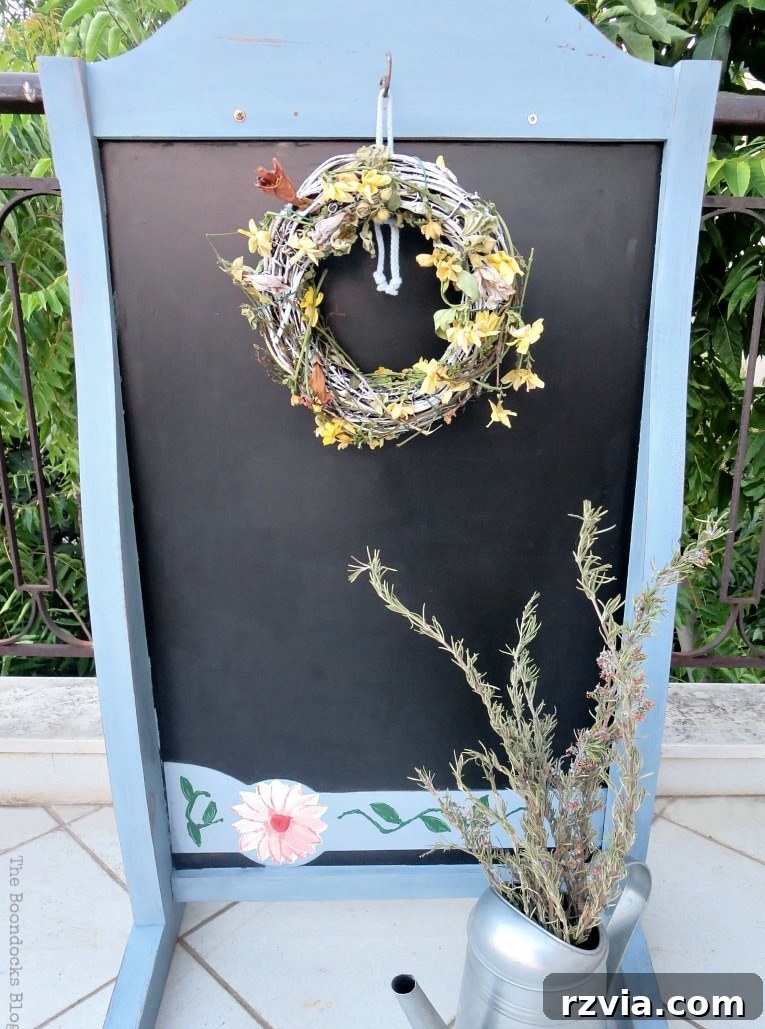
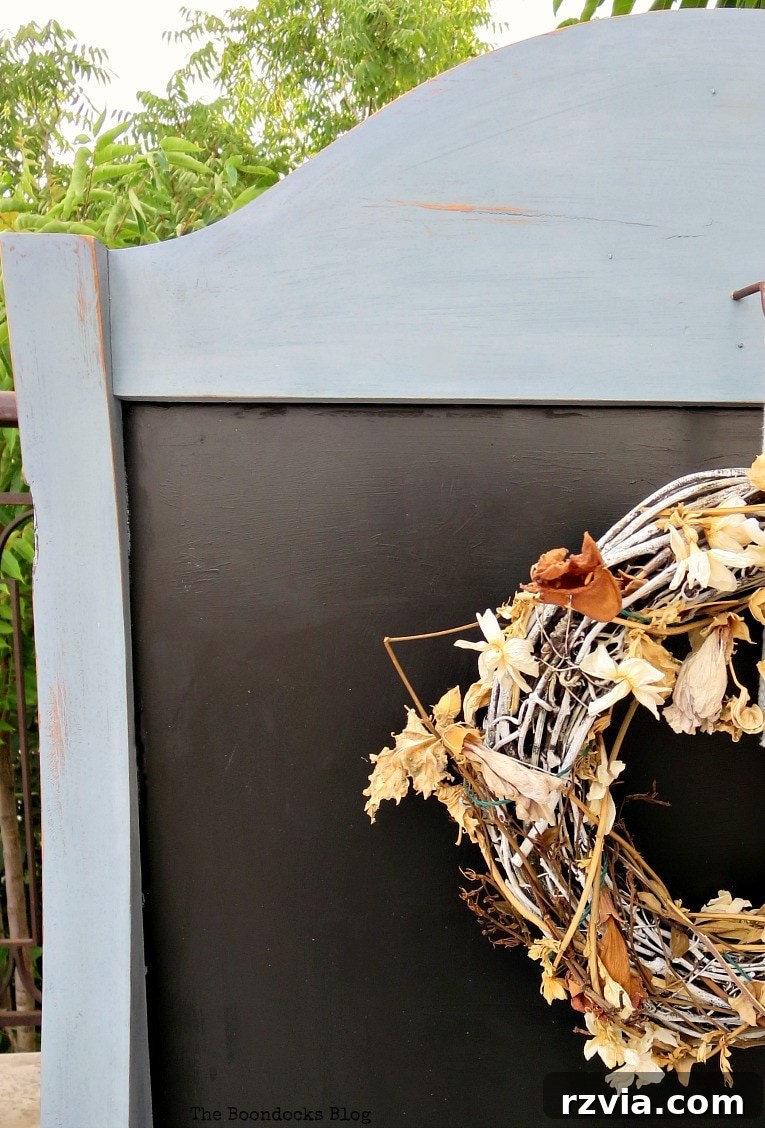
Turning the stand reveals its other equally charming side. Here, the central rusty hook proudly displays a simple, elegant wreath. This demonstrates the versatility of the added hardware – easily swapped out with seasonal decor, a small basket of fresh herbs, or even a lightweight gardening apron. The ability to customize its appearance makes this upcycled chalkboard stand an ever-evolving piece of decor for any outdoor space. It’s a dynamic focal point that can change with your mood or the season.
The true magic of this upcycled piece comes alive as evening descends. When the lanterns are lit, casting a soft, flickering glow, the chalkboard stand transforms into an enchanting beacon of warmth. The subtle light accentuates the distressed details and the gentle blue hue, creating an ambiance that is both cozy and inviting. It’s the perfect setting for enjoying a quiet summer evening on the balcony, surrounded by personalized beauty.
From Neglect to Niche: Embracing Upcycling
This project is a perfect illustration of how to turn a challenge into a triumph. As the saying goes, even when life hands you oranges – or in this case, a stubborn orange plastic ad – you can always find a way to make orangeade, or even beautiful flowers! I believe I’ve succeeded remarkably well in upcycling this piece, transforming a less-than-ideal situation into something truly positive and beautiful. It’s a reminder that with a little vision and elbow grease, we can make extraordinary things from the ordinary, reducing waste and enriching our surroundings.
Now, when I gaze upon my balcony, I envision the complete picture: a vibrant, welcoming outdoor sanctuary, all thanks to projects like this. I can’t wait to finish every detail and share the entirety of my outdoor transformation with all of you. But for now, I’m eager to hear from you. What would *you* have done with a piece like this? Have you tackled any upcycling projects recently that brought new life to old treasures? Share your thoughts and ideas in the comments below!

If you’re inspired by this transformation and eager for more DIY adventures and creative home decor ideas, be sure to subscribe to my blog! You’ll receive my latest projects and insights twice a week directly in your mailbox, ensuring you never miss a dose of inspiration. Simply find the subscription form on the sidebar. Rest assured, your email address is safe with me and will never be shared with any third party.
This blog is intended for entertainment purposes only; my DIY tutorials offer personal experiences and creative suggestions, not professional advice. For complete details and important safety information, please read my full disclaimer here.
Your comments mean the world to me, and I genuinely love hearing your thoughts and experiences! I do my best to reply to every comment and visit your blogs. To ensure your comment can be published, please remember not to include any hyperlinks directly within the comment text. Thank you for being a part of this creative community!