
Transform Your Old Chair: The Ultimate DIY Kitchen Organizer Makeover
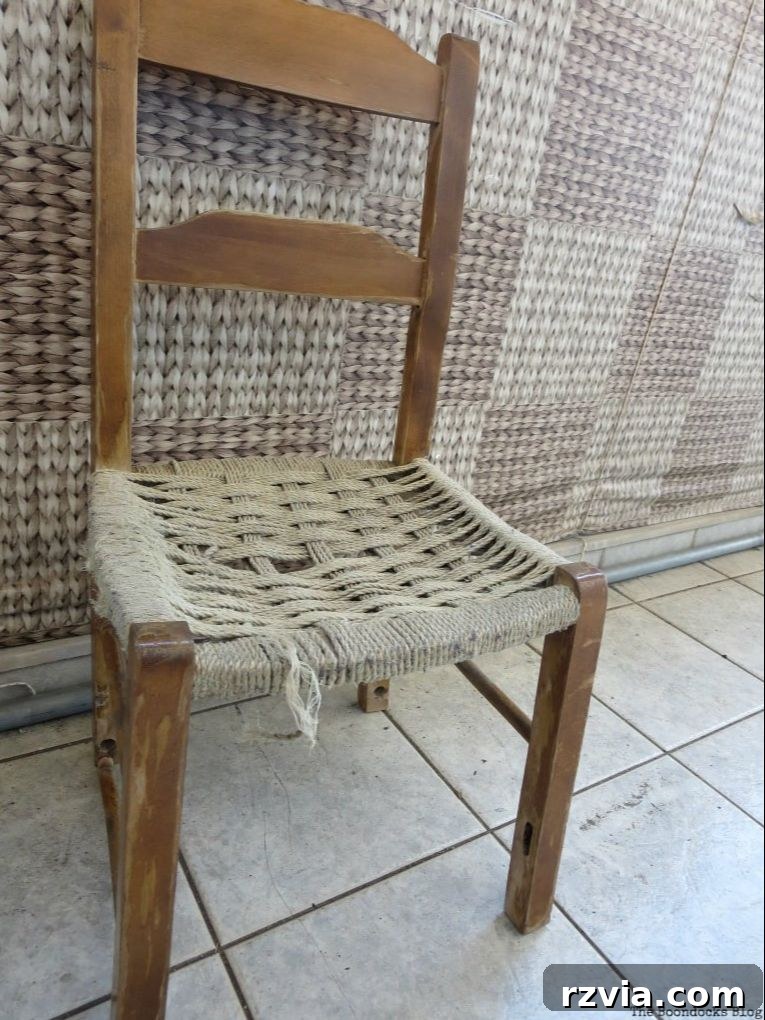
Every home has those forgotten pieces of furniture – perhaps an old chair, a relic from a previous era, gathering dust in a corner. For me, it was a pair of sturdy wooden chairs that had served their time faithfully by the fireplace, keeping me company through countless chilly evenings. While their legs had been thoughtfully shortened years ago to perfectly nestle by the warmth, time, and wear had inevitably taken their toll. They were no longer functional as seating, but their sturdy backs whispered promises of a new purpose.
As a passionate upcycler, I couldn’t bear to simply discard these chairs. They deserved a second act, a creative reincarnation that honored their history while embracing a new utility. My mind initially wandered towards a whimsical fall-themed sign, envisioning the chair back as a rustic canvas for seasonal décor. However, as is often the case with creative projects, an even better idea sparked – one that offered not just beauty, but brilliant functionality for the heart of the home.
Today, I’m thrilled to guide you through the process of transforming a discarded chair back into a wonderfully practical and stylish kitchen organizer. This DIY project is not just about repurposing; it’s about adding a unique, personalized touch to your kitchen, proving that even the most worn-out items can be reborn with a little imagination and elbow grease.
Disclosure: This post contains compensated content through product sponsorship. All opinions expressed are genuinely my own, reflecting my trust and recommendation for products I truly love and use.
Disclosure: The following list includes affiliate links that direct to Amazon.com. Should you decide to purchase any of these products via my links, I will earn a small commission at no additional cost to you. This helps support my blog and enables me to continue creating inspiring content for you.
Materials You’ll Need for Your Upcycled Kitchen Organizer:
- DecoArt Americana Decor Chalky Finish Paint in Everlasting (White)
- Sandpaper (various grits, e.g., 120-220 for general sanding, finer for distressing)
- DecoArt Americana Decor Chalky Finish Paint in Escape (Teal/Blue)
- Homemade Beeswax Furniture Polish (or a clear furniture wax/sealant)
- S-shaped hooks of various sizes
- Twine
- Basic tools: Screwdriver, hammer, pry bar (if needed for disassembly), paintbrushes, clean rags
- Wall anchors and screws (appropriate for your wall type and the weight of the organizer)
For context, here’s a glimpse of one of these chairs in its former glory, sharing space with my repurposed table. It’s hard to believe
this elegant piece would soon embark on a new life as a practical kitchen solution!
The Transformation Process: Turning a Chair Back into a Kitchen Organizer
Embarking on an upcycling project is always an adventure, and this one was particularly satisfying. Here’s a detailed, step-by-step guide to help you create your own functional and charming kitchen organizer.
Step 1: Disassembly and Initial Preparation
The first crucial step was to dismantle the chair, isolating the backrest – the star of our project. Given the chairs’ age and their long-standing proximity to the fireplace, their joints were surprisingly cooperative. I found that gently rocking the wooden pieces back and forth, then applying a steady pull, was enough to detach the legs and seat from the back. If your chair is more stubbornly constructed, you might need a hammer and a pry bar, but always proceed with caution to avoid damaging the components you wish to reuse.
Once you have the chair back isolated, it’s time for sanding. This is a vital step, especially if your furniture, like mine, is coated in thick, glossy varnish – a common sight on older Greek furniture pieces. Begin with a medium-grit sandpaper (around 120-150 grit) to remove the bulk of the old finish. This creates a rough surface that allows the new paint to adhere properly. Follow up with a finer grit (180-220 grit) for a smoother finish. Don’t worry about getting every speck of varnish off; the goal is to create a good key for the paint and to smooth out any rough patches or splinters.
Step 2: Applying the Base Coat of Paint
With the chair back prepped, it was time to bring in the color. I opted for two generous coats of DecoArt’s Americana Chalky Finish paint in “Everlasting.” This pristine white serves as an excellent base, providing a solid, clean canvas for subsequent layers. Chalk paint is a fantastic choice for upcycling projects because of its excellent adhesion properties, often requiring minimal prep, and its beautiful matte finish. Ensure each coat dries completely before applying the next, typically an hour or two depending on humidity. My apologies for the slight blur in the photo below; it was taken as the sun began its descent, casting long shadows.
Step 3: Adding the Top Coat and Customizing the Hue
The next layer was where the true character began to emerge. For the top coat, I used DecoArt’s Americana Decor Chalky Finish paint in “Escape.” However, to achieve a softer, more muted blue that perfectly complemented my kitchen aesthetic, I mixed in a bit of the white “Everlasting” paint. This custom blend resulted in a delicate, serene blue that adds a touch of coastal charm without being overpowering. Apply this top coat evenly, ensuring full coverage. The beauty of chalk paint is its forgiving nature; don’t stress too much about perfection at this stage.
Step 4: Distressing for a Shabby Chic Finish and Sealing
Once the top coat had dried thoroughly – I usually let it cure for at least a day to ensure optimal hardness – it was time for my favorite part: distressing. This technique creates a beautiful, aged, and “shabby chic” look by revealing the white base coat (or even the raw wood) underneath. Focus on areas that would naturally experience wear and tear, such as edges, corners, and raised details. Using a fine-grit sandpaper, gently rub away the top blue layer until the white peeks through to your desired extent. The more you sand, the more pronounced the distressed effect will be. The key is to make it look natural and organic, as if years of loving use have created these beautiful imperfections.
After distressing, wipe away any dust with a clean, dry cloth. To protect your newly painted and distressed surface, apply a sealant. I prefer to use my homemade beeswax
polish, which nourishes the wood and paint while providing a lovely, subtle sheen and durable protection. Apply the wax with a clean cloth, working it into the paint in circular motions. Allow it to sit for a few minutes, then buff it gently with another clean cloth until it feels smooth and dry to the touch. This step not only seals the paint but also enhances the depth of the distressed finish.
Step 5: Mounting Your Kitchen Organizer
With the chair back beautifully transformed, it’s ready to take its place on your kitchen wall. I simply used two nails, strategically placed, to hang it securely. However, for heavier items or more permanent fixtures, consider using D-ring hangers or keyhole hangers on the back of the chair and appropriate wall anchors to ensure it’s firmly affixed. Always choose mounting hardware that matches the weight of your organizer and the type of wall you’re attaching it to (drywall, plaster, tile, etc.). The goal is to create a sturdy and safe hanging solution for all your kitchen essentials.
Isn’t it amazing how a simple chair back can be reborn into such a “cool” and functional piece? It’s certainly far more dynamic than a purely decorative item, offering both aesthetic appeal and practical utility right where you need it most.
Step 6: Adding Hooks and Customizing Storage
Now for the fun part: making it truly functional! I took a handful of S-shaped hooks, originally from Ikea, and simply draped them over the horizontal slats of the chair back. These versatile hooks instantly transform the organizer, allowing you to hang a multitude of kitchen items. From colorful dish towels and oven mitts to whisks, spatulas, and even small strainers – anything with a loop or handle can find a home here. It’s a fantastic way to keep frequently used tools within easy reach, de-cluttering your countertops and drawers. Please excuse the well-used glove in the picture; it’s a testament to how much we truly use and appreciate our kitchen gear!
Step 7: Ingenious Paper Towel Holder
One of the most innovative additions to this organizer is the integrated paper towel holder. This simple yet brilliant feature utilizes twine and the natural structure of the chair back. Here’s how I did it: I took a long piece of twine, knotted the ends together to form a loop, and then folded it in half twice, creating four strands. I then threaded the paper towel roll through the folded twine, ensuring the knot was tucked neatly inside the roll for a clean look. This allows the paper towel roll to hang conveniently below the chair back. In my haste to catch a plane, I didn’t notice one of the twine loops had slipped, making the color appear slightly greenish in the photo, but rest assured, it’s designed to hang securely!
Step 8: Embracing Unique Character and Future Customizations
For now, we’ve chosen to leave the original holes on the sides of the chair back empty. These small details add a certain rustic charm and character to the kitchen organizer, hinting at its past life. We still have the original wooden pieces from the chair, and I’m already pondering future projects where they might find a new purpose. These seemingly minor elements contribute to the organizer’s unique story and its perfectly imperfect beauty.
Why Upcycle? The Benefits of Your New Kitchen Organizer
My initial idea of a fall-themed decorative piece quickly faded as this brilliant, practical kitchen organizer took shape. And honestly, I believe this outcome is far superior. Here’s why:
- Striking Aesthetic: The pop of soft blue against a rustic, distressed white background creates a captivating focal point in the kitchen. It’s a unique, custom piece that tells a story, unlike mass-produced storage solutions.
- Unparalleled Practicality: This organizer is a game-changer for kitchen efficiency. It allows you to conveniently store frequently used items – towels, utensils, oven mitts, and even paper towels – keeping them accessible without cluttering precious counter space.
- Space-Saving Solution: Especially in smaller kitchens or newly renovated spaces where drilling into tiles might be a concern, a wall-mounted chair back organizer offers an ideal alternative. It utilizes vertical space effectively, creating functional storage where none existed before.
- Sustainable Living: Upcycling is inherently eco-friendly. By giving new life to old furniture, you’re reducing waste and supporting sustainable practices, transforming discarded items into valuable household assets.
- Cost-Effective: This project is incredibly budget-friendly. Instead of buying a new organizer, you’re breathing new life into something you already own (or can find cheaply at a thrift store), using minimal new materials.
- Personalized Decor: Unlike store-bought items, a DIY project like this allows for complete customization. You choose the colors, the level of distressing, and the specific items you want to hang, creating a piece that truly reflects your personal style and needs.
Final Thoughts: Embrace the Beauty of Repurposed Furniture
I hope you enjoyed this easy and inspiring tutorial on how to make a cool kitchen organizer from a chair. It’s a testament to the potential hidden within everyday objects and the rewarding feeling of creating something beautiful and functional with your own hands. This project not only offers a practical solution for kitchen organization but also adds a distinctive, charming element to your home decor.
Do you have any old, forgotten chairs longing for a second chance? Perhaps a vision for a unique upcycling project has sparked in your mind? I encourage you to look at your “junk” with fresh eyes and discover the endless possibilities of repurposing!
If you love what you see and found this tutorial helpful, please consider sharing it with your friends on social media or saving it to your favorite Pinterest board! The images above are perfectly optimized for Pinterest sharing.
For more inspiring DIY projects, upcycling ideas, and home adventures delivered directly to your inbox once a week, subscribe to my blog! You’ll find the subscription form conveniently located on the sidebar and at the top of the page. Rest assured, your email address will always remain private and will never be shared with any third party.
Explore More Upcycling Ideas from The Small Apartment Series:
<< Sweet Inspiration Link Party #77 HOME Photos of the Day September >>
Linking up to these Link Parties
This blog is for entertainment purposes only; my DIY tutorials are not professional advice. Read my full disclaimer here.
I truly appreciate your comments and will do my best to reply to them or visit your blog. Please ensure your comments do not include hyperlinks, as this may prevent them from being published.