
Mastering Your Small Bedroom Makeover: The Power of a DIY Mood Board
Embarking on a bedroom transformation can feel daunting, especially when tackling a small space packed with multiple functions. But what if there was a simple, yet incredibly effective tool to guide your DIY journey, ensuring every project contributes to a cohesive and stunning final result? That tool, my friends, is a mood board. And today, I’m sharing my very first attempt at creating one for my own “master” bedroom, detailing how it will be my roadmap for several exciting DIY projects.
As a DIY blogger, you might wonder why I’m delving into the world of mood boards. Traditionally, they’re seen as the domain of professional interior designers. However, after a recent shelf makeover where I hinted at this very idea, the positive feedback convinced me: a mood board is not just for designers; it’s an indispensable asset for any DIY enthusiast looking to bring their vision to life with purpose and precision. It’s about more than just pretty pictures; it’s about tangible results for every hammer swing and paintbrush stroke.
The Reality of a “Master” Bedroom: Maximizing Style in a Small Footprint
Let’s be honest, the term “Master Bedroom” in our home is more of an ironic jest than an accurate description. We’re talking about a truly tiny room, far closer to the infamous New Yorker closet apartments than a spacious retreat! In our two-bedroom home, we made the conscious decision to allocate the larger room to our girls, simply because they have more “stuff.” Looking back, I sometimes question the logic of that choice, assuming I had fewer belongings. Regardless, this small space has bravely taken on the monumental task of functioning not only as our bedroom but also as a dedicated home office and craft storage area. Every inch must be meticulously planned to ensure both comfort and utility.
The challenge of decorating and organizing a multi-functional small room is precisely where a mood board shines. It forces a cohesive vision, preventing impulse buys or projects that don’t fit the overall aesthetic. For us, it means ensuring that the bed, desk, and storage units all work harmoniously, creating an illusion of space and an atmosphere of calm, despite the room’s compact dimensions. This detailed planning upfront saves countless hours and potential frustration down the line, especially when every DIY project requires thoughtful execution.
Crafting Our Bedroom’s Aesthetic: The Mood Board Unveiled
This is the visual blueprint for our tiny but mighty master bedroom. The core color palette is represented on the side: a comforting cream for the walls, providing a neutral and expansive backdrop. Anchoring the space are rich browns and sophisticated greys, drawn directly from our existing sideboard – a piece that will play a central role in our upcoming DIY transformations. To inject a touch of warmth and unexpected elegance, I’ve incorporated copper, inspired by a unique cork lampshade we already own. These colors are not just random selections; they’re thoughtfully chosen to create a serene, grounded, and subtly eclectic atmosphere that maximizes the feeling of space and style.
The primary goal of this mood board is to act as a visual guide, ensuring that every DIY project we undertake aligns perfectly with the overarching design scheme. It helps us visualize how new paint colors, updated furniture pieces, and decorative accents will interact within the room. This foresight is crucial in a small space where every design decision has a magnified impact. By laying out the colors and key furniture elements, we can anticipate potential clashes and refine our ideas before investing time and resources into a project.
Transforming Existing Treasures: Our DIY Furniture Projects
Our DIY journey begins with the existing furniture pieces, each awaiting a fresh perspective and a touch of creativity. The beauty of DIY lies in seeing the potential in what you already own, rather than constantly buying new. This not only saves money but also allows for unique, personalized touches that truly make a house a home. Let’s delve into the specific transformations we have planned for each item, guided by our mood board.
The Shabby Chic Dresser: A Stenciled Statement?
Below, you can see the current state of a dresser I showcased about a year ago. Its charmingly shabby chic, distressed finish once held appeal, but for our evolving small master bedroom, I envision something with a bit more refined character. The idea brewing is to introduce a stencil, perhaps mimicking the intricate patterns of faux bone inlay, to elevate its look and create a sophisticated focal point. This technique, when executed thoughtfully, can add a touch of luxury without overwhelming a compact space.
My inspiration for this dresser makeover comes from incredible examples like this one from Orphans with Makeup. Their faux bone inlay dresser is simply stunning, showcasing how a well-chosen stencil can dramatically transform a piece. However, a significant design dilemma arises: given the room’s diminutive size, I worry that such an elaborate stencil might be “too much,” creating a visually cluttered feel rather than an elegant one. The mood board helps me weigh these considerations, but I’m truly seeking your insights on this one. How do we achieve interest without sacrificing the sense of openness crucial for a small room?
The Mid-Century Modern Sideboard: A Stacked Solution
Next up is my beloved Mid-Century Modern Sideboard, a piece I meticulously painted last year. While I adore its style, its inherently low profile presented a practical challenge in a multi-functional room needing vertical storage. To overcome this, I ingeniously stacked another smaller side table on top, creating a unique, two-tiered storage unit. This innovative solution not only conserves precious floor space but also transforms two individual pieces into a more practical and visually interesting single unit. It now comfortably houses my printer and other office essentials, demonstrating how creative thinking can solve real-world space constraints.
Disclosure: The items below are affiliate links. If you purchase any of these products through the links, I receive a small commission, which helps me continue providing you with lovely content. There is no extra charge to you for purchasing through my affiliate links.
The primary design question now revolves around how best to integrate the top piece with the lower sideboard through paint. Should I paint the exteriors of the top unit in the same sophisticated grey as the bottom sideboard, creating a monolithic, cohesive structure? Or, should I take a contrasting approach, painting only the drawers of the top piece grey while leaving its sides in a natural wood finish? Each option offers a distinct visual impact, influencing the perceived weight and style of the combined unit. The mood board helps visualize these choices, but the final decision requires careful consideration of overall balance and the desired aesthetic flow within our small space.
To aid in this decision, I’ve created some mock-ups (bear with my Photoshop skills, sometimes even copious amounts of coffee can’t perfect them!) illustrating what each painting approach might look like. These crude visualizations, despite their imperfections, are invaluable in comparing the two options side-by-side. I’m even considering painting the openings for the handles on the first option, adding another layer of detail. Your feedback on which design direction you prefer would be incredibly helpful!
|
|
|
The Bookcases: Functional Storage with Flair
Finally, we have two narrow black bookcases. These humble units are veteran survivors from my boys’ younger years – definitely not aesthetic masterpieces, but incredibly practical for storing my extensive craft supplies. Their utilitarian nature makes them perfect candidates for a creative DIY overhaul, transforming them from mere storage into integrated design elements within the room. The goal is to elevate their appearance while retaining their essential functionality.
Below is a photo of one of them in its current, rather disheveled state. As I added the watermark, a humorous thought crossed my mind: who would possibly want to “steal” this photo? It’s definitely not a Pinterest-perfect shot! But that’s precisely the point of DIY – taking the ordinary and making it extraordinary. My vision for these bookcases involves adding a touch of paper decoupage, similar to a previous shelf project. I’m contemplating painting them white first to brighten them up, then applying book pages or decorative paper to the backs of the cases for a subtle, artisanal touch. Alternatively, a more modern, streamlined look like this could also be a compelling option, offering a clean contrast to the room’s other elements. Which direction feels right for our multi-functional, cozy space?
The Desk: From Vintage Charm to Modern Functionality
And then there’s the desk, a crucial element for our office-in-a-bedroom setup. This piece has seen an evolution! Initially, it was a vintage kitchen table with extenders that I had repurposed. While charming, its significant drawback was its height – it was too short, making it incredibly uncomfortable to sit at and requiring me to awkwardly squeeze my legs underneath. Ergonomics are key for a functional workspace, even in a small room.
After a recent garage sale, I swapped out the old short table for a new one that is considerably taller and offers a more generous surface area – a definite upgrade for productivity. My current thought is to simply paint the legs white, allowing the tabletop’s natural, soft color to shine through. This approach would offer a clean, bright aesthetic that complements the cream walls and prevents the desk from feeling too heavy in the compact room. However, I’m open to suggestions! What are your thoughts? Should I stick with the simple white legs, or is there another creative direction we could explore for the tabletop?
The Bed and Finishing Touches: Comfort in a Corner
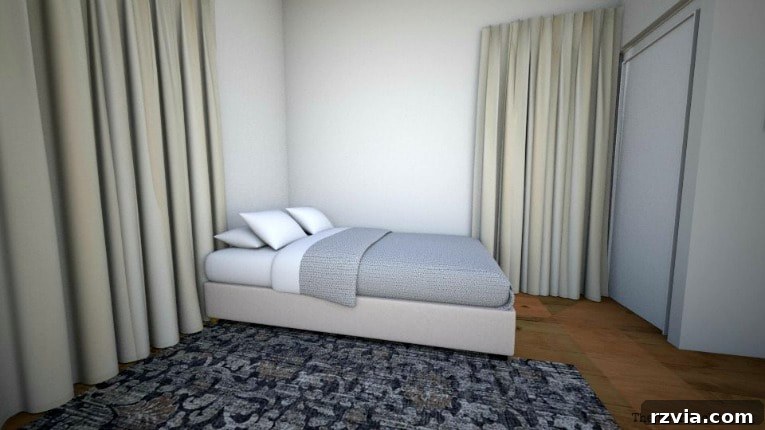
Of course, no bedroom is complete without a bed. At this stage, it’s a simple mattress on a frame, destined for a cozy corner of the room. Given the tight space and the proximity to the window sill, a crucial design element will be a short headboard – one that provides comfort and style without clashing with the window. This demonstrates just how small the room truly is and the precise measurements required for every piece.
We’ll also be integrating two recently finished DIY projects: the renovated bench and the natural wood chair. These pieces, with their fresh new looks, will contribute significantly to the room’s refreshed aesthetic, proving that even a small room can accommodate stylish and functional seating.
Visualizing Success: Leveraging Room Planner Tools
To really bring this vision to life and ensure every piece fits perfectly, I utilized the RoomStyler site. I absolutely love this tool! It allows you to effortlessly manipulate your furniture within a virtual space and generate stunning 3D images. This level of visualization is invaluable for a DIY enthusiast like myself, as it helps identify potential layout issues or design inconsistencies before any physical work begins. It’s incredibly fun and addictive – I could spend all day arranging and rearranging virtual furniture! And no, I wasn’t paid to endorse it; it’s genuinely a fantastic resource for anyone planning a room makeover. For more beautiful bedroom mood board inspiration, I highly recommend checking out Doreen’s stunning looks over at Fox Den Road.
Understanding the Layout: Our Bedroom’s Floor Plan
For absolute clarity on the room’s spatial dynamics, I’ve included a detailed floor plan. This blueprint reveals the true scope of our design challenge and highlights the necessity of thoughtful placement. The room measures a compact 13 by 10 feet. In the upper left-hand corner, you’ll find a small closet, offering essential but limited storage. The bed will be flanked by two windows, requiring careful consideration for curtain placement and a low-profile headboard. A door is situated on the upper right-hand side, dictating furniture arrangements to maintain clear pathways. Understanding these dimensions and fixed elements is paramount to optimizing the flow and functionality of this multi-purpose space.
This image provides a general idea of the wall opposite the bed, illustrating how elements like the stacked sideboard and bookcases might interact visually within the room.
Your Vision, Your Voice: Guiding Our DIY Journey
And that, in essence, summarizes the genesis and purpose of our master bedroom mood board. Did I follow all the “rules” of mood board creation? Perhaps not perfectly, but the crucial takeaway is that it serves its intended purpose: to clearly articulate my room design dilemmas and provide a visual roadmap for the series of DIY makeovers ahead. This structured approach is precisely why I’m here, and more importantly, why you’re here – to see practical, achievable DIY projects that yield real results.
The beauty of the DIY community lies in shared knowledge and collective brainstorming. Now, I eagerly await your valuable opinions on all the creative challenges we’ve discussed:
- The Dresser Stencils: To stencil or not to stencil? Do you think a faux bone inlay pattern would elevate the dresser’s charm or overwhelm our small room?
- The Bookcases: Should we opt for the white paint with paper decoupage backs for a personalized, crafty look, or would a sleeker, more modern aesthetic be a better fit?
- The Mid-Century Modern Stacked Unit: For the top portion, should the exteriors be painted grey like the bottom sideboard, or would a contrasting approach with grey drawers and natural wood sides create a more appealing visual dynamic?
Your insights are incredibly important as we embark on these transformations. Let’s make this small bedroom a testament to thoughtful design and the power of DIY!
More Room Projects & Inspiration:
HOME
Patriotic Art from Fabric Scraps >>
This blog is for entertainment purposes only; my DIY tutorials are not professional advice. Read my full disclaimer here.
I love receiving your comments and will do my best to reply to every one of them. Please refrain from adding hyperlinks to your comments, as they cannot be published.