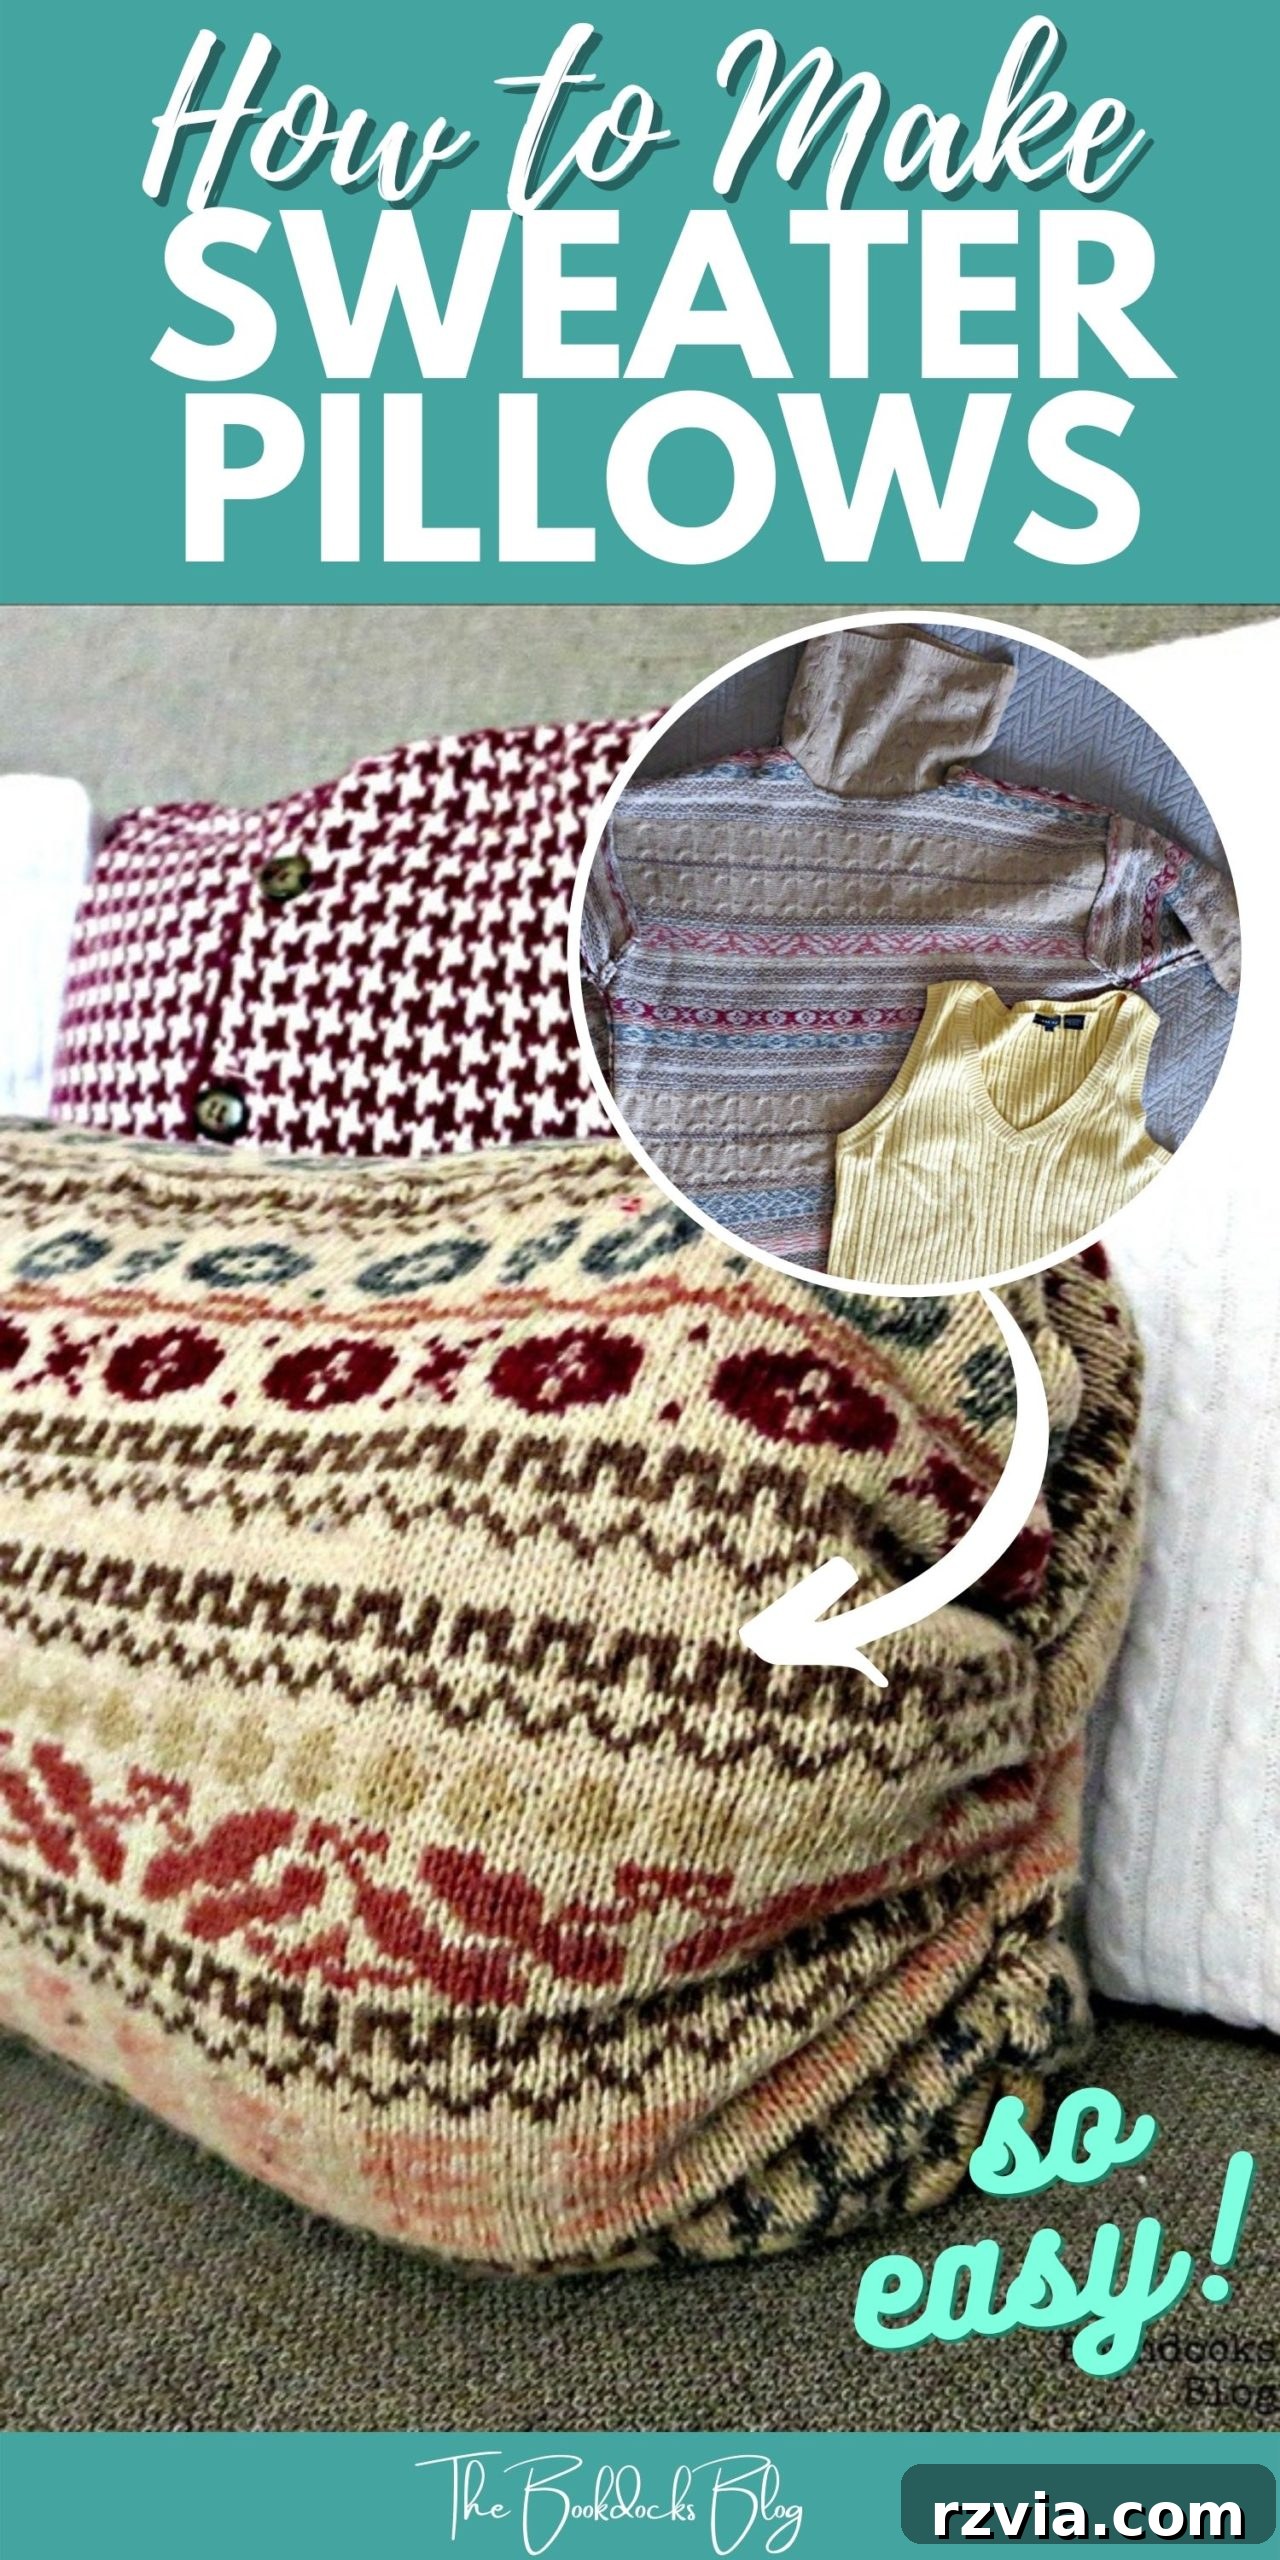
In a world increasingly focused on sustainability and personal expression, transforming forgotten items into cherished treasures has never been more appealing. A testament to this movement, upcycling old sweaters into cozy throw pillows offers a delightful blend of creativity, economy, and environmental consciousness. Just last week, we explored the charm of crafting pillows from a fringed fleece scarf, showcasing how simple fabric transformations can refresh your living space. Today, we delve even deeper into the art of repurposing by demonstrating an incredibly straightforward method to **make sweater pillows**. This project is not only satisfyingly easy but also boasts a zero-waste philosophy, ensuring every part of your beloved, yet retired, sweater finds a new purpose. Prepare to unlock the potential of your wardrobe discards and infuse your home with warmth and personalized style, all while embracing an eco-friendly approach to decor.
Discover the Charm of Upcycled Sweater Throw Pillows
There’s a unique satisfaction that comes with giving an old item a new lease on life, especially when it results in something as practical and charming as a throw pillow. Sweaters, with their inherent softness, varied textures, and often intricate patterns, are perfect candidates for this creative transformation. This DIY project is ideal for anyone looking to add a touch of handmade elegance to their home without breaking the bank or requiring extensive crafting skills. Whether you’re a seasoned crafter or a complete beginner, the simplicity of this method will surprise and delight you. Imagine transforming a beloved but worn-out sweater, perhaps one with a sentimental history, into a cozy accent piece that brings comfort and character to your sofa, armchair, or bed.
The journey to creating your own collection of bespoke sweater pillows begins with the hunt for suitable materials. You might be surprised by the abundance of options available, often right under your nose. Start by rummaging through your own closet for sweaters that are perhaps stained, stretched, or simply out of fashion but still boast beautiful fabric. Don’t hesitate to reach out to family and friends; they often have sweaters they’re ready to part with, presenting a wonderful opportunity to rescue textiles from landfills. For an even wider selection, local thrift stores are veritable treasure troves. Here, you’ll discover an array of textures, colors, and knits, from chunky wool to soft cashmere blends, enabling you to create pillows that perfectly complement your existing decor or introduce a vibrant new accent. Remember, any sweater shape will do – from classic crewnecks and cardigans to turtle necks and vests – each offering unique possibilities for your pillow design.
Essential Supplies for Crafting Your Sweater Pillows
Disclosure: This post contains affiliate links for your shopping convenience. If you purchase any of these products through the links, we receive a small commission at no extra charge to you. You can find our full disclosure here.
Gathering your supplies is the first tangible step in any DIY project, and for sweater pillows, the list is wonderfully minimal. This makes it an accessible craft that doesn’t require a significant upfront investment in specialized tools. Here’s what you’ll need to transform those forgotten garments into stylish home accents:
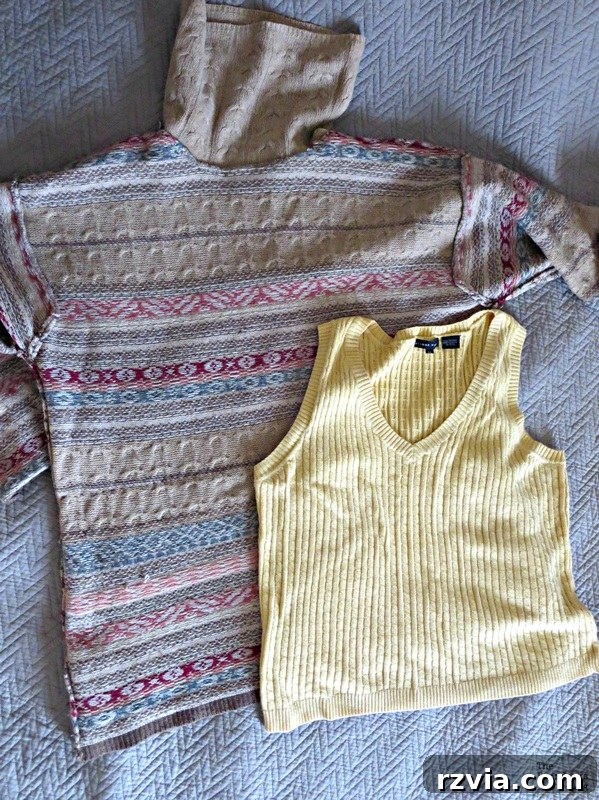
- Old Sweater Ready for Upcycling: As discussed, choose a sweater that you love the texture or pattern of, but no longer wear. Consider the material – wool, acrylic, cotton, or blends – as this will influence the final feel and appearance of your pillow. Ensure it’s clean and free from any major holes (unless you plan to patch them as part of the design).
- Sharp Scissors: A good pair of fabric scissors will make your work much easier and yield cleaner edges, though any sharp pair will suffice for this project, as most cuts will be hidden.
- Needle and Thread in a Coordinating Color: Select a thread color that either matches or blends seamlessly with your sweater. A strong, all-purpose polyester thread is usually best for durability. For those who prefer a machine, a sewing machine can speed up the process, but all steps are perfectly achievable by hand.
- Another Piece of Soft Clothing for Stuffing (or Cotton/Polyester Batting): This is where the true zero-waste magic happens! Instead of buying new stuffing, repurpose old t-shirts, scarves, socks, or even another worn-out sweater that might not be suitable for the exterior. This not only saves money but also gives these items a second life. Alternatively, standard cotton or polyester fiberfill can be used if you prefer a more uniform pillow feel.
Optional but helpful additions include sewing pins to hold fabric in place, a measuring tape for precise sizing (if desired), and a thimble to protect your fingers during hand-sewing.
Step-by-Step Guide: Crafting a Throw Pillow Cover from Sweaters
Let’s dive into the simple steps, beginning with arguably the easiest type of sweater to convert: the sweater vest. This method is so straightforward, it barely requires any cutting, making it a fantastic starting point for beginners or anyone seeking a quick craft project.
Transforming a Sweater Vest into a Pillow
The beauty of using a sweater vest lies in its inherent shape, which often requires minimal alteration. Here’s how you do it:
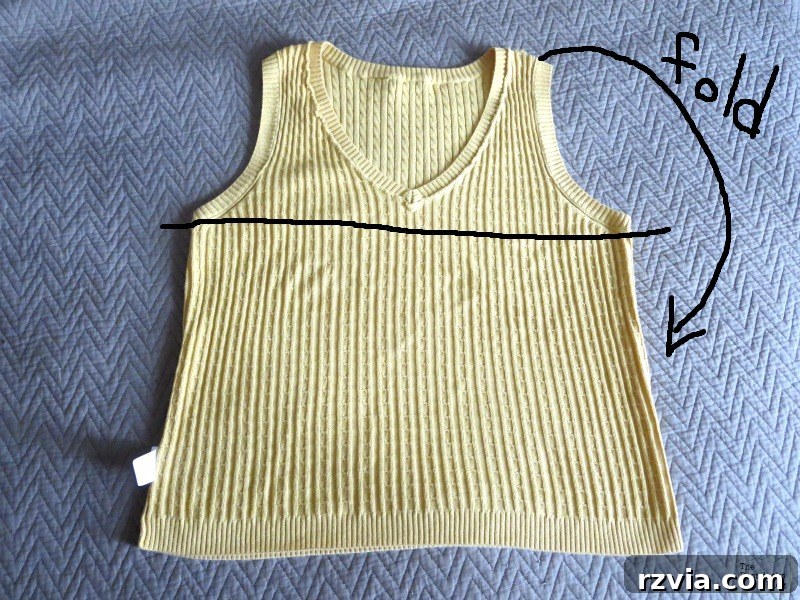
- Prepare the Vest: Lay your sweater vest flat. Identify the arm openings.
- The First Stitch: With your needle and coordinating thread, create a running stitch across the bottom of one arm opening, effectively closing it off. A running stitch is a basic hand-sewing stitch where you pass the needle in and out of the fabric in a straight line, creating small, even stitches. Repeat this on the other arm opening. The goal is to create a closed ‘bag’ from the vest’s body.
- Flip and Stuff: Once both arm openings are sewn shut, turn the vest inside out. Begin to stuff the vest with your chosen filling – whether it’s repurposed fabric scraps or traditional batting. Distribute the stuffing evenly to achieve the desired fullness and shape for your pillow.
- Sew Shut: With the vest now stuffed to your liking, carefully sew the remaining open end (typically the bottom hem or neck opening, depending on your preferred pillow orientation) shut using a strong stitch. A ladder stitch or whip stitch can provide a neat, almost invisible finish. And just like that, you have a finished pillow! The minimal cutting involved with a vest highlights the “no-waste” ethos of this project.
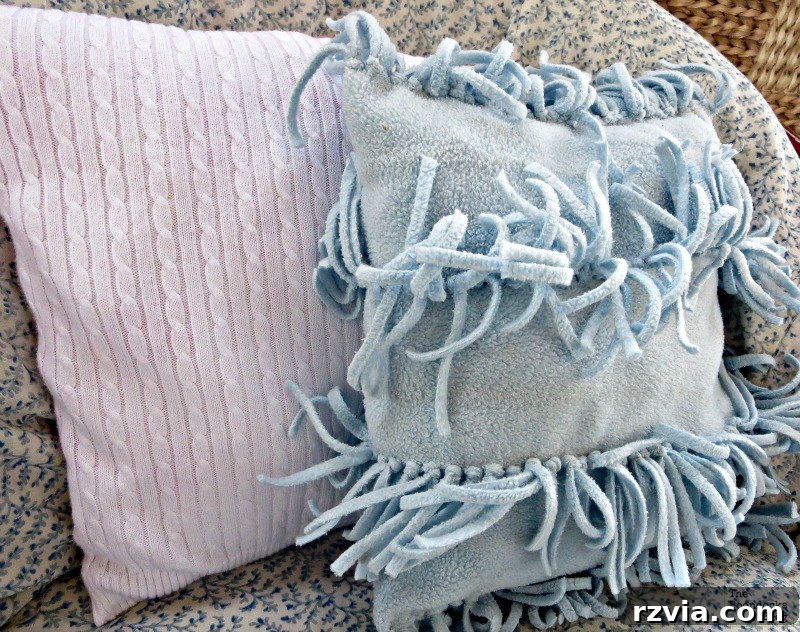
The resulting pillow from a sweater vest is often a perfect rectangle, ideal for layering with other cushions. My white sweater vest pillow, for instance, pairs wonderfully alongside the fleece scarf pillow, demonstrating how different textures can create a harmonious and inviting display.
Crafting a Pillow from a Full Sweater with Sleeves
Now, let’s tackle a full sweater – complete with sleeves and a neckline – and transform it into a unique throw pillow. This method is equally simple but allows for more creative shaping and utilization of all parts of the sweater, embodying the ultimate zero-waste approach.
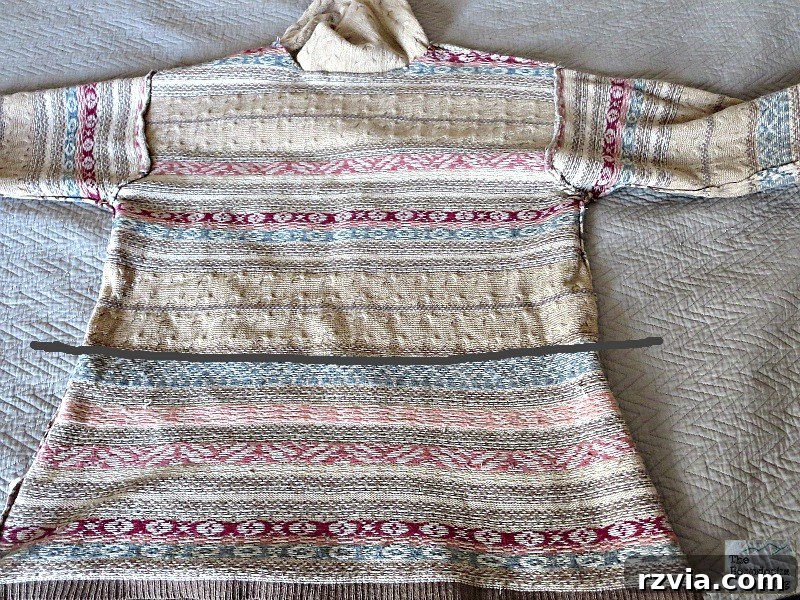
- Initial Seam for Pillow Shape: Turn your sweater inside out. Decide on the desired length of your pillow. For a rectangular pillow, sew a straight line across the sweater, roughly two-thirds of the way down from the shoulder seam. If you prefer a more square-shaped pillow, extend this stitch closer to the sweater’s bottom hem. Use a strong running stitch or a backstitch for durability, as this seam will bear much of the pillow’s stuffing pressure.
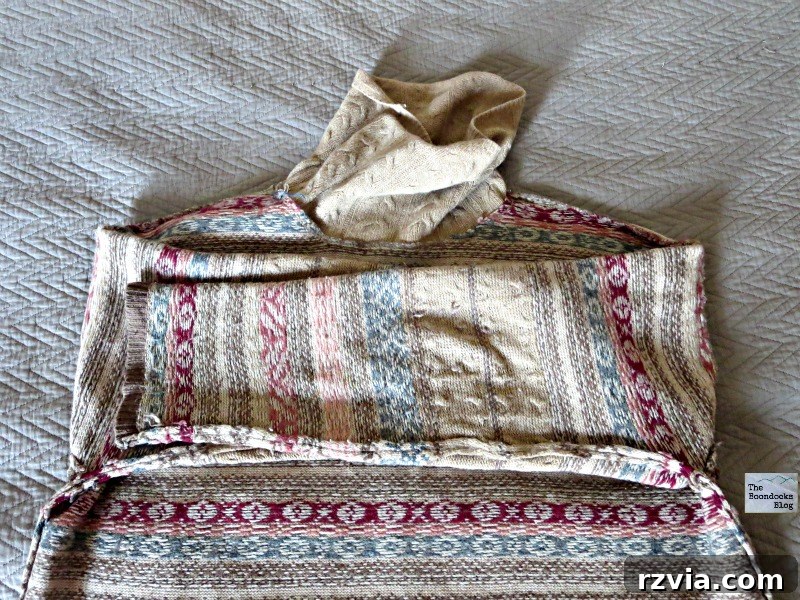
- Fold the Sleeves Inward: Carefully fold both sleeves inward towards the center of the sweater body. This step is crucial for two reasons: it helps create a uniform bulk within the pillow and ensures no part of the sweater is wasted. The sleeves will contribute to the overall stuffing and firmness.
- Fold the Neckline: Similarly, fold the cowl or turtleneck portion towards the body of the sweater. Like the sleeves, this adds to the internal structure and ensures all fabric is utilized. If your sweater has a wide neckline that might gape, you can secure it with a few stitches or pins at this stage.
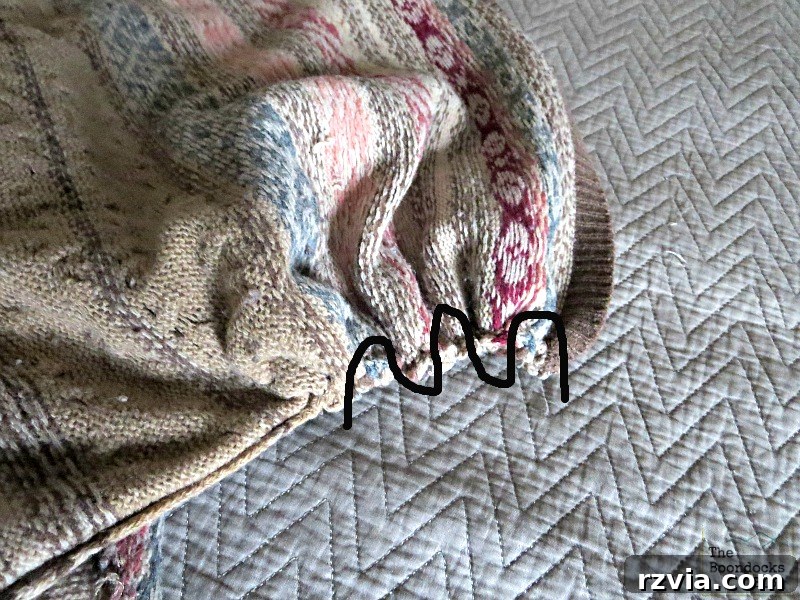
- Create the Gathered Ends (Optional but Recommended): For a unique, bunched-up look on the sides, employ a gathering stitch along the open ends of the sweater. To do this, make a row of loose, long running stitches near the edge and then gently pull the thread ends, gathering the fabric. This technique not only adds a decorative element but also helps to neatly enclose the bulk of the folded sleeves and neckline.
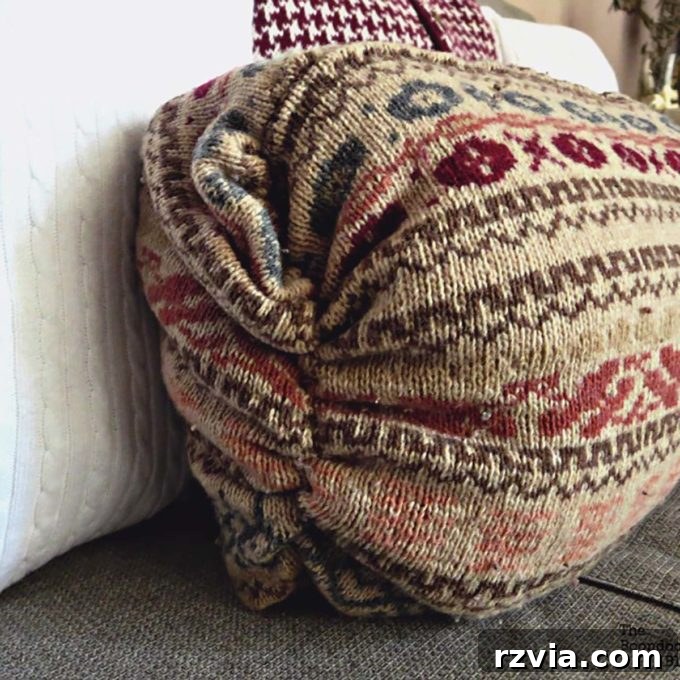
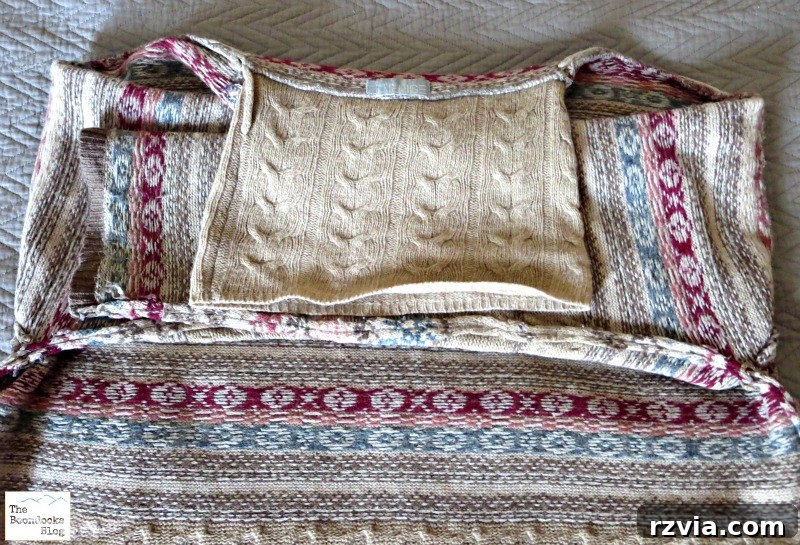
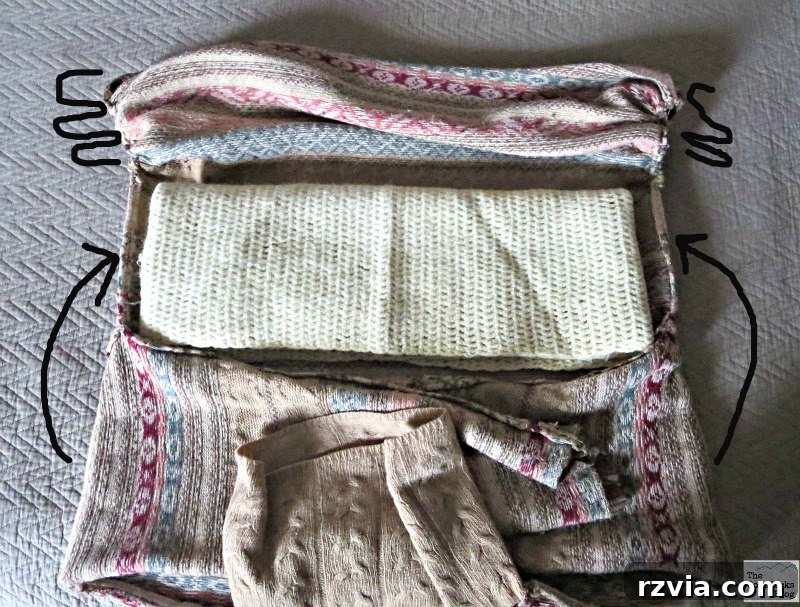
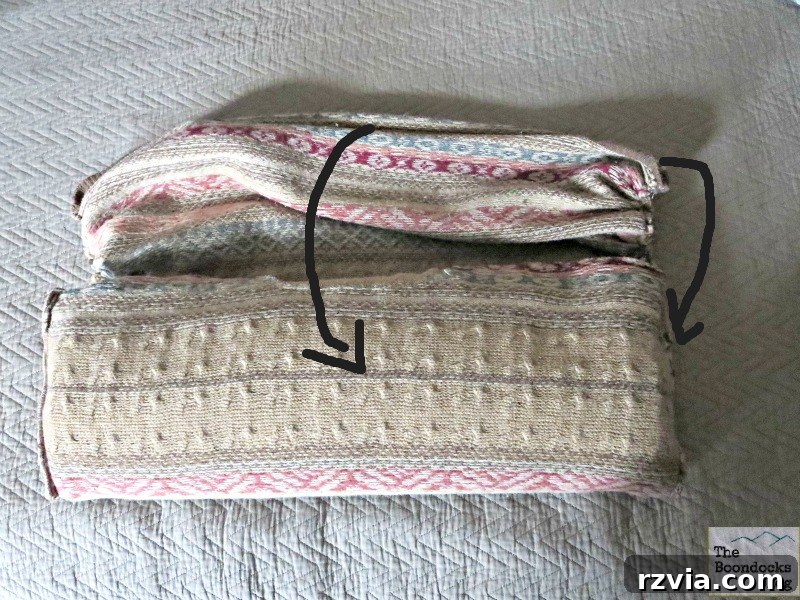
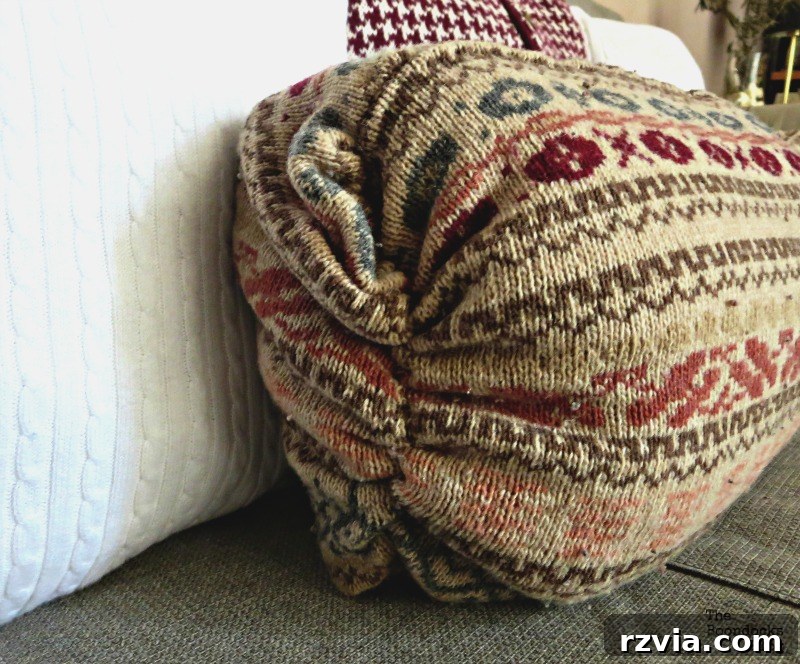
- Stuff and Fold: Observe the neatly gathered ends (as seen in the image below). Now, insert your chosen filling – for instance, another soft scarf or old clothing – into the main body of the sweater. Once the internal stuffing is in place, strategically fold the remaining fabric of the sweater (the sleeves, neckline, and any excess from the gathered bottom) on top of the scarf. Think of it as folding the sweater into thirds, creating a compact and well-filled internal structure without needing to purchase additional batting. This step truly exemplifies the zero-waste principle, as every bit of the original garment is used.
- Enclose the Stuffing: Take the gathered bottom part and fold the rest of the sweater – the stuffed section – into it. This creates a neat “pocket” effect, securely encasing all the internal components. It’s a surprisingly intuitive process once you start manipulating the fabric.
- Final Stitch: Once all the inner stuffing is snugly within the sweater’s “pocket,” simply sew the final opening shut. The beauty of this method is that absolutely nothing was cut off or discarded. Every part of the sweater found its purpose, resulting in a cohesive and sustainable throw pillow.
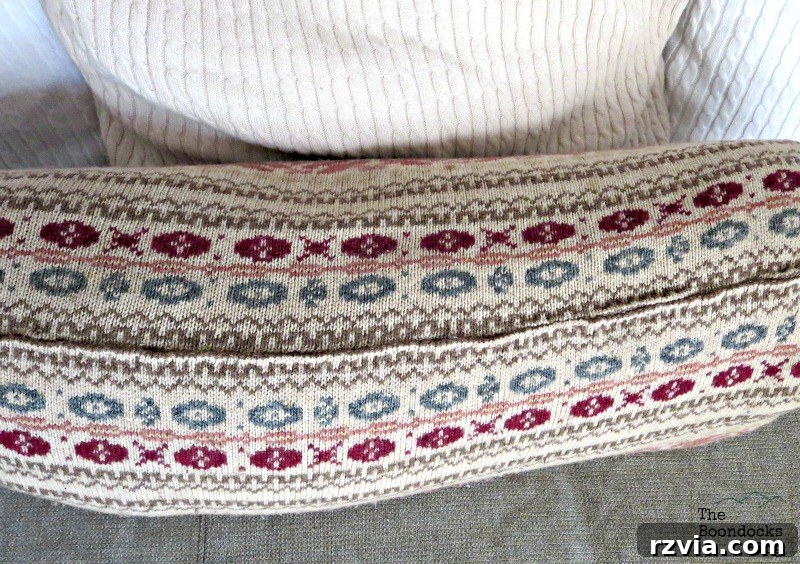
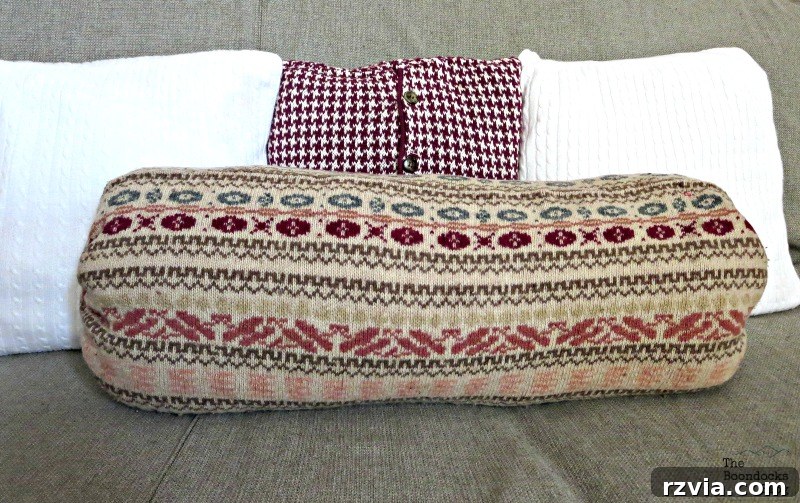
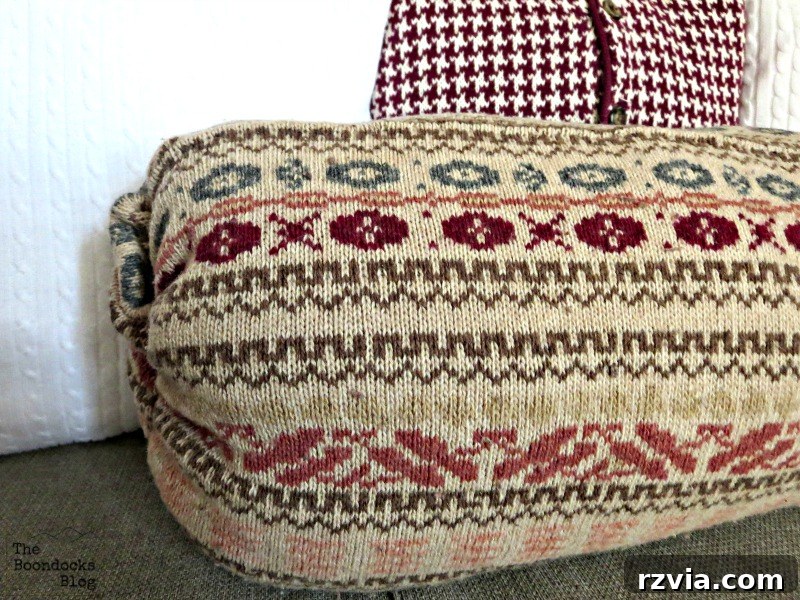
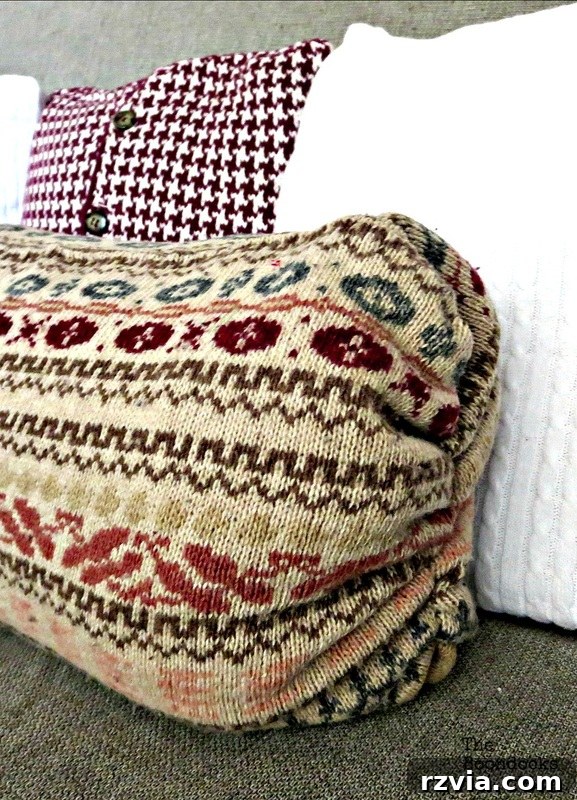
The finished product boasts a beautifully gathered end, giving the pillow a distinctive, almost roll-like appearance. This unique texture and shape add a bespoke touch to any room. It reminds me of the clever no-sew candy throw pillows from Sustain My Craft Habit, showcasing how simple techniques can yield impressive results.
Working with Buttoned Sweaters and Other Variations
This versatile technique can be adapted for a wide variety of sweaters. For instance, I used the same approach to create a charming sweater pillow from a buttoned sweater featuring a classic houndstooth embellishment. The process was identical to that of the vest, with the only modification being to fasten the buttons closed before beginning the stitching and stuffing process. This ensured the buttons remained a decorative and integral part of the pillow’s design.
The possibilities extend far beyond simple vests and full sweaters. Consider using sweaters with interesting cable knits, unique pockets, or even those with decorative patches or embroidery. Each feature can add character and a bespoke touch to your finished pillow. For instance, a sweater with chunky cables will result in a pillow with wonderful texture and depth, while one with a contrasting collar can be cleverly incorporated into the design. Don’t be afraid to experiment with different sweater types and see how their inherent qualities can enhance your upcycled creations.
What are your thoughts on these incredibly easy, no-cutting (mostly), and zero-waste sweater pillows? They offer a fantastic way to refresh your home decor seasonally, especially as you transition into cozier months. The satisfaction of taking something old and giving it a beautiful new life is truly unmatched.
Styling Your New Sweater Pillows
These unique pillows aren’t just crafts; they’re statements. While this particular gathered pillow might not perfectly fit in my upcycled basket, that’s perfectly fine! The joy comes from the act of repurposing something old and giving it a new, functional, and beautiful life. Imagine these cozy additions gracing your living room sofa, adding warmth to a reading nook, or bringing a touch of hygge to your bedroom. They are perfect for layering with existing cushions, introducing diverse textures and patterns that create an inviting and eclectic aesthetic. Their handmade quality makes them thoughtful gifts for loved ones, carrying a personal touch that store-bought items simply can’t replicate.
This project culminates our exploration into creating sweater pillows the easy way, proving that crafting doesn’t have to be complicated to be rewarding. The beauty lies in its simplicity, accessibility, and the profound impact it has on reducing waste. As we wrap up this cozy project, it feels like we’re finally bidding farewell to winter-themed crafts, ready to embrace new seasonal inspirations. Winter begone, and welcome a new era of upcycled beauty!
Embrace the satisfaction of sustainable crafting and transform your discarded sweaters into beloved home decor. Happy crafting!