
Transform Your Front Door: A Comprehensive Guide to Achieving a Lasting, Beautiful Finish
About a month ago, an unexpected incident prompted a much-needed project: repainting my front door. While it wasn’t a major calamity, it served as the perfect catalyst for a home improvement task I’d subtly been contemplating. Our front door, much like the entryway to any home, is more than just a barrier; it’s a statement piece, a welcoming embrace, and a crucial protector against the elements. Today, I’m thrilled to share how I gave my front door a stunning makeover, ensuring a sturdy, resilient finish that can withstand even the harshest weather, like a formidable nor’easter!
This guide will walk you through the process, from understanding the importance of the right paint to a step-by-step application, ensuring your door not only looks fantastic but also stands the test of time and weather.
The Unforeseen Catalyst: Why My Front Door Needed a Makeover
Life has a funny way of pushing us towards projects we might otherwise postpone. For me, it was a severe rainstorm that hit about a month ago. We were caught unprepared, and the result was a rather unfortunate mess splattered across our front door. What happened, you ask? The culprit was a seasonal wreath I had crafted, adorned with faux flowers. Despite having a storm door, we hadn’t yet swapped out the summer screen for the solid glass insert, allowing the torrential rain to pass right through the netting. The vibrant red dye from the artificial flowers bled profusely, leaving unsightly streaks and stains that marred the door’s surface. It was clear then: a simple wipe-down wouldn’t suffice. My front door was crying out for a full repaint.
This very wreath, which I had made with love, inadvertently caused the damage. It was a stark reminder of how important it is to protect our exterior surfaces and to be mindful of decorative elements that might not be entirely weather-proof. The incident, while initially frustrating, ultimately provided the perfect motivation to address the door’s aging paint and give it the refresh it deserved.
Disclosure: I was compensated for doing this post with product. However, all the opinions stated here are my own. I only use products I love and would recommend to my viewers. The items below are affiliate links. If you purchase any of these products through the links, I receive a small commission, which helps me continue to provide you with lovely content. There is no extra charge to you for purchasing through my affiliate links.
Essential Tools and Materials for Your Door Painting Project
Before diving into any DIY project, gathering the right tools and materials is paramount. For this front door transformation, I opted for specific products known for their quality and durability. Here’s what you’ll need to achieve a similar, long-lasting finish:
- Americana Decor Curb Appeal front door and shutter paint: This specialized paint is the star of the show, formulated for exterior resilience.
- High-quality angled paintbrush: A 2-inch angled brush is ideal for cutting in around hardware and tackling the detailed paneling of the door, ensuring crisp lines and smooth application.
- Drop cloth: Essential for protecting your porch, steps, and surrounding areas from paint drips and spills. A canvas cloth is durable and reusable.
- Command hook: A simple yet ingenious tool for hanging a damp rag or even the paintbrush during short breaks, keeping your workspace tidy.
- Cleaning supplies: Mild detergent, water, and sponges or rags for thorough door preparation.
- Painter’s tape (optional, but recommended): For masking off hinges, hardware, and any glass inserts to ensure clean lines.
- Screwdriver: To remove door hardware (knobs, hinges, kick plates) if you choose to for a cleaner paint job.
- Fine-grit sandpaper (optional): For lightly sanding existing rough spots or glossy finishes to improve paint adhesion.
Having these items ready before you begin will streamline the painting process and contribute significantly to a professional-looking result.
The How-To: Achieving a Flawless, Durable Front Door Finish
Selecting the Right Paint: My Top Recommendation
When faced with the task of repainting my door, I immediately knew who to turn to for the ideal solution: the ever-reliable DecoArt company. They provided me with their remarkable product, Americana Decor Curb Appeal. This isn’t just any ordinary paint; it’s a specialty formulation designed specifically for the rigorous demands of front doors and shutters. Its unique composition makes it exceptionally suitable for both wood and metal surfaces, and its versatility extends to other exterior elements like mailboxes and railings – perfect for tackling multiple projects around the house!
Why Americana Decor Curb Appeal Stands Out
One of the most appealing aspects of this paint is its consistency: it’s notably thicker than standard acrylic paints, which contributes to its robust finish and excellent coverage. Crucially, it’s water-based. For anyone who has endured the messy, arduous cleanup of oil-based paints and their strong fumes, this is a dream come true. Water-based paints offer easier application, quicker drying times, and a simple water cleanup for brushes – a significant relief after past painting nightmares.
Beyond its user-friendly nature, Americana Decor Curb Appeal is engineered for outdoor endurance. It’s fade-resistant, meaning it can truly take a beating from the sun’s harsh UV rays without losing its vibrant color or integrity. This characteristic is vital for a front door, which is constantly exposed to the elements and often bears the brunt of weather fluctuations.
Choosing Your Hue: Salem Grey and Beyond
For my brick house, selecting the right color was a thoughtful process. With the warm, earthy tones of brick, options often feel limited beyond classic white. I ultimately chose Salem Grey, a sophisticated shade that offers a beautiful contrast without clashing. It’s a versatile color that harmonizes wonderfully with brick exteriors, providing a contemporary yet timeless appeal. This paint comes in a wide array of shades, so you’re sure to find one that perfectly complements your home’s aesthetic and personal style. Remember, the right color can dramatically enhance your home’s curb appeal, making it more inviting and polished.
Step-by-Step Application for a Professional Finish
Step 1: Thorough Preparation – The Foundation of Success
Before any paint touches the door, proper preparation is non-negotiable. I started by thoroughly wiping down the entire door surface to remove all dirt, grime, and any residual dye from the previous incident. A solution of mild detergent and water works perfectly for this. For a truly professional finish, consider removing all door hardware (knobs, hinges, kick plates) if possible, or meticulously taping them off with painter’s tape. If your door has any flaky old paint or particularly glossy areas, a light sanding with fine-grit sandpaper will create a better surface for the new paint to adhere to, though with this particular paint, extensive sanding isn’t always necessary if the surface is sound.
Step 2: Precision Painting – Details First
With the door clean and dry, it’s time to begin painting. The key to a smooth, even finish, especially on paneled doors, is to tackle the recessed areas and indentations first. Using my angled brush, I carefully painted the molded sections and any detailed trim work. This technique ensures that these intricate areas receive full coverage without accumulating excess paint. Work in small sections, always brushing in the direction of the wood grain (if applicable) for a natural look.
Step 3: Covering the Main Surfaces and Second Coats
Once the detailed sections are complete, move on to the larger, flat surfaces of the door. Apply thin, even coats, avoiding heavy drips or pooling. This paint offers excellent coverage, but two coats are almost always recommended for optimal durability and color depth. I found that two coats, with a little touch-up here and there, were sufficient to achieve a flawless finish. The beauty of this water-based paint is its relatively quick drying time. Allowing for adequate drying between coats is crucial; typically, waiting a couple of hours or following the manufacturer’s recommendations will ensure proper adhesion and a smooth final result. The entire process, including drying time between coats, took me about two hours from start to finish. Below, you can see the door after the first coat, already showing significant improvement.
The Stunning Transformation: My Front Door’s New Lease on Life
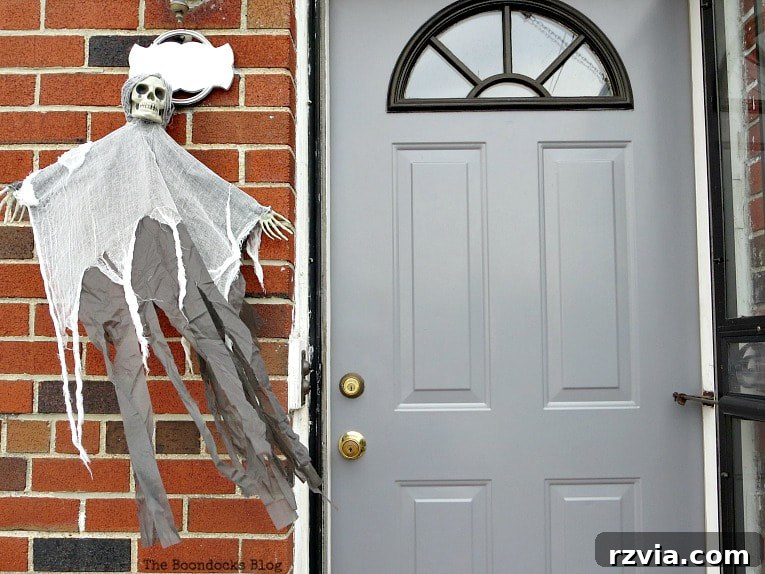
The transformation was truly remarkable. The door now boasts a smooth, uniform finish in the beautiful Salem Grey. Shortly after the paint cured, our area was hit by a nor’easter – a severe storm known for its strong winds and heavy precipitation. I’m delighted to report that the newly painted door, now protected by its storm door with the glass insert, held up beautifully! There were no signs of wear, fading, or moisture intrusion. This experience cemented my trust in the durability and protective qualities of Americana Decor Curb Appeal.
The 16 oz (473 ml) bottle size is absolutely perfect for projects like this. It’s generous enough to complete a full door project, often with plenty left over, without being an excessive amount that might go to waste. In fact, I used less than half the bottle for my entire front door. This efficiency means it’s an economical choice for homeowners looking to refresh their entryways.
I was so impressed by the paint’s resilience and ease of use that I plan to use the remaining paint to tackle some of our interior doors. Our indoor doors endure a fair amount of abuse, and I’m confident this paint’s sturdy finish will provide the long-lasting protection they need, matching the quality of the exterior application.
I believe Salem Grey is the perfect choice for all those vibrant, flashy brick exteriors. It provides a sophisticated grounding color that allows the natural beauty of the brick to shine without competing. While I adore my color choice, remember that this paint comes in a variety of shades, offering options for every home style and preference. Experimenting with color can be incredibly rewarding, and a refreshed front door is an easy way to boost your home’s curb appeal significantly.
One of the delightful surprises of Salem Grey is how its appearance shifts with the lighting. On a bright, sunny day, the color takes on an almost slate blue hue, adding another layer of depth and interest to the door’s aesthetic. This dynamic quality makes the door feel even more alive and welcoming, adapting beautifully to different times of day and weather conditions.
Final Thoughts and Your Turn!
Looking back, it seems the “accident” with the wreath was actually a blessing in disguise! It spurred me to undertake a project that was truly overdue, providing the perfect excuse to give my front door the fresh coat of paint it deserved. Now, you too are equipped with the knowledge and steps to paint your front door for a sturdy, long-lasting finish – robust enough to survive even the fiercest nor’easter! A beautifully painted front door not only enhances your home’s curb appeal but also offers crucial protection against the elements, making it a worthwhile investment in both aesthetics and durability.
What are your thoughts on my color choice? Do you have a brick house, and if so, what other colors have you found work best with brick exteriors? Share your ideas and experiences in the comments below!
If you really like what you see, subscribe to my blog and get my adventures delivered right to your mailbox. The subscription form is located on the sidebar and at the top of the page. To see my privacy policy, click here.
More Paint Ideas & Inspiration
<
HOME
Christmas Wreath with Metallics
Linking up to these Link Parties
This blog is for entertainment purposes only; my DIY tutorials are not professional advice. Read my full disclaimer here.
I love it when I get your comments and I will try to reply to every one of them.