
Revitalize Your Home: A Simple DIY Basket Makeover for Cozy Snugglies
As the brisk air persists and winter’s chill remains a constant companion, there’s an undeniable appeal to the comfort of a warm blanket and a soft pillow. Even here in my coastal haven, where the water’s edge offers a serene backdrop, the cold can often seep in. When those rare moments of relaxation arrive, my ultimate indulgence is to nestle onto my couch, enveloped by my favorite throws and cushions. Yet, a common dilemma invariably arises: where do all these wonderful snugglies go when they’re not actively in use? The joy of a cozy space can quickly be overshadowed by a burgeoning pile of blankets and pillows.
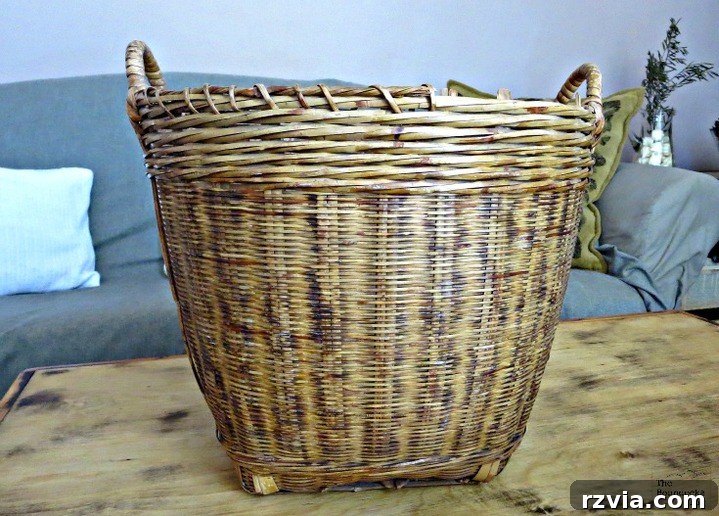
This universal need for organized comfort led me on a treasure hunt through my own home, where I rediscovered an old, unassuming wicker basket. Its size and shape struck me as absolutely perfect for tidily stowing away my cherished “snugglies”—those soft blankets and plump pillows that are essential for transforming a simple sofa into an inviting sanctuary. However, before it could fulfill its destiny as a stylish storage solution, this humble basket was in dire need of a complete aesthetic overhaul. Join me as I guide you through an engaging and surprisingly simple DIY project, breathing new life into a forgotten item and making it a functional, beautiful addition to any living space.
Gathering Your Creative Supplies
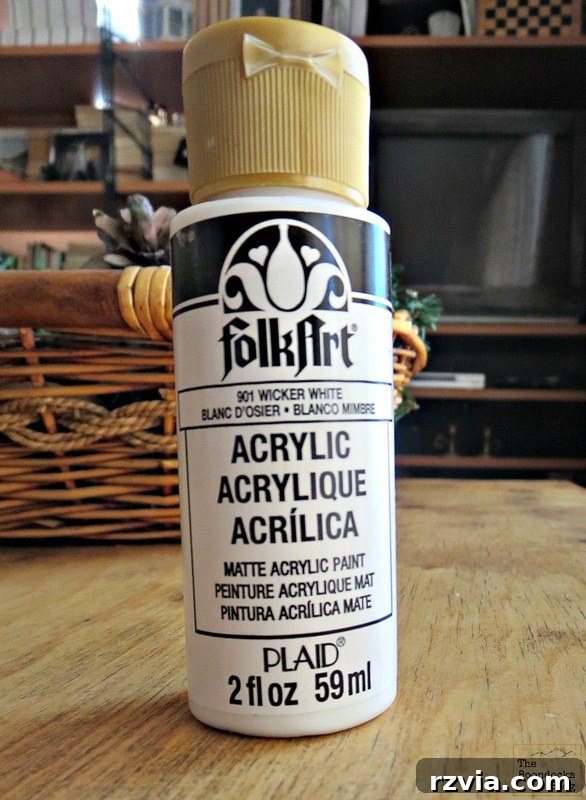
The inherent charm of upcycling projects lies in their accessibility and often, the ability to utilize materials you already have on hand. As I rummaged through my dependable collection of paints, a familiar favorite caught my eye: a specific brand of acrylic paint. I must emphasize that this is not a sponsored post, and I am not compensated for showcasing this particular product (though, truth be told, perhaps I should be!). Its reliable performance and ease of application make it an excellent choice for revitalizing natural textures like wicker, offering both durability and a smooth finish. For this particular basket makeover, I envisioned a classic white, knowing it would provide a crisp, clean foundation, perfectly setting the stage for subsequent design elements and a touch of artful distressing.
Beyond the paint itself, ensuring you have the right brushes is crucial. For intricate wicker work, a mix of brush sizes can be incredibly helpful – a wider brush for broader strokes and a smaller, more detailed brush for getting into the nooks and crannies of the weave. Old towels or rags are also indispensable for cleaning brushes, wiping away excess paint, and later, for the distressing technique. A dedicated workspace, ideally covered with newspaper or a drop cloth, will protect your surfaces and make cleanup a breeze. Having all your tools organized before you begin ensures a smoother, more enjoyable crafting experience, allowing your creativity to flow without interruption.
Commencing the Transformation: The Foundational Base Coat
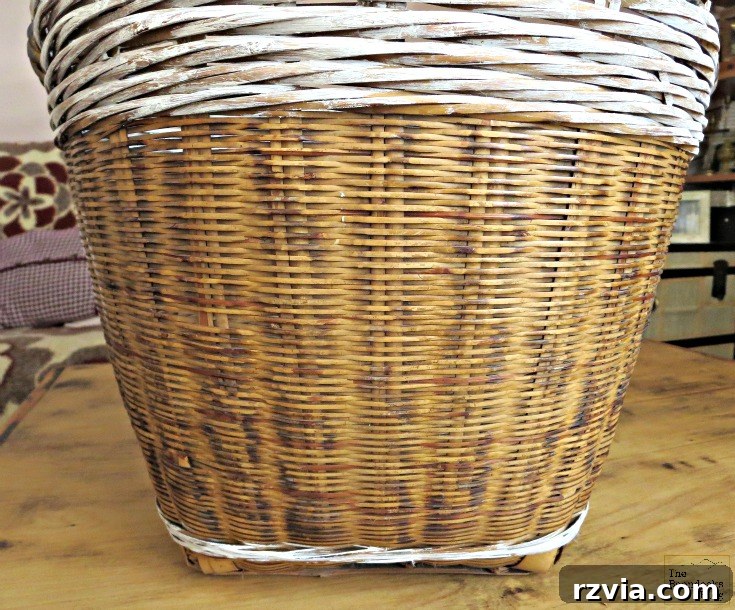
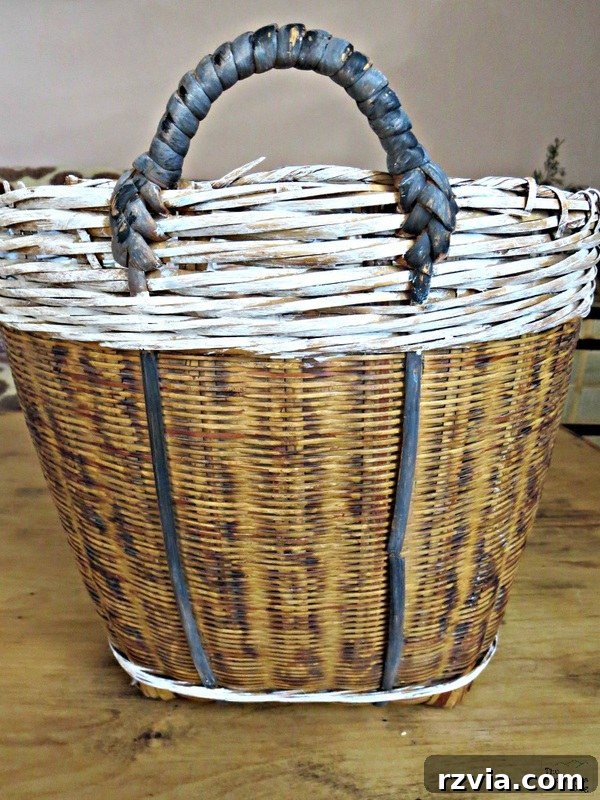
With my chosen paint ready, I eagerly began the first phase of the basket’s exciting metamorphosis. My initial focus was on applying paint to the most prominent structural components: the robust, thicker reeds that form the defining top and bottom rims of the basket. These areas are not only critical to the basket’s structure but also tend to bear the brunt of everyday use. A well-applied base coat here provides essential protection, enhances durability, and, importantly, creates a visually appealing frame for the entire piece, drawing the eye to its elegant contours.
Working methodically, I used a moderately sized brush to carefully apply the crisp white acrylic paint. My primary goal was to achieve thorough coverage without allowing excessive drips or unsightly pooling within the intricate basket weave. Patience, I quickly realized, is a virtue when painting wicker due to its inherently textured and porous surface. I found that applying several thin, even coats yielded a far superior and more professional result compared to attempting a single thick application, which can easily obscure the natural texture and lead to premature chipping. Allowing each thin layer to dry partially before applying the next was key to ensuring optimal adhesion and a beautifully refined finish. This foundational step, while seemingly straightforward, is absolutely vital; it meticulously prepares the surface and sets the stage for the basket’s complete aesthetic renewal.
Perfecting the Interior Edge
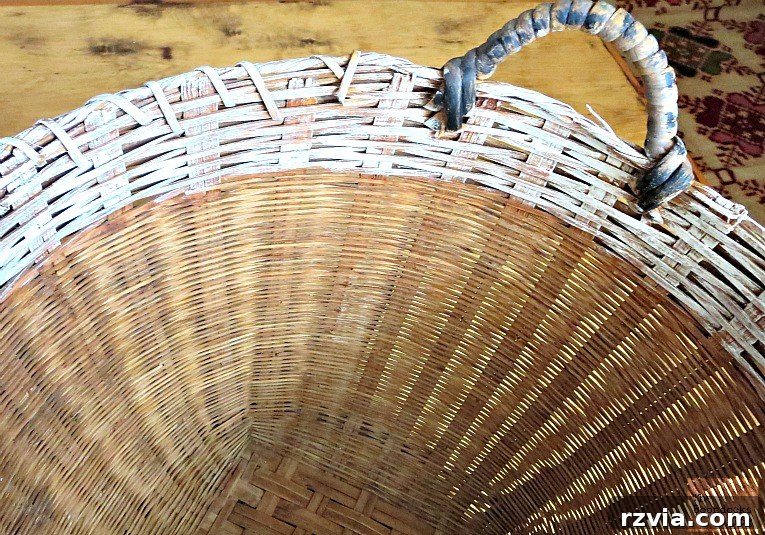
A truly successful makeover pays meticulous attention to every detail, including those areas that might not immediately catch the eye. After meticulously painting the exterior rims, I extended my efforts to the inside edge of the basket. Applying even a small amount of paint to this interior perimeter is crucial for achieving a seamlessly cohesive and polished look, especially since this area becomes visible each time blankets and pillows are placed inside or retrieved. These subtle, thoughtful touches are what truly elevate a DIY project from merely functional to exquisitely finished, lending an air of professional craftsmanship to your creation.
This particular step holds significant importance for storage baskets, as their interiors are frequently exposed during use. A clean, uniform paint application here prevents any jarring visual contrast between the aged, natural wicker and the newly painted exterior, ensuring a harmonious transition and significantly enhancing the basket’s overall aesthetic appeal. It’s a detail that speaks volumes about the care and dedication invested in the project, transforming the basket from a simple container into a well-considered, intentional piece of home decor. This attention to detail ensures that the basket feels complete, inside and out, making it a joy to use and admire.
Infusing Depth with a Custom Grey Accent
To introduce an element of sophisticated contrast and visual intrigue, I made the decision to craft a custom shade of grey. This was effortlessly accomplished by blending a modest quantity of black acrylic paint directly into my pristine white base. The inherent beauty of mixing your own colors lies in the artistic freedom it provides, allowing you to achieve a nuanced tone that perfectly aligns with your specific vision and existing decor. My customized grey turned out wonderfully, featuring subtle, organic variations in hue that lent additional character rather than a sterile uniformity. This delightful, organic variation is an intrinsic part of the allure and uniqueness of truly handmade items.
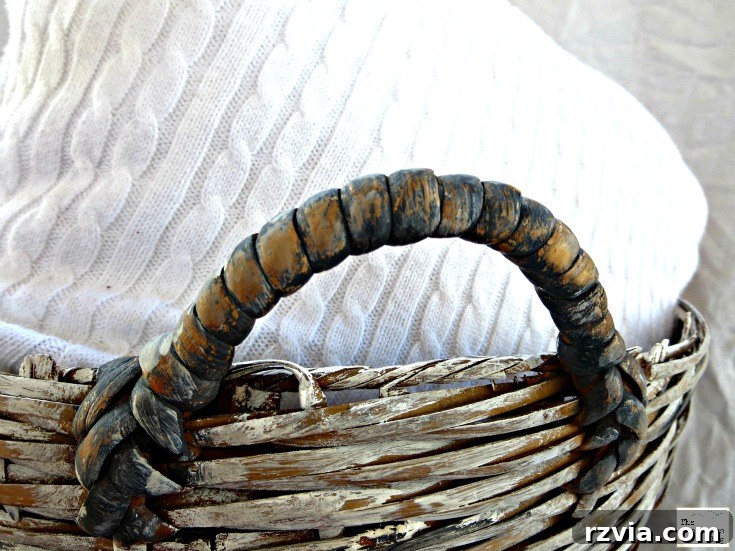
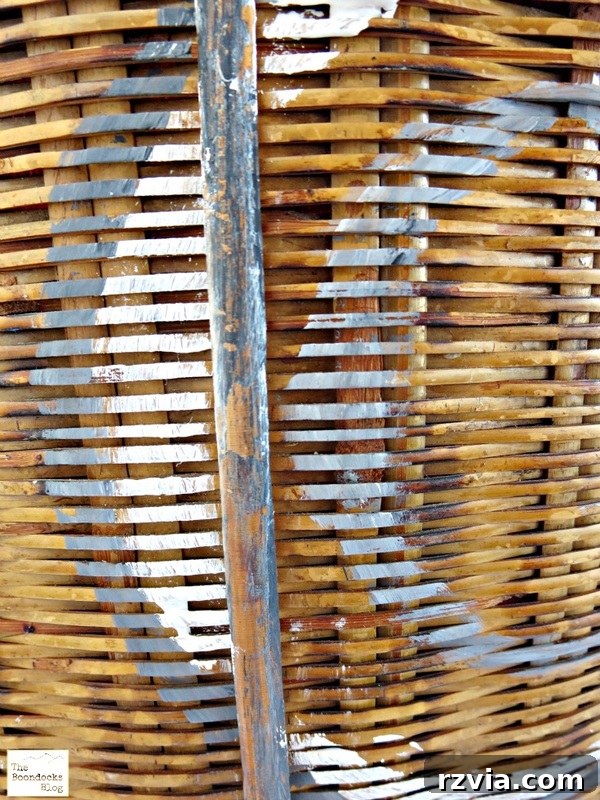
I strategically applied this bespoke grey to the basket’s handles, consciously transforming them from mere utilitarian components into captivating design features. The handles, being areas of frequent contact, would also benefit from a slightly darker, more resilient shade that could better withstand handling. Furthermore, I extended this accent color to the two prominent reeds that gracefully descended vertically down the front face of the basket. This choice was deliberate and strategic: these strong vertical lines naturally draw the eye, and the contrasting grey accentuates the basket’s inherent form, imbuing it with a touch of modern elegance that beautifully complements its rustic charm. This simple yet impactful addition of a secondary color truly began to define the basket’s renewed personality, elevating it beyond a practical storage container to a distinctive and decorative statement piece that effortlessly enhances its surroundings.
Playful Details: The Charm of Imperfect Circles
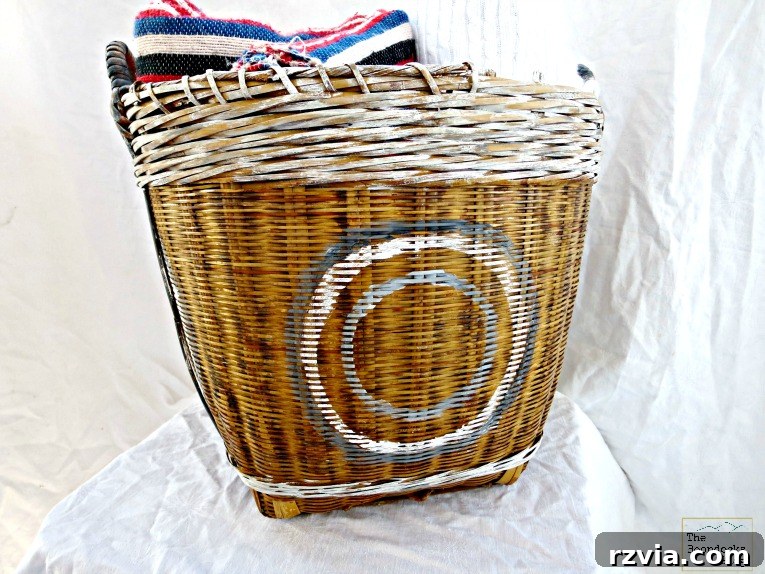
To truly elevate the basket and inject a delightful touch of whimsical interest, I decided to adorn its front face with a series of charming circles. Sometimes, the most captivating and memorable designs emerge from a foundation of simplicity combined with a liberating willingness to embrace imperfection. I gathered an assortment of jar caps that I had conveniently lying around—their varying sizes offered a dynamic and visually engaging appeal. Using these caps as loose guides, I carefully outlined circles onto the basket’s surface, intentionally not fretting over achieving absolute perfect symmetry or immaculately pristine edges. In fact, these slight irregularities significantly contributed to the overall charm, imbuing the basket with an authentic, handcrafted feel that mass-produced items simply cannot replicate.
This embrace of creative freedom is an incredibly empowering aspect of any DIY project. My primary aim wasn’t mechanical precision, but rather to infuse the piece with personality and character. The deliberate choice of varying sizes and the subtly uneven placement of the circles created a playful, organic pattern that beautifully broke up the solid painted surface, adding rich visual texture and intriguing depth. It’s a fantastic, accessible technique to personalize any item and guarantee that it genuinely stands out in your home. I heartily encourage you to experiment with patterns that genuinely resonate with your personal style—whether you lean towards classic polka dots, bold stripes, or even freehand abstract designs. Remember, these seemingly small artistic additions have the profound ability to make a truly significant impact on the final aesthetic of your upcycled creation, transforming it into a unique reflection of your taste.

Embracing the Shabby Chic: Distressing for Authentic Character
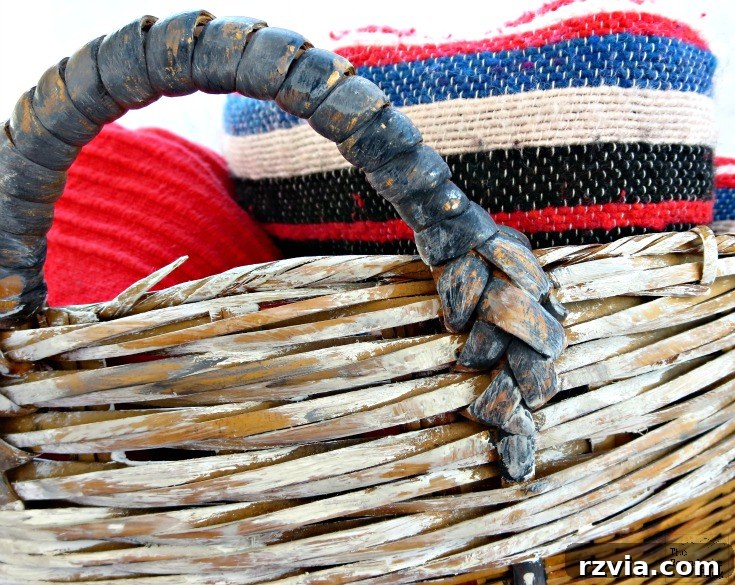
Once the paint had completely dried and cured, I eagerly moved on to a crucial step that truly unearthed the basket’s rustic allure: the art of distressing. My objective was to bestow upon it a beautifully aged, ‘shabby chic’ aesthetic, creating the impression that it had been a cherished, well-loved item for many generations. To achieve this, I employed a remarkably simple yet highly effective technique: using a lightly dampened towel. By gently yet firmly rubbing the painted surfaces in various strategic places, particularly along the raised reeds and prominent edges, I allowed subtle glimpses of the natural wicker underneath, and even faint traces of its original darker tones, to peek through.
It’s possible that I approached this step with a touch too much enthusiasm, perhaps removing slightly more paint than my initial plan dictated! However, the inherent beauty of distressing lies in its forgiving nature. The ultimate result was a wonderfully authentic, beautifully worn-in look that perfectly captured the essence of timeless vintage charm. The basket no longer appeared as a freshly painted item; instead, it exuded a compelling sense of history and warmth, seamlessly blending into its surroundings as if it had always been an integral part of the home. This technique not only dramatically enhances the character of a piece but also makes it feel more approachable and less ‘perfect,’ fitting effortlessly into a comfortable, lived-in aesthetic. It is an absolutely ideal method for anyone aspiring to achieve that highly sought-after antique, farmhouse, or rustic finish on their beloved DIY projects, adding depth and narrative to their creations.
The Finished Masterpiece: A Home for All Snugglies
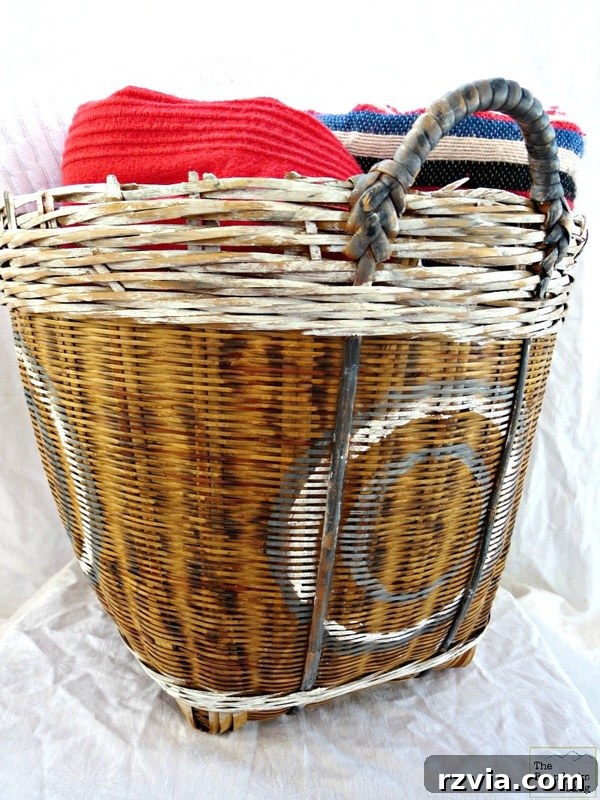
And there it is! My newly transformed basket, now brimming with distinct character and poised to embrace its vital role as the perfect, stylish repository for all my cozy “snugglies.” It stands proudly in its designated spot, a tangible testament to the incredible power of a little paint, a dash of creativity, and a whole lot of imagination. No longer an overlooked, aging piece that faded into the background, it has been triumphantly reborn as a stylish and immensely functional element of my living room decor. The harmonious combination of crisp white, subtle grey accents, and the playful, artfully distressed circles has culminated in a piece that is simultaneously elegant and inviting, perfectly complementing the very comfort and warmth it promises to hold within its revitalized weave. This isn’t just a basket; it’s a statement of personal style and practical organization, bringing both beauty and order to my cozy corner.
Beyond Blankets: Versatile Storage and More DIY Inspiration
This charmingly refurbished basket isn’t merely destined for blankets; it also perfectly cradles my beloved pillow, a unique creation I crafted entirely from an old sweater. These delightful sweater pillows are currently enjoying a huge surge in popularity, offering a wonderfully sustainable and creative method to upcycle old garments into something both decoratively appealing and incredibly comfortable. If your curiosity is piqued about how I brought this cozy project to life, please don’t hesitate to share your interest in the comments section below! I’ve already managed to create a collection of about four of these inviting pillows, and if this chilly weather continues to keep me happily indoors much longer, my home might very well soon be overflowing with a soft, comforting army of them!
The inherent versatility of a freshly painted basket extends far beyond simply holding “snugglies.” Envision it gracefully organizing magazines, tidying up children’s toys, neatly storing craft supplies, or even serving as a stylish and unique planter (naturally, with appropriate internal lining to protect the basket). This deceptively simple DIY project effortlessly unlocks a myriad of organizational and decorative possibilities for any room in your home. It serves as a potent and inspiring reminder that, armed with just a little creativity and a willingness to upcycle, everyday items can be utterly transformed into captivating focal points that not only reflect your distinct personal style but also significantly enhance the functionality and aesthetic appeal of your living space. Embrace the potential for transformation that lies within everyday objects!
Disclosure:
The items below are affiliate links and link to Amazon.com. If you purchase any of these products through the links, I receive a small commission, which directly helps me continue to provide you with engaging and inspiring content. Please note, there is absolutely no extra charge to you for purchasing through my affiliate links.
Your Cozy Corner Awaits!
I truly believe I succeeded in breathing much-needed new life into this old basket, transforming it into the perfect, charming holder for my beloved snugglies. Now that the creative work is complete, all that’s left for me to do is to grab those freshly organized blankets and my incredibly cozy sweater pillow and happily settle onto my comfy couch. The sun is indeed shining brightly outside today, but oh, it’s remarkably windy right now, making the allure of indoor snuggling even more irresistible and perfectly timed!
I’m curious to hear from you: do you have a special, designated place where you store your own cozy essentials? Perhaps you’ve discovered a unique DIY storage solution, or you cherish a beloved piece of furniture that serves this purpose? I would absolutely love to hear about your clever storage ideas and creative home hacks in the comments section below! Sharing our inspirations truly enriches our community.
If you genuinely enjoyed this inspiring transformation and found it helpful, please consider sharing it generously with your friends or saving it to your favorite Pinterest board. The image directly above this paragraph is perfectly sized and thoughtfully curated specifically for seamless Pinterest sharing!
For a continuous flow of creative DIY projects, fresh home decor inspiration, and engaging adventures delivered directly to your inbox twice a week, I warmly invite you to subscribe to my blog. You’ll find the convenient subscription form easily accessible on the sidebar of my website. Rest assured, your email address will always be treated with the utmost privacy and will never, under any circumstances, be shared with any third party. Join our community of makers and dreamers!
You May Also Like:
<<
Breakfast in Greece – IBC Challenge
HOME
Almost No-Sew Fleece Pillow >>
This blog is for entertainment purposes only; my DIY tutorials are not professional advice. Read my full disclaimer
here.
I genuinely love it when I receive your insightful comments and I make it a sincere priority to reply to each and every one of them.