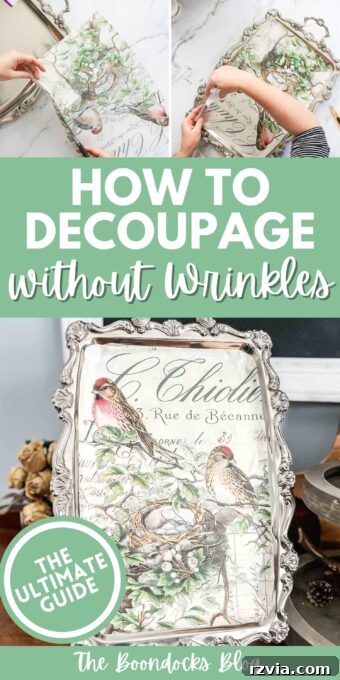
Are you tired of frustrating bubbles and unsightly wrinkles ruining your decoupage projects? Many crafters face this common challenge, turning a relaxing hobby into a battle against imperfections. The good news is that achieving smooth, professional-looking results is not only possible but also surprisingly simple with the right technique. Today, we’re excited to share a revolutionary method for mastering how to decoupage without wrinkles: the ingenious iron-on decoupage technique. This game-changing approach will transform your crafting experience, allowing you to create beautiful, flawless pieces with confidence and ease.
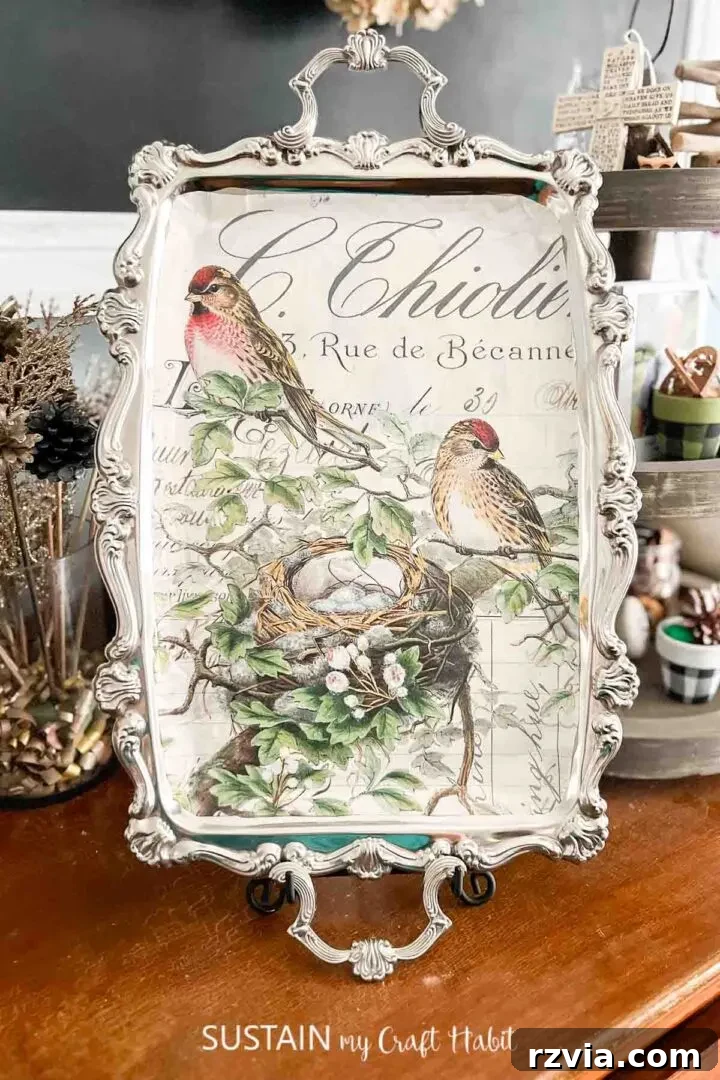
Mastering Decoupage: Achieve Wrinkle-Free Results with the Iron-On Method
What Exactly is Iron-On Decoupage?
When most people envision decoupage, they typically picture the traditional wet-glue method: carefully applying a piece of paper onto a wet layer of decoupage medium and then frantically trying to smooth out every ripple before it dries. While this method is excellent for small embellishments, delicate papers, or irregular, textured surfaces where flexibility is key, it often presents a steep learning curve for achieving perfectly smooth results on flat objects. The inherent moisture in the glue can cause thinner papers to warp, stretch, and tear, leading to those all-too-familiar wrinkles and air bubbles.
Enter the iron-on decoupage method – a brilliant alternative that redefines precision and ease. Instead of working against the clock with wet glue, this technique involves applying the decoupage medium to your surface and allowing it to dry completely. Once the glue is thoroughly dry and transparent, you position your chosen paper and then use gentle heat from an iron to reactivate the dried adhesive, bonding the paper smoothly and securely to the surface. This innovative approach allows for precise placement and eliminates the hurried pressure of traditional methods, making it ideal for creating flawlessly smooth finishes on any flat or gently curved surface. You can witness this amazing technique in detail through our comprehensive step-by-step guide below, and for a visual demonstration, be sure to check out our video of the process on our YouTube channel.
Choosing the Best Glue for Iron-On Decoupage
One of the many appealing aspects of the iron-on technique is its versatility with a range of decoupage glues. The key is to select a medium that dries clear and can be reactivated by heat without becoming gummy or leaving residue. Our top recommendations, favored for their consistent performance and strong adhesion, are Mod Podge (specifically the original Matte formula) and Decoart Decoupage Glue. Both of these mediums offer excellent tackiness once dry and respond beautifully to heat, ensuring a strong, lasting bond with your paper. While these glues are superb for the initial adhesion, for a superior, streak-free top-coat sealer that offers maximum protection and a professional finish, we prefer a dedicated varnish like Decoart Duraclear Varnish, which is available in various finishes to suit your desired aesthetic, from matte to high gloss. Using a separate top coat ensures enhanced durability and clarity for your finished piece.
Selecting the Perfect Paper for Your Decoupage Project
The type of paper you choose plays a significant role in the final look and feel of your decoupage project. While the iron-on method is more forgiving, selecting the right paper can make the process even smoother and lead to truly seamless, painted-on effects. Thinner papers tend to blend more seamlessly into the surface, creating an illusion of a painted design, but they can be more delicate to handle. Here’s a breakdown of different paper options that work beautifully with the iron-on method:
- Tissue Paper or Paper Napkins: These are perfect for delicate projects, offering a translucent quality that allows background colors to subtly show through. When using napkins, remember to separate and use only the top printed ply. Their extreme thinness requires a gentle touch, but the iron-on method helps minimize tearing and wrinkling often associated with wet application.
- Decoupage Paper: Specifically designed for decoupage, these papers are often a happy medium in terms of thickness – durable enough to handle without tearing but thin enough to adhere smoothly. They come in a vast array of beautiful designs and patterns, making them a go-to for many crafters.
- Rice Paper: Known for its unique fibrous texture and exceptional durability, rice paper is a fantastic choice. It’s incredibly strong even when thin, making it resistant to tearing and wrinkling. Its slightly translucent quality allows it to blend beautifully with the surface, often providing a subtle, organic texture that adds depth to your project.
- Wrapping Paper: For a budget-friendly option, high-quality, thinner varieties of wrapping paper can work wonderfully. Avoid overly thick or glossy papers, as these may not adhere as smoothly or accept the top coat as well. Look for matte or semi-gloss options with good print quality.
- Copy Paper Printed at Home: You can personalize your projects by printing your own designs or photos on standard copy paper. For best results, use a laser printer to prevent ink from bleeding when the glue is reactivated or when applying the top coat. Inkjet prints can sometimes run. Creative Fabrica is one of our favorite places to find an endless supply of high-quality graphics and patterns for our decoupage creations.
No matter which paper you choose, always ensure it is clean, dry, and free of creases before you begin.
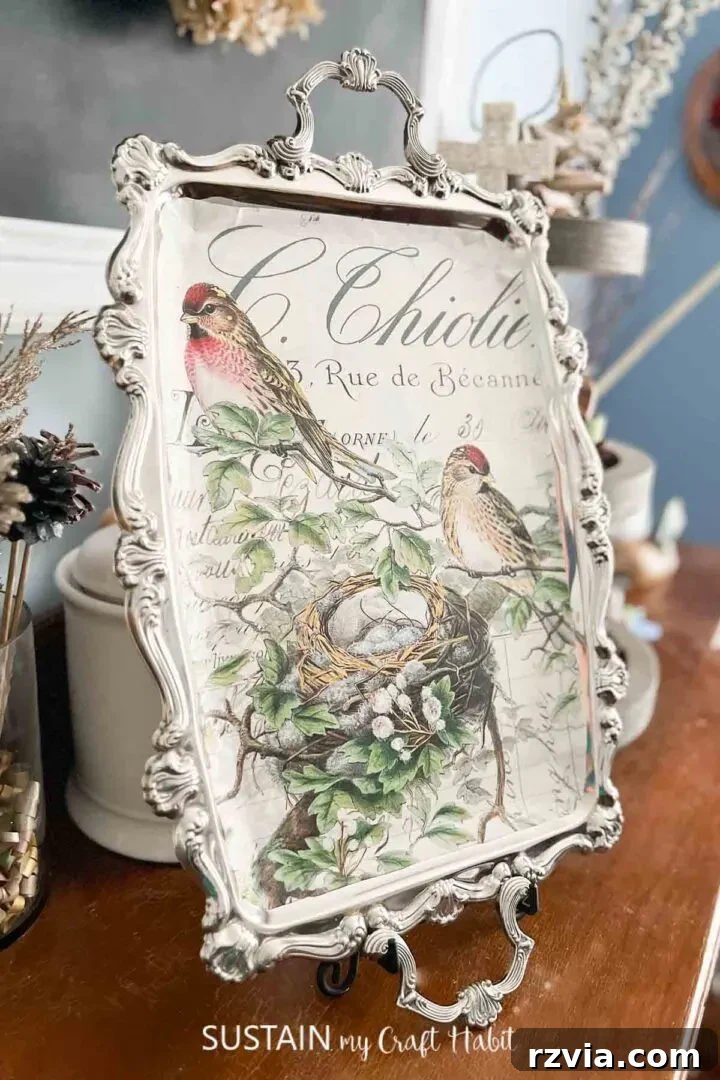
Perfect Decoupage Results: Step-by-Step Iron-On Technique
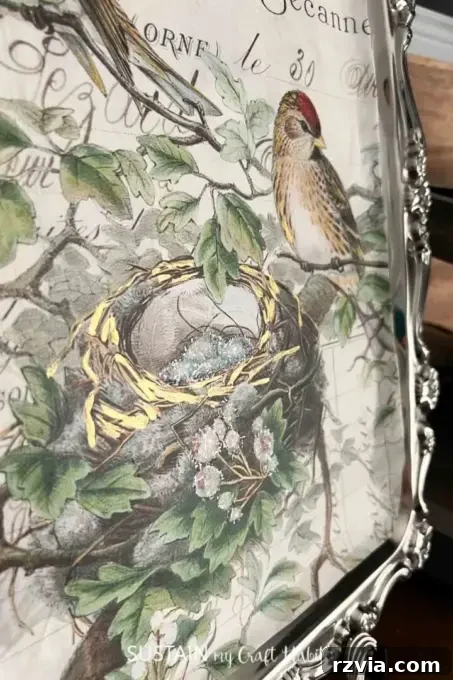
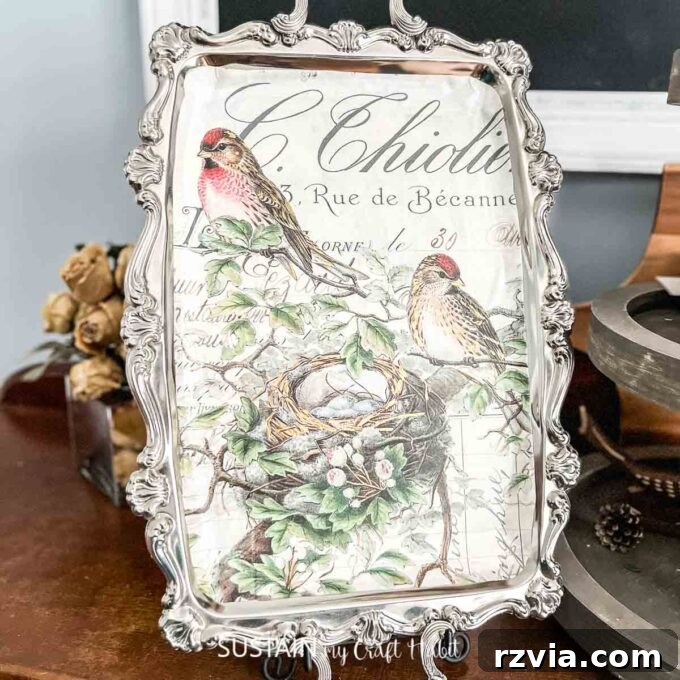
To truly illustrate the simplicity and effectiveness of the iron-on decoupage method, let us walk you through a detailed decoupage tutorial using a common thrift store find: a silver tray. This project will serve as a perfect example of how to achieve pristine, professional results without any of the frustrating wrinkles or bubbles typically associated with decoupage. Follow these steps closely for a truly transformative crafting experience.
Materials Needed:
Disclosure: This post contains affiliate links for your shopping convenience. If you purchase any of these products through the links, we receive a small commission at no extra charge to you. You can find our full disclosure here.
- Your chosen surface (like our thrifted silver tray or any flat item)
- Decoupage paper, rice paper, or tissue paper (we used this beautiful Roycycled design)
- Decoupage glue (Mod Podge Matte or Decoart Decoupage Glue recommended)
- Sponge brush or flat synthetic brush for glue application
- Piece of parchment paper (essential for protection)
- Hair dryer on medium heat setting or a mini craft iron
- White chalky paint (if working with dark or shiny surfaces like a silver tray to provide an opaque base)
- Clear top coat sealer/varnish (e.g., Decoart Duraclear Varnish)
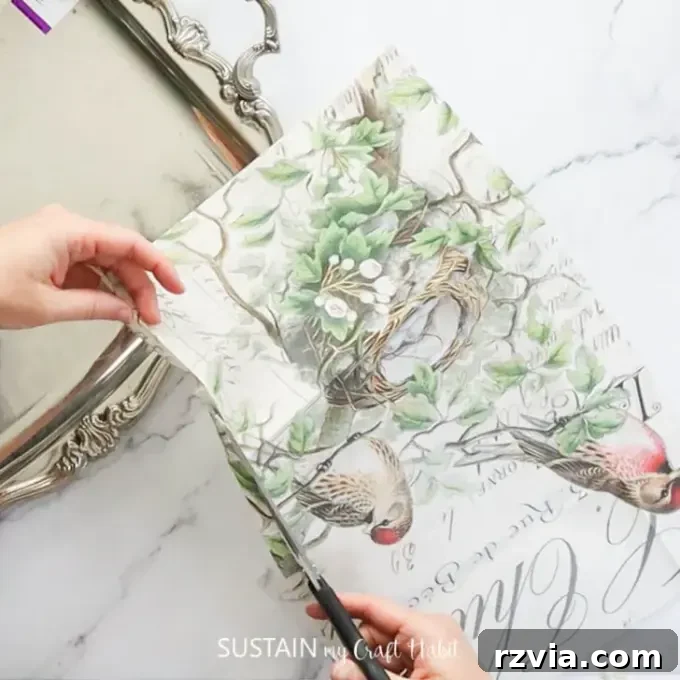
- Scissors or craft knife for trimming paper
- Soft cloth or brayer for smoothing (optional but helpful)
The Iron-on Method: Detailed Steps
Step 1: Prepare Your Surface. Thorough preparation is key to a flawless finish. If you’re using a silver tray or any metal object, begin by cleaning it thoroughly to remove any dirt, grease, or tarnish. For optimal adhesion and to ensure your paper’s colors pop, apply a base coat of white chalky paint. This step is particularly important for dark or metallic surfaces as it creates an opaque, bright foundation, preventing the underlying color from dulling your design. Allow this paint layer to dry completely according to the manufacturer’s instructions, which typically takes a few hours.
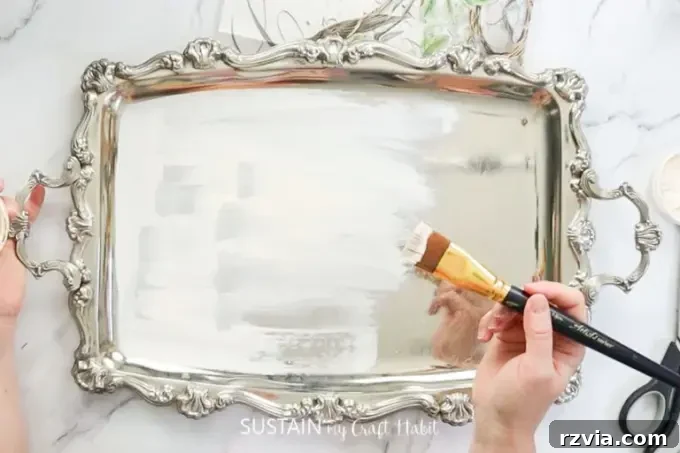
Step 2: Apply a Thin Layer of Decoupage Glue. Using your sponge brush or a flat synthetic brush, apply a very thin, even layer of your chosen decoupage glue across the entire area where your paper will be placed. Ensure complete coverage without any thick puddles or missed spots. This is critical for an even bond. Once applied, set your project aside and allow the glue to dry fully until it is clear and completely dry to the touch, with no stickiness remaining. Depending on humidity and glue thickness, this can take anywhere from 30 minutes to several hours. Patience here prevents future headaches.
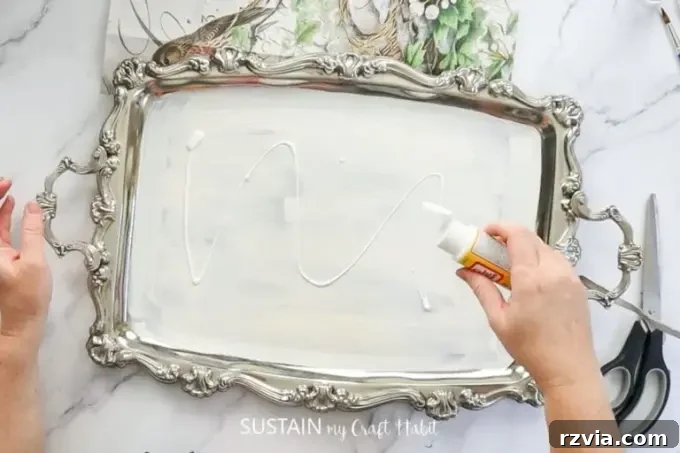
Step 3: Position Your Paper. With your glue now completely dry, carefully center and place your pre-cut decoupage paper onto the surface. Take your time to align it perfectly, as you won’t have the slipperiness of wet glue to reposition. Once satisfied with the placement, gently press the paper down with your hands, starting from the center and lightly smoothing outwards. At this point, the paper is simply resting on the dried glue; the bond has not yet been activated.
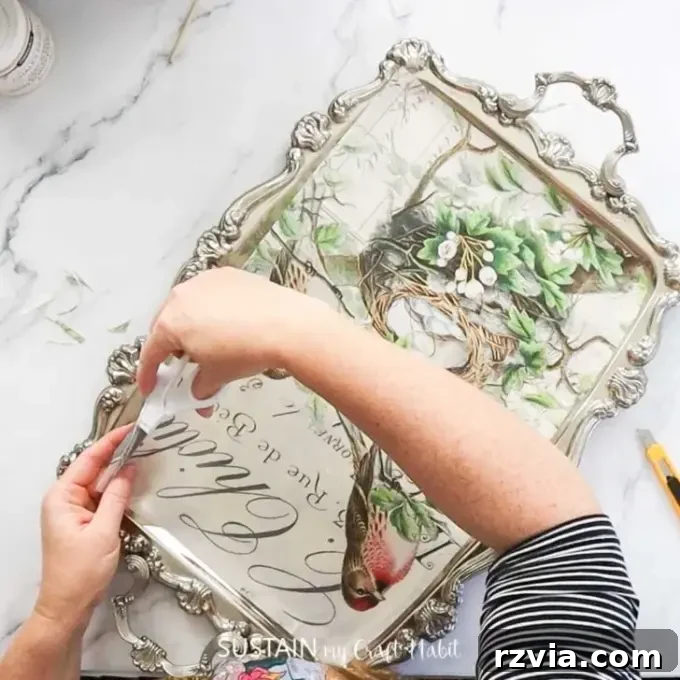
Step 4: Add a Protective Layer. Place a piece of parchment paper directly over your positioned design. This protective barrier is crucial; it prevents your iron or hair dryer from directly touching and potentially damaging your delicate paper or leaving sticky residue on your heat tool. Ensure the parchment paper covers the entire area you intend to heat.
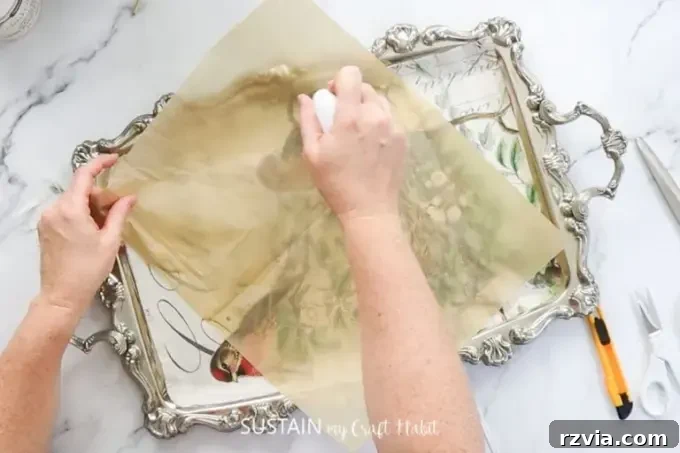
Step 5: Activate the Glue with Heat. Here’s where the magic of the iron-on method truly unfolds. Using a hair dryer on a medium heat setting or a mini craft iron (on a low to medium setting, without steam), begin to gently warm the parchment paper-covered design. If using an iron, apply light, even pressure and move it continuously in small sections, just as you would iron clothes, ensuring not to linger too long in one spot. The heat will reactivate the dried decoupage glue beneath, causing it to re-liquefy slightly and form a strong, permanent bond with the paper. As you apply heat, you’ll notice the paper smoothing out and adhering perfectly to the surface, free of wrinkles and bubbles. Continue this process until the entire paper area is firmly adhered. Allow the piece to cool completely after heating.
Step 6: Apply the Top Coat. Once your project has cooled down and the paper is securely bonded, it’s time to seal your design. Apply a clear top coat of your chosen decoupage sealer or varnish (like Decoart Duraclear Varnish) using a clean sponge brush. Apply thin, even coats, allowing each coat to dry completely before applying the next. Typically, two to three coats are recommended for durability and protection. This final layer not only seals your design but also adds a professional finish, protecting it from moisture, wear, and UV rays.
Adding the Final Touches for Longevity and Shine
With your base design securely and wrinkle-free, the final step involves applying protective top coats. This is crucial for sealing your work, safeguarding it from daily wear and tear, and giving it that coveted professional finish. Opt for a clear, durable sealant, such as a water-based varnish or a dedicated decoupage sealer, available in various finishes from matte to glossy. Apply several thin, even coats, ensuring each layer dries completely before applying the next. This layered approach not only builds up robust protection but also prevents cloudiness or uneven drying. Pay close attention to the edges, applying a slightly thicker bead to ensure they remain sealed and prevent any future lifting. The choice of finish can dramatically alter the perception of your project – a matte finish provides a subtle, integrated look, while a gloss finish adds vibrancy and depth.
TikTok-Inspired Tips for Decoupage Success!
The vibrant decoupage community, especially on platforms like TikTok, is a treasure trove of innovative tips and tricks. These collective insights can significantly enhance your crafting journey. Next time you embark on a decoupage project, keep these brilliant strategies in mind:
- Work in Small Sections for Larger Pieces: This gives you greater control over placement and smoothing, preventing the paper from becoming unwieldy and reducing the chance of air bubbles or wrinkles forming across large areas. Tackle your project bit by bit for consistent results.
- Keep Your Paper Taut as You Apply It: When positioning your paper (especially before heating), hold it slightly taut without stretching it. This helps minimize initial slack and makes it easier to achieve a flat, smooth surface once heat is applied.
- Use a Soft Tool to Smooth Out Air Bubbles: Instead of just your fingers, employ a brayer, a plastic card (like a credit card), or even a soft, lint-free cloth over the parchment paper to gently work out any trapped air from the center outwards during the heating phase.
- Apply a Second (or Third) Top Coat Only After the First is Completely Dry: Rushing the drying process between top coats is a common mistake that can lead to cloudiness, tackiness, or even slight lifting. Be patient and allow each layer to fully cure, which can take several hours depending on humidity.
- Keep Your Top Layer Thin to Prevent Cloudiness and Drips: While multiple coats are good, thick individual coats can lead to a cloudy appearance, uneven drying, and unattractive drips. Aim for thin, even layers that dry quickly and transparently.
- Pre-cut Your Designs Precisely: For intricate designs, cut your paper as precisely as possible before application. This minimizes the need for trimming once the paper is adhered, reducing the risk of accidental tearing or damage to your sealed surface.
- Maintain a Clean Workspace: Dust, debris, or even tiny pet hairs can become permanently trapped under your decoupage paper or within your top coat. Ensure your workspace, surface, paper, and tools are meticulously clean before you start.
Troubleshooting Common Decoupage Issues
Even with the best techniques, challenges can sometimes arise. Don’t panic; most common decoupage issues are easily fixable, especially with the controlled nature of the iron-on method.
Wrinkles: If you notice wrinkles forming during the initial paper placement (before heating), you have a brief window to act. Gently lift the affected section of the paper and reposition it, ensuring it lies flat. With the iron-on method, since the glue is dry, you have more time to adjust. If wrinkles appear during heating, apply gentle pressure with your iron over the parchment paper, working them outwards. Sometimes, paper simply needs a moment to settle into its new form – patience is often the key to perfect results.
Bubbles: Air bubbles can appear even in the most careful work, but they are relatively simple to resolve. During the heating phase, if you spot a bubble, use a plastic card or a brayer over the parchment paper to gently smooth it from the center outward. For stubborn air pockets that refuse to budge, allow the piece to cool, then carefully pierce the tiny bubble with a sharp pin or craft knife. Once pierced, place the parchment paper back down and apply heat and pressure with your iron or fingers to release the trapped air and smooth the area. Working in smaller sections during the heat application helps prevent trapped air, especially on larger projects.
Paper Tearing: Paper tearing can be disheartening, particularly with delicate materials. To prevent this, always ensure your hands are clean and completely dry when handling paper. For very thin or delicate papers (like tissue or napkins), consider applying a very thin coat of decoupage glue to the back of the paper and letting it dry *before* cutting and applying – this can add strength. When moving delicate papers, support them with a piece of cardstock. During smoothing with heat, apply gentle, even pressure and let the heat and glue do most of the work. If you’re working with extremely delicate papers, a dry brush technique (where you just use a dry brush to press) or light finger pressure through parchment paper is safer than heavy ironing. Also, pre-cutting detailed shapes can minimize handling of fragile areas.
Uneven Drying: While primarily a concern for the initial glue layer and final top coats, uneven drying can still create unexpected issues. To manage this, apply glue and top coats in even, consistent layers. When drying, work in sections on large projects to control the drying time, and rotate your project occasionally to prevent glue or top coat from pooling in one area. Using a fan on a low setting in a well-ventilated area can help circulate air evenly around your project, promoting uniform drying. Avoid high humidity environments, which can significantly extend drying times and lead to tackiness or cloudiness. Keep a close eye on the edges during drying, as they are often the first to show signs of lifting. If you notice any slight lifting, gently re-adhere and apply minimal weight until fully dry.
Edge Lifting: Edge lifting can be particularly frustrating but is highly preventable with the right approach. When applying your initial glue layer, ensure the edges are thoroughly coated, extending slightly beyond where your paper will sit. After the paper is adhered with heat, apply some extra adhesive around the perimeter of your design using a small detail brush for precise work, pressing firmly to bond the paper. For added security, consider using small weights (like books or clothes pegs) strategically along the edges while the piece is drying, particularly after applying the top coats. Always apply an extra sealing coat or two specifically around the perimeters of your design during the final finishing stages. This focused attention to the edges ensures they stay firmly in place, resisting peeling and creating a seamless transition.
How to Decoupage on Different Surfaces
One of the most exciting aspects of decoupage is its incredible versatility. Did you know that you can transform nearly anything with paper and glue? From rustic rocks to sleek plastic, decoupage opens up a world of creative possibilities. The iron-on method, with its smooth finish, is particularly well-suited for a variety of flat and gently curved surfaces, providing excellent results. Learn how to decoupage on an array of different surfaces with these helpful guides:
- How to Decoupage on Plastic: Great for upcycling containers and creating unique decorative pieces.
- How to Decoupage on Canvas: Transform plain canvases into personalized wall art with ease.
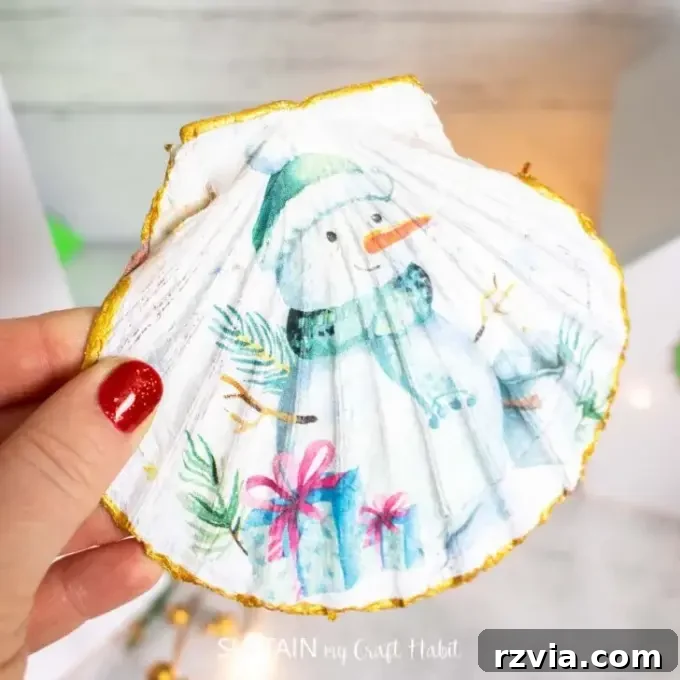
- Learn how to Decoupage Shells: Turn natural finds into beautiful coastal decor.
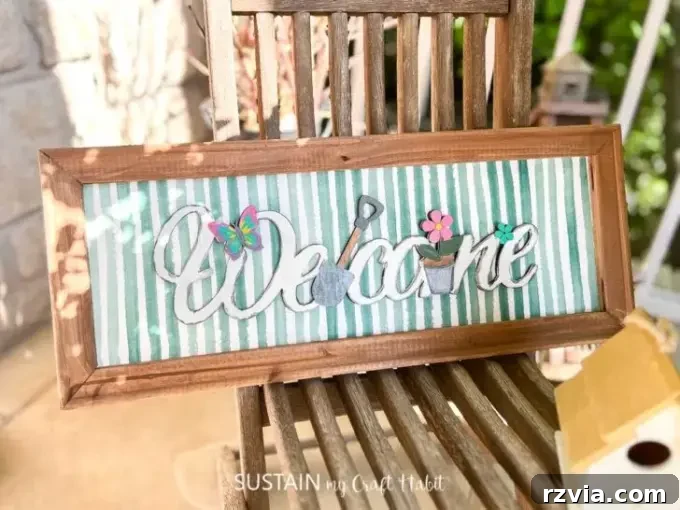
- How to Decoupage on Wood: Perfect for furniture makeovers, boxes, and decorative signs due to wood’s porous nature.
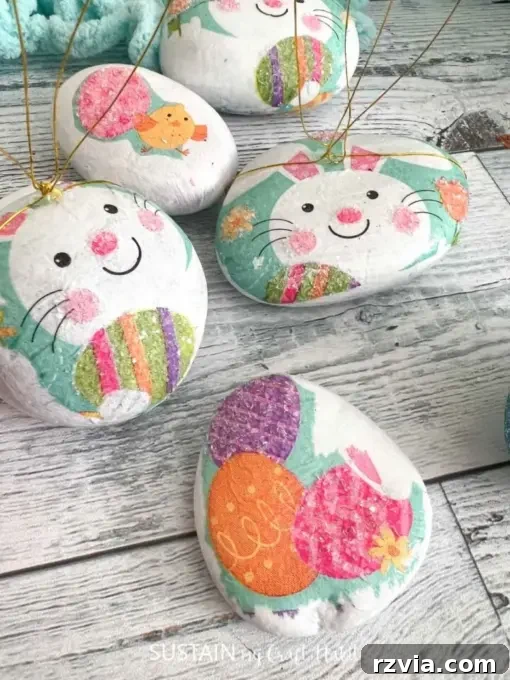
- How to Decoupage a Rock: A fun project for all ages, turning ordinary stones into art.
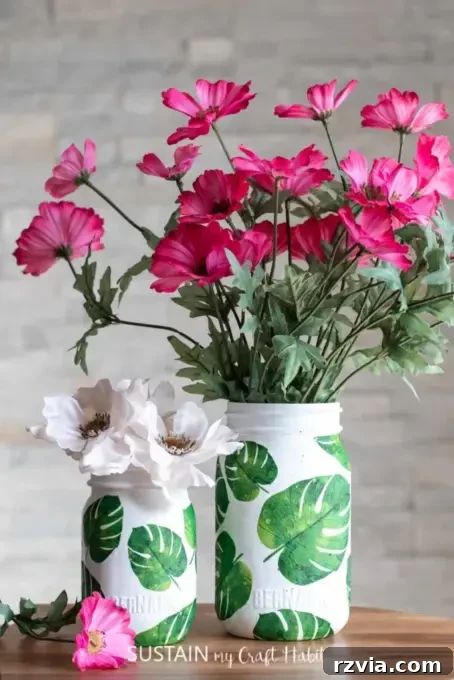
- Best way to Decoupage onto Glass Jars: Create stunning decorative or functional storage with clear or colored glass.
- How Not to Decoupage on Plastic Bottles: Learn from common mistakes to ensure your projects succeed.
- How to Decoupage on Clay Pots: Bring new life to terracotta pots for your plants or as decorative items.
Making Your Decoupage Projects Truly Unique
The iron-on decoupage method isn’t just about avoiding wrinkles; it’s about unlocking a new level of creative freedom and precision in your crafting. The techniques you’ve mastered here are incredibly versatile and can be applied to an almost endless array of surfaces. While our demonstration focused on revitalizing a silver tray, imagine applying these same wrinkle-free methods to upcycle old furniture, personalize decorative boxes, create bespoke wall art, or embellish any decoupage project you can dream up. The only limit is your imagination.
Remember, practice truly does make perfect. Each project, whether big or small, offers valuable insights into working with different decoupage glues, various paper types, and diverse surfaces. Don’t be afraid to experiment! Start with smaller, simpler projects to build your confidence and refine your technique before taking on more ambitious pieces. Embrace the process, learn from any minor setbacks, and celebrate every smooth, flawless finish you achieve.
Whether you’re refreshing neglected thrift store finds, crafting thoughtful handmade gifts, or simply creating something entirely new for your home, these advanced yet simple techniques will empower you to achieve stunning, smooth, and professional results every single time. The profound satisfaction of completing a beautifully wrinkle-free decoupage project, knowing you’ve meticulously brought your vision to life, is an immensely rewarding experience that makes the extra care and attention to detail absolutely worthwhile. Happy crafting!
Like it? Pin it for later!