
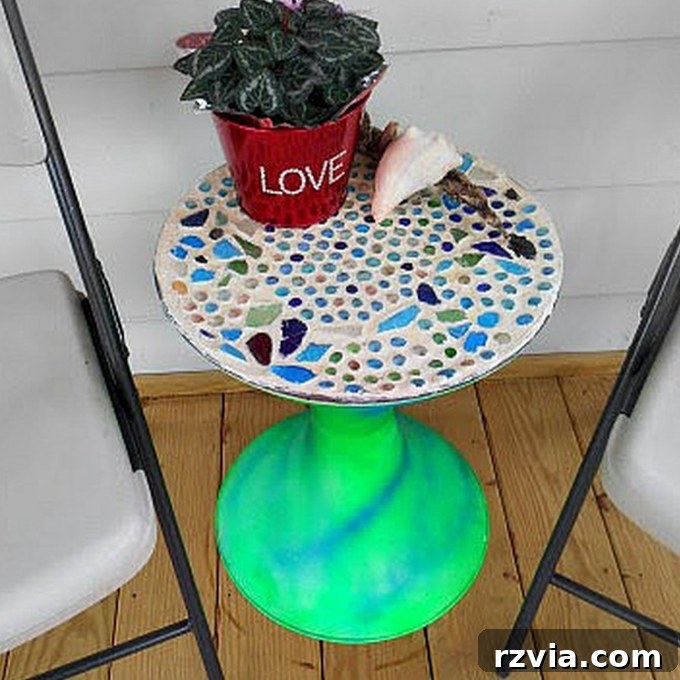
February often feels like a month of fresh starts and new adventures, and this year is no exception. In that spirit, I’m absolutely delighted to welcome a wonderful friend to the blog today, who will be sharing one of her truly inspiring projects with us. Millie, the creative force behind 2 Crochet Hooks, is here to guide us through the fascinating process of crafting a magnificent Sea Glass Mosaic Table. This project instantly transports me to sun-drenched beaches and the calming rhythm of ocean waves, both of which hold a special place in my heart and memories. I can almost feel the sand between my toes just looking at it! So, without further ado, let’s turn the spotlight over to Millie to share her incredible journey.
Hello, everyone! Millie here, popping in from 2 Crochet Hooks! First and foremost, I want to extend my immense gratitude to Mary for graciously inviting me to craft with all of you today. I stumbled upon Mary’s delightful blog last year and quickly became a devoted follower—her wonderful sense of humor and radiant spirit truly shine through every post, and I know you all understand exactly what I mean! I reached out to her, asking if she would consider sharing one of our projects here, and she very kindly said yes! Today, I’m thrilled to unveil this beautiful Sea Glass Mosaic Table, a creation that brings a touch of the seaside charm into any home.

This project is more than just a table; it’s a story of transformation, recycling, and a dash of unexpected joy. It all began quite serendipitously, evolving from a simple home improvement task into a beloved piece of art. Join me as I walk you through each step of bringing this coastal-inspired masterpiece to life, demonstrating how easy and rewarding it can be to create something truly unique from forgotten items. Whether you’re an experienced crafter or a curious beginner, I hope this tutorial inspires you to embark on your own mosaic adventure!
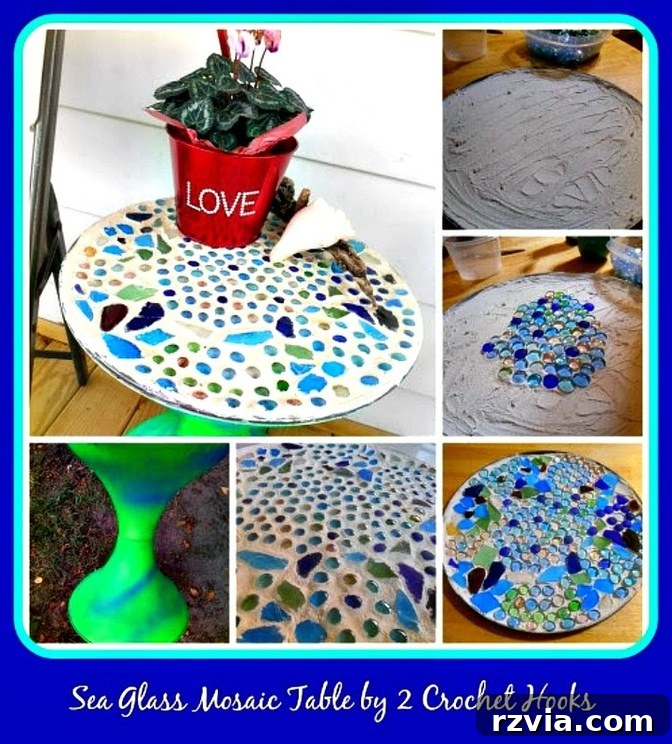
How to Craft Your Own Enchanting Sea Glass Mosaic Table
Every great DIY project often starts with an unexpected find, and for this sea glass mosaic table, the story began with a porch renovation. We decided it was time to give our front porch a facelift, as the old wooden planks had seen better days. When the contractor began pulling up the aged wood, we discovered a treasure trove of forgotten items beneath – a surprising collection of flower pots, a very old battery, an antique military cot, various bits of trash, and, most importantly, this unassuming beige table stand. I wasn’t entirely sure what its original purpose was – perhaps a flower stand, or even a bird feeder? Regardless, its potential immediately caught my eye, and I knew I had to give it a new lease on life.
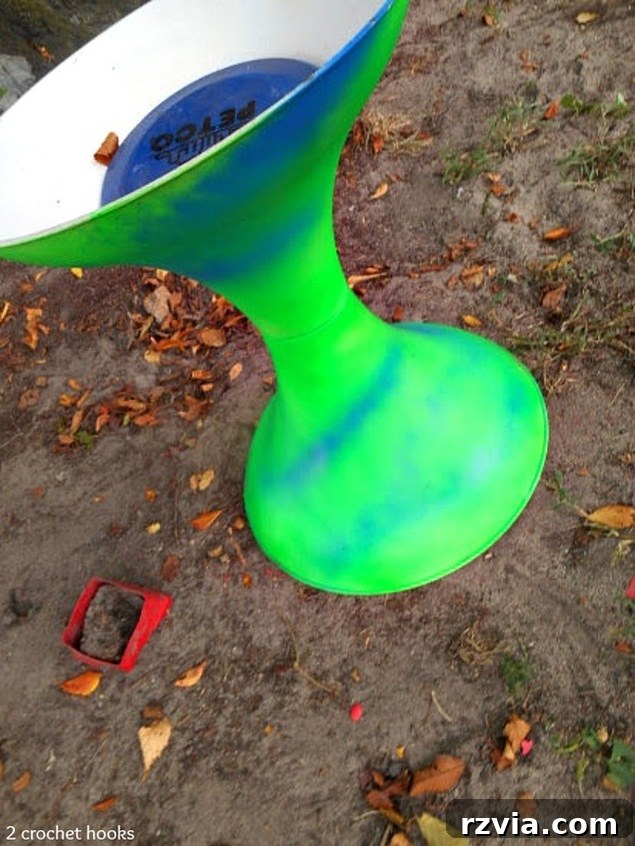
My first step in revitalizing this rescued find was to infuse it with some much-needed color. I gave it a generous coat of vibrant neon green paint, but it still felt like it needed something extra to truly pop. So, I decided to add a few striking bright blue stripes, creating a delightful contrast that immediately made me fall in love with its new look! The frisbee you might spot lurking inside was definitely not a permanent fixture, merely a temporary resident. The next challenge was deciding what kind of top to create for this charming base. I brainstormed a few ideas, but nothing truly clicked until my husband and I returned from a recent beach trip. During our coastal getaway, I had collected a beautiful assortment of sea glass, originally intended for a beach-themed decor project for Kristina’s new home. However, a spark of inspiration hit me: why not use this stunning sea glass to create a unique mosaic tabletop for my newly painted “table-bird feeder-plant stand-thingy”? It felt like the perfect fusion of repurposing and beach-inspired artistry.
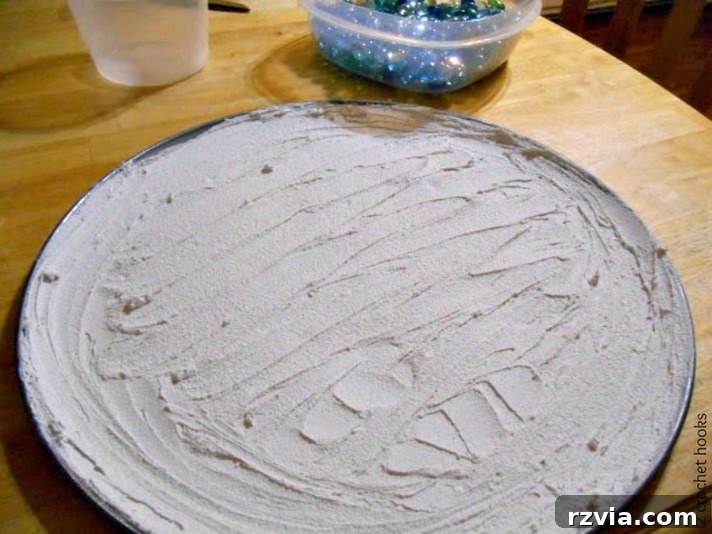
For the tabletop itself, I needed a sturdy and appropriately sized base. A used pizza pan proved to be the perfect solution, fitting precisely into the opening of the table stand. With my base secured, the next crucial step was applying the grout. I carefully slathered a generous amount of grout onto the pan, meticulously trying to achieve as even and smooth a surface as possible. This initial layer is fundamental, as it provides the foundation upon which all the beautiful sea glass and marbles will be set, ensuring they adhere securely and evenly. It’s a step that requires patience and a steady hand, laying the groundwork for the mosaic’s eventual splendor.
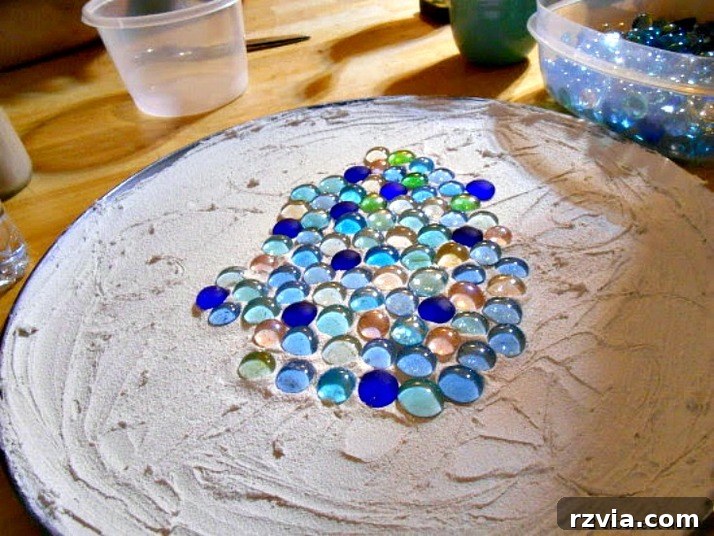
The next phase was by far the most enjoyable and collaborative part of the project: arranging the mosaic elements. You might notice some shadows in the photo, a testament to the fact that I wasn’t crafting alone! My son and his girlfriend were wonderful helpers, though they did occasionally block the light—and it was already approaching 10 PM, adding to the cozy, late-night crafting atmosphere. We began by carefully placing the flat-sided glass marbles, often used in floral arrangements and other crafts, onto the wet grout. To achieve that quintessential beachy feel, I had purchased two bags of marbles in various shades of blue and one bag with a mix of greens and other complementary colors. We meticulously arranged these pieces, envisioning a harmonious flow of ocean hues. This stage is where creativity truly takes over, allowing for experimentation with patterns and color transitions.
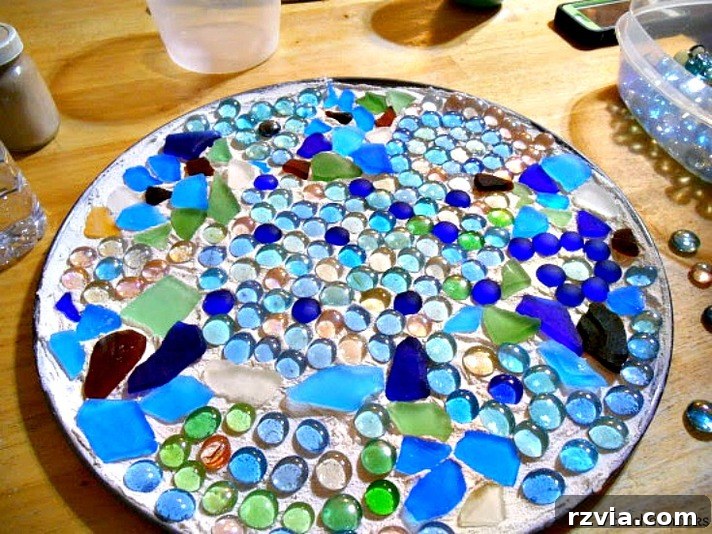
My initial vision for the design was to create a perfectly symmetrical circle of color at the center. However, as often happens with creative projects, the reality diverged slightly from the plan – as you can probably tell, it ended up being neither perfectly circular nor perfectly centered! But that’s part of the charm of handmade items, isn’t it? We then integrated the natural sea glass pieces, carefully positioning them around the marbles. If you look very closely (though I completely understand if it’s hard to discern!), you might notice subtle spirals of marbles interspersed between the larger sea glass pieces. Looking at it now, I realize it might appear a bit chaotic to an outsider, but to me, it embodies the organic beauty of the sea shore, and I absolutely adore the spontaneous, vibrant result! Each piece tells a story, and the slight imperfections only add to its unique character, making it truly one-of-a-kind.
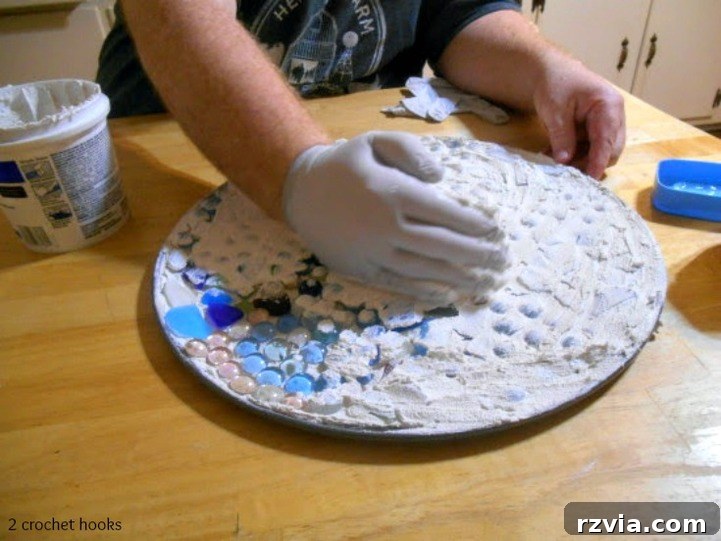
Once the initial layer of grout had thoroughly dried, it was time for the crucial second application. This step is essential for securing all the mosaic pieces firmly in place and filling any remaining gaps, ensuring a smooth and durable surface. We carefully went back over the entire mosaic, spreading an even layer of grout into all the crevices, nooks, and crannies. My wonderful husband even lent a hand with this step, patiently working alongside me to achieve the best possible finish – isn’t he a sweetie? This secondary layer helps to unify the entire design, embedding each piece of sea glass and every marble, creating a cohesive and resilient tabletop that will withstand the test of time and use.
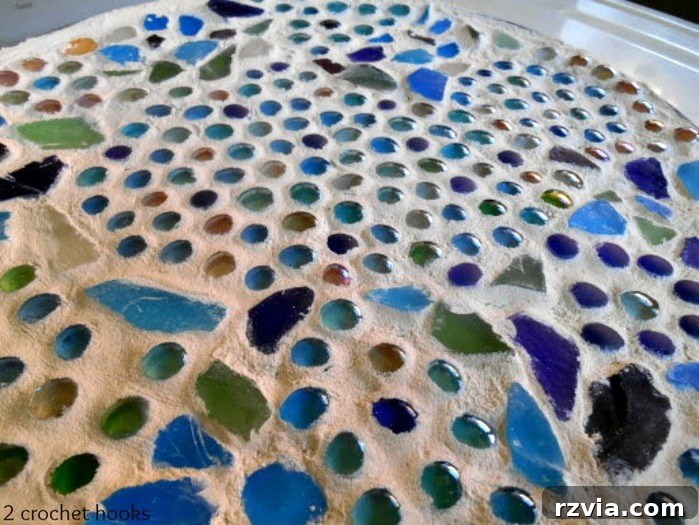
After the grout had set sufficiently, it was my turn for the delicate, yet immensely satisfying, task of revealing the mosaic’s true beauty. Armed with a sponge, I carefully began washing off all the excess grout from the surface. This step is incredibly transformative; as the hazy film of grout disappears, the vibrant colors and unique textures of the marbles and sea glass truly begin to shine through. It’s a moment of pure magic, where the abstract pattern comes to life, sparkling and gleaming with newfound brilliance. This meticulous cleaning process ensures that each mosaic piece is highlighted, creating a stunning visual effect that truly captures the essence of sea-worn treasures. The reveal was simply beautiful!
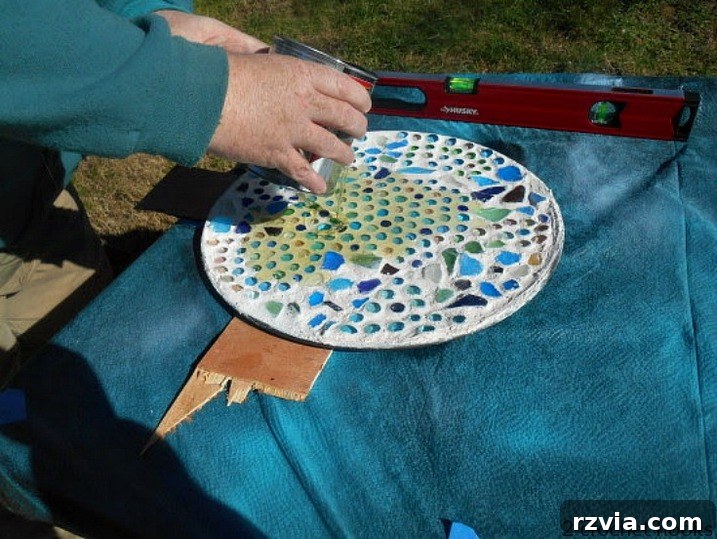
To give the mosaic that durable, hard, clear finish commonly seen on professional projects, I knew I needed a strong sealant. My husband confidently assured me he knew exactly what was required and returned home with what he believed was the perfect solution. Unfortunately, he had mistakenly brought polyurethane instead of the epoxy I had envisioned. Despite my reservations, he insisted it would work and proceeded to pour most of the can onto my beautiful, newly created sea glass mosaic! After waiting a hopeful six hours, we checked back on the project. It became clear that the polyurethane wasn’t setting as expected, and my husband sheepishly admitted he might have indeed used the wrong product. We carefully drained off the excess, leaving a light coat to dry and offer some initial protection to the project. While it provided a decent seal, I still plan to acquire the correct epoxy to give the table that ultimate, crystal-clear, robust finish it truly deserves. This unexpected detour was a valuable lesson in material selection for future DIY endeavors!
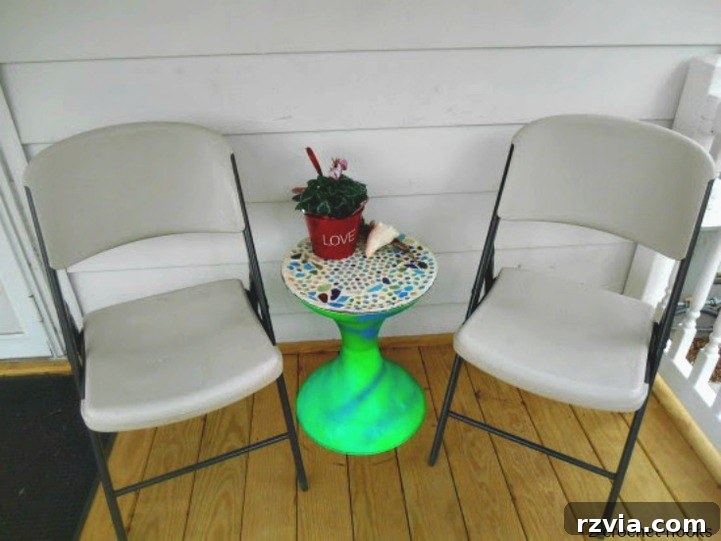
Even though the table isn’t entirely “finished” with its final epoxy coat, I simply couldn’t wait to share my enchanting sea glass mosaic table with you all! Doesn’t it look absolutely stunning? The vibrant blues and greens truly pop against the backdrop. In a fun coincidence, the son of one of my husband’s co-workers (try saying that three times fast!) is currently involved in a fundraiser for the FFA (Future Farmers of America), where they are building custom Adirondack chairs. I immediately placed an order for two, with plans to paint them in colors that perfectly complement this beautiful table. Until those custom chairs arrive, these folding chairs serve as a charming temporary pairing, showcasing the table’s undeniable allure.
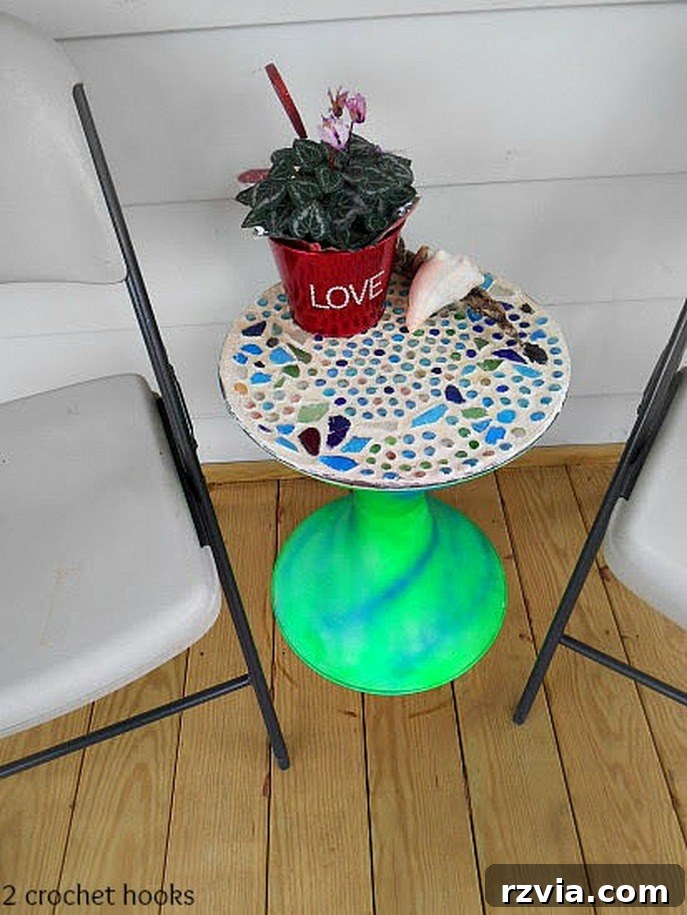
Working on this project as a family was an incredibly rewarding experience, filled with laughter, teamwork, and a few minor creative detours. While it certainly had its chaotic moments, and technically, the final epoxy layer is still pending, the overall journey and the result were an absolute A+! It’s a testament to how much joy and beauty can be created when you combine salvaged items, a vision, and a little help from loved ones. The process itself was as memorable as the finished product, fostering creativity and connection. I hope this glimpse into our DIY adventure inspires you to gather your family or friends and embark on a creative project of your own. Take some time today to share a bit of love with your family and the wider world; we could all certainly use it!
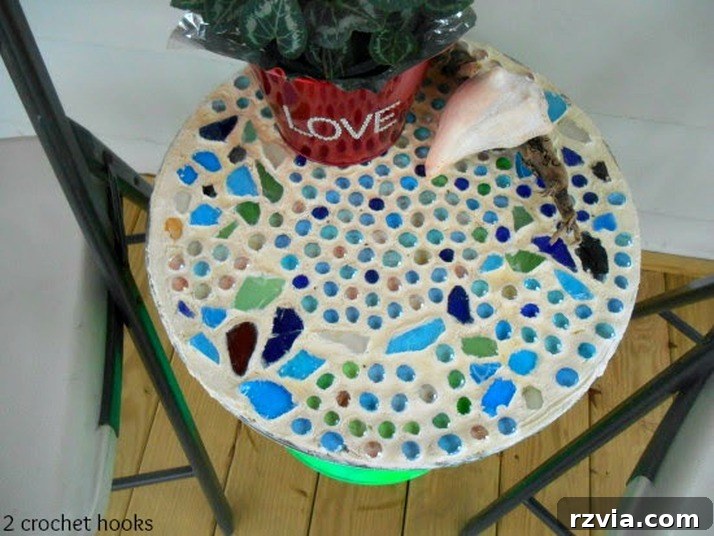
Thanks so much for crafting along with me today!
Warmly,
Millie
Millie, alongside Kristina, shares their creative endeavors over at 2crochethooks.com. There, you’ll discover a wealth of original crochet patterns, engaging adventures with yarn and various other crafty materials, and their ongoing journey as they delve into the art of self-sustainability. Their blog is a vibrant hub of inspiration for anyone passionate about handmade creations and mindful living. Be sure to stop by and pay them a visit sometime for more unique DIY ideas and textile artistry!

Wow, what an absolutely breathtaking beachy mosaic table! Millie, you’ve truly outdone yourself with this piece. I’m completely mesmerized by the way you transformed a forgotten table base into such a vibrant, coastal-inspired centerpiece. Now, if only I had an old porch or backyard where I could unearth some hidden treasures and embark on a similar repurposing adventure! I want to extend my deepest gratitude to Millie for joining us here on the blog today and for so generously sharing her incredible sea glass mosaic table project. Her step-by-step guide and insightful tips make this project feel truly accessible to anyone looking to add a touch of seaside charm to their home. Be sure to hop over to Millie’s blog, 2crochethooks.com, and explore all the wonderful things she’s up to. She truly is a wiz with those crochet hooks and needles, creating beautiful things with yarn. And Millie, just a little whisper (wink, wink), that stunning table would look absolutely gorgeous on my balcony, perfectly ready for summer gatherings! Speaking of which, summer is just around the corner, and I can almost smell the salty sea air already. Are you all getting your outdoor spaces ready and preparing for those long, sunny days?