
Transform Your Old Crib into a Stylish and Functional Desk: The Ultimate DIY Upcycling Guide
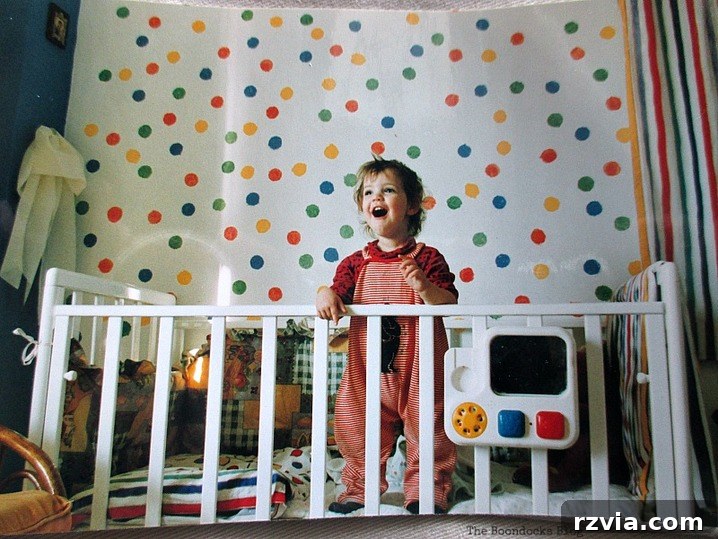
As a mom of four, I’ve certainly had my fair share of baby cribs. Over the years, these essential pieces of nursery furniture have accompanied us through countless sleepless nights and precious milestones. My first two cribs were in New York, used by my boys who are only 16 months apart, bringing double the joy and double the baby gear. After relocating to our current home, I purchased another crib, this time for my two daughters.
Looking back, if I had known I’d need them for so long, I might have held onto them. But life is unpredictable, isn’t it? We often make decisions based on our current circumstances, not knowing what the future holds. The first two cribs found new homes with family and friends, as the thought of transporting them across the Atlantic Ocean seemed more daunting than practical. At least they continued to serve their purpose, getting more mileage from other little ones.
Then came the last crib. My daughters, especially the older one, absolutely adored it. It witnessed countless naps, playful mornings, and quiet evenings. Yet, like all baby essentials, its time eventually passed. It was disassembled and, unfortunately, found its way to the basement, destined to collect dust. And for me, seeing something with so much potential simply gathering cobwebs feels like a real waste.
From Clutter to Creativity: The Inspiration Behind the Transformation
My home office corner was in desperate need of an overhaul. A bulky, oversized table occupied far too much space, making the area feel cramped and inefficient. It had become increasingly challenging to work effectively, constantly battling a lack of room for my computer and other essentials. This frustration, combined with the guilt of the unused crib in the basement, sparked an idea.
What if I could merge these two problems into one elegant solution? That’s when inspiration struck: I decided to flip the crib over and repurpose it into a functional table or desk. The vision was clear, but as with many DIY projects, the execution proved to be a bit more complex than the initial thought.
The Transformation Process: A Step-by-Step Guide
Step 1: Tackling the Stubborn Legs
The first hurdle in converting the crib into a desk involved its legs. When turned upside down, the original leg structure, designed to accommodate wheels, protruded upwards. These sharp metal pieces, once anchors for mobility, were now an obstruction. Despite my best efforts to pull them out, they remained firmly in place. It quickly became clear that a more robust approach was needed.
With a little help from my husband – a testament to the fact that many DIY projects are better as a team effort – we armed ourselves with the right tools. Carefully and safely, we were able to cut off the offending leg sections, creating a flat, stable surface for the future desk. This step, while challenging, was crucial for transforming the crib’s base into a usable tabletop frame.
Step 2: Preparing the Frame and Addressing the Slats
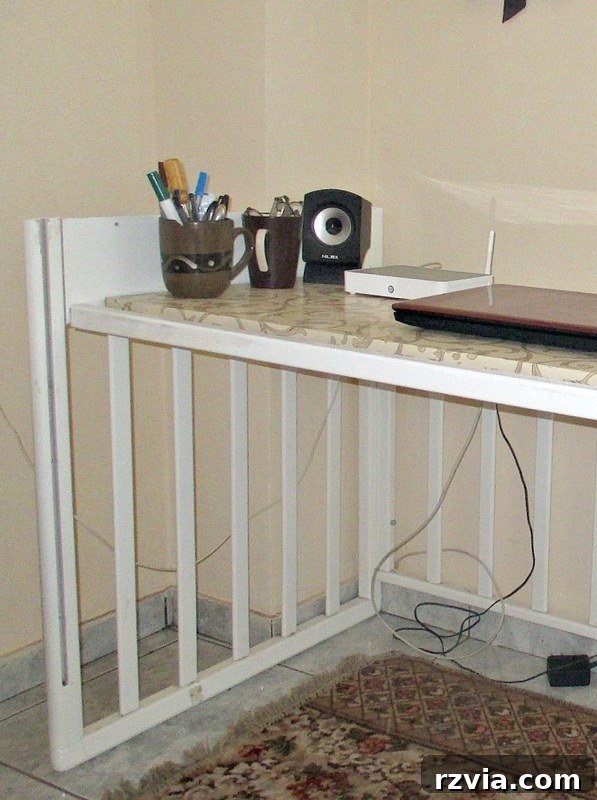
Once the legs were trimmed, I painted the tops of the newly cut sections a crisp white. This small detail helped to clean up the edges and give the structure a more polished, desk-like appearance. At this stage, I also removed the front panel of the crib. With the crib now inverted, this meant I had three solid sides and an open front, creating a perfect recessed space for a seating area.
However, turning the crib upside down also meant the former bottom mattress support, with all its vertical slats, was now facing upwards. This presented a new challenge: how to create a smooth, continuous desktop surface over these numerous slots. A quick trip back to my trusty basement, a veritable treasure trove of forgotten items, was in order.
Step 3: Crafting the Desk Surface with Melamine
My basement rarely disappoints when it comes to finding reusable materials. This time, I unearthed a large piece of melamine. Melamine is an excellent choice for a desk surface due to its smooth finish, durability, and ease of cleaning. To give it a more appealing aesthetic and further protect it, I decided to wrap the melamine piece in contact paper. This allowed me to choose a pattern or color that perfectly complemented my room’s decor without having to paint or finish a raw piece of wood.
While the melamine wasn’t a perfect, edge-to-edge fit for the entire top of the “desk,” it suited my needs perfectly. The slight overhang or recessed edges actually proved to be an advantage, providing subtle compartments or channels. This resourceful solution not only provided a sturdy, flat workspace but also repurposed another item that might have otherwise gone to waste.
Step 4: Ingenious Wire Management
One of the unexpected benefits of this crib-to-desk conversion was the excellent wire management potential. The remaining structure of the crib, particularly the gaps between the slats and the frame, provided ample room to discreetly tuck away all those unsightly computer wires, power cords, and various what-nots. This design feature instantly created a cleaner, more organized workspace.
My router, a notorious source of tangled cables, also found a perfect, hidden spot within the former crib’s framework. This thoughtful design element eliminates the visual clutter that often plagues modern home offices, ensuring a sleek and professional look. It’s a vast improvement from the previous table, which struggled to contain the inevitable tangle of electronics.
The Finished Product: A Dream Workspace Realized
The transformation is truly remarkable. The new crib-turned-desk looks significantly lighter and far more uncluttered than the bulky table it replaced. While the old table is currently undergoing its own restoration project to make it more aesthetically pleasing, this new desk offers a fresh, inviting workspace. You definitely wouldn’t want to see the mess that was here before – but rest assured, I’m working on it!
This is where I now sit, typing away, crafting blog posts, and connecting with all of you. It’s a space that feels bright, open, and incredibly peaceful – truly the perfect spot for inspiration to flow. I’ve since added some personal touches, like cherished photos on the wall above the desk and a handy display rack, further enhancing its functionality and charm.
Why Upcycle Your Old Crib?
Repurposing furniture, especially something as significant as a baby crib, offers a multitude of benefits:
- Sustainability: By giving an old item a new lease on life, you contribute to reducing waste and lessening your environmental footprint. It’s a wonderful way to practice eco-friendly living.
- Cost-Effectiveness: Creating a custom piece of furniture from something you already own is far more economical than buying a brand-new desk. This project saved me money while providing a bespoke solution.
- Unique Design: Upcycled pieces possess a unique character and story that mass-produced furniture simply cannot replicate. My desk is not just a desk; it’s a piece of my family’s history, transformed.
- Space Optimization: For those living in smaller spaces or simply looking to declutter, repurposing can create functional items that fit perfectly into specific nooks and crannies.
- Personal Satisfaction: There’s immense pride in creating something with your own hands. Seeing the crib transform from a dusty basement item into a beautiful and useful desk is incredibly rewarding.
Your Next DIY Project? Tips for Upcycling Your Own Crib
If you have an old crib gathering dust, I highly encourage you to consider giving it a new purpose. Here are a few tips to get you started on your own crib upcycling journey:
- Assess Your Crib: Check its condition. Is the wood sturdy? Are there any broken parts that need repair?
- Plan Your Design: Think about what you need. A desk, a craft table, a storage unit, or even a bookshelf? Sketch out your ideas.
- Gather Your Tools: Depending on your project, you might need a saw, drill, sandpaper, paint, or specialized cutting tools. Safety is paramount – always use protective gear.
- Embrace Creativity: Don’t be afraid to experiment with colors, finishes, and additional materials like melamine or contact paper.
- Seek Assistance: Some steps, like cutting tough metal, might require an extra pair of hands or specialized equipment. Don’t hesitate to ask for help.
What do you think of this crib repurpose? I truly believe it’s a far better outcome than having it languish in the basement. I absolutely adore my new desk!
If you like what you see, share it with your friends, or save it on Pinterest. If you really like what you see, subscribe to my blog and get my adventures twice a week in your mailbox.
You may also like:
<< Happy Mother’s Day HOME A Sound of Inspiration >>
This blog is for entertainment purposes only; my DIY tutorials are not professional advice. Read my full disclaimer here.
I love it when I get your comments and I will reply to each one here or on your blog.