
Transform Leftover Cardboard Boxes into Stylish Wall Art: An Affordable DIY Guide
Decorating a living space can be an exciting endeavor, but often, the budget doesn’t quite match our grand visions. This is especially true for young adults setting up their first apartment or for those looking to refresh their home decor without breaking the bank. The good news is, a stunning, personalized touch doesn’t always require an expensive shopping spree. Sometimes, the most beautiful pieces emerge from the most unexpected materials – like a humble cardboard box!
Join me on a creative journey as we repurpose everyday items into chic, eye-catching wall art. This project is a testament to the power of upcycling, proving that with a little imagination and a few household staples, you can transform forgotten objects into unique home accents that tell your story. Get ready to discover how to create elegant box art using fabric scraps and ribbons, adding character and warmth to any room, all while keeping your wallet happy.
The Spark of Inspiration: Frugal Decor for a Bachelor Pad
A few months ago, I had the pleasure of visiting my sons. As typical bachelors, their apartment, while comfortable, had a noticeable lack of decorative flair, especially when it came to wall art. The walls were largely bare, and it was clear they needed some personality. My immediate thought was to tackle this challenge frugally, creating something meaningful and stylish without incurring significant costs.
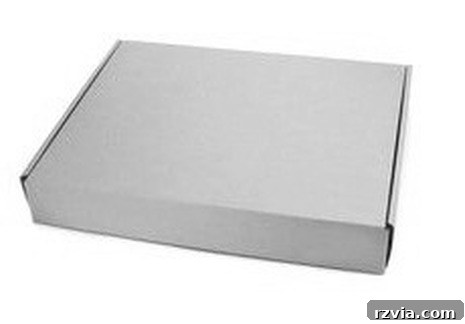
We had just been furniture shopping, and as is often the case, we were left with several sturdy cardboard boxes. Staring at one particularly robust box, an idea began to form. Why couldn’t this discarded packaging be transformed into a piece of art? It was the perfect canvas for a budget-friendly DIY project that would add a much-needed splash of character to their space.
The unassuming cardboard box that started it all. Its potential for transformation was undeniable, offering a blank slate for creativity and a perfect foundation for our upcycling adventure.
Attempt One: Learning from the First Try
My initial concept was straightforward: cover the box with some fabric, secure it tightly, and then add ribbons in an abstract design. I envisioned a quick and easy way to bring some texture and visual interest to the plain box. The process began by carefully wrapping the box in a piece of fabric I had on hand, stapling the edges neatly to the back to create a smooth, taut surface. This step was successful, providing a clean base.
Next, I started experimenting with ribbons. I had a roll of a particular ribbon that I thought would work, laying out various patterns and designs until I settled on one I liked. I carefully secured the ribbons, stapling them to the back of the box, much like I did with the fabric. The result was… presentable, but not quite what I had hoped for. It was a good first effort, but it lacked the vibrancy and impact I wanted to achieve for the boys’ apartment.
Upon reviewing my first attempt, I realized a few key issues. The ribbon I chose, while functional, was a bit too thin and lacked significant texture, causing it to look somewhat dull against the fabric. More frustratingly, despite my best efforts to secure them, the ribbons kept sliding slightly, making the overall composition appear messy and less refined. The design simply didn’t pop; it was too subtle and unremarkable to truly stand out as wall art. This experience, however, wasn’t a failure but a crucial learning step, pushing me to rethink my approach and strive for something better.
Refining the Vision: A Ribbon Hunt for Pizzazz
Acknowledging the shortcomings of the first iteration, I decided to dismantle it and start fresh. I carefully removed the “slouchy” ribbons, recognizing that they simply didn’t have the visual weight or character required for the project. This led to a focused “ribbon hunt” around my house. I rummaged through my craft supplies, scrap bins, and even old gift-wrapping stashes, determined to find pieces that possessed more “pizzazz” – ribbons with richer textures, bolder colors, or more substantial widths.
The search proved fruitful. I unearthed a collection of ribbons that were thicker, offered a more interesting variety of textures, and had a deeper color palette. These new candidates immediately felt more promising, promising to create a more dynamic and balanced composition. With my enhanced material selection, I was ready to embark on the second, and ultimately successful, phase of this DIY project. The goal was to create a piece that was not only aesthetically pleasing but also stable and impactful, truly transforming the humble box into a striking work of art. Here is what it looks like now:
I genuinely believe the revised version looks significantly better. The introduction of thicker, darker ribbons immediately made the piece stand out more, creating a much-needed contrast against the background fabric. This thoughtful selection of materials brought a greater sense of balance to the overall composition, making it feel more intentional and artistically resolved. Furthermore, a delightful coincidence emerged: the chosen ribbons happened to be in colors that align perfectly with my sons’ favorite hues. This personal touch is incredibly important, as we certainly can’t neglect the preferences of the apartment’s occupants!
The contrast, texture, and strategic placement of the new ribbons elevated the simple box from a mere craft project to a genuine piece of wall decor. It now exudes a modern, abstract charm that complements a contemporary living space, injecting personality without overwhelming the room. This evolution from the first attempt to the final design truly showcases how a minor adjustment in material choice can lead to a dramatic improvement in aesthetic appeal and overall satisfaction.
Crafting Your Masterpiece: Step-by-Step DIY Box Art
Ready to create your own stunning, budget-friendly art? This project is remarkably simple and forgiving, perfect for beginners and seasoned DIYers alike. Follow these steps to transform a plain box into a personalized statement piece.
Materials You’ll Need (Most Likely Already at Home!)
- Cardboard Box: The star of our show! Any sturdy, clean cardboard box will do. Consider the size and shape – a medium-sized shipping box, a shoe box lid, or even a cereal box (reinforced if needed) can work. Rectangular or square shapes are easiest for beginners.
- Fabric Scraps: Look for old clothing (denim, linen shirts), dish towels, remnant pieces from sewing projects, or even a sturdy paper bag you can paint. Choose a fabric with a little body that won’t fray too easily. The color and pattern will serve as your background, so pick something you love.
- Ribbons: This is where the magic happens! Gather a variety of ribbons. Different widths, textures (satin, grosgrain, velvet, burlap), and patterns will add depth. Contrast is key; if your fabric is light, opt for darker ribbons, and vice-versa.
- Tools:
- Stapler and Staples: Essential for securing fabric and ribbons.
- Scissors: For cutting fabric and ribbons.
- Optional: Hot Glue Gun: For extra security, especially with slippery ribbons, or for adding embellishments.
- Optional: Fabric Adhesive: Can also be used instead of or in conjunction with staples for a cleaner finish.
Preparation is Key
- Prepare Your Box: Ensure your cardboard box is clean and structurally sound. If it’s a thinner box, you might want to reinforce the back with an extra layer of cardboard glued on to prevent warping. Remove any tape or labels.
- Cut Your Fabric: Lay your chosen fabric flat. Place your box in the center. Cut the fabric, leaving enough excess on all sides to wrap around the edges of the box and overlap onto the back by at least 1-2 inches. This ensures you have enough material to secure it properly.
The Fabric Foundation
- Wrap the Box: Place the box face down on the wrong side of your cut fabric. Start by folding one long edge of the fabric over the back of the box, pulling it taut. Secure it with staples, spacing them every inch or so along the edge.
- Handle the Corners: For neat corners, treat them like wrapping a present. Fold the fabric inwards at the corners, creating crisp folds, and then pull the remaining fabric over the back. Staple securely. Repeat this process for all four sides, ensuring the fabric is smooth and tight on the front of the box, without wrinkles or creases. This covered box now serves as your canvas.
Designing with Ribbons: From Dull to Dynamic
- Lay Out Your Design: Before permanently attaching any ribbons, experiment with different layouts on your fabric-covered box. Try horizontal, vertical, diagonal, or abstract patterns. Play with overlapping ribbons, creating different depths and visual interest. Remember my initial challenge: thin, monochrome ribbons can fall flat. Aim for variety!
- Securing the Ribbons: Once you’re happy with your design, start attaching the ribbons.
- Stapling: For most ribbons, especially those with some thickness, a stapler is your best friend. Wrap the ends of each ribbon around the edges of the box and staple them securely to the back. For ribbons that cross in the middle of the design, you can add a tiny, discreet staple where they intersect on the front to keep them from shifting, or use a tiny dot of hot glue.
- Hot Glue or Fabric Adhesive (Optional): If you’re working with particularly slippery ribbons, or if you want an extra-clean finish without visible staples, a hot glue gun or fabric adhesive can be used to secure the ribbons directly to the fabric on the front of the box. Be sparing with glue to avoid making the fabric stiff or showing through.
- Refine and Adjust: Step back and evaluate your piece. Does it have balance? Is there enough contrast? This is where my initial project improved significantly. The switch to thicker, darker ribbons (like the ones in my final example) provided the necessary visual weight and contrast, making the design truly “pop.” Consider using colors that resonate with the room’s aesthetic or, in my case, my sons’ preferences!
The Beauty of Budget-Friendly DIY: Why This Project Shines
This DIY box art project is more than just a craft; it’s a smart, sustainable, and satisfying way to enhance your living space. Its appeal lies in several key aspects:
- Zero Cost (or Very Low): As demonstrated, this project didn’t cost me a dime because I utilized materials I already had at home. The fabric, ribbons, and cardboard box were all readily available. This makes it an incredibly accessible project, proving that beautiful decor doesn’t require a significant financial investment.
- Sustainability and Upcycling: In an age of conscious consumption, repurposing items is more important than ever. By transforming a discarded cardboard box, you’re not only creating something new but also reducing waste. This act of upcycling gives new life to materials that would otherwise end up in a landfill, contributing to a more eco-friendly home.
- Personalization and Uniqueness: Unlike mass-produced art, a DIY piece like this is inherently unique. You get to choose every element – the fabric, the ribbons, the design – ensuring it perfectly reflects your personal style and the character of your home. It’s a conversation starter, a piece with a story, and a true reflection of your creativity.
- Accessibility for All Skill Levels: This project requires minimal tools and basic crafting skills, making it suitable for crafters of all experience levels. Whether you’re a seasoned DIY enthusiast or just starting your creative journey, you can achieve impressive results with this simple technique.
- Therapeutic and Rewarding: There’s immense satisfaction in creating something with your own hands. The process of selecting materials, designing, and assembling offers a therapeutic escape, and the final outcome provides a tangible sense of accomplishment and pride.
Take Your Box Art Further: Customization Ideas
While the basic concept is simple, the possibilities for customization are endless. Don’t stop at just one; consider creating a series or experimenting with these variations:
- Varying Box Sizes and Shapes: Use smaller boxes for a gallery wall, or a large, shallow box for a bold statement piece. Combine different sizes and shapes to create an eclectic display.
- Different Fabric Textures: Experiment with luxurious fabrics like velvet for a rich feel, coarse linen for a rustic look, or even patterned cotton for a playful vibe. The fabric choice can drastically change the mood of the art.
- Incorporating Other Embellishments: Beyond ribbons, consider adding buttons, small beads, faux flowers, dried leaves, or even small lightweight trinkets. These can be glued on top of the ribbons for added dimension and personality.
- Creating a Multi-Panel Display: Make two or three pieces of similar sizes but with slightly varied designs or color schemes. Hang them together to create a cohesive, larger art installation.
- Seasonal Themes: Adapt your box art for holidays or seasons. Use red and green ribbons for Christmas, pastel colors for spring, or autumnal hues for fall.
- Adding a Frame: If you find an old, discarded picture frame, you can mount your finished box art inside it for a more polished look. This adds another layer of upcycling to your project.
Displaying Your Upcycled Art
Once your ribbon box art is complete, it’s time to find its perfect spot. Here are some tips for displaying your new decor:
- Choosing the Right Location: This type of lightweight art is versatile. It can brighten up a hallway, add a pop of color to a bedroom, or provide a unique focal point in a living room. For smaller pieces, consider grouping them together on a shelf or mantelpiece.
- Secure Hanging: Given the light weight of the cardboard box, a simple command strip or a lightweight picture hook with a small loop of string/wire stapled to the back of the box will suffice. Ensure it’s hung securely to prevent accidental falls.
- Complementing Existing Decor: Think about the colors and textures already present in your room. Your box art can either complement these elements subtly or provide a striking contrast that draws the eye. Its handmade nature adds warmth and a personal touch that store-bought items often lack.
Your Creative Journey Awaits
To sum it up, this DIY box art project is a fantastic way to unleash your creativity, add a unique touch to your home, and practice sustainable living—all without spending a dime. The satisfaction of transforming simple, discarded items into something beautiful and meaningful is truly unmatched.
I hope this journey from a plain cardboard box to a vibrant piece of wall art has inspired you. It’s a reminder that beauty and creativity often lie in the most unexpected places and materials. So, before you toss out that next empty box, take a moment to imagine its potential!
Why not give this project a try? Gather your materials, let your imagination guide you, and create something truly special for your space. I’d love to hear about your ideas and creations!
Discover More DIY Inspiration
If you enjoyed this project and are looking for more creative ways to upcycle and decorate, you may also like these other DIY tutorials:
<< A Scarf Hanger for a Scarf Lover HOME Untangling the Wires >>
This blog is for entertainment purposes only; my DIY tutorials are not professional advice. Read my full disclaimer here.
I love it when I get your comments and I will reply to each one here or on your blog. Please share your thoughts and experiences below!