Mid-Century Modern Stool Makeover: The Unexpected Two-Day Transformation
What began as an optimistic vision for a quick and effortless makeover of a cherished mid-century wooden stool quickly evolved into an unexpected two-day saga. This wasn’t just any piece of furniture; it was a family heirloom, a silent witness to decades of memories. While the journey was fraught with unforeseen challenges, the final transformation proved to be incredibly rewarding, breathing new life into a piece that holds immense sentimental value, beautifully blending its rich history with a refreshed, modern aesthetic.
The beautifully refinished Mid-Century Modern stool, ready for its next chapter in contemporary decor.
A Mid-Century Furniture Makeover: Simplicity Can Be Deceptive!
This particular project will forever be etched in my memory as one of the most challenging and, at times, frustrating DIY endeavors I’ve ever undertaken. Looking at its original state, so unassuming and humble, it almost seemed to whisper, “Come, give me a quick refresh; I’m just a simple little bench.” Oh, how misleading those unspoken words turned out to be! This tale serves as a vivid reminder that appearances can be deceiving, especially in the world of vintage furniture restoration.
It’s a common misconception that age equates to simplicity, particularly when dealing with well-used pieces. What appears straightforward on the surface can often hide layers of complexity, demanding more time, effort, and ingenuity than initially anticipated. This is precisely the saga of this Mid-Century Modern piece – a tale of a transformation that was anything but simple, yet ultimately triumphed in bringing a forgotten gem back to its glorious potential.
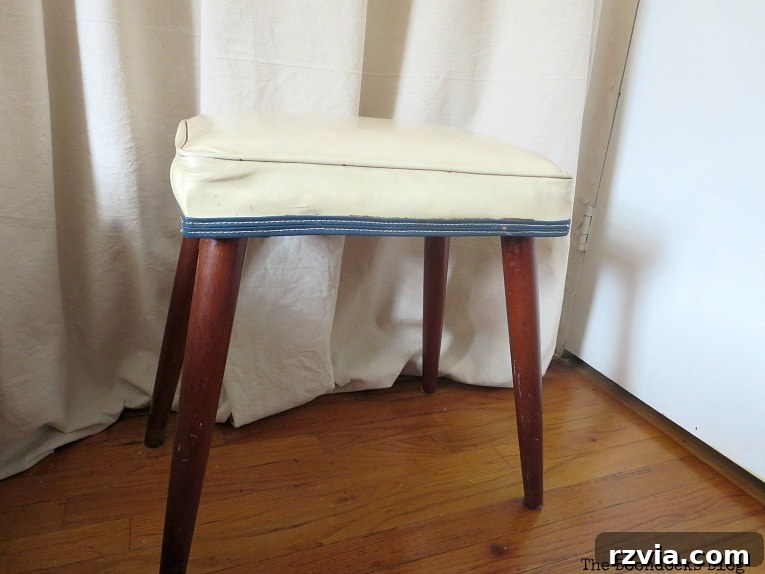
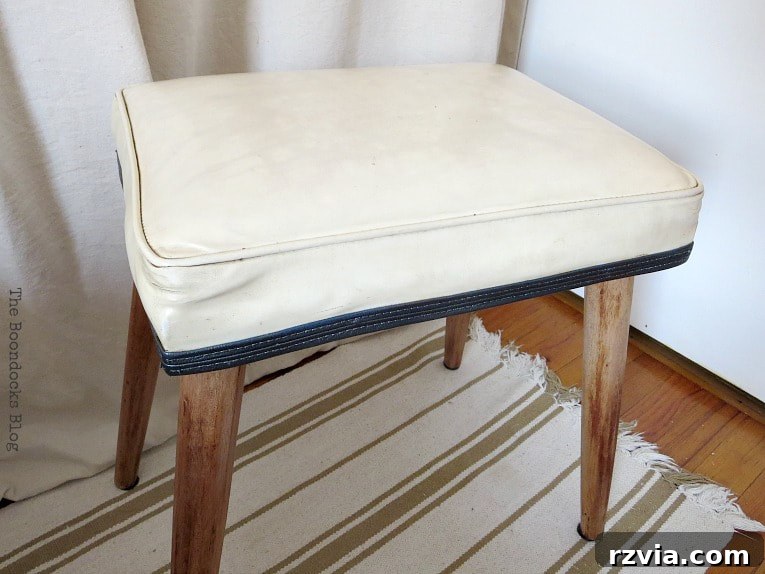
The humble Mid-Century Modern bench in its original, worn condition, awaiting a new lease on life.
Having previously tackled various MCM transformations, from sideboards to dressers, I approached this project with a degree of confidence and a toolkit of learned lessons. However, this piece, with its unique character, resilient old finish, and unexpected structural nuances, proved to be a formidable adversary right from the start. It was, quite literally, a true “piece of work” that demanded every ounce of my patience and problem-solving skills!
Stool, Ottoman, or Bench? Deciphering Mid-Century Furniture Terminology for Your Home
One of the initial hurdles, surprisingly, wasn’t related to the physical restoration but rather to its very identity. Was it a stool, an ottoman, or perhaps a small bench? The distinctions, while subtle, are important when discussing furniture types, especially when trying to define its function and place within a room’s design.
Traditionally, stools or footstools are generally lower in height, primarily designed for resting one’s feet, offering an auxiliary function rather than primary seating. Ottomans, on the other hand, often serve multiple functions. They can be used as footrests, but their typically higher stature and often softer, more substantial upholstery make them perfectly suitable for additional seating, or even as a makeshift coffee table or storage unit, embodying versatility. Benches, by definition, are elongated seats designed for multiple people or for a single person to recline on, often featuring a longer, rectangular form, ideal for hallways or dining areas.
Observing this particular piece, with its relatively high legs and comfortable seating potential, it leaned heavily towards the functionality of an ottoman. Its dimensions made it perfectly comfortable as a single seat, while also serving as a convenient footrest. So, for the sake of clarity and its practical use post-makeover, we officially declared it an ottoman! Though, its compact size still allows for a charming debate among furniture aficionados. Ultimately, its intended purpose in your home, whether as a stylish footrest, extra seating, or a decorative accent, dictates its most fitting name.
Essential Tools and Materials for Your MCM Furniture Makeover
Disclosure: This post contains affiliate links for your shopping convenience. If you purchase any of these products through the links, we receive a small commission at no extra charge to you. You can find our full disclosure here.
Before diving into any furniture restoration project, assembling the right arsenal of tools and materials is paramount. The success of a DIY makeover often hinges on proper preparation and having the correct supplies at hand. Here’s a detailed breakdown of what was used for this particular transformation, along with insights into their importance:
Sandpaper: Crucial for stripping old finishes, smoothing imperfections, and preparing surfaces for new treatments. A variety of grits, from coarse to fine, is essential. For heavily stained or varnished surfaces like these, starting with a lower grit (e.g., 60-80) to aggressively remove the old layer and then progressing to medium (120-150) and fine (220+) ensures a perfectly smooth, ready-to-finish result. View a selection of sandpaper here.
Electric Sander: An absolute game-changer for larger surfaces or, as I discovered, for exceptionally stubborn finishes. While manual sanding is an option for small areas, a good orbital or palm sander significantly reduces physical effort, saves time, and provides a much more consistent finish. It’s an investment that pays dividends in any serious furniture restoration project. A reliable hand sander makes all the difference in achieving professional results.
Americana Decor Creme Wax in Clear: Essential for protecting raw wood surfaces after sanding, particularly when you want to preserve the natural grain and tone. This clear wax provides a durable yet natural-looking finish without altering the newly exposed wood, enhancing its warmth and offering a layer of protection against daily wear. Find clear creme wax for sealing and protecting your refinished wood.
Americana Dazzling Metallic Acrylic Paint in Black Pearl: Chosen for its sophisticated, subtle sheen and elegant appearance. Despite its name, this particular shade delivers a beautiful smoky gray hue, perfect for adding a modern touch to elements like vinyl piping without being stark black. It provides a contemporary contrast that updates the vintage piece. Explore metallic acrylic paints to add a touch of glamour to your projects.
Paintbrush: A good quality brush is indispensable for smooth, even application of paint, especially on intricate details or narrow surfaces like piping. It ensures clean lines and a professional, streak-free finish, significantly impacting the overall aesthetic.
Protective Gear: Safety glasses and a dust mask are non-negotiable for any sanding project. They are indispensable for protecting your eyes and respiratory system from airborne particles, ensuring a safe working environment.
Drop Cloths/Newspaper: Essential for protecting your work area from dust during sanding and accidental paint splatters, making cleanup significantly easier.
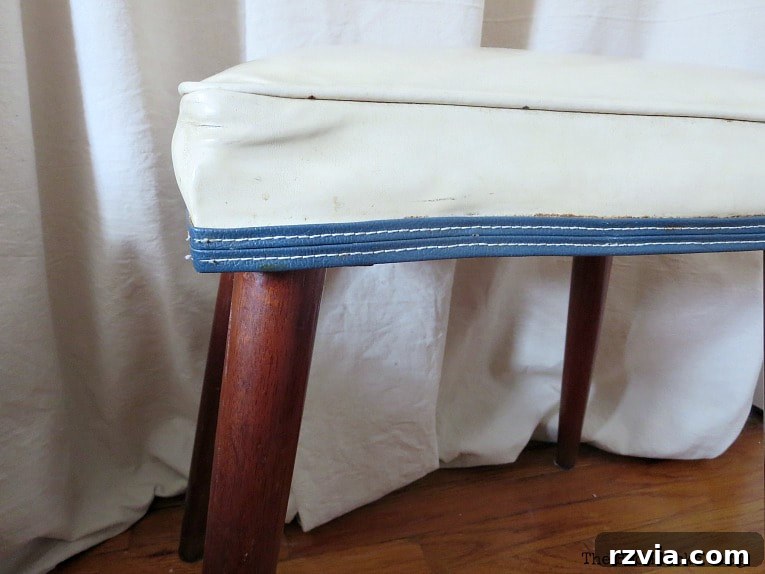
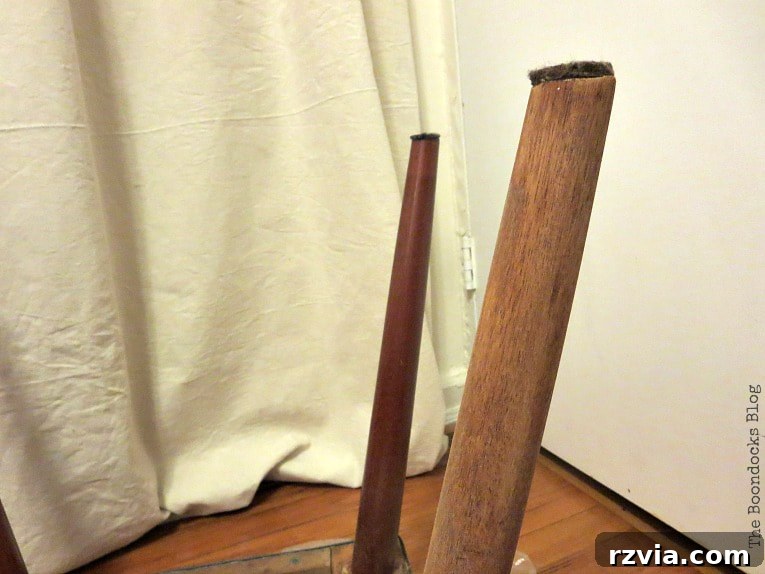
A closer look at the intricate details and wear on the bench’s legs and original blue piping.
The Renovation Journey: From Cherry Stain to Honey Hues
My initial plan was deceptively simple, bordering on naive: refresh the wooden legs by completely removing the dated, dark cherry-colored stain and repaint the vibrant blue vinyl piping a sophisticated gray to seamlessly integrate with our room’s evolving color scheme. I optimistically envisioned this entire process taking no more than half an hour – a quick, satisfying update that would transform the piece without much fuss. Oh, how spectacularly far off that estimation proved to be!
The Unexpected Ordeal of Sanding: A Lesson in Patience and Proper Tools
The reality of furniture restoration often diverges sharply from the initial plan, and this project was a prime example of such a divergence. I began sanding the first leg with an almost childlike enthusiasm, convinced I’d be done in mere minutes, witnessing the old finish peel away effortlessly. However, a grueling half-hour later, I was still painstakingly scrubbing away with manual sandpaper, barely making a discernible dent in the exceptionally stubborn cherry stain. My initial optimism quickly gave way to confusion, then exasperation, as the wood seemed to defiantly cling to its ancient coating. This wasn’t just a leg; it felt like an impenetrable fortress of old finish, resisting all my attempts at removal!
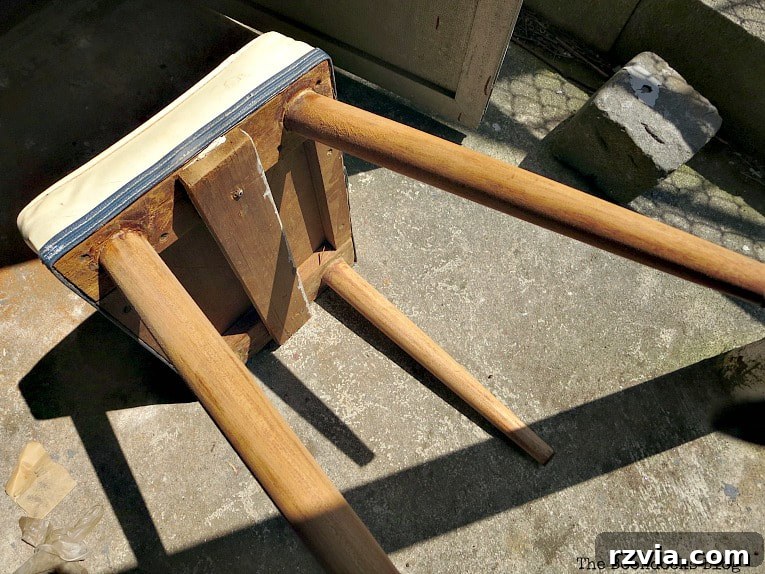
The minimal progress after half an hour of sanding on just one leg – a clear sign of the stubbornness of the old finish.
Day two dawned, bringing with it a renewed determination and a strategic shift in approach. Recognizing the futility of manual labor against such a resilient finish, I wisely relocated the entire project to the backyard for better ventilation and mess containment. My next move was to borrow my dad’s trusty Black and Decker sander, armed with what I believed was a superior tool. I plunged back into the task with renewed hope. To my dismay, within another short period, the rubber pad on the bottom of the sander began to burn, leaving half of it charred and useless. This was clearly not a good sign; it was a loud, smoking alarm bell! Was I using the wrong grit sandpaper? Was the finish simply too old and tough for even a power tool? The frustration compounded, pushing my patience to its limits.
Further attempts at sanding proved incredibly challenging, highlighting the urgent need for the right tools and refined technique.
After yet another unproductive half-hour battling the recalcitrant legs with the failing hand sander, I finally admitted defeat. It was a clear sign that brute force and inadequate tools were not going to win this battle. A quick, decisive trip to Home Depot became not just essential, but a critical turning point. It was there I invested in a Ryobi Orbital Finishing Sander. While I receive no compensation for endorsing this particular brand, its excellent online reviews and my desperate need for a powerful, efficient solution made it an obvious choice. This purchase was, without a doubt, the turning point that saved the project.
The newly acquired orbital sander, a true hero in the struggle against decades of stubborn finishes.
The power and efficiency of the new sander were immediately apparent and incredibly satisfying. It devoured the stubborn layers of stain with remarkable ease, sending satisfying clouds of dust and old finish into the air. After hours of sweat and arduous toil, wrestling with ineffective tools, the sheer speed and efficacy of this machine brought immense relief and satisfaction. It felt like I was finally making real, tangible progress, reclaiming the natural beauty of the wood that lay hidden beneath decades of wear and tear, and transforming the piece before my eyes.
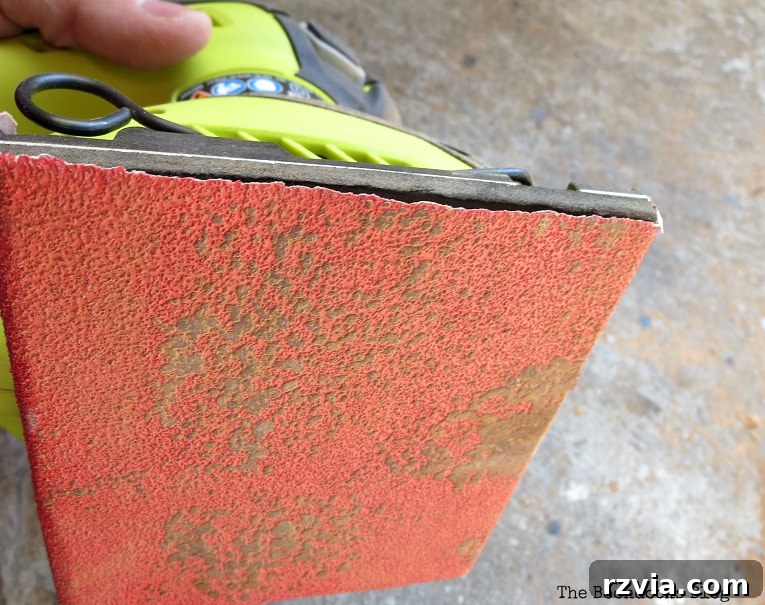
Evidence of the hard-won battle: sandpaper heavily laden with the stubborn cherry stain.
Finally, after considerable and persistent effort, the extensive sanding of all the legs was complete. Through this process, I discovered a fascinating characteristic of the wood: it featured a natural degradation, or perhaps an inherent variation in grain and color that created darker tones within the wood itself. I realized that further aggressive sanding would not have removed these deeper tones; instead, it would have merely distorted the shape of the legs, creating an undesirable, uneven appearance. It was a crucial lesson in understanding the unique characteristics of vintage wood and knowing when to stop, preserving the integrity and natural beauty of the piece.
To protect the newly exposed, beautiful bare wood, which now boasted a lighter, more natural hue, I carefully applied a generous coat of clear creme wax. This not only sealed the wood from moisture and daily wear but also brought out its inherent warmth and luster, enhancing its natural grain. The legs were transformed into a rich, appealing honey color, glowing with renewed life. The arduous task was finally over, much to the relief of my aching arms and weary spirit! But the stunning result, a testament to perseverance and the right tools, made every ounce of effort unequivocally worthwhile. The legs now exude a timeless elegance that beautifully complements their Mid-Century origin and the overall refreshed design.
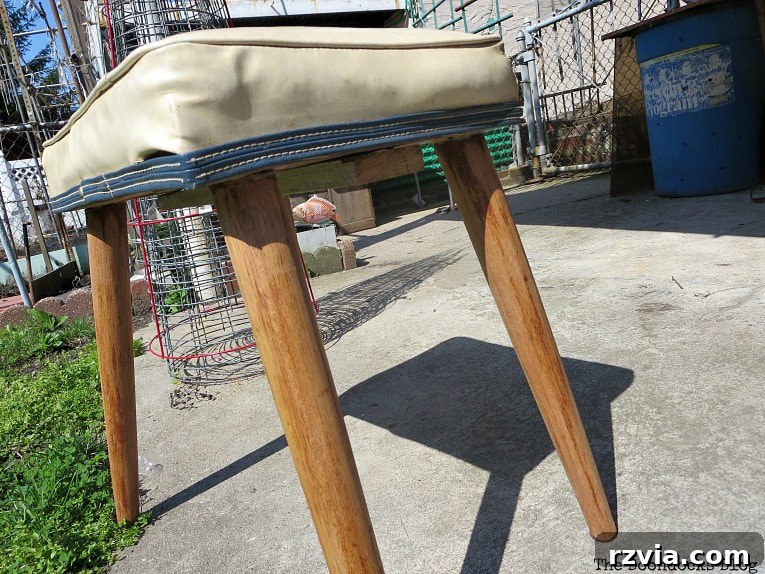
The legs, finally stripped and sealed with creme wax, showcasing their beautiful, natural honey tone and restored character.
Refining the Details: Painting the Vinyl Piping for a Modern Touch
With the demanding and physically taxing task of sanding well behind me, the next step felt refreshingly straightforward and immensely satisfying: painting the vinyl piping that elegantly accentuated the bottom edge of the white upholstery. This seemingly small detail was, in fact, crucial for tying the entire piece into the desired contemporary color scheme and elevating its overall aesthetic.
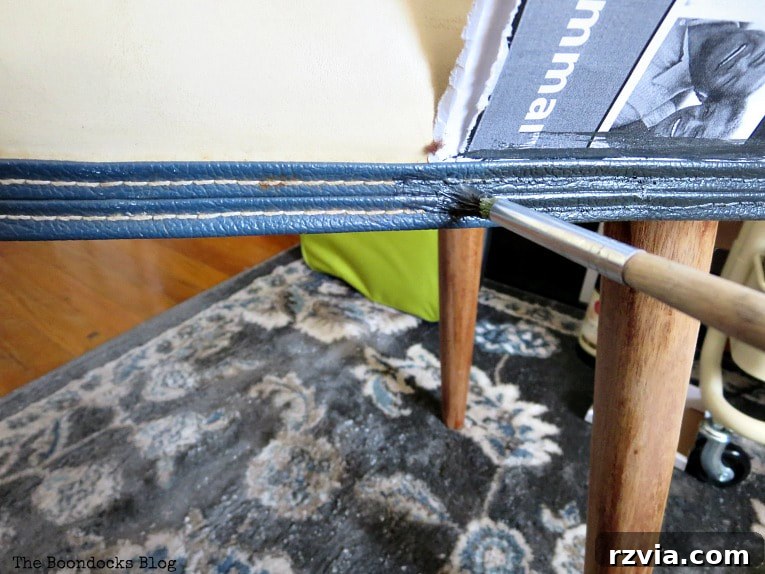
For this detail, I carefully selected Americana Dazzling Metallic acrylic paint in the shade “Black Pearl.” Despite its name, the paint delivers a sophisticated, multidimensional smoky gray hue rather than a stark, true black. This subtle metallic shimmer offered the perfect modern contrast to the pristine white upholstery, providing a sleek and updated look. To ensure crisp lines and prevent any accidental paint transfer onto the precious white fabric, I simply tucked a piece of ordinary paper behind the piping as I painted, creating an effective and easy-to-manage protective barrier. This simple masking technique proved highly effective, allowing for precise application and a clean, professional finish that truly brought the entire makeover together.
Carefully painting the vinyl piping a sophisticated smoky gray, transforming a key detail with precision.
The Grand Reveal: A Two-Day Labor of Love and Learning
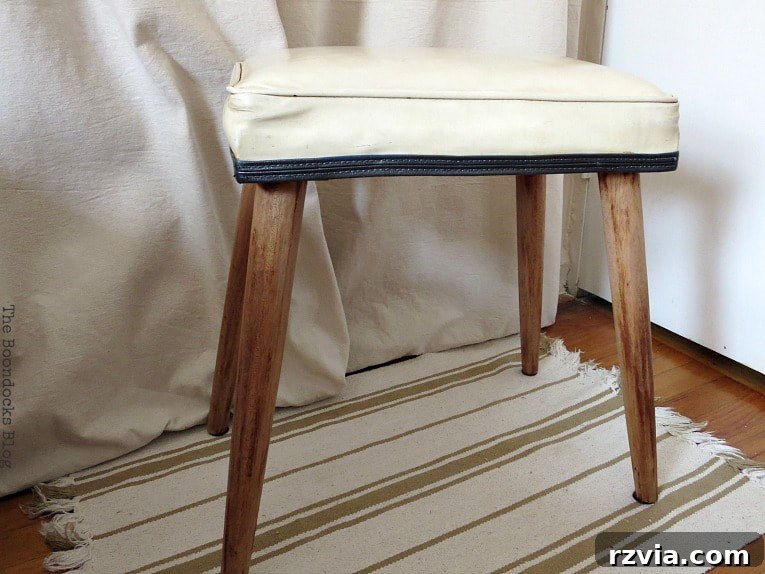
And here she stands, in all her refreshed glory, my beautifully refinished Mid-Century (and yes, this journey definitely deserves some emphatic emphasis!) ottoman/stool/bench! What began with the innocent expectation of a swift half-hour job blossomed into a comprehensive two-day project, filled with unexpected challenges, moments of exasperation, and ultimately, immense personal satisfaction. The subtle yet impactful changes have completely revitalized this cherished family treasure, infusing it with renewed vibrancy and purpose, ready for its next generation of use and admiration.
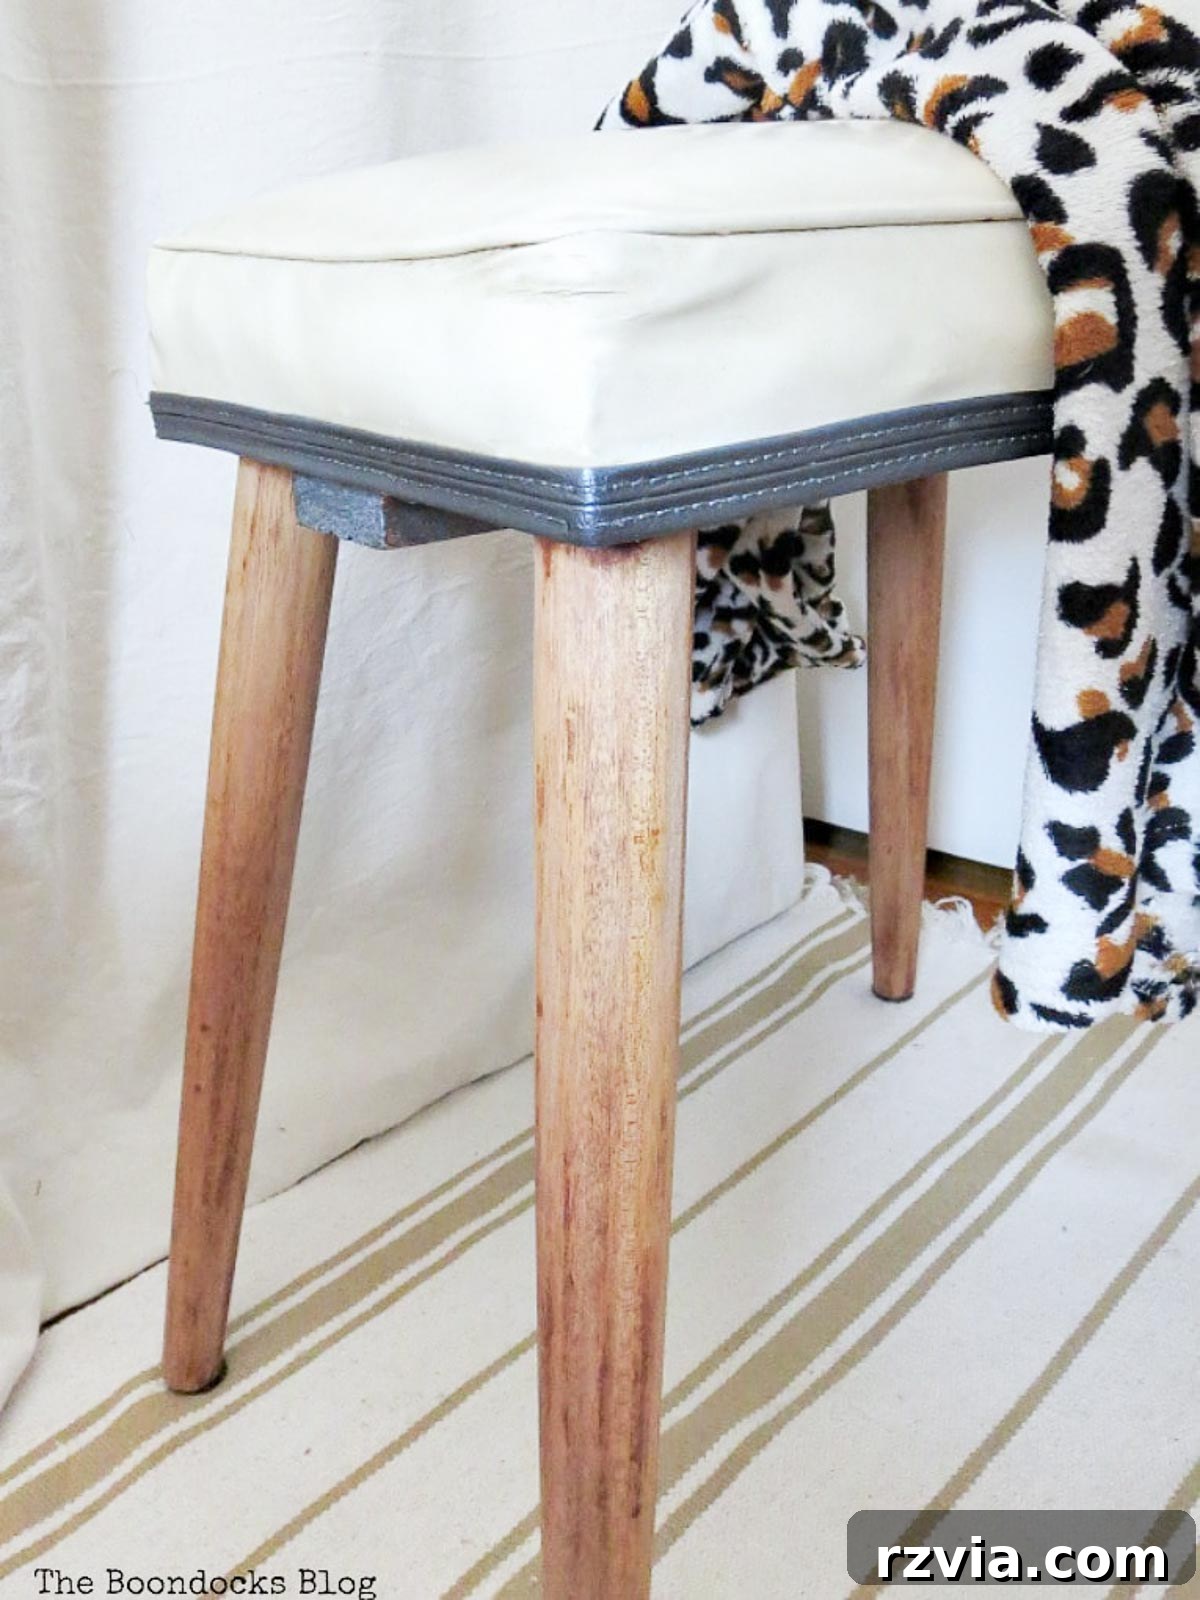
The elegant ‘new’ Mid-Century Modern piece, a testament to perseverance, thoughtful design, and a touch of DIY magic.
My journey through this project inadvertently became a masterclass in essential DIY wisdom. If you’re contemplating a similar vintage furniture restoration, especially one involving stubborn old finishes, please, for your own sanity and efficiency, learn from my “why take the easy way when you can make things hard on yourself” approach! The most crucial takeaway from this entire experience is unequivocally this: invest in the right tools, especially a powerful electric sander, and always use the appropriate sandpaper grit from the outset. Don’t be like me, struggling unnecessarily when efficiency and a superior result are well within reach with the proper equipment!
The transformed bench, now a focal point, demonstrating the enduring beauty of upcycled heirlooms and vintage design.
Now that the project is complete and this stunning piece sits proudly in its new home, radiating a fresh elegance, I can confidently say that I’ve learned an invaluable lesson: never underestimate the potential complexities of a seemingly simple piece of furniture, especially one with decades of history. Each scratch, stain, and layer of old finish tells a unique story, and uncovering its true beauty requires patience, the right approach, and sometimes, a little extra elbow grease – or, more accurately, the right power tool and a willingness to adapt! The satisfaction of seeing the transformation, however, makes every challenge worth facing.
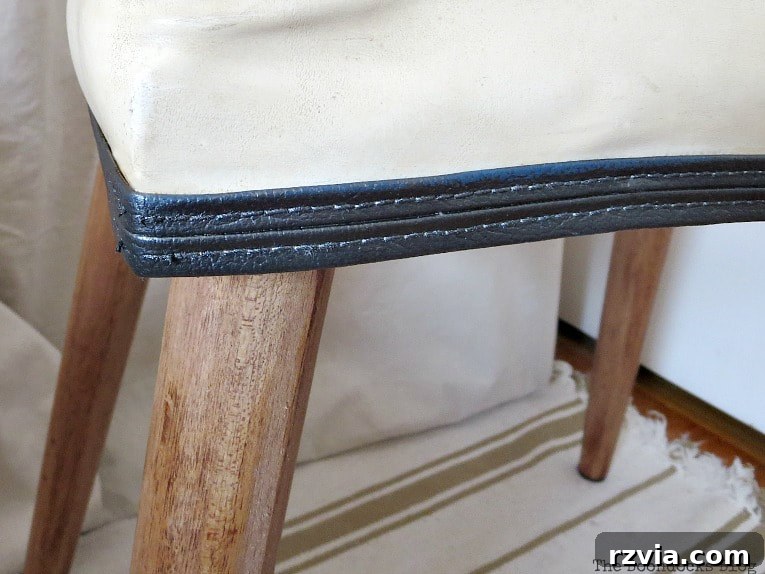
The subtle yet impactful detail of the painted vinyl piping, perfectly tying the entire design together with a modern flair.
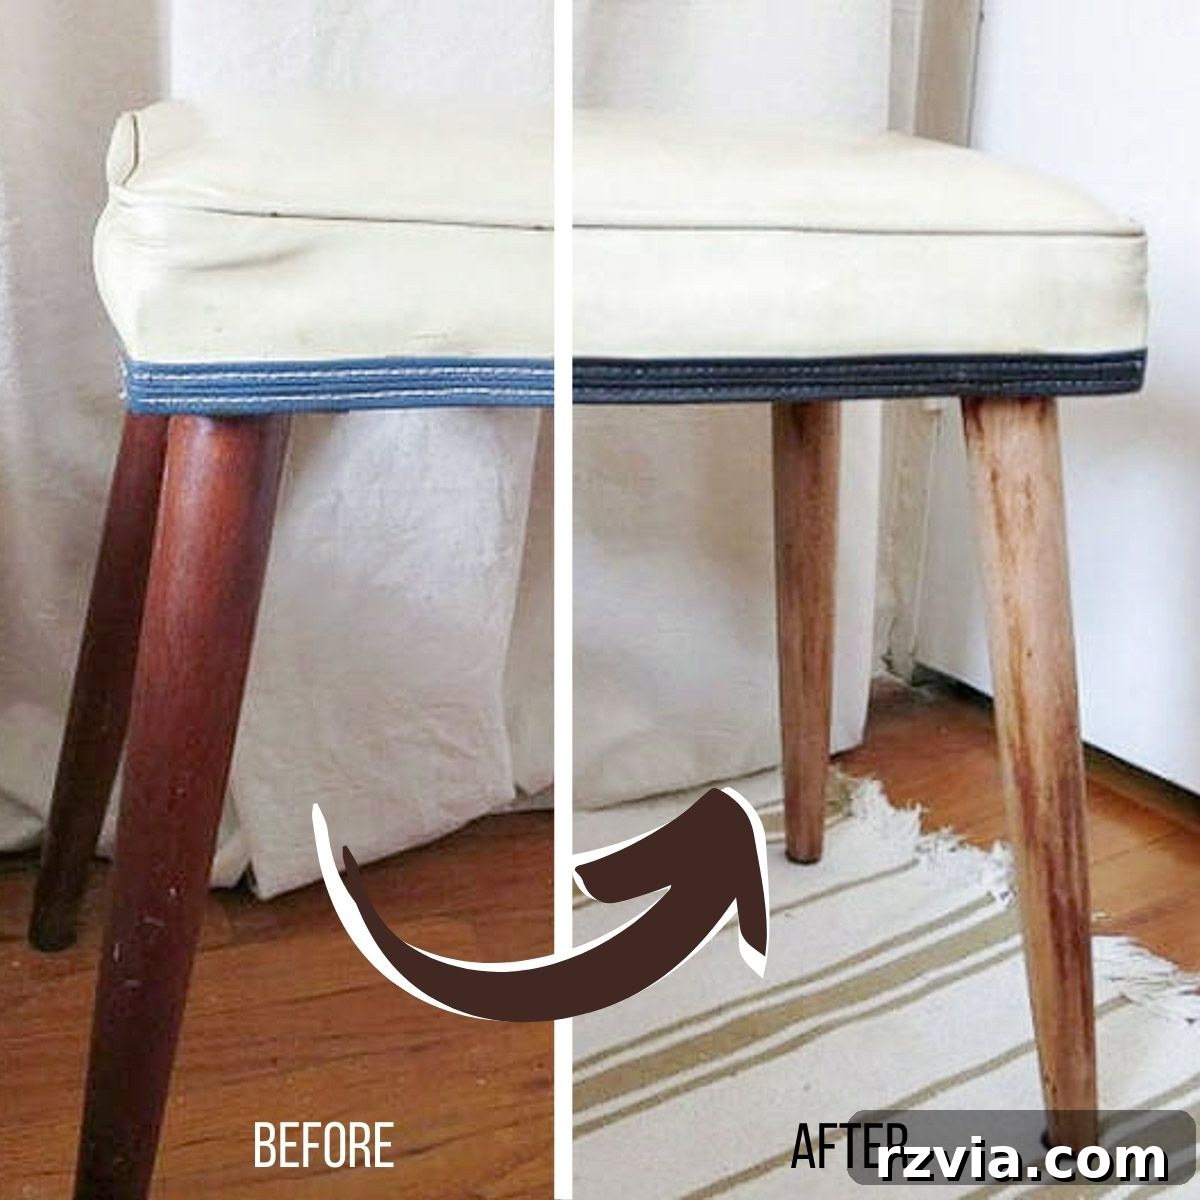
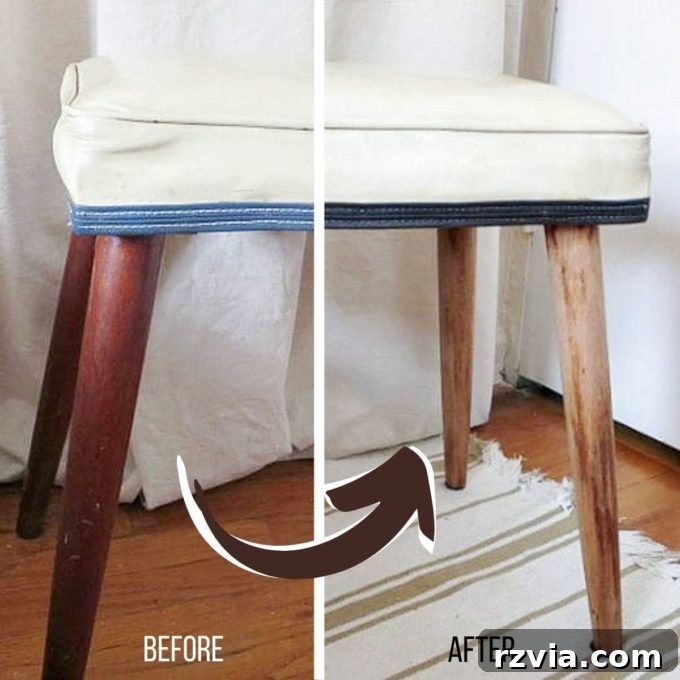
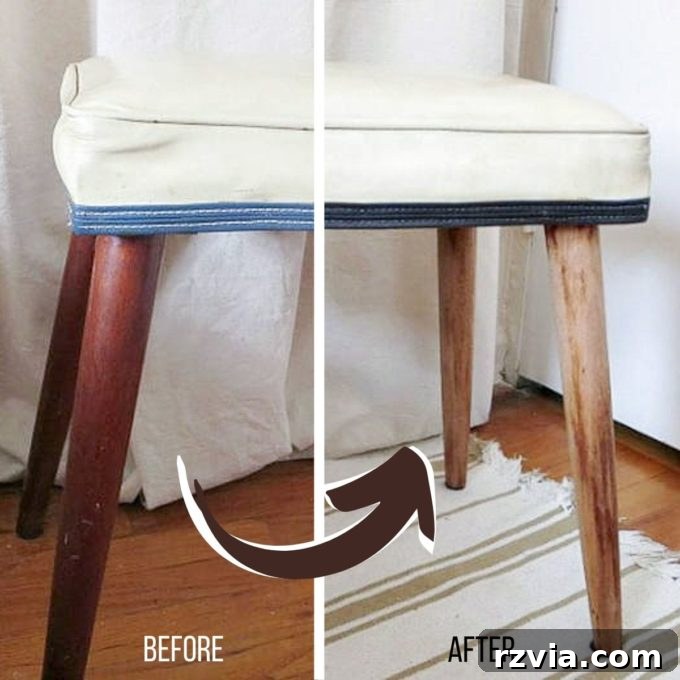
For a striking visual comparison, observe the before and after presented side-by-side below. While the transformation might appear subtle at first glance, especially in how it respects the original design, the difference in warmth, clarity, and overall aesthetic appeal is undeniable. The aged, faded elements have been replaced with a vibrant, refined finish. In my opinion, the effort invested was unequivocally worth it, elevating a tired family heirloom into a contemporary design statement that now harmonizes beautifully with its surroundings.
A compelling before-and-after shot showcasing the incredible difference a little dedication and the right tools can make in vintage furniture restoration.
This particular piece is an original from the swinging sixties, a genuine Mid-Century treasure that embodies the iconic design principles of its era. It was, indeed, one of my dad’s cherished possessions, though, admittedly, it bore the marks of years of utilitarian use rather than careful preservation. Its unique lines and vintage charm are truly distinct; I’ve only come across one other piece that bears a close resemblance to it online, underscoring its unique character and heritage.
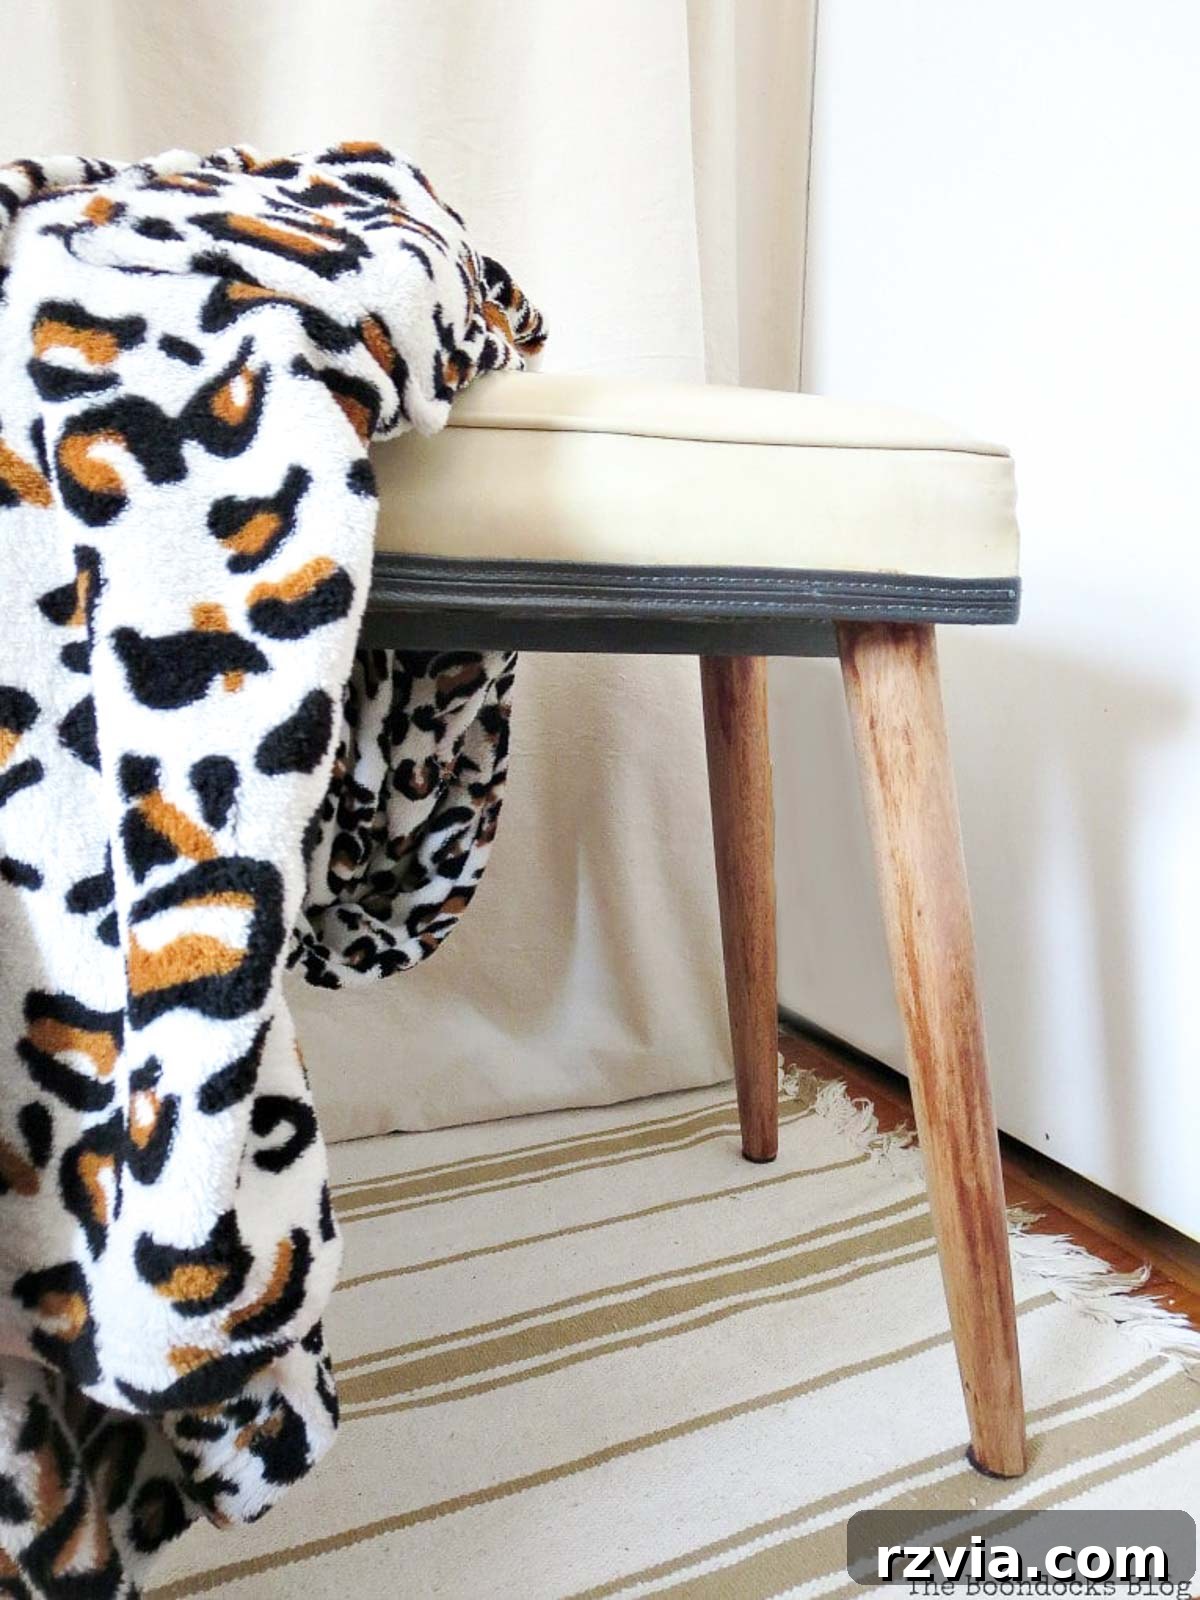
The elegant profile of the transformed piece, showcasing its beautiful honey-toned legs and the refreshed vinyl piping.
While the transformation is significant and deeply satisfying, it’s important to note that it’s far from “perfect” in a factory-new sense. The edge of the vinyl upholstery, for instance, still bears the subtle misshapenness and character marks of decades of continuous use – a silent testament to its long life and dedicated service. Some might be tempted to discard such minor imperfections, but there’s an undeniable beauty and authenticity in these unique lines, a tangible character that mass-produced items simply cannot replicate. And, truly, who could resist the timeless allure and graceful taper of those elegantly restored legs?
Embracing the charm of imperfections – a true hallmark of cherished vintage furniture and its unique story.
And so concludes my exasperating, yet ultimately exhilarating, story of the not-so-simple transformation of a Mid-Century Modern bench (or stool, or ottoman!). It was a journey rich with learning, demanding perseverance, and culminating in the profound satisfaction of bringing a beloved family heirloom back to its former glory, enhanced with a fresh, contemporary twist. This project stands as a testament to the enduring appeal of MCM design and the rewarding nature of thoughtful restoration.
Now, I turn to you, my fellow furniture enthusiasts and DIYers: given its versatile characteristics and stylish new lease on life, what do *you* think this captivating piece of furniture should primarily be called? Bench, Stool, or Ottoman? Share your thoughts and join the discussion in the comments below!
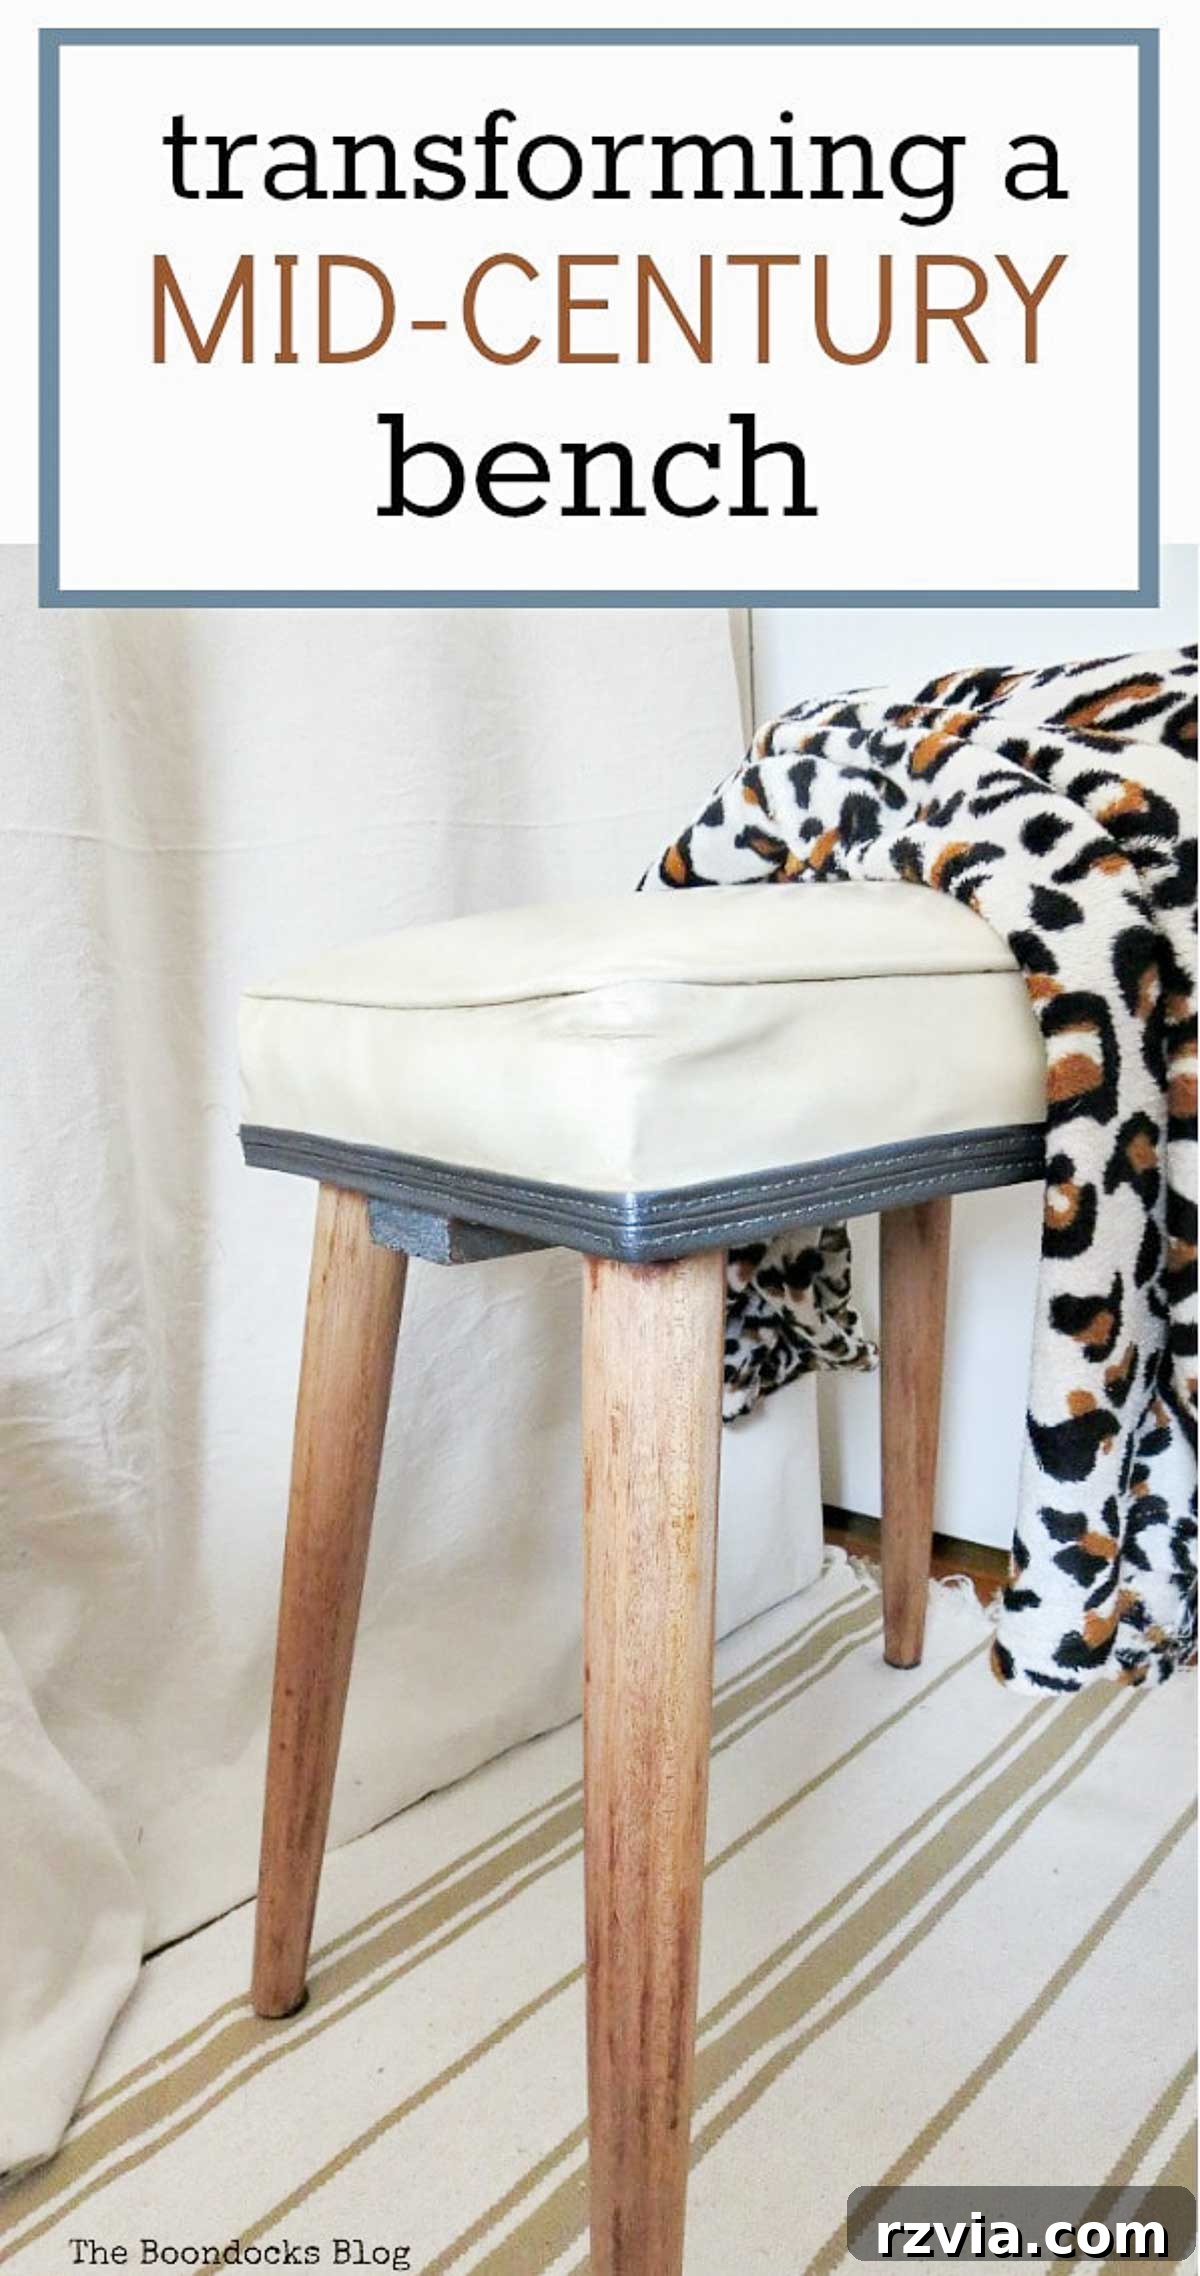
Pin this inspiring Mid-Century Modern furniture makeover for your future DIY projects and home decor inspiration!
A final, comprehensive look at the complete Mid-Century Modern transformation, showcasing its timeless appeal.
If you enjoyed this furniture transformation story and want to follow more of my DIY adventures, be sure to subscribe to my blog! You’ll receive exclusive updates and inspiring new projects directly in your mailbox, keeping you motivated for your next creative endeavor. The subscription form is conveniently located in the sidebar and at the top of the page. Rest assured, your email address will always remain private and will never be shared with any third party. Join our community of DIY enthusiasts today!
Discover More Furniture Transformations You’ll Love
Embark on more inspiring journeys through furniture restoration, upcycling, and creative makeovers with these related projects from the blog. Each post offers unique insights and step-by-step guidance for breathing new life into old pieces:
Transform an IKEA Pine Dresser into a Stylish Statement
Beautifully Transform an IKEA Malm Dresser with Creative Flair
The Tale of the Happy Ombre Chairs: A Vibrant DIY Project
Please note: This blog is intended for entertainment and informational purposes only; my DIY tutorials are not professional advice. Always exercise caution, follow manufacturer guidelines, and prioritize safety when using tools and materials. Read my full disclaimer here.
I genuinely appreciate your comments and strive to respond to each one as quickly as possible! To ensure your comment can be published and shared with our community, please refrain from including any hyperlinks. Thank you for being a part of our thriving DIY community and sharing your thoughts!