
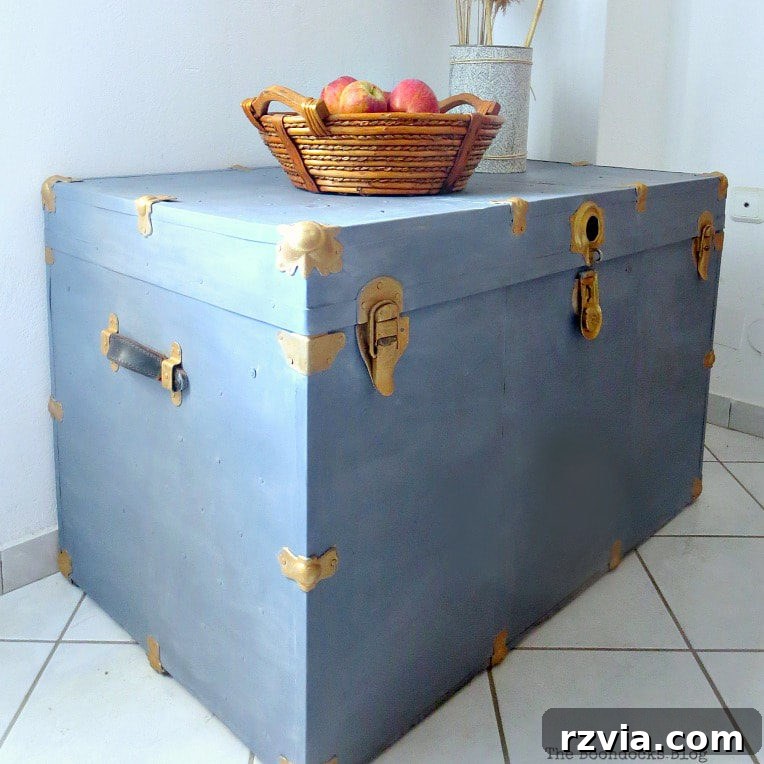
In a world increasingly focused on sustainability and unique home decor, the art of **upcycling vintage treasures** has never been more relevant. Among these cherished finds, old metal trunks stand out, brimming with stories of bygone eras and awaiting a new lease on life. After generations of transatlantic journeys, our family has amassed a remarkable collection of these historical pieces. Join us as we explore how simply painting old trunks can transform them from dusty relics into captivating focal points, injecting character and charm into any space.
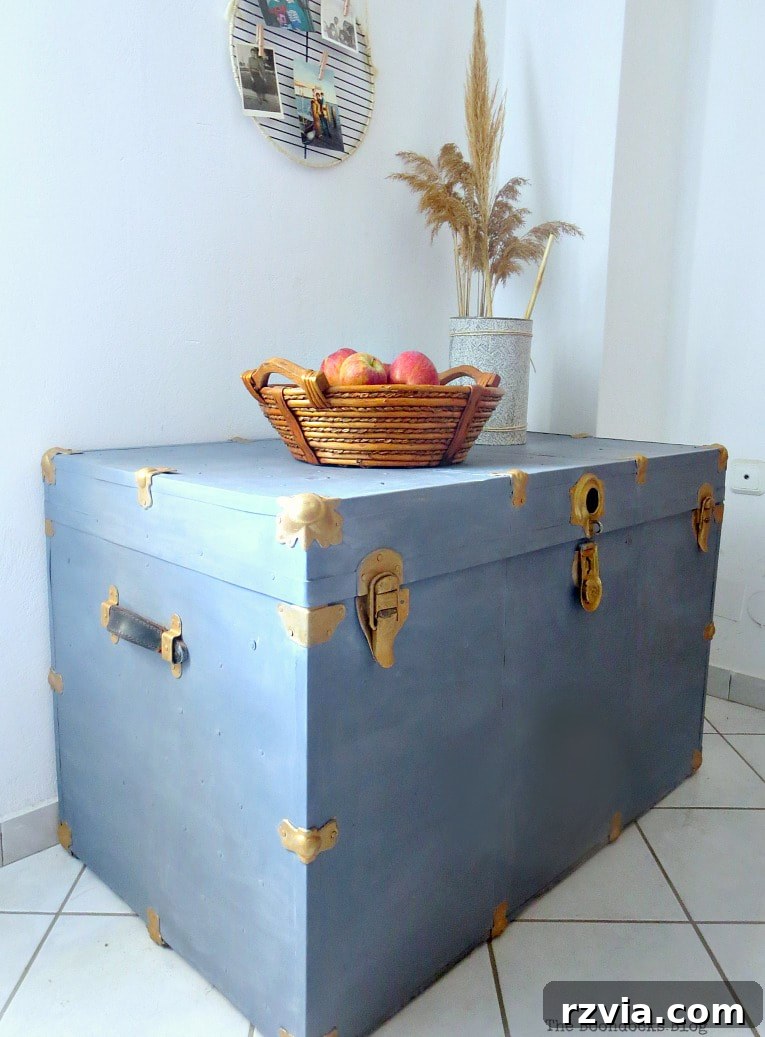
Breathing New Life into History: The Art of Painting Old Trunks
Disclosure: This post features products that were provided to me, but all opinions expressed here are genuinely my own and reflect my personal experience.
Our basement, much like a forgotten attic, harbors more than just storage boxes; it’s a veritable treasure trove of vintage metal trunks. While not every household boasts such a collection, our family’s unique history explains this abundance. Both my husband’s ancestors and my own have undertaken numerous migrations across the vast Atlantic, journeying between the US and Europe. Each relocation, each chapter of their lives, was marked by these sturdy, travel-worn companions. It’s little wonder then that these durable metal chests became an integral part of our family’s heritage, each dent and scratch a silent testament to countless memories and untold adventures.
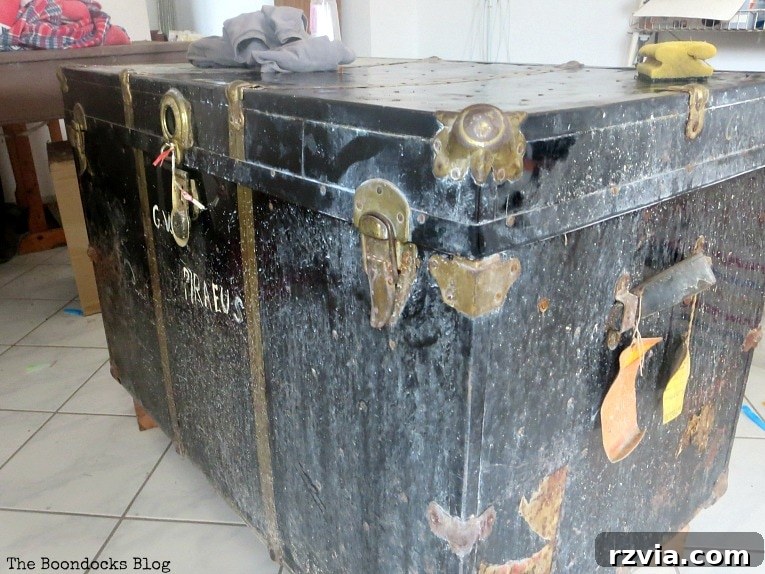
A recent inventory revealed no less than five of these historical relics, patiently awaiting their turn in the spotlight. One, a few years back, received a delightful transformation through decoupage, emerging as the distinguished Chivalrous Trunk. The others, however, remained in a state of endearing disrepair, their surfaces bearing the unmistakable marks of time and neglect. After decades of silent repose in the cool, dim confines of the basement, the moment for a dramatic revival had arrived. This particular trunk, with its intriguing blend of robustness and weathered charm, was carefully hauled upstairs, ready for its grand rehabilitation.
As a proud Brand Blogger for Old Fashioned Milk Paint, I’ve had the pleasure of working with their exceptional products on various surfaces. However, a burning question lingered: would this authentic milk paint truly adhere and perform beautifully on metal? Today, I’m thrilled to share a comprehensive guide on exactly **how to revive a metal trunk with Old Fashioned Milk Paint**, showcasing its versatility and transformative power. Get ready to discover a simple yet impactful way to elevate your home decor with a touch of history and personalized style.
The Complete Guide to a Vintage Metal Trunk Makeover
Embarking on a **DIY trunk restoration** project like this is incredibly rewarding, and the secret to a lasting, beautiful finish lies in thorough preparation and understanding your materials. Here’s a detailed breakdown of how we brought this vintage metal trunk back to life.
Step 1: Meticulous Cleaning – The Foundation of a Flawless Finish
The first and arguably most crucial step in any successful furniture makeover is preparation. Our vintage trunk had accumulated years, perhaps even decades, of dust, grime, and environmental residue. To ensure optimal paint adhesion and a smooth finish, a deep clean was absolutely essential. I began by diligently scrubbing down every surface using a simple yet effective solution of white vinegar and water. This natural cleaner not only cuts through grease and dirt but also helps to neutralize any lingering odors and provides a mildly etched surface for better paint grip. I made sure to pay close attention to all the nooks, crannies, and especially the heavily textured metal strips and hardware, ensuring every inch was pristine. Patience here truly pays off, as a clean slate is the bedrock for your beautiful transformation.
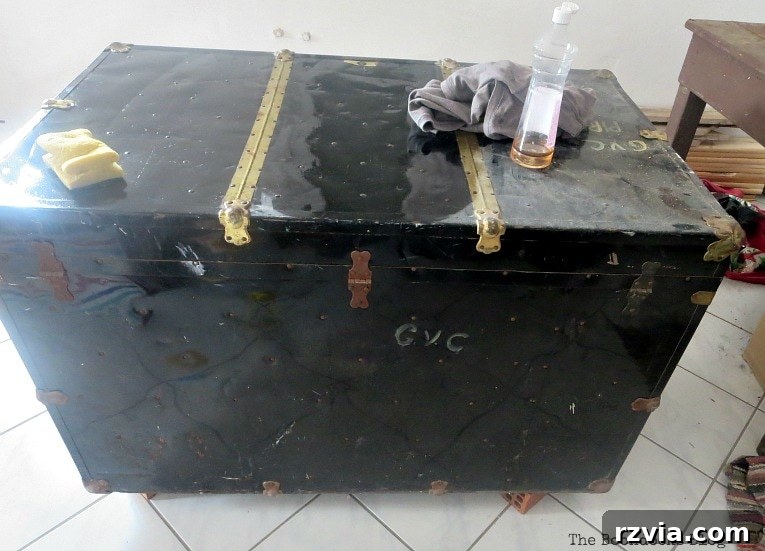
Step 2: Choosing Your Paint – Old Fashioned Milk Paint for Metal
For this project, I chose Old Fashioned Milk Paint’s SafePaint version. It’s important to understand that traditional milk paint is renowned for its unique, charming chippy finish, which naturally occurs as the paint adheres to certain non-porous surfaces. While this effect is highly sought after for a rustic, distressed look, it wasn’t the aesthetic we were aiming for on this particular metal trunk. Given its pre-existing collection of dents and battle scars – which already contribute beautifully to its natural, time-worn character – we wanted a smooth, durable, and consistent finish that would highlight its form without adding further ‘distress’ in the form of chips.
The SafePaint formulation, unlike its traditional counterpart, is designed to provide a more stable and even coat, making it ideal for applications where a non-chipping finish is desired, even on challenging surfaces like metal. This made it the perfect choice to ensure our vintage trunk received a modern yet respectful update. Moreover, Old Fashioned Milk Paint is incredibly safe and environmentally friendly, a crucial consideration for any indoor project. It’s VOC-free and non-toxic, allowing my daughter – who is quite the artist herself – to assist with the painting without any concerns. Enlisting her creative eye and nimble brushwork was not only a delightful bonding experience but also a smart way to achieve professional results.
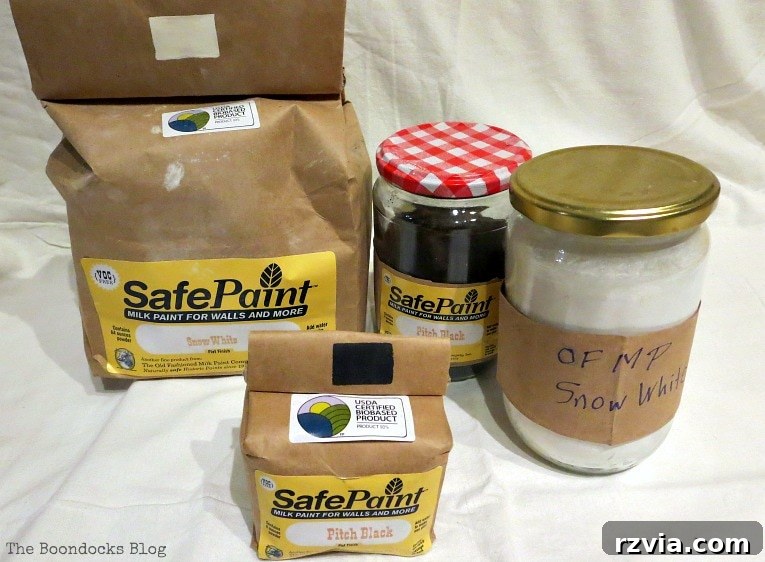
Step 3: Custom Color Creation – Mixing Your Perfect Shade
One of the true joys of working with Old Fashioned Milk Paint is the incredible freedom it offers for custom color creation. Forget limiting yourself to pre-mixed swatches; with milk paint, your palette is as limitless as your imagination. For our trunk, we envisioned a sophisticated, soft grey – a hue that would provide a serene backdrop while allowing the trunk’s inherent character and metallic hardware to truly shine. We achieved this by carefully blending Pitch Black and Snow White. The process is surprisingly straightforward and doesn’t require any advanced color theory expertise.
I started with a base of Snow White in a clean jar, then gradually introduced small amounts of Pitch Black, stirring meticulously after each addition, until I achieved the desired shade of grey. This iterative process allows for precise control over the final color, ensuring it perfectly complements your vision. When mixing the paint powder itself, I combined equal parts warm water with the powder, stirring until a smooth, foamy mixture formed. It’s vital to allow this mixture to rest for approximately 20 minutes. This resting period, often overlooked, is crucial as it allows the pigments to fully hydrate and the milk proteins to properly activate, resulting in a consistent, lump-free paint that applies beautifully.
My enthusiasm for this paint is evident in my generous stock of it; I always keep a substantial batch on hand, conveniently stored in airtight jars. This method highlights another practical advantage of milk paint: you only need to mix the amount you anticipate using for your current project. Any leftover mixed paint can be safely stored in the refrigerator for up to three days, minimizing waste and ensuring your custom color is ready for touch-ups or future small projects. This flexibility makes it an economical and eco-conscious choice for any DIY enthusiast engaged in **antique trunk refurbishment**.
After applying several thin, even coats of our custom-mixed Old Fashioned Milk Paint, the transformation was already remarkable. The soft grey began to elegantly mask the original worn finish, hinting at the refined piece it was soon to become. The ease with which one can customize colors is truly a game-changer for those seeking to create truly unique, personalized furniture pieces.
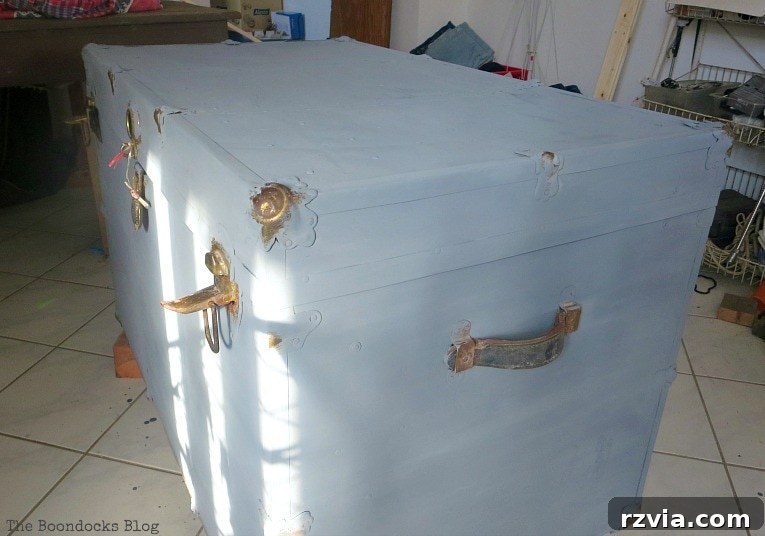
Step 4: Sealing for Durability and Sheen – The Finishing Touch
With the paint flawlessly applied and dried, the next critical step was to seal and protect our newly transformed trunk, ensuring its durability and enhancing its aesthetic appeal. Sealing is not merely about adding a protective layer; it’s about locking in the color, providing resistance against daily wear and tear, and often, imparting a subtle sheen that elevates the entire piece. For this project, we opted to apply a nourishing wax finish. Wax is an excellent choice for milk paint, as it penetrates the surface, providing a rich, soft luster while offering a good level of protection.
Applying the wax is a simple process: using a soft cloth, I gently buffed the wax onto the painted surface in circular motions, ensuring even coverage. After allowing it to dry slightly, I then used a clean cloth to buff it to a beautiful, soft sheen. This not only sealed the paint but also brought out a subtle depth in the grey, making the trunk feel incredibly smooth and luxurious to the touch. For those who enjoy a truly hands-on approach, you might even consider the rewarding experience of learning how to make your own beeswax furniture polish, adding another layer of personal craftsmanship to your **DIY trunk restoration**.
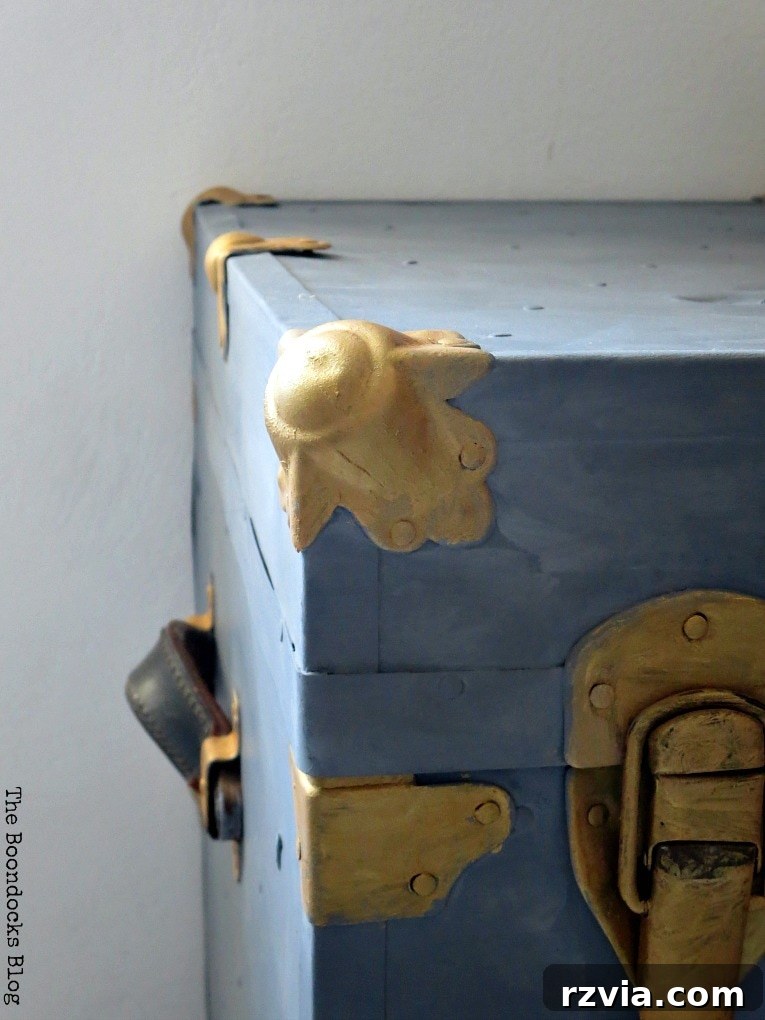
Step 5: Revitalizing the Hardware – A Contrast of Textures
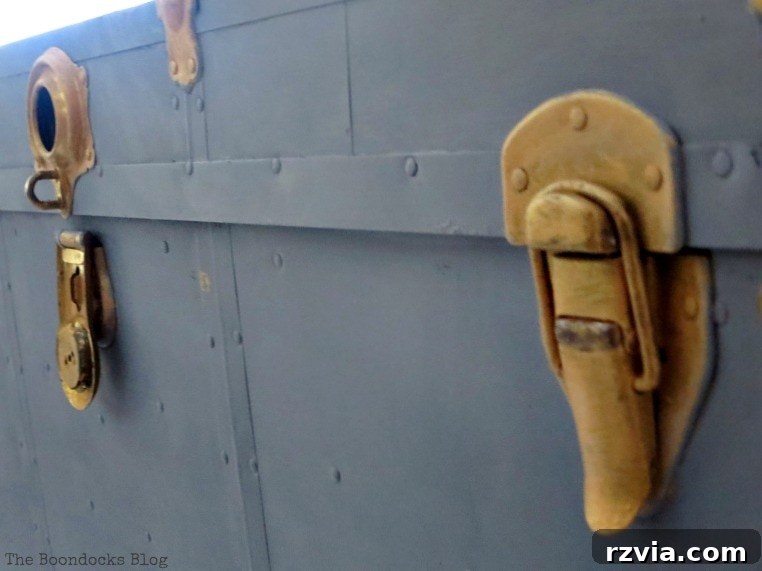
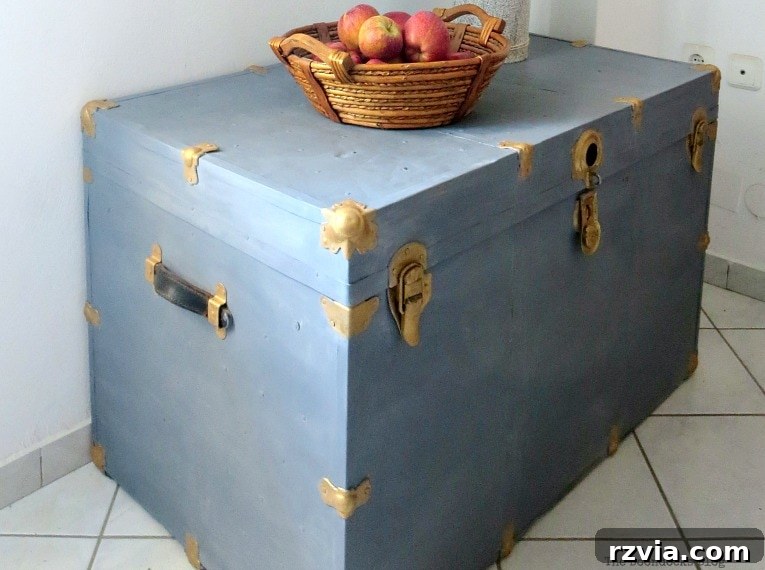
No **vintage trunk makeover** is complete without addressing its unique hardware. These metallic accents are often the most defining features of an antique trunk, bearing intricate details and a timeless allure. Our trunk was adorned with beautiful brass handles and numerous metal studs. After cleaning them thoroughly, I decided to enhance their natural metallic luster. A careful application of wax, similar to the process used on the painted body, worked wonders. It not only provided a protective barrier but also brought out the inherent warmth and burnished glow of the brass, creating a stunning contrast against the cool, soft grey of the milk paint.
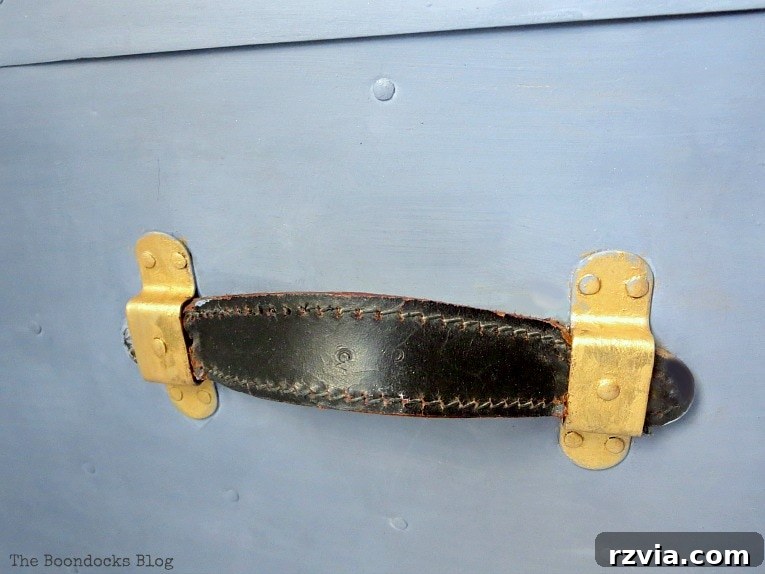
The interplay between the metallic burnished brass and the soft grey painted surface is simply captivating. This thoughtful contrast elevates the trunk from a mere storage container to a piece of art. While the trunk also featured several metal strips running vertically, we made a conscious decision to leave some areas unpainted. In this particular instance, we embraced the philosophy that “less is more,” allowing certain original metallic elements to peek through, adding an authentic, layered dimension to the overall aesthetic. This subtle detail ensures the trunk’s historical essence isn’t entirely overshadowed by its modern update.
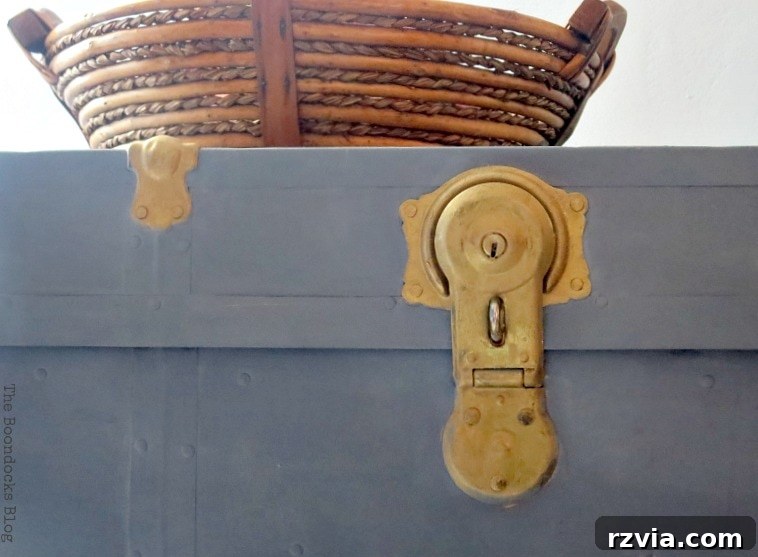
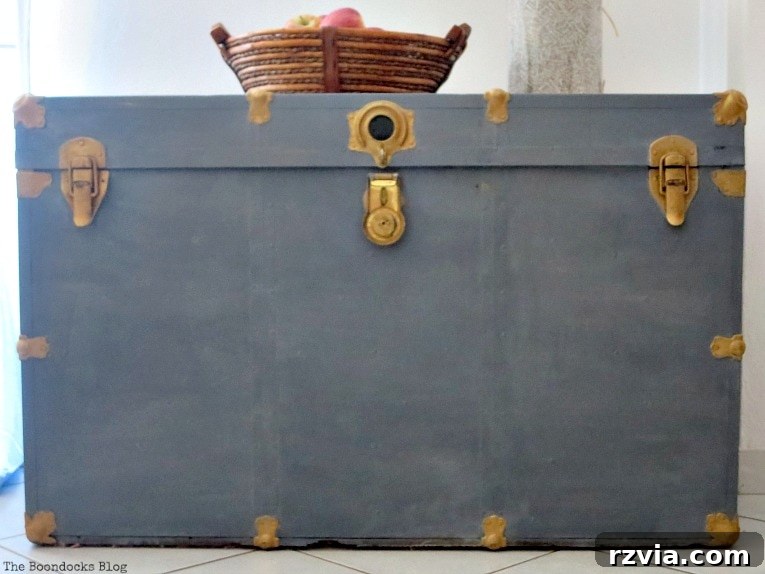
You can clearly see the intricate metal studs and the subtly contrasting vertical strip I mentioned, positioned just in front of where a basket would typically rest. These details, meticulously preserved or highlighted, ensure the trunk retains its original charm while proudly displaying its renewed beauty. Every element, from the largest surface to the smallest stud, contributes to the narrative of its past and its exciting future.
Achieving a Unique “Cloud Effect”
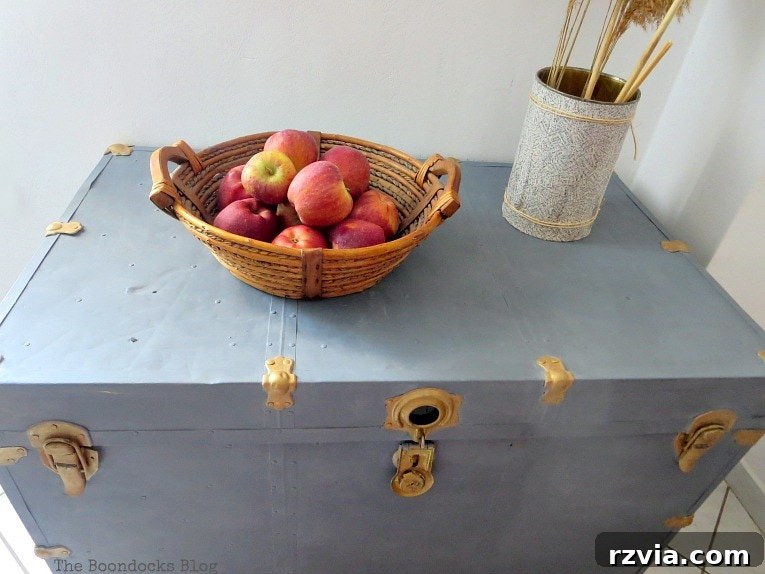
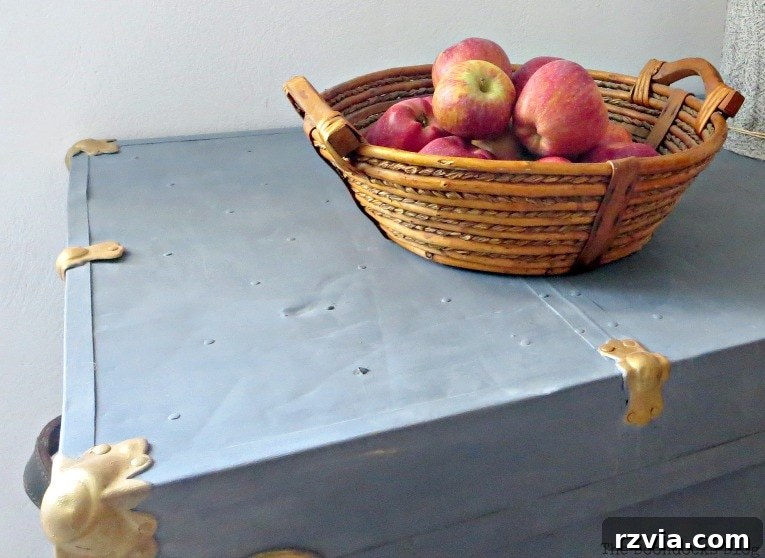
To add an extra layer of visual interest and uniqueness to the trunk, I deliberately chose not to over-mix the milk paint powder during preparation. This subtle technique allowed for slight variations in pigment distribution, resulting in a beautiful, almost ethereal “cloud effect” on the surface. Can you discern the gentle shifts in shade, creating an organic, soft visual texture? It’s a testament to the versatility of milk paint and a simple trick to add depth and character, moving beyond a flat, uniform color.
Even with its beautifully refreshed paintwork, the trunk proudly retains its history, with many of its original dents and imperfections still visible on its top surface. These aren’t flaws; they are badges of honor, telling silent tales of its extensive travels and past life. They perfectly embody the sought-after “natural time-worn look” that gives vintage pieces their undeniable charm and character. Our goal wasn’t to erase its history but to enhance it, allowing its narrative to continue in a renewed form.
Integrating Your Revived Trunk into Home Decor
With its makeover complete, this once-forgotten relic is now fully presentable and ready to grace any room in our home, far from its previous exile in the basement. Beyond its aesthetic appeal, it’s now a fully functional piece, perfectly suited for stylish storage. Imagine it as a chic coffee table, a unique end table beside a sofa, or an elegant entryway console. Its renewed elegance makes it a versatile addition to any decor scheme, seamlessly blending vintage charm with contemporary style. This project truly showcases the potential of **upcycling vintage luggage** into practical and beautiful home furnishings.
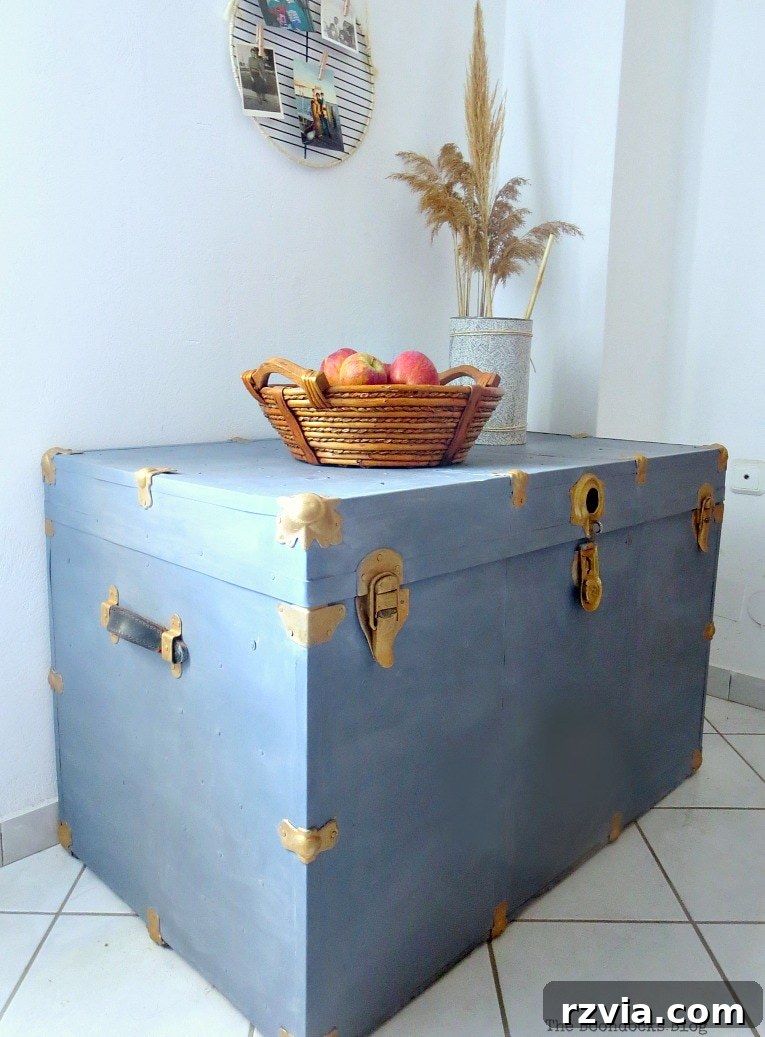
It’s been a month since this **DIY trunk makeover** was completed, and I’m continually impressed with the resilience and beauty of this true milk paint. Prior to this, I had never personally attempted using milk paint on metal, but the process was an absolute breeze. The ease of application and the stunning, durable finish confirm that Old Fashioned Milk Paint is an exceptional choice for **painting metal furniture** and tackling even the most challenging **DIY home improvement projects**.
Unlock More Potential: What’s Next for Our Trunks?
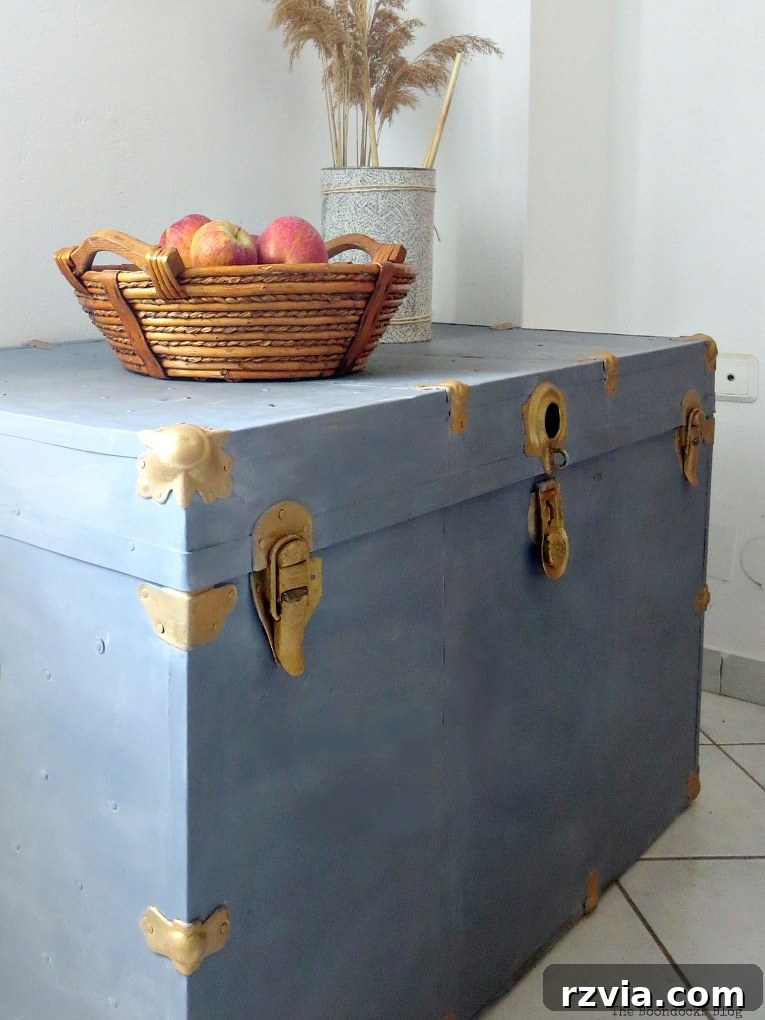
And so concludes our detailed guide on **how to paint an old metal trunk** using Old Fashioned Milk Paint. The result? A stunningly gorgeous “new” trunk that breathes elegance and history into our home. This project was a definite win-win: not only do I have a beautiful, functional piece of furniture, but my daughter also earned some extra money for her artistic efforts, gaining valuable experience along the way. It’s a wonderful reminder that investing in quality materials and a little creativity can yield incredible transformations.
Now, with one remarkable success under our belt, my thoughts turn to the remaining vintage trunks patiently awaiting their turn. Each possesses its own unique character and potential. Should they receive a similar elegant paint treatment, perhaps in a different shade to complement various rooms? Or should we explore alternative makeover techniques?
Consider these possibilities for your own **antique trunk refurbishment**:
- Decoupage: As seen with our Chivalrous Trunk, covering a trunk with maps, old book pages, or fabric can create a wonderfully personalized and artistic statement.
- Stenciling: Adding intricate patterns, monograms, or historical motifs with stencils can introduce a layer of sophisticated detail.
- Adding Casters: For practical mobility, especially for heavier trunks used as coffee tables, attaching vintage-style casters can be a functional and aesthetic upgrade.
- Lining the Interior: While this project focused on the exterior, lining the inside with cedar, velvet, or patterned fabric can make the trunk even more luxurious and functional for storage.
- Hardware Swaps: Sometimes, merely replacing or upgrading the existing hardware can dramatically alter a trunk’s appearance.
I’d love to hear your creative ideas! What suggestions do you have for transforming the other treasures in our collection?
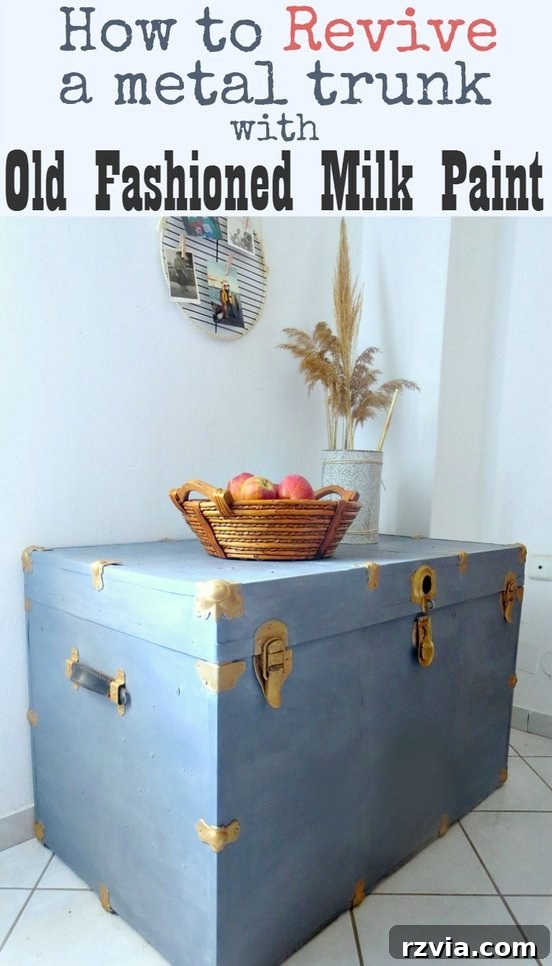
If you found inspiration in this **vintage metal trunk makeover**, please consider sharing it with your friends or saving it to your favorite Pinterest board. The image above is perfectly sized for pinning!
For more exciting DIY projects, home decor ideas, and creative transformations delivered directly to your inbox twice a week, be sure to subscribe to my blog. You’ll find the subscription form conveniently located in the sidebar and at the top of the page. Rest assured, your email address will always remain private and will never be shared with any third party.