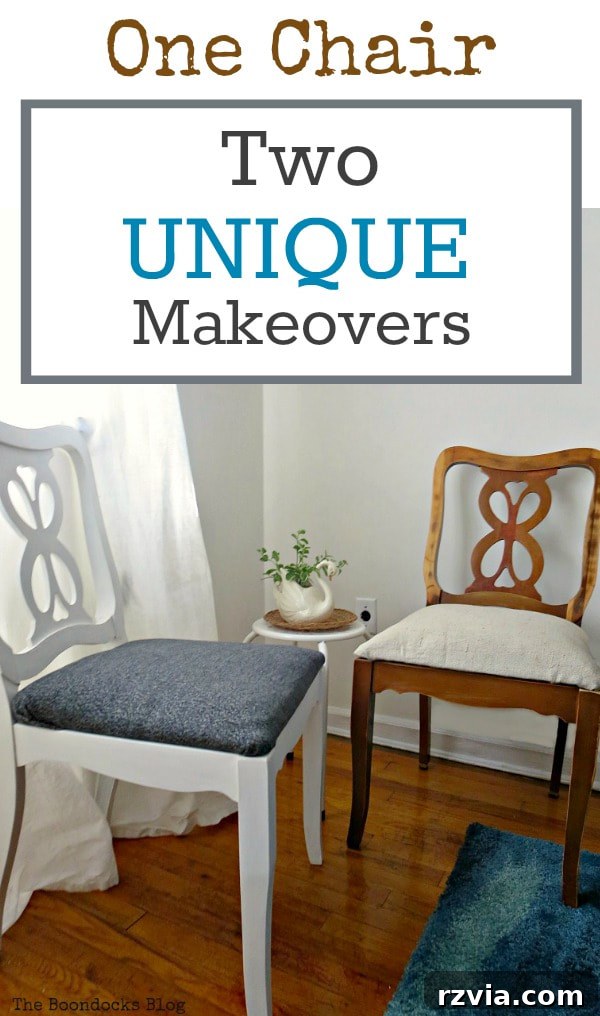
Last week, I had the pleasure of sharing the reveal of my girls’ newly redecorated bedroom with you. It’s always exciting to see a space come together, but as any seasoned decorator knows, even a “finished” room often holds hidden potential for further enhancement. In this instance, our immediate need was a proper computer desk chair. The makeshift ottoman my daughter was using simply wasn’t cutting it; it was uncomfortable, unsupportive, and frankly, getting quite squashed. It became clear that a more permanent and ergonomic solution was needed, and fast.
Serendipitously, a quick trip to the basement proved to be quite fruitful. Instead of finding just one, I discovered a treasure trove of four identical chairs, waiting patiently to be given a new lease on life. While only one was immediately necessary for the girls’ room, the creative spark was ignited. I decided to challenge myself by transforming two of these chairs, each with a completely distinct makeover. This approach would not only demonstrate the incredible versatility hidden within a single piece of furniture but also cater to different aesthetic needs in various rooms of our home. This project became an exploration of how to achieve two unique makeovers from one foundational chair design, showcasing the power of imagination and a little elbow grease.
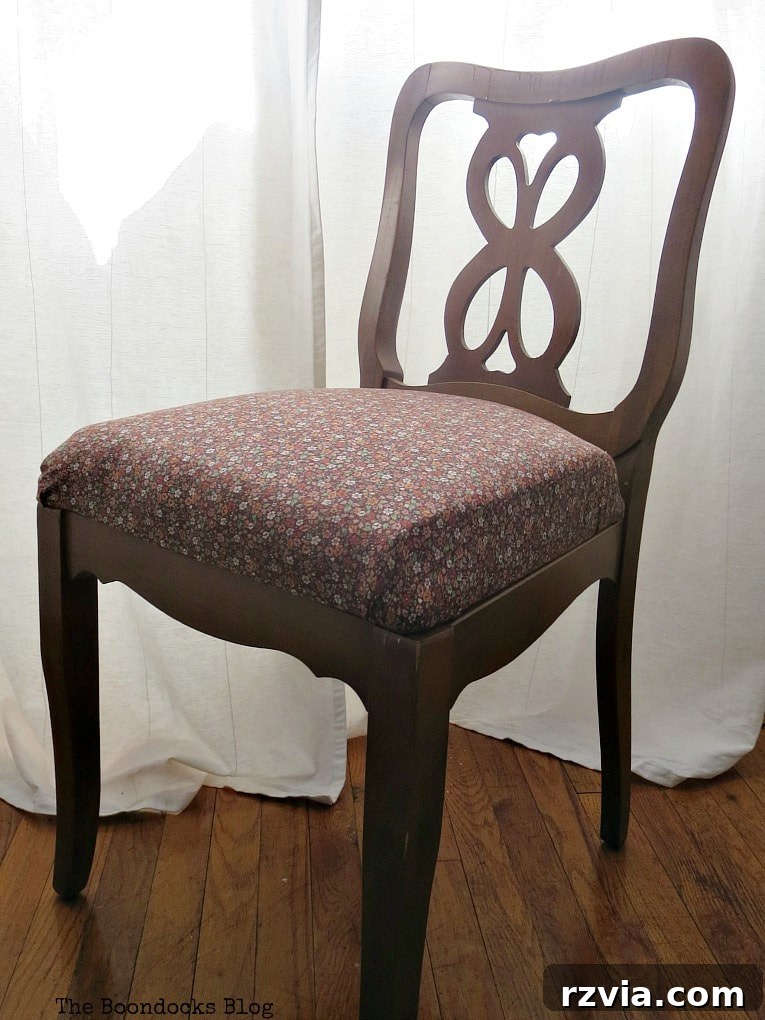
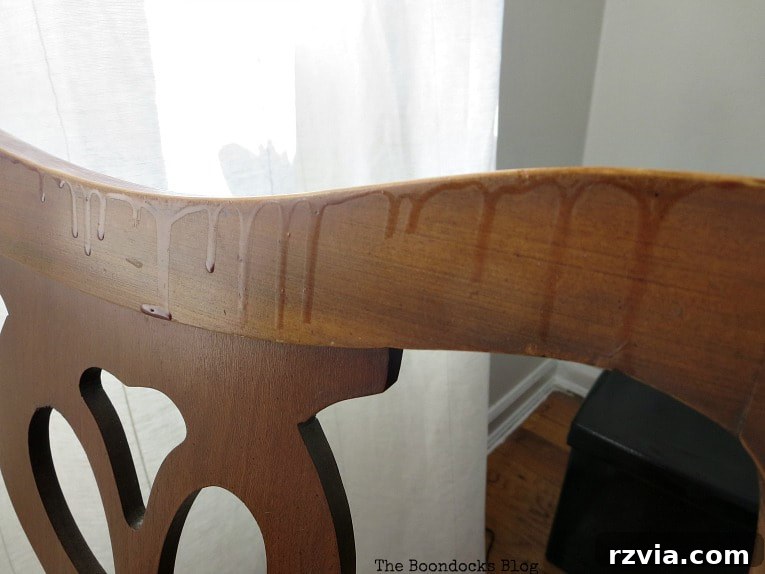
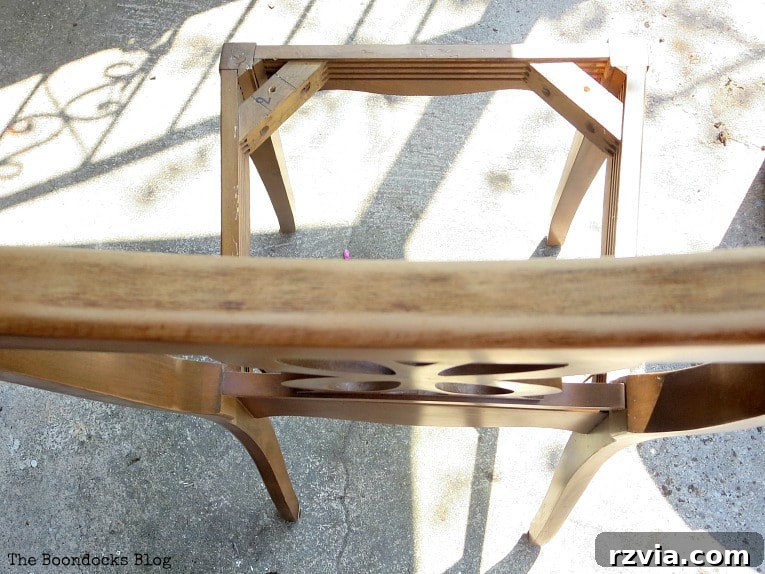
While the chairs might have appeared passable at first glance in the initial photograph, a closer inspection quickly revealed their true condition. Years of neglect had left their mark, most notably in the form of dried, uneven stain drips that marred the wooden frames. These unsightly imperfections were a testament to a previous, perhaps hurried, finishing attempt long ago, and they certainly needed to be addressed for any successful transformation.
Beyond the surface imperfections, the existing cushions presented another significant challenge. I had added them myself a few years prior, intending to enhance comfort, but they proved to be far too high and surprisingly uncomfortable. This meant my project scope expanded beyond just refreshing the wood. I had my work cut out for me: meticulously revitalizing the wooden skeleton of each chair and completely overhauling the seating by removing the excessive foam that made them so impractical. The goal was not just a cosmetic change, but a functional and comfortable upgrade.
Disclosure: This post contains affiliate links for your shopping convenience. If you purchase any of these products through the links, we receive a small commission at no extra charge to you. You can find our full disclosure here.
Essential Tools and Materials for Your Chair Makeover Project
Embarking on a furniture transformation project, whether it’s a simple refresh or a complete overhaul, requires the right tools and materials to ensure a smooth process and a beautiful finish. For these chair makeovers, I carefully selected items that would help achieve both the modern white look and the rustic wood aesthetic. Here’s a comprehensive list of what I used:
- Power Sander: An orbital or finishing sander is indispensable for quickly and efficiently smoothing surfaces and removing old finishes.
- Sandpaper: A variety of grits (coarse to fine) for initial stripping, smoothing, and final preparation.
- Decoart Americana Chalky Type paint in Everlasting: My choice for a smooth, matte finish that requires minimal prep work.
- Decoart Creme Wax in Clear: Essential for sealing and protecting chalk-painted surfaces, giving them durability.
- Hope’s Tung Oil: For enhancing and protecting the natural beauty of wood, creating a durable and water-resistant finish.
- Pieces of Fabric for the upholstery: I repurposed an old sweatshirt and used a fresh linen fabric for different looks.
- Staple gun: A heavy-duty staple gun is crucial for securing upholstery fabric tightly.
- Rags for wax and for the oil: Clean, lint-free cloths are necessary for applying finishes evenly and wiping off excess.
The DIY Chair Makeover Process: From Basement Find to Stunning Statement Pieces
The journey to transform these chairs began with a critical first step: addressing those stubborn, dried stain drips that plagued the wooden frames. My power sander became my best friend here, diligently working to smooth out these imperfections until the surface was perfectly clean and even. Once the initial preparation was complete, I began the exciting process of painting the entire chair with the chalky finish paint. This type of paint is a dream for DIY enthusiasts, as it adheres beautifully to most surfaces with minimal preparation, truly forgiving of minor flaws and eliminating the need for extensive pre-sanding. Three generous coats were applied to fully cover the original dark wood, achieving a pristine, opaque finish. One of the greatest advantages of chalky paint is its incredibly fast drying time; each coat was touch-dry within about 10 minutes, allowing the project to progress swiftly without wasting precious time waiting. To ensure the chair would withstand daily use and maintain its beautiful finish, I then applied a protective layer of clear wax. This not only seals the paint but also provides a soft, durable sheen that is easy to clean. All the specific products I utilized are conveniently listed earlier in this post for your reference.
Speaking of sanding, you might be wondering if I had to sand the entire chair down to bare wood. The answer, thankfully, is a resounding no! That would have added days to the project, and frankly, who has the time or patience for that? This is precisely where the magic of chalky paint truly shines. Its remarkable adherence and forgiving nature mean that extensive, arduous sanding is simply not required for a successful application. This characteristic makes chalk paint an absolute game-changer for anyone looking to quickly and effectively update furniture without the daunting task of full stripping and sanding. Once the beautiful white finish was achieved, I diligently applied a protective wax coat. This step is non-negotiable for chalk-painted pieces, as the wax cures to form a durable barrier against wear and tear, ensuring that the fresh, new look lasts for years to come. You can find all the specific products I enthusiastically recommend and used listed at the beginning of this detailed guide.
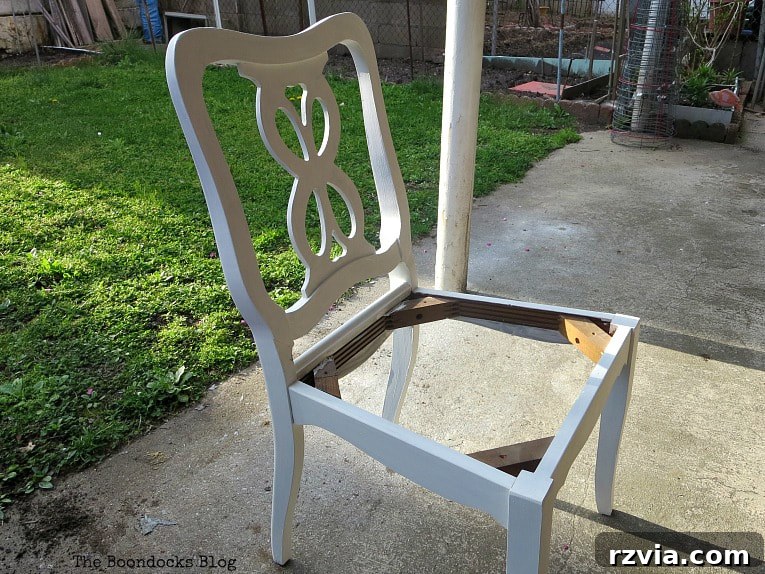
Chair Makeover 1: Modern White Charm for the Girls’ Room
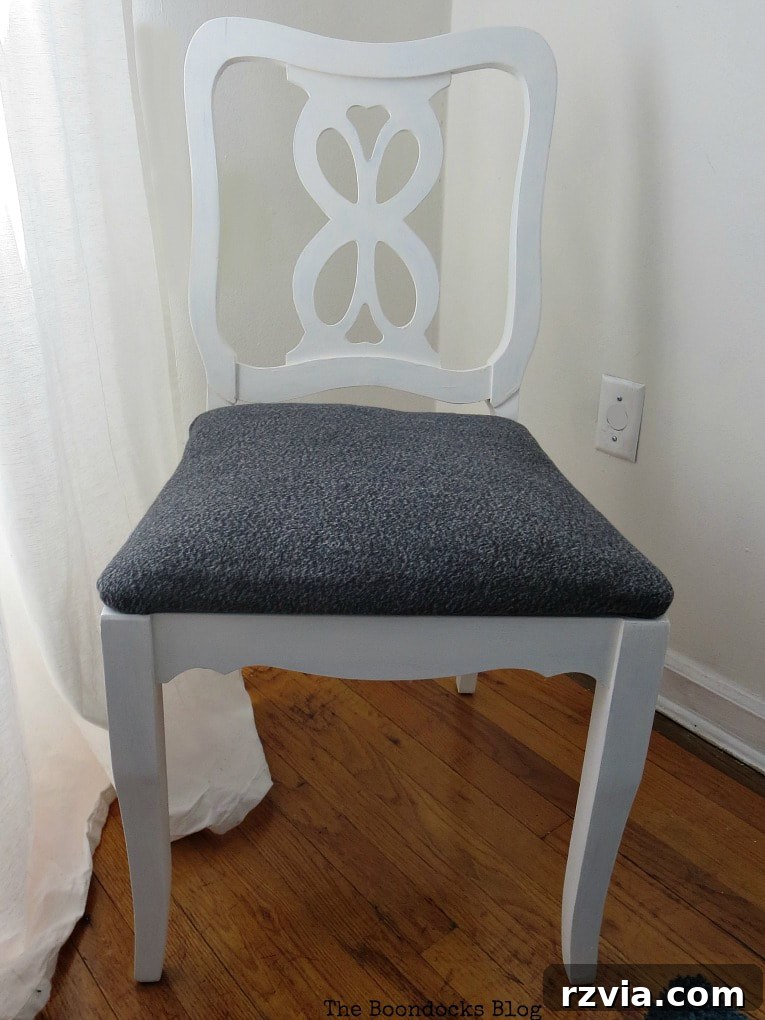
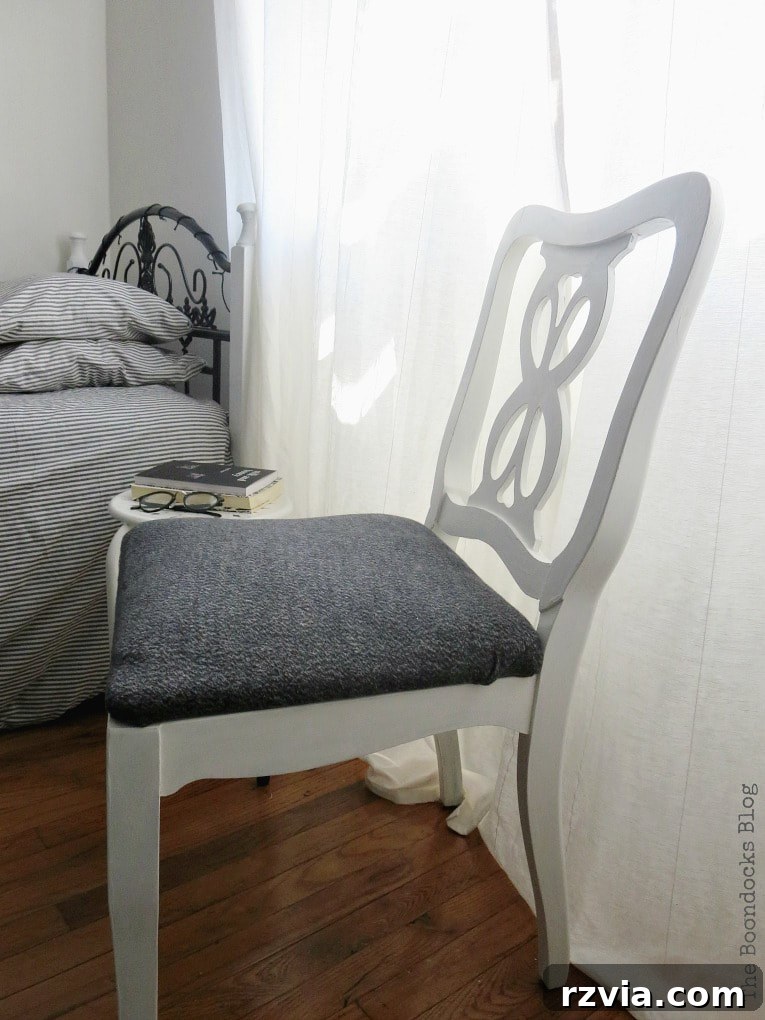
With the frame flawlessly painted, it was time to address the seating for the first chair. The old foam, which I had added years ago and had made the chair so uncomfortably high, was meticulously removed. This allowed me to start fresh, adding only a thin layer of batting. This subtle change drastically improved the comfort and proportions of the seat, making it much more suitable for a desk chair. And in true thrifty fashion, I even sourced the upholstery fabric from an old sweatshirt! This is a fantastic way to save money and give old clothing a new purpose, contributing to a more sustainable approach to home decor. Although I won’t dive into the full details of reupholstering a chair seat here, I highly recommend checking out this incredibly helpful tutorial on how to reupholster a chair over on Sustain My Craft Habit. For my particular project, I found that I didn’t need to remove the deeper, original layers of stuffing, focusing instead on optimizing the top layer for comfort and appearance. The result is Chair No. 1: simple, chic, and perfectly aligned with the black and white theme of my girls’ bedroom, offering a modern and comfortable seating solution.
Chair Makeover 2: Rustic Wood Elegance with a Distressed Finish
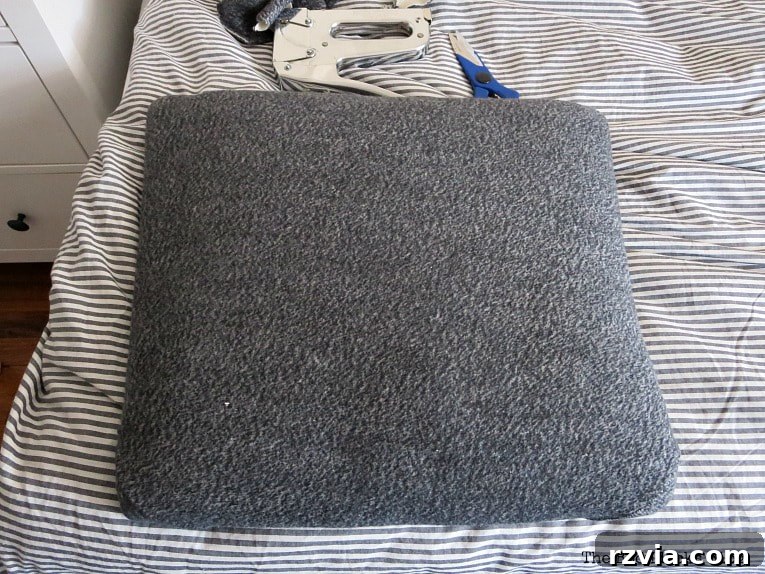
For the second chair, I envisioned a completely different aesthetic, one that would complement a bedroom featuring warmer, natural wood tones. Instead of painting, my goal was to celebrate the inherent beauty of the wood, albeit with a few thoughtful modifications. While searching for fabric for the first chair, I serendipitously came across a soft grey cotton t-shirt. Always one to embrace innovative and thrifty solutions, I decided to experiment by simply stuffing the chair seat cushion directly into the t-shirt, hoping for an instant cover.
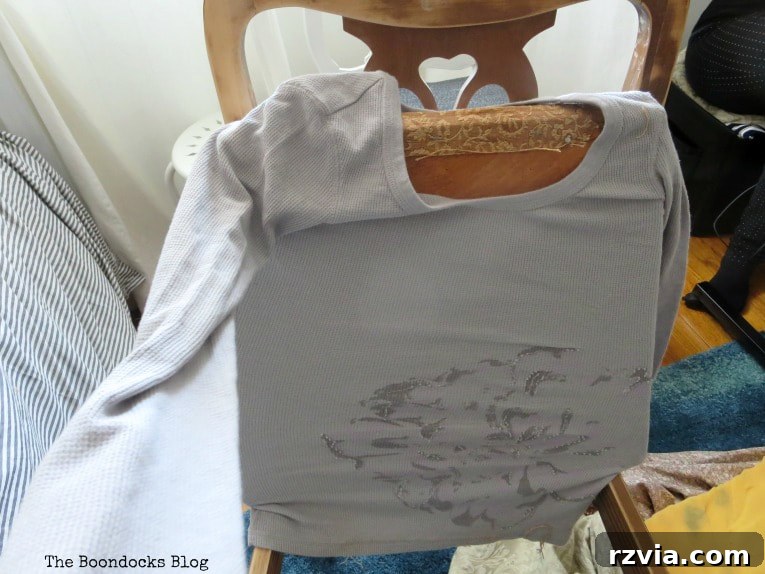
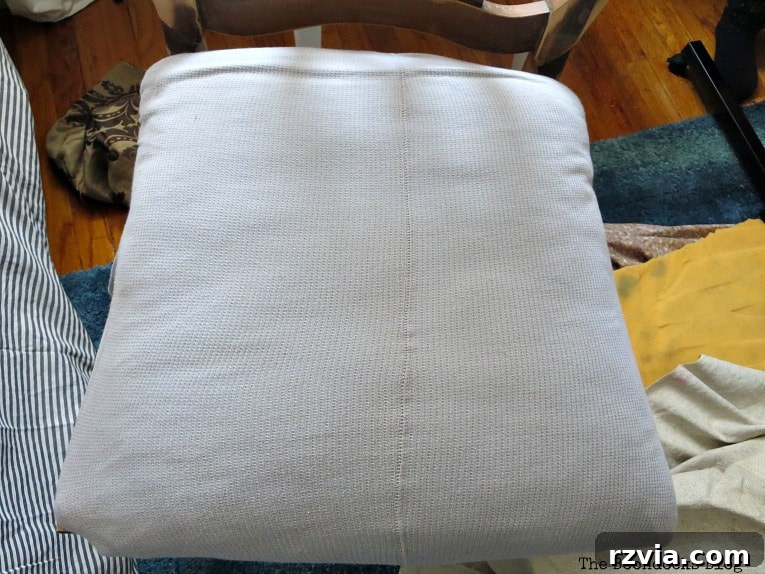
My initial idea of using the t-shirt as a direct cover was almost successful! If it hadn’t been for that visible seam at the back, I might have gotten away with it, simply tucking the sleeves neatly underneath. Unfortunately, the seam created an undesirable look that I wasn’t happy with, so I pivoted. Instead, I opted for a beautiful linen fabric to cover the cushion, which offered a more polished and enduring finish while still maintaining a natural, understated elegance. This experience taught me that sometimes, even the most creative shortcuts need a Plan B, and investing in the right material can make all the difference to the final aesthetic. Even when you start with a thrifty idea, being flexible and willing to adjust your plan can lead to an even better outcome.
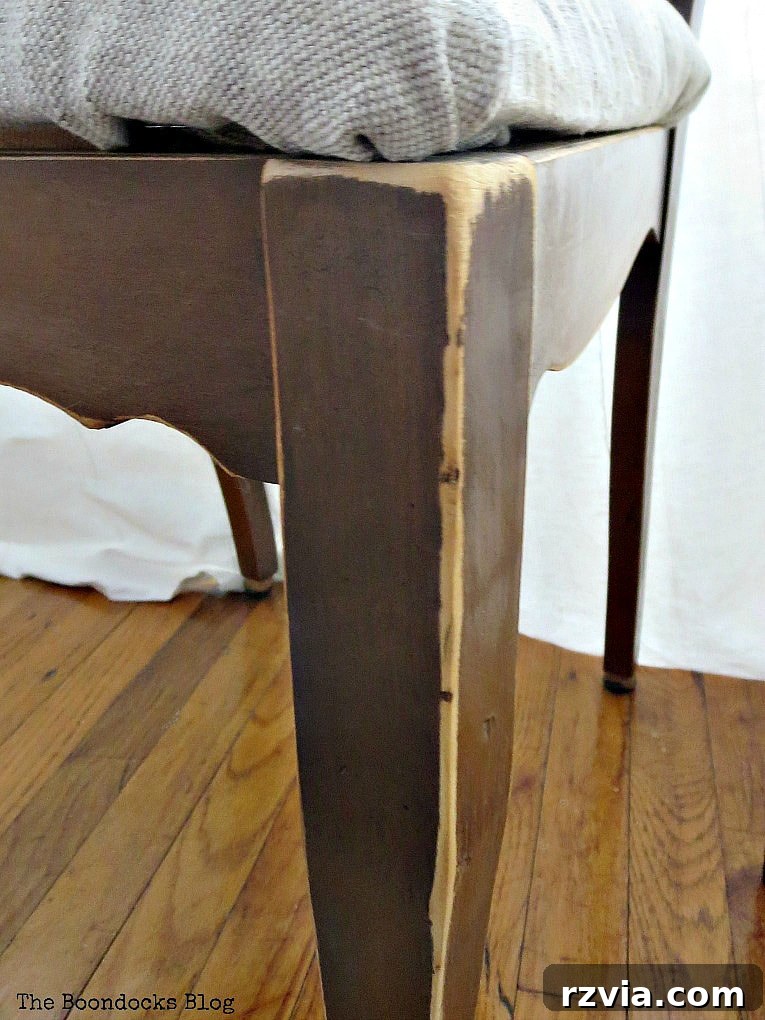
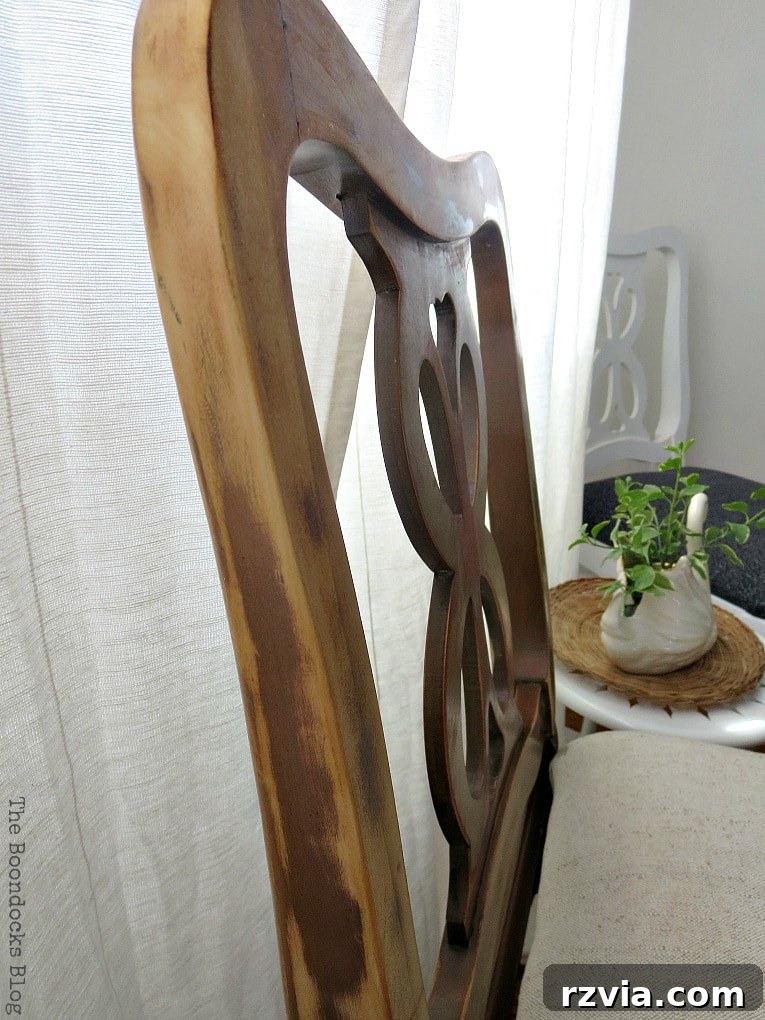
As I mentioned, Chair No. 2 demanded a distinct approach. My vision was to let the natural wood grain truly shine through, embracing its character rather than concealing it. To achieve this, I employed a technique of selective sanding. I heavily sanded certain areas to reveal the lighter wood beneath the dark, aged stain, while intentionally leaving other sections less touched. This “distressing” process wasn’t governed by a strict method; rather, it was an intuitive effort to remove a significant portion of the dark finish and impart an authentically aged, rustic feel. The aim was to create a sense of history and warmth, allowing the natural imperfections and textures of the wood to become part of the chair’s charm. After achieving the desired distressed look, I moved on to applying Tung Oil. Using a clean rag, I meticulously rubbed the oil into the wood, allowing it to penetrate and nourish the fibers, before gently wiping off any excess. Tung Oil is fantastic for bringing out the natural beauty of wood, offering a rich, durable, and moisture-resistant finish. I’ve previously used this technique to great effect on my Mid-Century cabinet, so I knew it would provide the perfect finishing touch for this rustic transformation.
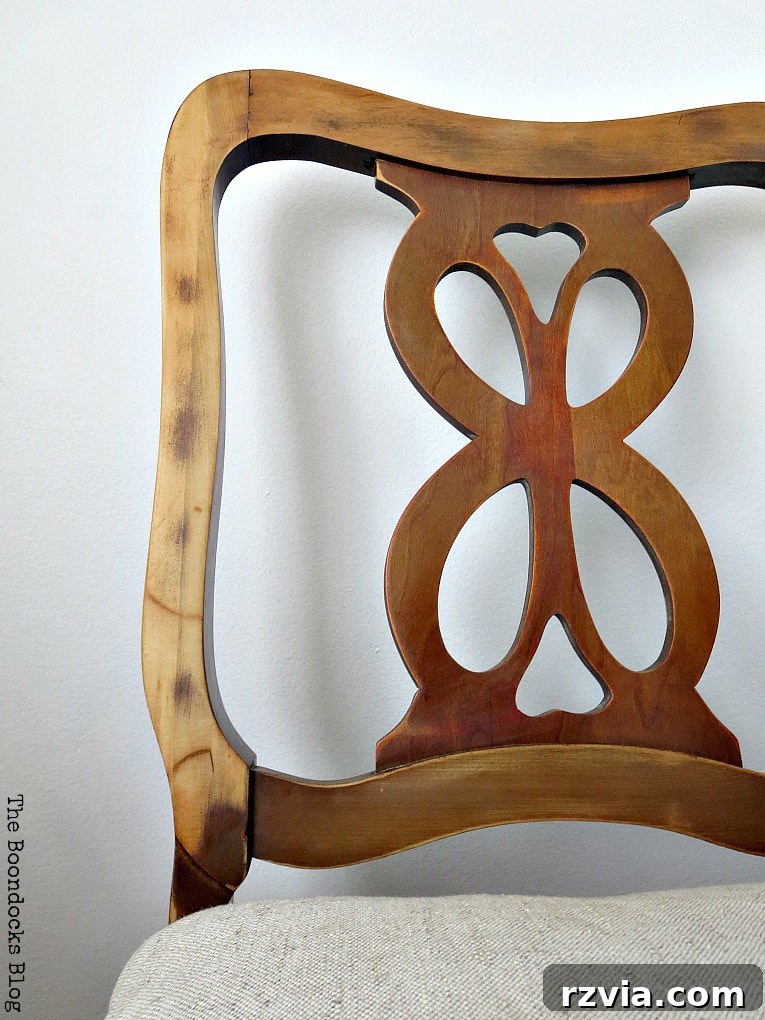
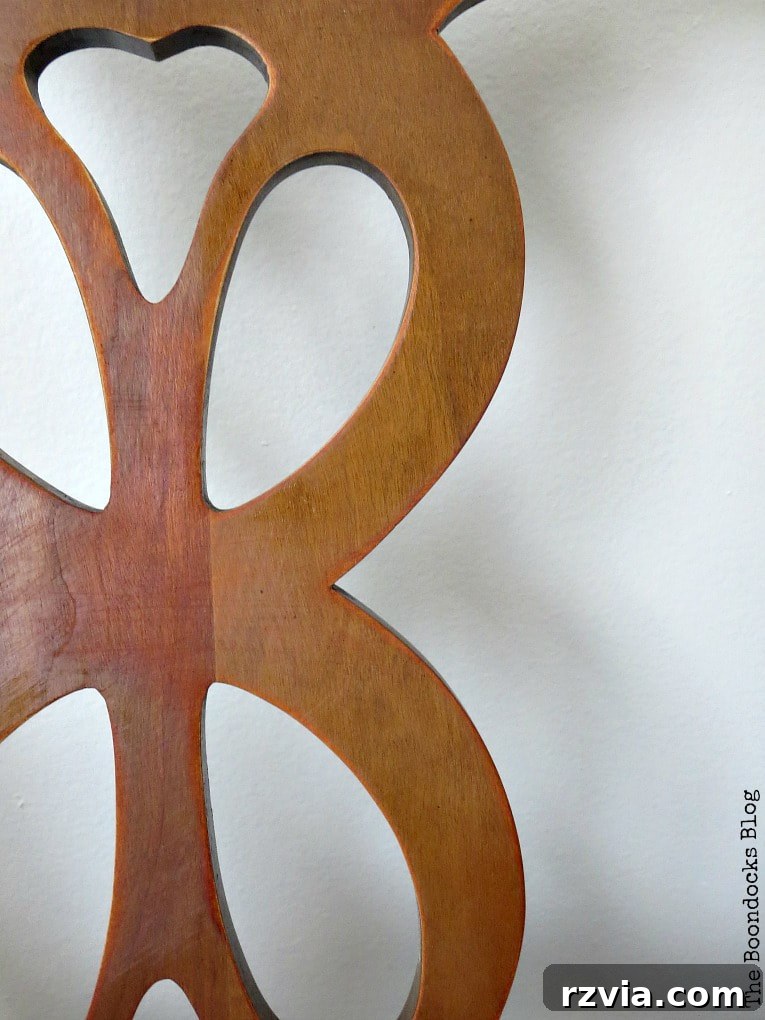
An interesting discovery during this process involved the central piece of the chair’s backrest. It appeared to be crafted from a different type of wood than the outer frame, as it proved considerably more resistant to distressing. While the outer frame beautifully transformed into a sweet, warm honey color with the application of Tung Oil, this central piece developed a more orangey finish. This experience served as a valuable reminder that sometimes, the furniture itself dictates its destiny. You have to adapt your plans and follow the natural characteristics of the material rather than forcing a preconceived outcome. Embracing these natural variations can lead to truly unique and charming results, proving that the most beautiful transformations often arise from working with the wood, not against it.
To further enhance the rustic appeal of Chair No. 2, I also applied random distressing to the legs. This seemingly small detail adds to the overall character, making the chair feel more authentically aged and loved. And on a more candid note, it’s funny how sometimes you don’t notice the little things until you see them captured in photographs. Looking at the pictures, it seems I’ll need to tighten the screws on that seat! It’s all part of the real-life DIY process, folks – always a learning curve and often a quick adjustment needed here and there. Keeping it real means acknowledging that not every step is perfect the first time, and minor tweaks are a normal part of finishing any project.
Two Chairs, Two Distinct Styles, One Shared Origin
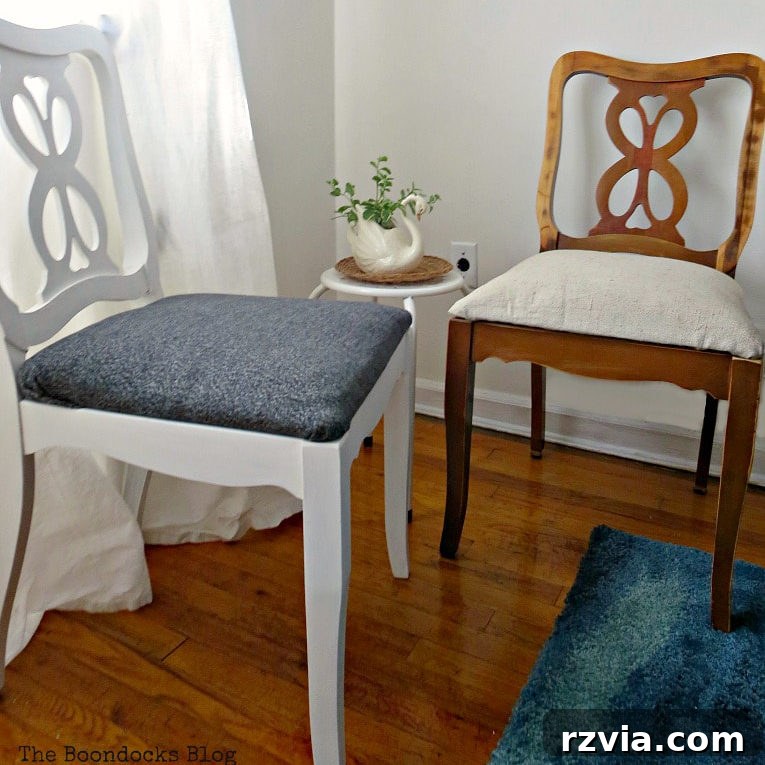
And here they are, both chairs standing proudly, each a testament to the transformative power of DIY. It’s truly remarkable how two pieces, originating from the very same style of chair, can emerge with such utterly distinct personalities. This project vividly demonstrates that with a clear vision and a touch of creativity, you can achieve vastly different looks from identical starting points, tailoring each piece to perfectly suit its intended space and aesthetic.
By a delightful coincidence, my friend Christina from Art, Decoration and Crafting also embarked on a similar journey around the same time, transforming two French cane chairs into two beautifully distinct styles. She lives across the world in Greece, and I often joke with her that we must be creative twins separated by continents! It’s incredible how two individuals, even if they had been neighbors, could independently conceive such parallel and unique projects, further emphasizing the boundless possibilities within the world of furniture upcycling.
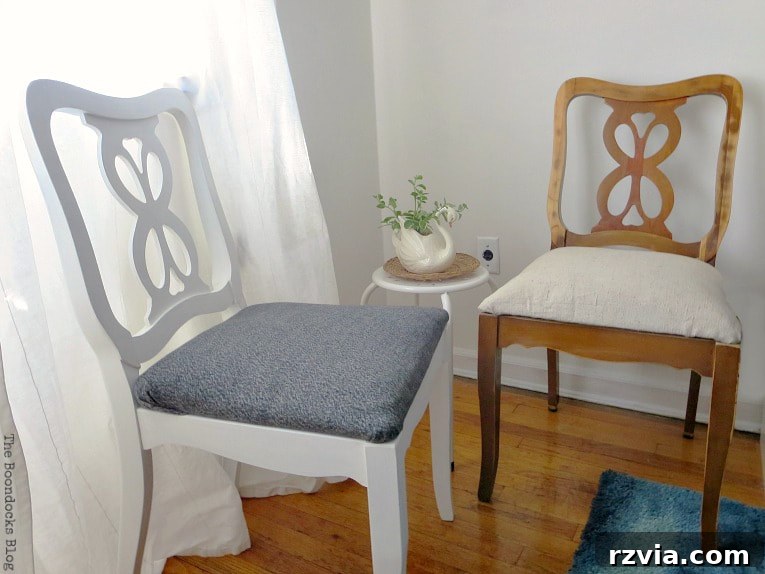
Reflecting on the final results, I believe that using solid-colored fabric for the upholstery truly allows the graceful curves and intricate details of the chair frames to take center stage. Previously, with patterned fabric, the frame often had to compete for visual attention, resulting in a somewhat cluttered or busy appearance. By opting for solid hues, the beautiful design of the wooden frames now gets to shine unimpeded, offering an elegance that feels both modern and timeless. This deliberate choice highlights the architectural beauty of the chairs, letting their inherent form be the star of the show.
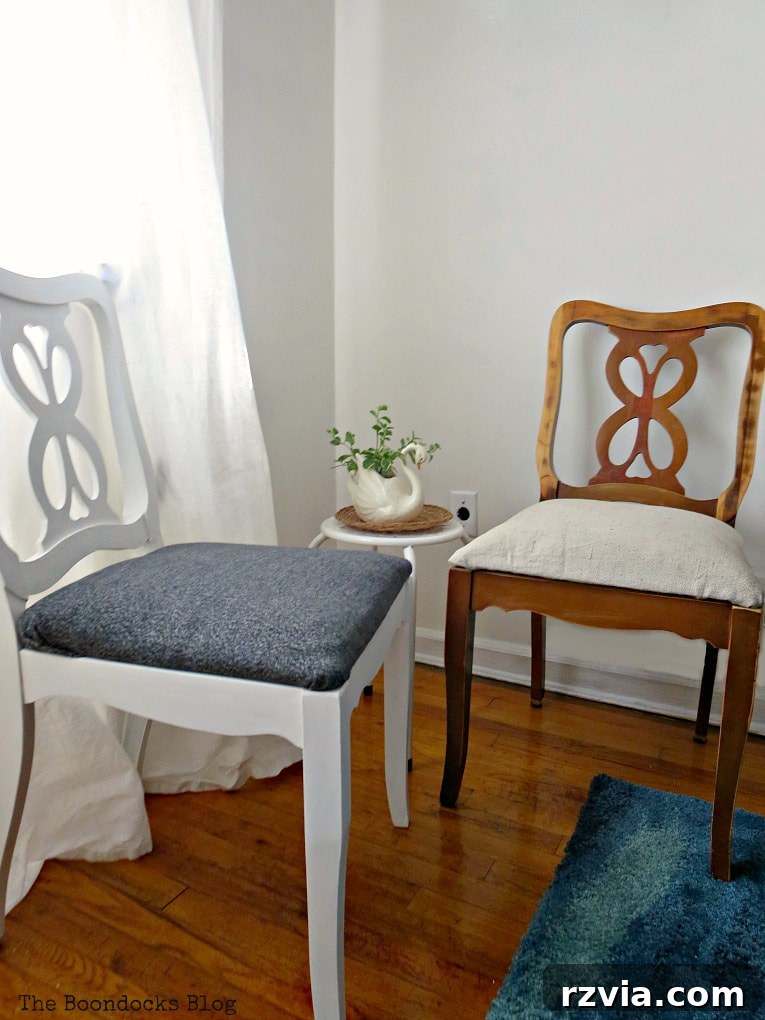
My daughter can now comfortably sit at her computer desk without sinking to the ground, a definite win for ergonomics and productivity! The white chair, with its fresh, modern finish, blends seamlessly with the rest of her black and white bedroom decor. It contributes to a cohesive and stylish aesthetic, proving that practical pieces can also be beautiful. The transformation truly gives the room an updated, contemporary feel, elevating its overall design.
This project ultimately reinforced a crucial lesson in home decor and DIY: sometimes, you simply have to let the room dictate the style, as was the case with the crisp white chair complementing the black and white bedroom. Other times, you need to listen to the furniture itself, allowing the natural characteristics of the wood to guide your design choices and tell you how it truly wants to look. This flexibility and responsiveness are precisely how I achieved two truly unique and successful makeovers from one humble set of chairs. My daughter is absolutely delighted with her comfortable new seat, and for that, I am truly grateful. Now, I’m curious to know: which of these two distinct chair makeovers do you find most appealing? Share your thoughts!