
Transform Your Laundry Room: A Stylish DIY Guide to Hiding Your Washing Machine
Have you ever looked at your washing machine, standing proudly in what’s meant to be a cozy family space, and wished it could just… disappear? Many of us face the common dilemma of an appliance that’s essential but an undeniable eyesore, especially when our homes feature multi-functional rooms. Today, I want to take you back to a project I undertook a while ago – a simple yet incredibly effective solution to disguise my washing machine in a combined laundry and family room. This medium-sized room, despite its practical purpose, still needed to feel welcoming and aesthetically pleasing. Since relocating the washing machine was simply not an option without major structural changes, my mission was clear: hide it in plain sight. Here’s a detailed look at how I achieved this seamless integration, transforming an industrial necessity into a harmonious part of my home decor.
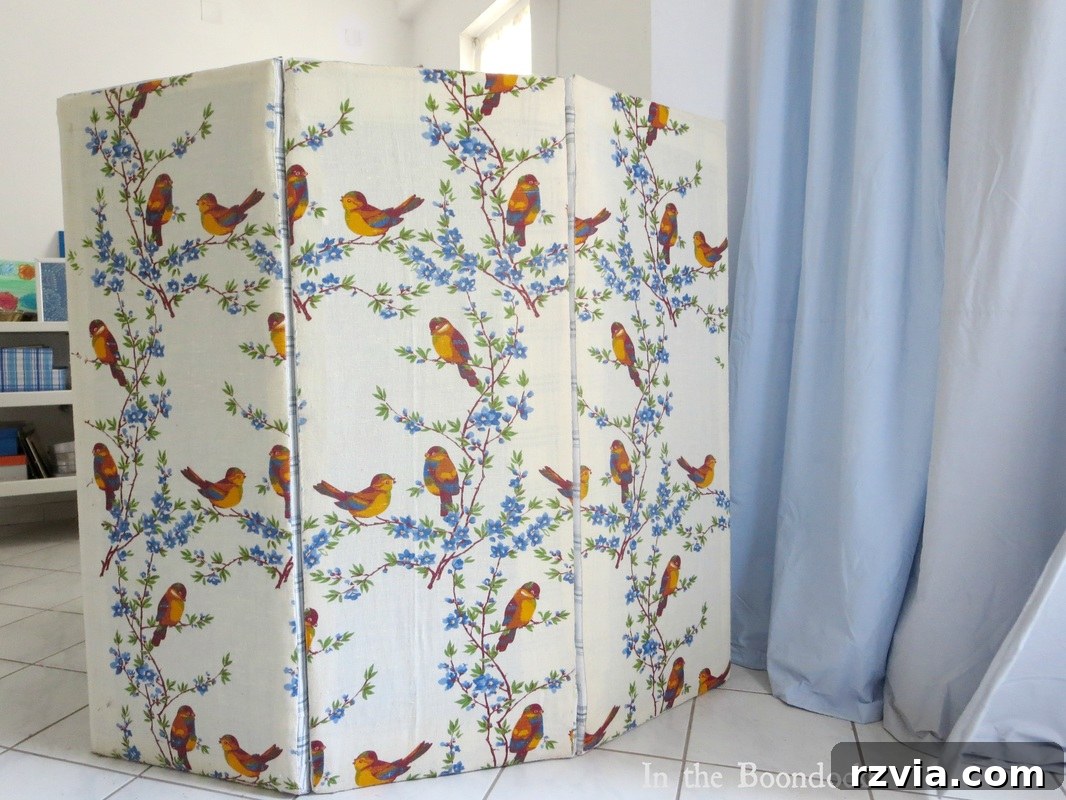
The Unveiling: What Was Hiding Behind the Partition
Before diving into the “how-to,” let’s reveal the “what.” This partition isn’t just a decorative element; it’s a clever concealment for a necessary appliance. The image below shows exactly what was (and still is) tucked away behind the custom-made screen, highlighting the stark contrast between the exposed machine and the integrated solution.
Crafting the Concealment: A DIY Fabric Screen
My solution involved a custom-built, folding screen partition. With a little help from my wonderful husband, we constructed a simple yet elegant divider that perfectly blended into the room’s aesthetic. The core of this project lies in its simplicity and versatility. Essentially, it consists of three individual pieces of laminate board, each transformed into a padded, fabric-covered panel, and then joined together with hinges to create a folding screen. This design allows for easy movement and access to the washing machine whenever needed, without compromising on style.
Materials You’ll Need for Your DIY Partition:
- **Laminate Boards:** Three panels of suitable size (or plywood/MDF as an alternative). Choose a thickness that offers stability without being too heavy.
- **Batting:** A generous amount of quilt batting or similar padding material. This adds softness and a professional, upholstered look.
- **Fabric:** Two different coordinating fabrics. One for the front (visible side) and one for the back (side facing the washing machine). Choose patterns and colors that complement your room’s decor.
- **Strong Adhesive:** Spray adhesive or fabric glue for attaching the batting and fabric securely to the boards.
- **Hinges:** Several small, sturdy hinges to connect the three panels, allowing them to fold smoothly.
- **Staple Gun (optional but recommended):** For an extra secure fabric attachment, especially around the edges.
- **Basic Tools:** Measuring tape, utility knife or saw (for cutting boards if needed), scissors, screwdriver for hinges.
Step-by-Step Construction Guide:
-
Prepare Your Boards:
Begin by cutting your laminate boards to the precise dimensions needed to cover your washing machine and the surrounding area. Measure the width and height carefully, ensuring the three panels, when unfolded, completely conceal the machine. Remember to account for the slight gap created by the hinges. If using pre-cut panels, simply ensure they are clean and free of debris.
-
Apply the Batting:
Lay each board flat. Unroll your batting and cut it to slightly larger dimensions than your boards. Apply a strong adhesive to one side of each laminate board. Carefully place the batting onto the adhesive, smoothing out any wrinkles or air bubbles. Wrap the excess batting around the edges and secure it to the back using either more adhesive or a staple gun. This layer adds a plush feel and helps to soften the appearance of the screen.

-
Cover with Fabric:
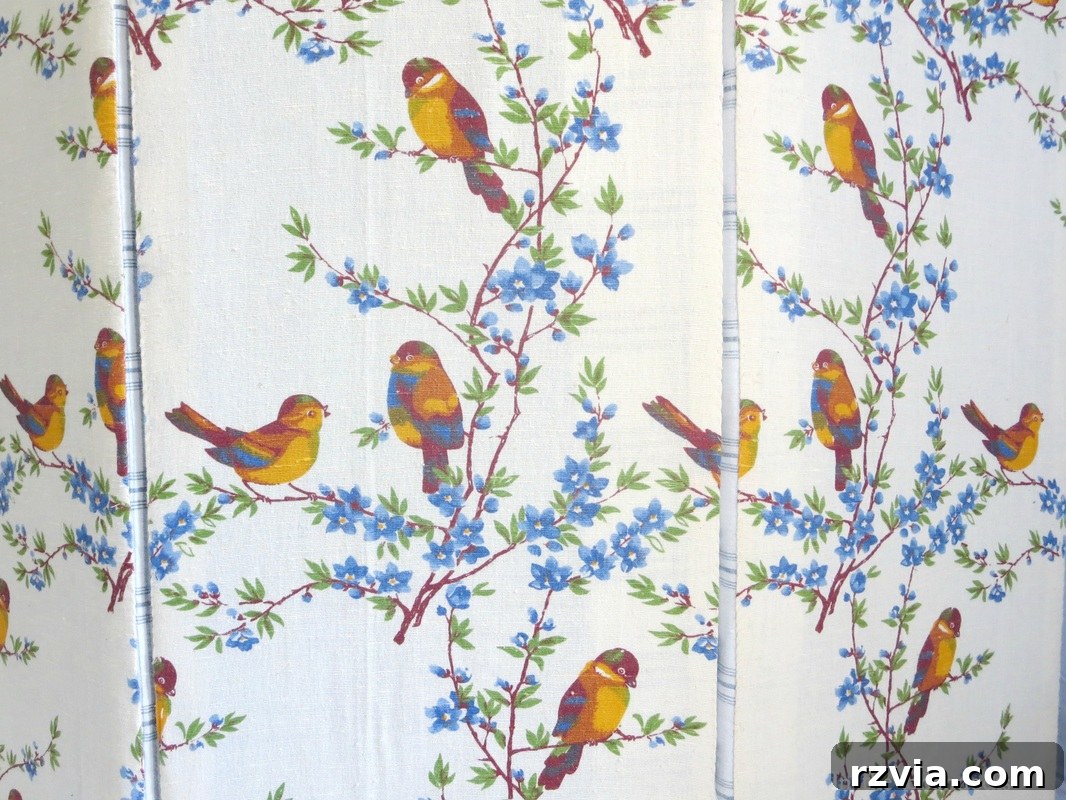
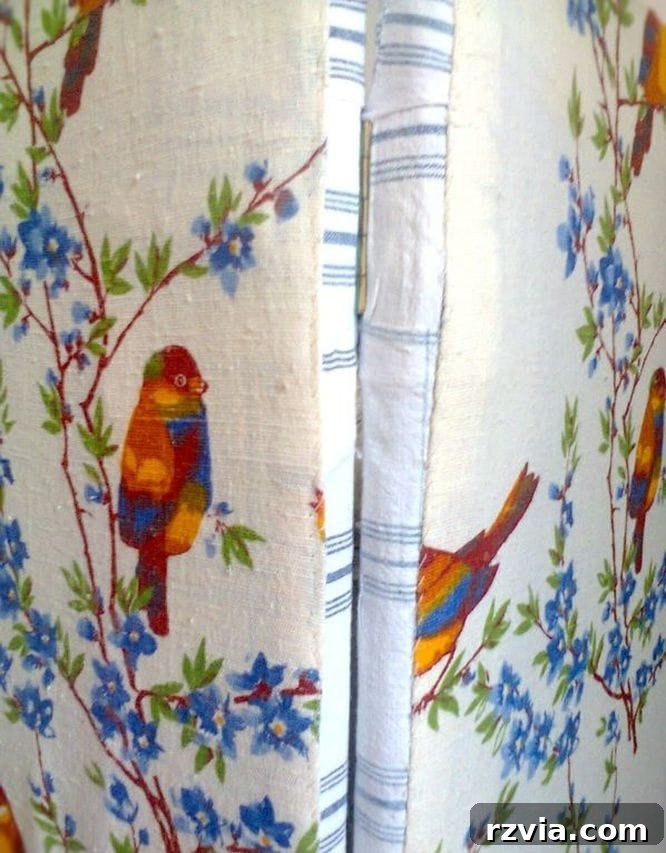
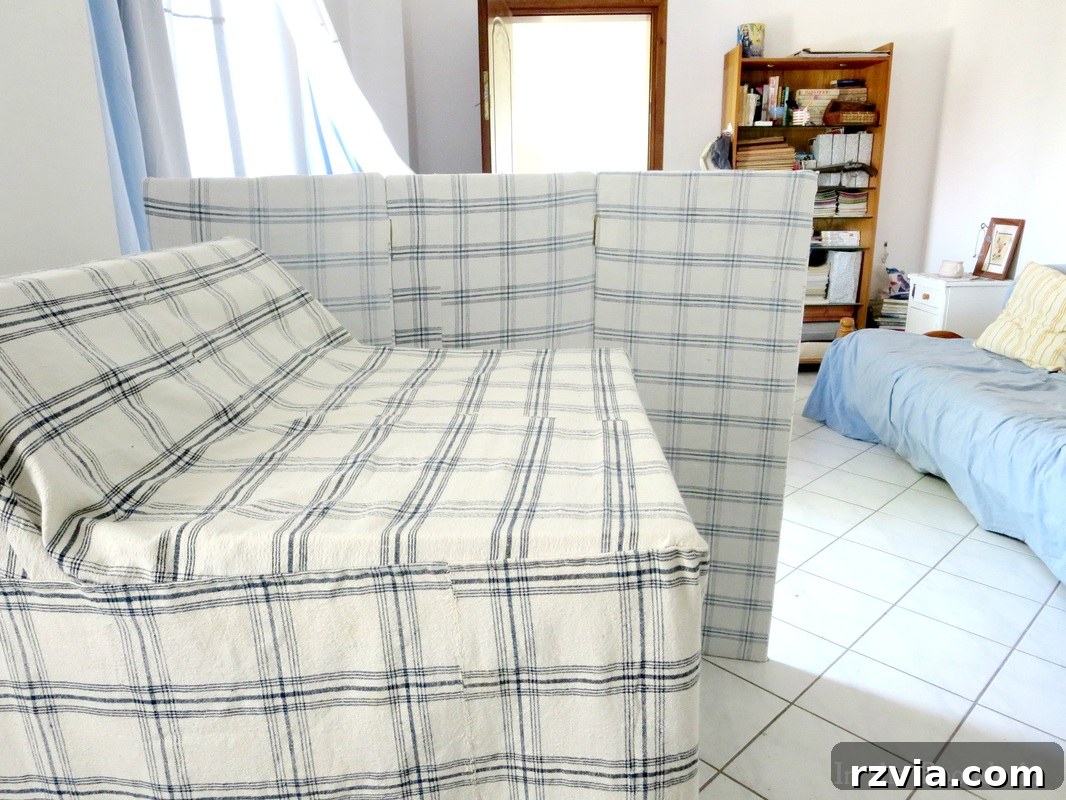
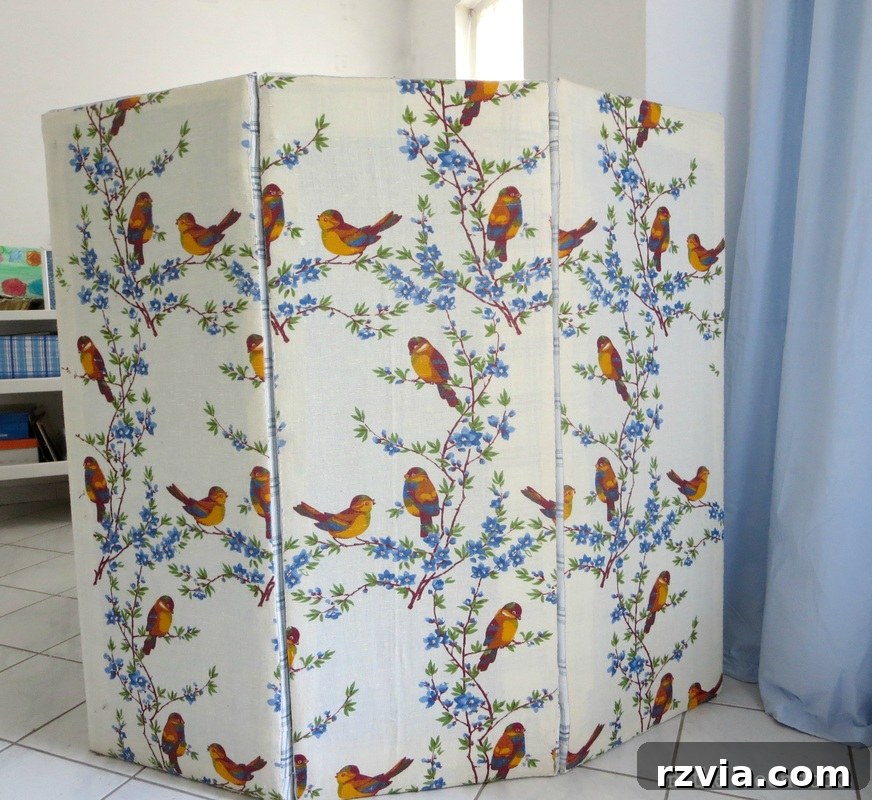
Now for the fun part – choosing and applying your fabric! For the visible side of the partition, I selected a lovely bird-patterned fabric that added character to the room. For the backside, which would face the washing machine, I opted for a more neutral, plaid fabric to create a cohesive look with other elements in the room (more on that later). Cut your chosen fabrics, ensuring enough overhang to wrap around the edges of the boards. Apply adhesive over the batting, then carefully lay the fabric on top, stretching it taut to avoid wrinkles. Smooth it out thoroughly. Wrap the excess fabric around to the back of the board and secure it firmly with adhesive or staples. Pay extra attention to the corners for a neat, tailored finish.
-
Attach the Hinges:
Once all three panels are covered, it’s time to connect them. Lay two panels side-by-side on a flat surface, ensuring the edges are perfectly aligned. Position your hinges along the seam where the panels meet. I used several hinges per seam to ensure stability and smooth folding. Mark the screw holes, pre-drill if necessary (especially with laminate to prevent splitting), and then screw the hinges into place. Repeat this process for the third panel, connecting it to the second. Test the folding mechanism to ensure it operates smoothly. The result should be a sturdy, freestanding screen that can be easily folded and unfolded.
Before & After: A Dramatic Transformation
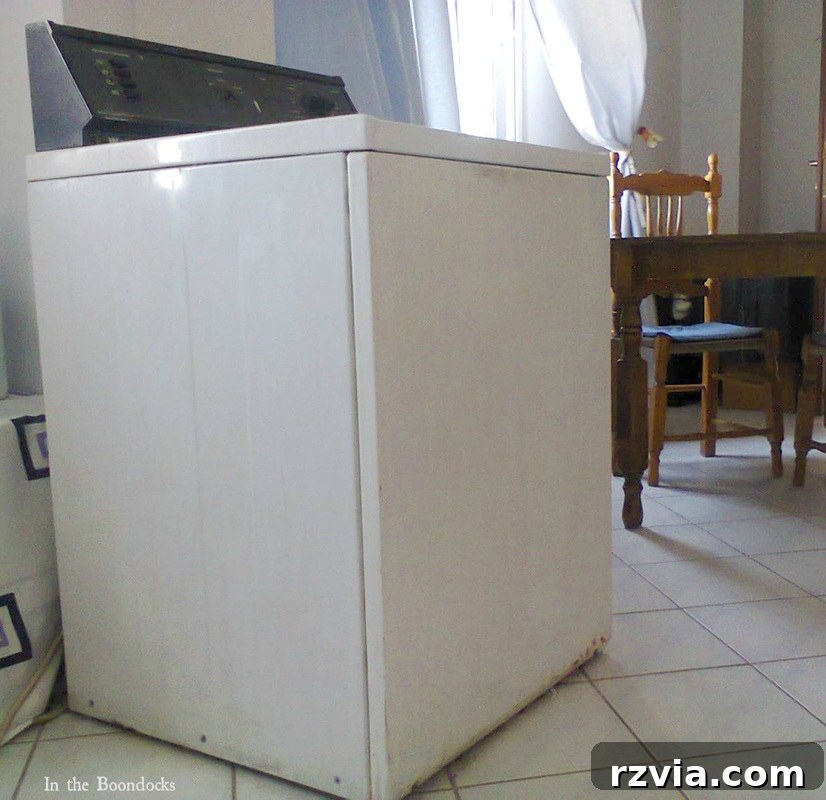
To truly appreciate the impact of this DIY project, let’s revisit how the space looked before the partition was introduced. The washing machine, while functional, dominated the room and disrupted the flow of the family area. It was the proverbial “elephant in the room,” screaming “laundry” in a space meant for relaxation and daily life. The “before” image starkly illustrates this contrast, underscoring the necessity and effectiveness of the partition.
And here it is, after the transformation! The washing machine is now completely concealed behind the stylish folding screen. But the disguise doesn’t stop there…
Seamless Integration: Beyond the Partition
To ensure a completely harmonious look, I extended the fabric theme beyond just the partition. I used the same plaid fabric that adorned the backside of the partition to create a custom cover for the washing machine itself. This thoughtful detail ensures that even if a glimpse of the machine were caught from a certain angle, it would still blend in beautifully with the overall decor, tying all the elements together. This creates a cohesive and well-thought-out design, truly making the washing machine disappear into its surroundings.
Furthermore, to enhance functionality and maintain the aesthetic, I also covered a small stool in the same coordinating fabric. This stool serves a dual purpose: it can be used as a convenient surface to place the laundry basket while working, or simply as an additional decorative element when not in use. These small details collectively elevate the entire space, proving that practicality and beauty can indeed coexist.
The Practicality of This DIY Washing Machine Cover
One of the greatest advantages of this solution is its sheer practicality. When it’s time to do laundry, I simply remove the fabric cover from the machine and fold back the screen partition. It provides easy access to the controls and loading drum without any hassle. Once the task is done, the cover goes back on, the screen is closed, and the room instantly reverts to its neat and tidy state. This simple, flexible system has made living with a washing machine in a shared space incredibly convenient and visually appealing.
Final Thoughts: A Creative Solution for Everyday Home Challenges
This project was my creative answer to the “elephant in the room” – or rather, the washing machine that felt just as imposing. It’s a testament to how simple DIY projects can significantly improve the functionality and aesthetics of our living spaces without requiring extensive renovations or a large budget. If you find yourself grappling with an unsightly appliance in a prominent area of your home, I highly encourage you to consider a similar approach. Not only is it a cost-effective solution, but it also allows for immense customization, letting your personal style shine through. If you’re interested in attempting a project like this and need more guidance, feel free to reach out, and I can direct you to the resources and tutorials that inspired my own journey.
If you’re inspired by this transformation, please consider sharing it with your friends or saving it to your Pinterest boards. The image below is perfectly sized for pinning!
For more home decor ideas, DIY projects, and creative solutions, I invite you to subscribe to my blog. You’ll receive fresh content twice a week directly in your inbox. The subscription form is conveniently located on the sidebar, and rest assured, your email address will always remain confidential and will never be shared with any third party.
Other Fabric-Inspired Posts You Might Enjoy:
<< Zeus’s Wrath HOME The Hanging Corner >>
This blog is for entertainment purposes only; my DIY tutorials are not professional advice. Read my full disclaimer here.
I love reading your comments and I will do my best to reply to them or visit your blog. Please do not add a hyperlink to your comment, otherwise, it may not be published.