
Transforming Dated Frames: Banishing the Shine for a Shabby Chic Look
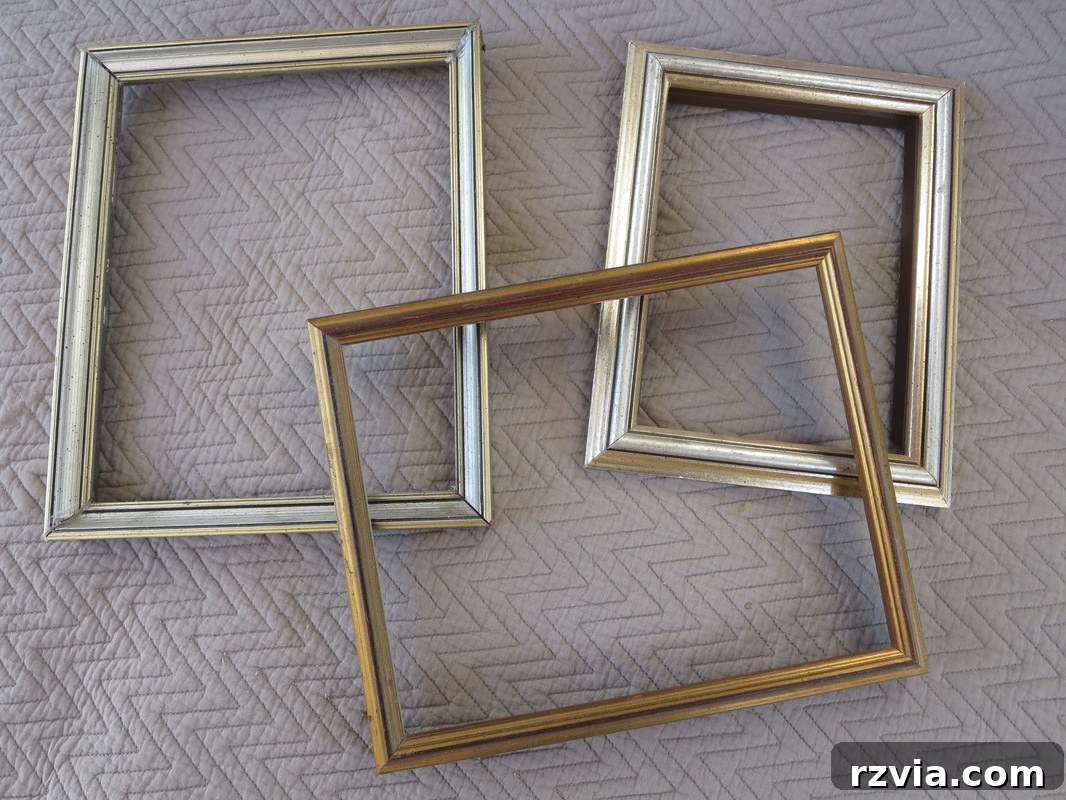
A dear blogger friend once wisely commented on my recent frame project that we, as creative spirits and DIY enthusiasts, are simply incapable of leaving anything shiny and untouched alone. And to wholeheartedly prove her point, I recently embarked on a delightful journey to revitalize a trio of picture frames that had been part of my life for decades. These weren’t just any frames; they were a collection acquired at different junctures, unified by their original gold and silver metallic finishes on wood. For years, they proudly displayed precious memories of my children as babies, serving their purpose beautifully. However, after more than twenty years, their once-gleaming facade felt dated and out of sync with my evolving home aesthetic. It was time for a change, a significant refresh – it was time to finally banish that persistent shine.
The Inspiration Behind the Makeover: From Glimmer to Grace
Like many cherished household items, these frames held immense sentimental value. They were silent witnesses to countless milestones and tender moments captured in photographs. But while the memories they held remained timeless, their exterior had certainly seen better days. The metallic sheen, once fashionable and perhaps quite grand, now felt heavy and a little too ostentatious for the relaxed, comfortable ambiance I desired in my home. My vision was not to discard them, but rather to infuse them with new life, transforming them into pieces that felt fresh, personal, and perfectly aligned with a more contemporary, yet still classic, decor style.
I envisioned a soft, aged look – something that whispered stories rather than loudly demanding attention. This project wasn’t merely about applying a new coat of paint; it was about the art of repurposing, the joy of upcycling, and the creation of a cohesive visual narrative for a beloved collection of photographs. The goal was to give these frames a character that celebrated their history while firmly anchoring them in the present, reflecting a more serene and intentional aesthetic. This makeover promised to be more than just a cosmetic change; it was a revival, giving these cherished items a second, equally beautiful, act.
Preparation and the First Layer of Transformation: A Subtle Foundation
With the decision made and the vision clear, I gathered my tools and materials. The first crucial step in any successful DIY painting project is always thorough preparation. While these frames didn’t require extensive heavy sanding, a meticulous cleaning to remove decades of dust, grime, and any residual oils was absolutely essential. This ensures optimal paint adhesion, preventing peeling or an uneven finish down the line. A simple wipe-down with a damp cloth and a quick dry was all it took to set the stage for their metamorphosis.
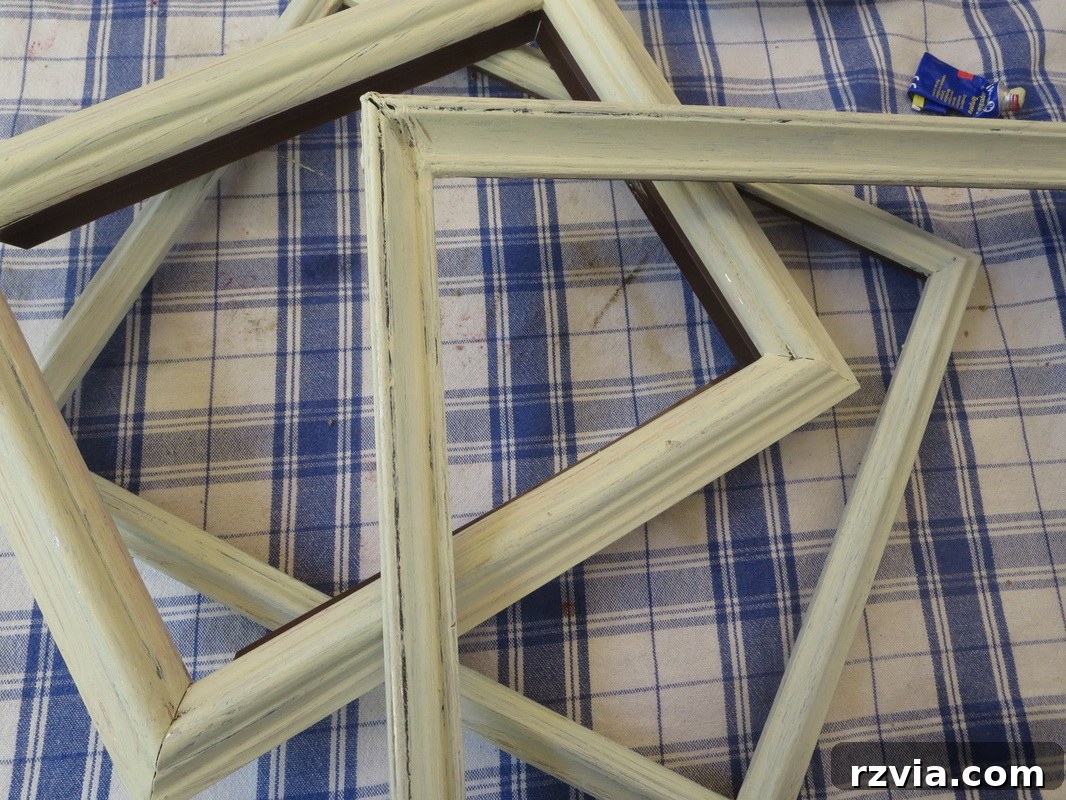
Once clean and completely dry, it was time for the initial layer of paint – but not just any paint. I wanted to achieve a subtle, almost ethereal base, something that would add depth without reclaiming the old shine. To this end, I meticulously mixed a pure white latex paint with just a touch of metallic silver paint. This custom blend wasn’t intended to bring back the original luster, but rather to impart a very faint shimmer, a hint of luminosity that would peek through the subsequent layers, contributing to the rich depth and character of the final distressed finish. This unique mix would serve as the soulful undercurrent of the frames’ new identity.
Applying this first coat was almost meditative, transforming the old, somewhat tired metallic finish into a fresh, promising canvas. This initial coat served multiple purposes: it provided a clean, unified base over the varying gold and silver tones of the original frames, ensuring consistency. Secondly, the subtle silver infusion guaranteed that even if parts of this layer remained visible through the distressing process, they would contribute to a sophisticated, understated glow rather than the starkness of plain white. It’s these small, thoughtful details in custom paint mixing that truly elevate a DIY project from a simple cover-up to a thoughtfully crafted transformation, laying the groundwork for the shabby chic elegance to come.
Achieving the Perfect Distressed Finish: The “Sophisticated Machinery” Technique
Once the base coat was thoroughly dry, it was time for the second, and arguably most defining, layer: pure white paint. This crisp, unadulterated white would be the predominant color, providing the quintessential shabby chic aesthetic I was aiming for. I applied this coat carefully and evenly, ensuring good coverage over the silver-infused base. The true magic, however, began once this layer was dry enough to work with, yet not fully cured – a crucial window for effective distressing. This is precisely where my “sophisticated machinery” came into play – a simple, unassuming stone.
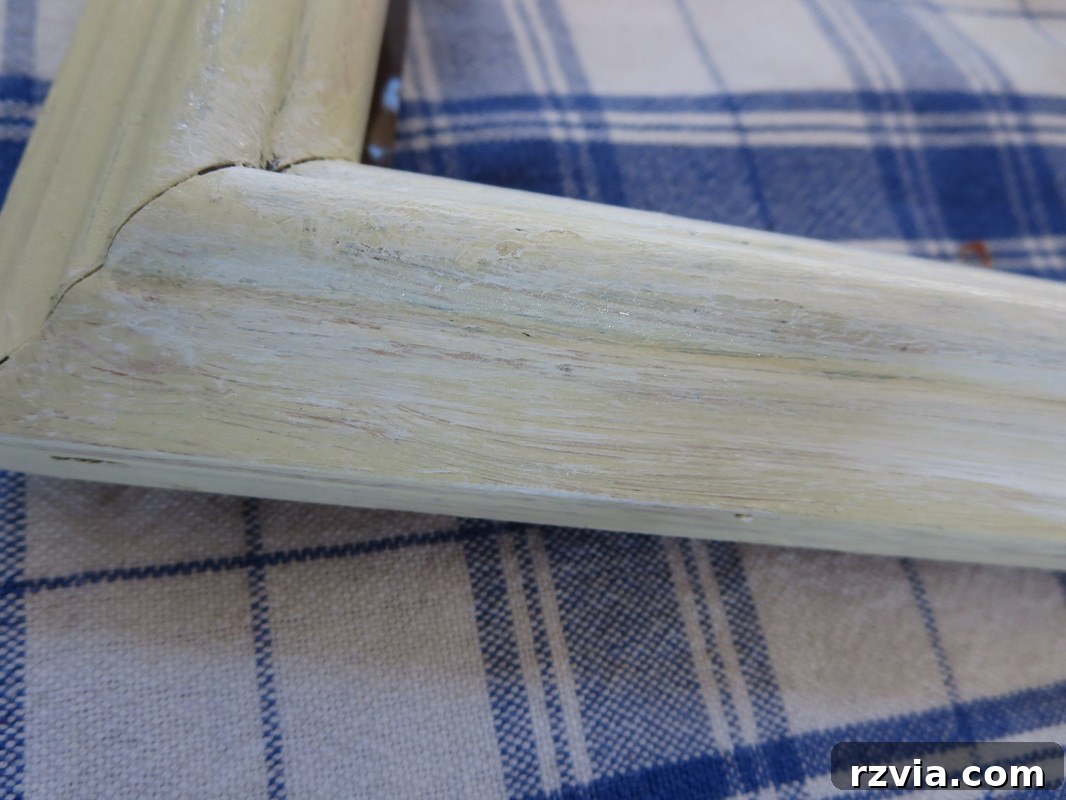
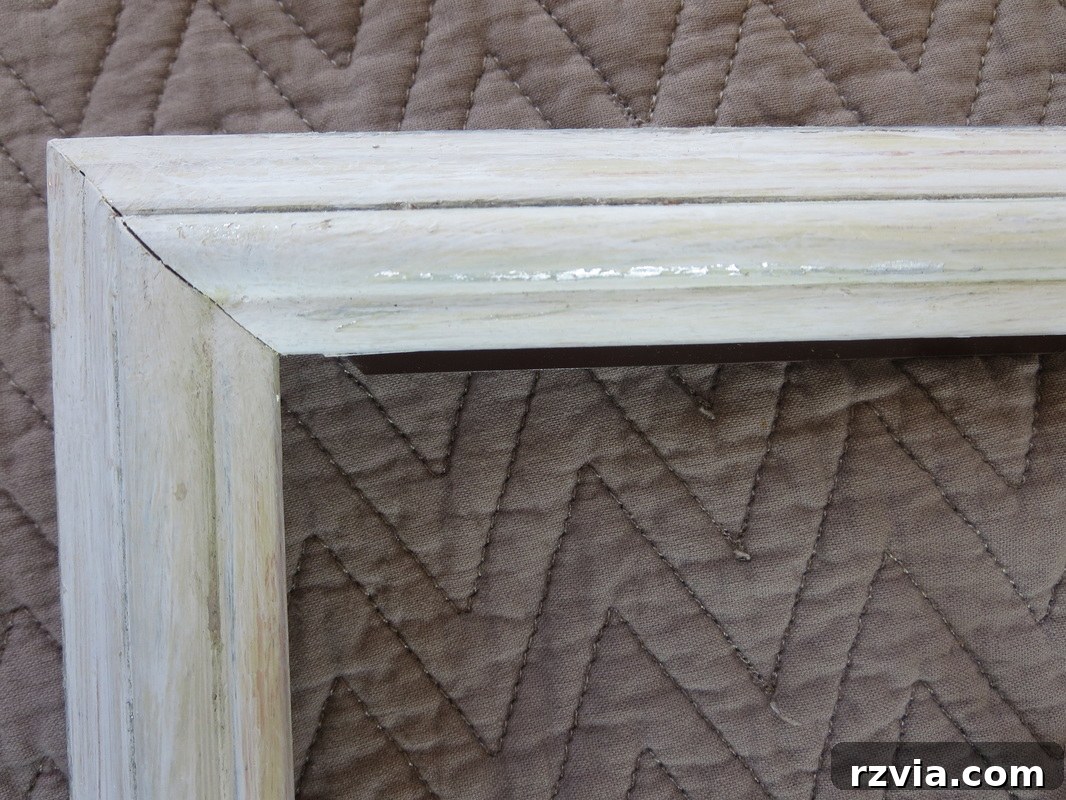
With the stone comfortably in hand, I gently yet firmly dragged it along the prominent edges, raised details, and any areas that would naturally show wear over time on each frame. The objective was to strategically abrade the top layer of fresh white paint, allowing tantalizing glimpses of the underlying silver-white mixture, and in some select areas, even the faint sparkle of the original metallic finish, to peek through. This technique masterfully creates a beautifully worn, aged effect, mimicking years of natural handling and weathering. It’s a wonderfully tactile and intuitive process, offering immediate gratification as the authentic distressed look begins to emerge with each deliberate stroke.
The inherent beauty of using a natural object like a stone lies in its organic irregularity; no two strokes are exactly alike, ensuring an authentically worn and organic appearance that tools with uniform, precise edges simply cannot replicate. This method is fantastic for adding character and depth without resorting to harsh sanding or chemical strippers, which can be messy and time-consuming. It’s a controlled approach to celebrating imperfection, honoring the history of the piece while simultaneously giving it a renewed purpose and a contemporary appeal. The gentle contrast between the fresh, matte white and the subtle gleam of the older layers creates profound visual interest and a timeless sense of elegance, ensuring each frame, though part of a unified set, developed its own unique narrative through this thoughtful distressing process.

The Beauty of Layered History: A Glimpse of the Past
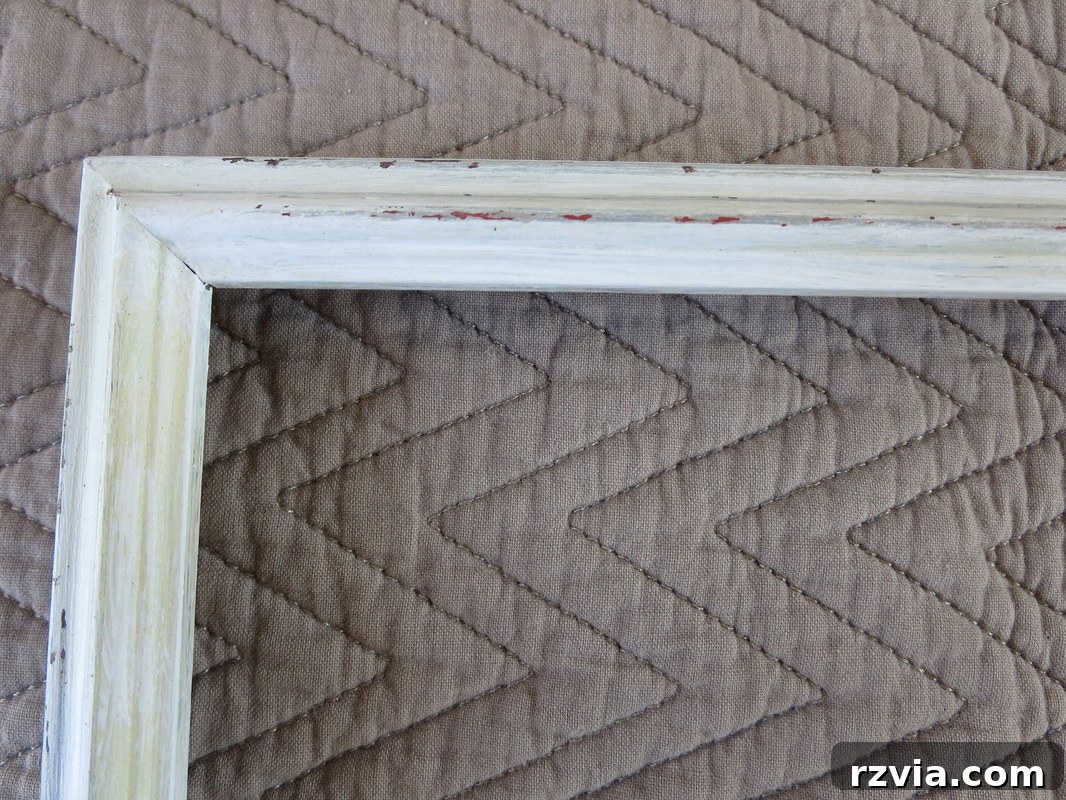
One of the most profoundly satisfying aspects of this distressing technique is witnessing the original frame color subtly peeking through the new layers. It’s not merely about covering up the old; it’s about intentionally revealing a history, creating a beautiful dialogue between the past and the present. The faint, subtle hints of gold and silver beneath the crisp, fresh white add an unexpected richness and a deep, complex dimension to the frames, preventing them from looking flat or overly simplistic. This layered effect is precisely what truly defines the coveted shabby chic style – a harmonious and sophisticated blend of old-world charm seamlessly integrated with refreshed, contemporary elegance.
Observe closely, and you’ll discover how the faintest glimmer of the metallic undertones catches the light at certain angles, adding a sophisticated, almost ethereal luminosity to the otherwise matte white finish. This intentional exposure of the old beneath the new is a hallmark of truly effective distressing; it tells a compelling story of transformation, hinting at what once was, while firmly establishing the frames’ new, graceful identity. This technique ensures that while the overt shine has been successfully banished, a subtle, intrinsic luminosity remains, born from the frames’ remarkable journey through time and artistic renewal. It’s a testament to the fact that beauty often lies in the imperfections and the stories they tell.
Creative Display: Crafting a Unique Vertical Gallery Wall
With the frames beautifully transformed and brimming with new character, it was time to consider their display. I wanted to move beyond the conventional side-by-side arrangement and create something truly visually striking and unique. My vision was a vertical presentation on the wall, adding an element of height and an unexpected artistic touch to the room. To achieve this, I opted for a creative and charming hanging method that would, in itself, become an integral part of the decor, complementing the shabby chic aesthetic.
I took an old, beautifully detailed decorative pin I had on hand and combined it with a piece of pristine white fabric. The fabric, carefully cut into a long, narrow strip, would serve as the elegant backbone of my vertical gallery display. The pin, now adorned with the fabric, was then securely nailed to the wall, becoming the sturdy and stylish anchor point for the entire arrangement. This ingenious solution not only provided a practical method for hanging but also introduced a soft, inviting textile element that perfectly complemented the newly distressed frames. It infused the display with an appealing texture and a handcrafted touch that significantly amplified the overall shabby chic charm.
This creative hanging method offers several distinct advantages. Firstly, it allows for effortless adjustment of frame spacing, ensuring perfect alignment and balance. Secondly, the fabric strip acts as a powerful visual connector, seamlessly linking the frames and creating a unified flow even before the pictures are hung. And perhaps most importantly, it injects a unique, personalized flair into what could otherwise be a standard photo arrangement. It’s a simple yet incredibly effective trick that elevates the entire display from purely functional to genuinely artful, transforming a blank wall into a focal point of cherished memories and understated elegance.
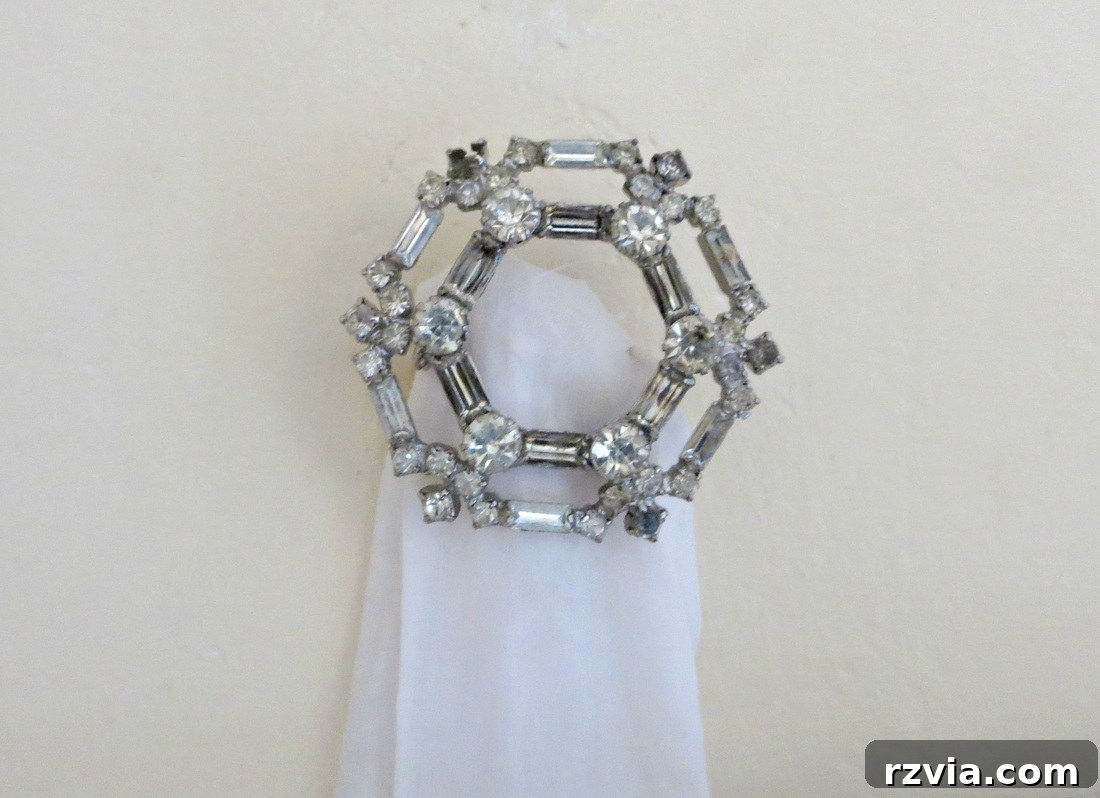
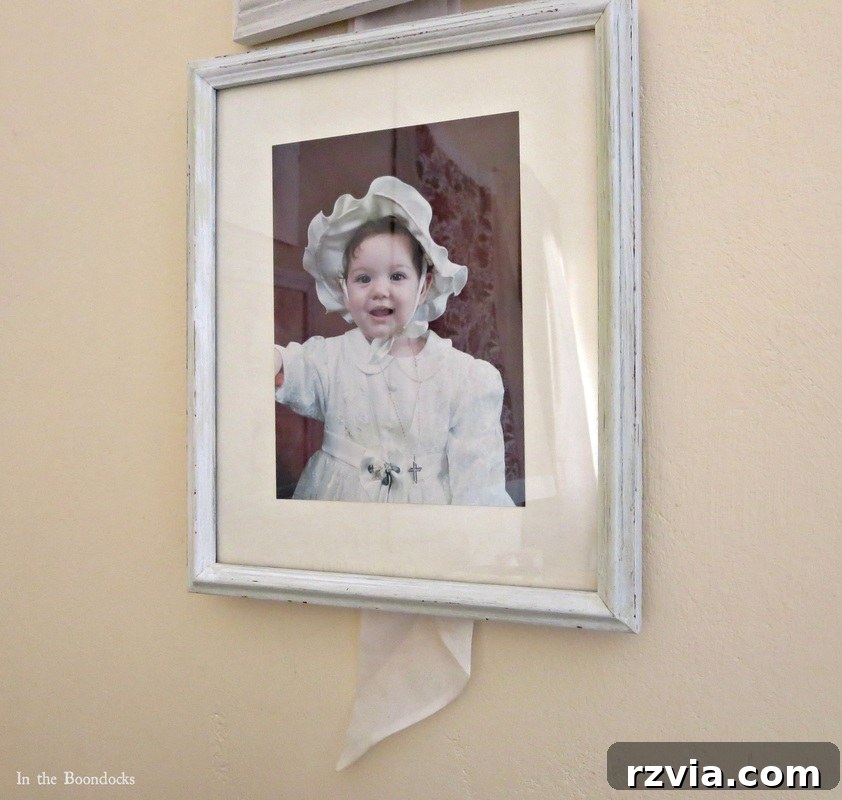
Once the fabric strip was securely and neatly attached to the wall, the exciting next step was to carefully position and hang the transformed frames. I strategically placed small, discreet nails along the length of the fabric strip, ensuring they were evenly spaced and perfectly aligned to accommodate each frame. Precision in this step is key to achieving a balanced and aesthetically pleasing display. Then, one by one, I gently added the frames, allowing them to rest gracefully on the nails, thereby creating a beautifully cascading vertical display. The soft white fabric created a serene and appealing backdrop, making the newly distressed frames truly pop against the wall and drawing the eye.
This vertical arrangement transforms a simple collection of photos into a dynamic and captivating gallery wall. The frames appear to float gracefully along the fabric, drawing the eye upwards and adding an illusion of height and airiness to the room. It’s an inviting and delightfully unconventional way to showcase cherished memories, adding both subtle structure and an element of softness to the overall home decor. Furthermore, the fabric serves as an invaluable unifying element, visually connecting the individual frames and emphasizing the cohesive and thoughtful transformation they’ve undergone. This method is not just about hanging pictures; it’s about curating a personal story on your wall.
The Power of Cohesion: Unifying Diverse Memories
One critical aspect that truly underscored the success of this project was the desire for a cohesive aesthetic, especially given that each of the baby pictures I intended to display had a distinctly different background. Without a strong unifying element, the arrangement could easily look disjointed, chaotic, or simply unplanned. This is precisely where the frame makeover truly shone. By meticulously applying the same painting and distressing technique to all three frames, I instantly forged a harmonious and visually pleasing ensemble. Despite their individual histories and the varied photographic backdrops, they now shared a common visual language, allowing the focus to gracefully shift from the varying photo settings to the beautiful, unified presentation of cherished family moments.
This cohesive look is absolutely vital for any successful gallery wall, serving to prevent visual clutter and ensuring that the entire display feels intentional, well-curated, and effortlessly stylish. The distressed white finish provided a soft, neutral, and versatile backdrop that beautifully complemented every photograph, regardless of its original setting or color palette. It magically transformed a collection of individual items into a single, impactful, and coherent piece of wall art. The subtle individuality that still peeked through, thanks to the artful distressing, added depth and character without ever disrupting the overall harmony. It’s a powerful testament to how a relatively simple DIY project can dramatically elevate the aesthetics and the emotional feel of a space, making disparate elements sing together in perfect unison.
A Timeless Transformation and the Joy of DIY Success
The satisfaction of seeing these frames so beautifully transformed is truly immense. What were once dated, overly shiny pieces are now elegant, distressed beauties, perfectly suited for a fresh new chapter in my home. These frames now proudly display a fresh new look for my “babies” (who, by the way, are no longer babies – in fact, they’re all considerably taller than me and growing into remarkable young adults!). The frames now harmoniously match, creating a serene and unified display that instantly elevates the space, yet they cunningly retain a hint of their original individuality peeking through the artfully distressed layers. This project truly embodies the spirit of upcycling and the profound joy of giving beloved, sentimental items a second, equally beautiful, and often more meaningful, life.
And just like that, another rewarding DIY project bites the dust, leaving behind a refreshed space and a renewed sense of accomplishment. This experience has only fueled my passion for creative reuse and home embellishment. Now, I find myself eagerly looking around every corner, searching for more hidden gems, more forgotten pieces of furniture or decor that could benefit from a little love, ingenuity, and a touch of paint. Perhaps I’ll find more frames to renew – or simply continue my delightful quest to banish the shine wherever it overstays its welcome, bringing a touch of shabby chic charm to every corner of my home!
Embrace the Shabby Chic Journey: Your Home, Your Story
I sincerely hope this frame makeover inspires you to look at your own old items with fresh, creative eyes. A little paint, a touch of courage, and a dash of creativity can go an incredibly long way in transforming your home decor and making it truly reflect your personal style. Whether it’s banishing an outdated shine, embracing a vibrant new hue, or experimenting with unique distressing techniques, the possibilities with DIY are absolutely endless. Don’t be afraid to experiment, to distress, to make things uniquely yours. Remember, it’s not just about saving money; it’s about infusing your living space with personality, warmth, and the tangible stories of your own creative endeavors. Happy crafting!
If you enjoyed reading about this frame transformation and are feeling inspired to try your own home decor refresh, please consider sharing it with your friends or saving it to your Pinterest boards. The image above is perfectly Pinterest-worthy for easy saving and sharing!
For more DIY adventures, practical home decor tips, and an array of creative projects that inspire, I warmly invite you to subscribe to my blog. You’ll receive fresh updates twice a week directly in your mailbox, bringing new inspiration and ideas right to your inbox. You can conveniently find the subscription form on the sidebar, and rest assured, your email address will always remain private and will never be shared with a third party. Join our creative community today!
Related Posts You Might Enjoy:
I love it when I get your comments and I will try to reply to them or visit you on your blog. Please do not add a hyperlink to your comment, otherwise we cannot publish it.