
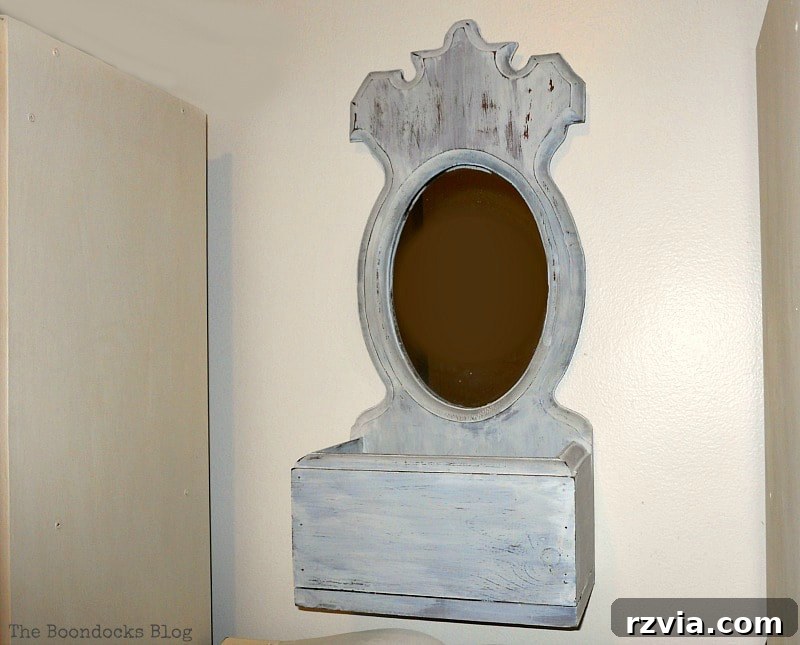
Transform Your Space: Mastering the Farmhouse Chippy Look for Your Mirror
Every DIY enthusiast knows the joy and occasional frustration of revisiting a cherished project. Sometimes, a first attempt doesn’t quite capture the vision, or perhaps newfound skills inspire a second, more refined approach. This is precisely the spirit behind today’s post as we embark on a mirror makeover project: Take Two! My goal? To infuse this mirror with the coveted Farmhouse Chippy aesthetic, a look that speaks of history, warmth, and rustic elegance.
Looking back, my initial foray into transforming this mirror was a significant learning curve. It was my very first time using milk paint, a medium I knew little about in terms of application or its unique characteristics. But as is often the case with creative endeavors, a lack of experience didn’t deter me from diving in headfirst. The journey since then has been one of continuous discovery and refinement, leading us to this exciting revisit.
The Mirror’s Humble Beginnings: A Curbside Treasure
Before any paint touched its surface, this mirror held a simpler charm. It was a curbside find, rescued by my husband who, with uncanny accuracy, knew it would capture my heart. And he was absolutely right! Its sturdy frame and classic lines hinted at immense potential, a blank canvas awaiting a creative touch. My first attempt involved painting it with Old Fashioned Milk Paint, specifically the SafePaint version, which at the time, was my introduction to this unique medium. It was a beautiful transformation from its original brown wood, but it lacked the specific distressed, chippy character I now yearned for.
A Year of Growth: Mastering the Art of Milk Paint
Fast forward a year, and my understanding and confidence in using milk paint have grown exponentially. This past year has been a deep dive into its nuances, with several successful projects under my belt. I’ve used it to breathe new life into MDF bookcases, transform a utilitarian Ikea shelving unit, and even revitalize a chalkboard stand. Through these experiences, I’ve come to deeply appreciate the smooth, velvety finish milk paint can achieve when applied with care, and also how beautifully it can distress to create an aged, authentic look.
With this expanded knowledge and a craving for genuine farmhouse charm, I knew it was time to revisit the mirror. This time, however, my approach would be different. I was determined to achieve the iconic chippy look that only the original Old Fashioned Milk Paint formula can deliver. You see, for my previous projects where I didn’t want chipping, I specifically chose the SafePaint version. But for this mirror, the goal was deliberate imperfection, a time-worn appearance that tells a story.
Original vs. SafePaint: Understanding the Difference for Your Project
Many DIYers often ask: “What exactly is the difference between the original milk paint and the SafePaint version?” It’s a crucial distinction, especially when aiming for a specific finish like the chippy farmhouse look. The original milk paint formula was historically designed for highly porous surfaces, such as raw wood or masonry. Its unique composition allows it to penetrate these surfaces, creating a bond that, when applied over a non-porous or previously sealed surface, naturally resists adhesion in some areas, leading to that coveted authentic chipping and flaking effect.
In contrast, the SafePaint version, which I had used extensively until this mirror’s second attempt, is formulated with a built-in bonding agent. This makes it ideal for non-porous surfaces that you want the paint to adhere to smoothly and without chipping. Think of surfaces like previously painted or varnished furniture, laminate, or even metal. I successfully used SafePaint when upcycling metal trunks – in fact, two of them! The bonding agent ensures a strong, durable, non-chipping finish on these challenging materials. For this mirror, however, I was intentionally seeking the rebellious, naturally distressed outcome of the original formula, even if it meant navigating a few unexpected challenges along the way.
What I Used for My Farmhouse Chippy Mirror Makeover:
- Old Fashioned Milk Paint in Snow White (original formula, without bonding agent for the initial coats)
- Extra Bond (a separate bonding agent, which proved to be a lifesaver!)
- Daddy Van’s All Natural Decorative Wax in Dark Nior (for sealing and adding depth)
- Good quality paint brushes
- Clean cloths for buffing
- Warm water for mixing paint
- Sandpaper (fine-grit for distressing)
This time, I was feeling a bit rebellious and committed to embracing the original formula of Old Fashioned Milk Paint without any initial bonding agent. My heart was set on that authentic, chippy goodness. I also opted for a new shade, ‘Snow White,’ which offers a slightly warmer tone compared to the ‘Oyster White’ I used previously, ensuring a fresh and inviting farmhouse appeal for my mirror.
The How-To: A Journey of Trial, Error, and Triumph
Phase 1: The Initial Application and Unexpected Chipping
The process began by carefully mixing the Snow White milk paint with equal parts lukewarm water, ensuring a smooth, consistent mixture. I then applied three generous coats to the mirror frame, excited to see the transformation unfold. After each coat, I patiently waited, anticipating the beautiful, subtle chipping that characterises this paint on sealed surfaces.
And then I waited…
…and waited. The anticipation was palpable.
Disclosure: The items below are affiliate links. If you purchase any of these products through the links, I receive a small commission, that way I can continue to provide you with lovely content. There is no extra charge to you for purchasing through my affiliate links.
After about an hour, the mirror had dried, revealing what initially seemed like chippy goodness. I was thrilled! However, my excitement was short-lived. A gentle blow was all it took for the paint to flake off excessively, revealing not a beautifully distressed finish, but rather a disheartening mess. This wasn’t the controlled, charming chippiness I envisioned; it was uncontrolled peeling, threatening to undo all my hard work.
The photograph below perfectly illustrates how quickly things spiraled out of control. Nearly half of the freshly applied paint was simply flaking away. It was at this critical juncture that panic set in, prompting me to reach out to the seasoned experts in the Old Fashioned Milk Paint Q & A Group on Facebook. Their collective wisdom is an invaluable resource for anyone navigating the unique properties of milk paint. I highly recommend joining if you have questions or encounter challenges!
Through their guidance, the mystery was solved: the excessive chipping wasn’t due to a flaw in the paint or my application, but rather the lingering presence of a wax coat I had applied to the mirror a year prior. This wax acted as a barrier, preventing the original milk paint, which thrives on porous surfaces, from properly adhering. It was a classic case of past treatments influencing current results.
Phase 2: The Rescue Mission with Extra Bond
While some suggested stripping all the old paint and starting from scratch, the thought of sanding in the cold weather was far from appealing. So, I opted for a more practical, and perhaps lazier, solution: integrating Extra Bond into the original milk paint. This bonding agent, which can be purchased separately, is a true game-changer for situations like this. Thankfully, a moment of foresight (or perhaps just hoarding) meant I had a bottle on hand, purchased a year ago without any idea how vital it would become.
After carefully wiping down the mirror to remove any loose, excessively chipped paint, I mixed the original Old Fashioned Milk Paint with Extra Bond. This strategic addition ensured that the paint would adhere properly to the previously waxed surface, allowing me to achieve a more controlled and desirable chippy effect. I applied two coats of this fortified milk paint, carefully covering the areas where the paint had previously failed to adhere.
The image above highlights the successful integration of the original milk paint layers with the new layers fortified with Extra Bond. You can begin to see the intentional texture and subtle variations emerging, moving us closer to the authentic farmhouse aesthetic. This blending of old and new layers contributes significantly to the mirror’s ultimate character and depth.
Phase 3: Refining the Finish – Distressing and Waxing
After allowing the mirror to dry completely overnight, I moved on to the next crucial step: distressing. Using fine-grit sandpaper, I gently sanded the edges and raised areas of the frame. This technique selectively removes a small amount of paint, revealing hints of the layers beneath and creating a naturally aged, worn look that is synonymous with farmhouse style. The key here is subtlety – you want it to look authentic, not artificially forced.
The final layer of character and protection came from Daddy Van’s All Natural Decorative Wax. This time, I chose the ‘Dark Nior’ shade, which provided an even deeper, richer tone to the distressed areas and accentuated the underlying paint layers. The wax not only seals the milk paint, protecting it from daily wear and tear, but also adds incredible depth, warmth, and a beautiful subtle sheen to the finish. It truly brings all the elements together, giving the mirror an almost heirloom quality.
With a final buff using a clean, soft cloth, the mirror makeover was complete. The wax was worked into the paint, creating a lovely, subtle sheen that highlights all the beautiful layers and textures. This buffing process is essential for achieving a durable and aesthetically pleasing finish, transforming the raw painted surface into a polished, yet aged, masterpiece.
The Transformed Mirror: A Story in Layers
Just look at it now! The mirror boasts an incredible sense of age, with layers of paint and intentional distressing that make it appear as though it has been a treasured family heirloom for generations. It’s a testament to the power of milk paint and thoughtful distressing techniques. The chippy edges, the subtle variations in color, and the depth added by the dark wax all contribute to a narrative of enduring charm and character.
…but in a good way! This isn’t just an old mirror; it’s a piece with a soul, perfectly embodying the farmhouse aesthetic.
Observe the delicate layers and the intentional peeling – a hallmark of the farmhouse chippy style. Honestly, when I first started blogging and experimenting with DIY, I wasn’t particularly fond of this heavily distressed look. My aesthetic leaned more towards clean lines and smooth finishes. But over time, as I’ve grown in skill and appreciation for various decor styles, I’ve developed a deep love for it. Now, this mirror truly speaks to me, echoing stories of time and transformation.
And what exactly is it saying?
“Thank you for letting my personality shine through.” Of course! Every piece of furniture, especially vintage finds, holds an inherent character, and embracing the chippy farmhouse look allows that personality to truly emerge and captivate.
This transformation is so much more impactful than its previous state with the plain brown wood. The depth of color from the wax combined with the subtle distressing creates a richer, more inviting aesthetic that beautifully complements a farmhouse or vintage-inspired home. It’s truly a testament to how paint can entirely redefine an item.
Before and After: A True Transformation
Let’s take a moment to truly appreciate the incredible journey this mirror has undergone. Here’s a quick look at its state before this detailed makeover, a reflection of my earlier, less experienced attempts at painting with milk paint.
And now, behold the final result: a warmer, richer look, boasting more intricate layers and significantly greater depth. This iteration truly captures the essence of a Farmhouse Chippy Mirror, showcasing a matured understanding of Old Fashioned Milk Paint and distressing techniques. The contrast is striking, demonstrating the power of a second chance and refined skills in DIY projects.
While this particular distressed aesthetic might not resonate with everyone, the journey and the outcome are undeniably unique. The bonding agent, in this instance, truly saved the day, allowing me to transform a challenge into a triumph. This mirror is now a standalone piece, brimming with character and individuality, truly deserving of the special treatment it received.
Reflections and Encouragement for Your Next Project
The overarching lesson from this mirror makeover project is one of perseverance and continuous learning. Even when my initial attempts were guided by limited knowledge a year ago, I wholeheartedly tackled the project. Now, armed with more experience and a deeper familiarity with Old Fashioned Milk Paint, I returned to the mirror, knowing I could achieve a far superior result – especially with a little help from the supportive DIY community!
So, please, don’t shy away from trying new things. Embrace the learning process, even if it means making a few mistakes along the way, just as I did. Remember, help and guidance are often just a quick chat or a Facebook group post away. The journey of creation is messy, but the reward of a truly unique, handmade piece like this Farmhouse Chippy Mirror is absolutely worth it. Happy painting, and don’t be afraid to give your projects a “Take Two”!
If you’ve enjoyed this transformation and want to follow more of my DIY adventures, consider subscribing to my blog! You’ll receive updates directly in your mailbox, and rest assured, your email will never be shared with any third party. The subscription form can be found on the sidebar.
Explore More Milk Paint Projects
<< Sweet Inspiration Link Party #94 HOME
Linking up to these Link Parties
This blog is for entertainment purposes only; my DIY tutorials are not professional advice. Read my full disclaimer here.
I love it when I get your comments and I will try to reply to every one of them. Please do not add a hyperlink to your comment, otherwise it cannot be published.