
Effortlessly Tame Blinding Glare: A Simple DIY Solution for Glass Block Windows
Living with glass block windows can be a double-edged sword. While they offer privacy, natural light, and architectural interest, they can also unleash a torrent of blinding glare, especially in sun-drenched environments. If you’ve ever found yourself squinting indoors or struggling to watch TV because of an unruly glass block window, you’re not alone. Today, I’m excited to share a wonderfully simple, incredibly frugal, and surprisingly stylish solution that transformed my living room from a glare-zone to a comfortable sanctuary.
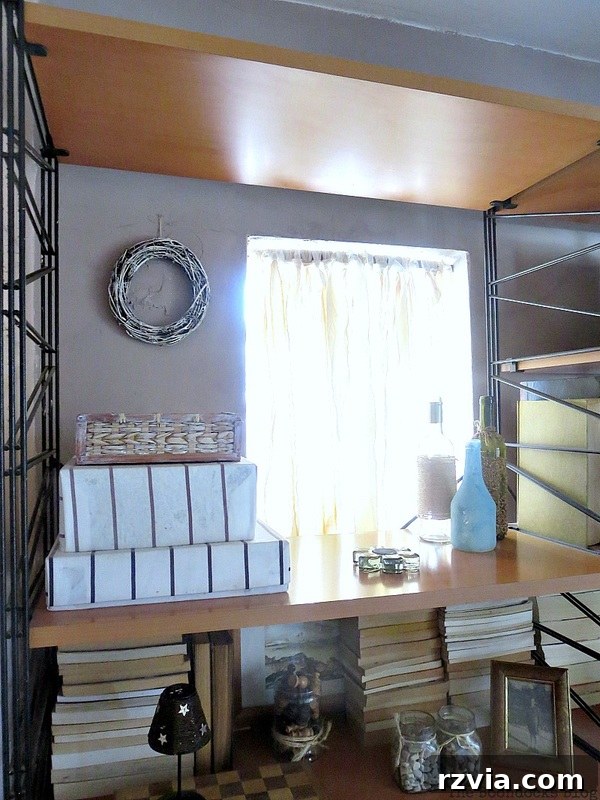
Before diving into the solution, let’s set the scene. Take a look at the “before” picture below. This is what my living room looked like on a typical sunny day. While the glass blocks themselves are a charming feature, their unfiltered light created a significant problem.
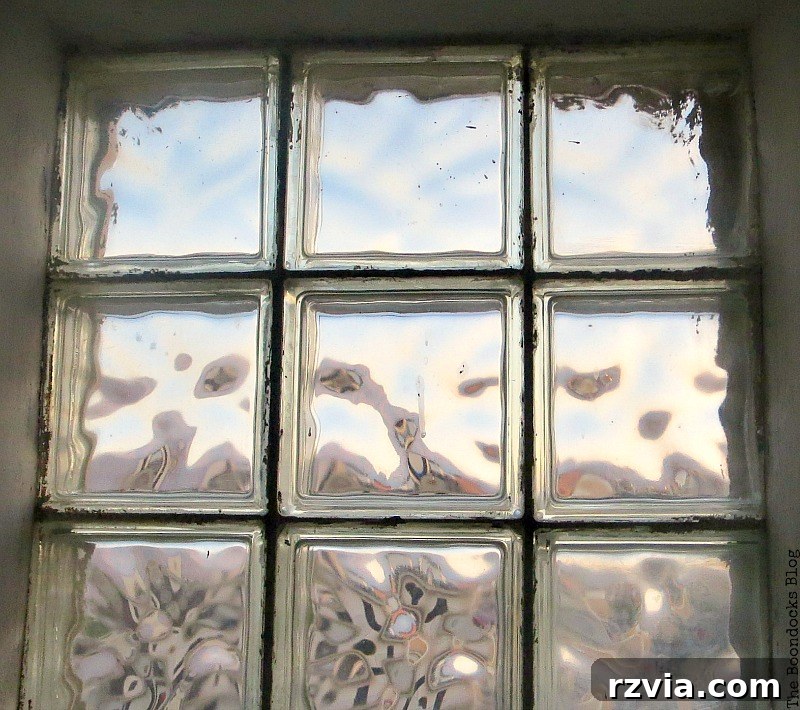
The Glare Problem: When Good Light Goes Bad
You might be wondering, “What could possibly be the problem with more light?” Well, as the saying goes, “too much of a good thing.” In my case, this was literally true. Observe the next image – do you see that intense shaft of light piercing through, just behind the wall unit? That’s the culprit. In the colder months, this glass block window is a welcome asset, allowing warmth and ambient light to flood the room, creating a cozy atmosphere. It helps keep heating costs down and brightens dreary days, making it an appreciated architectural feature.
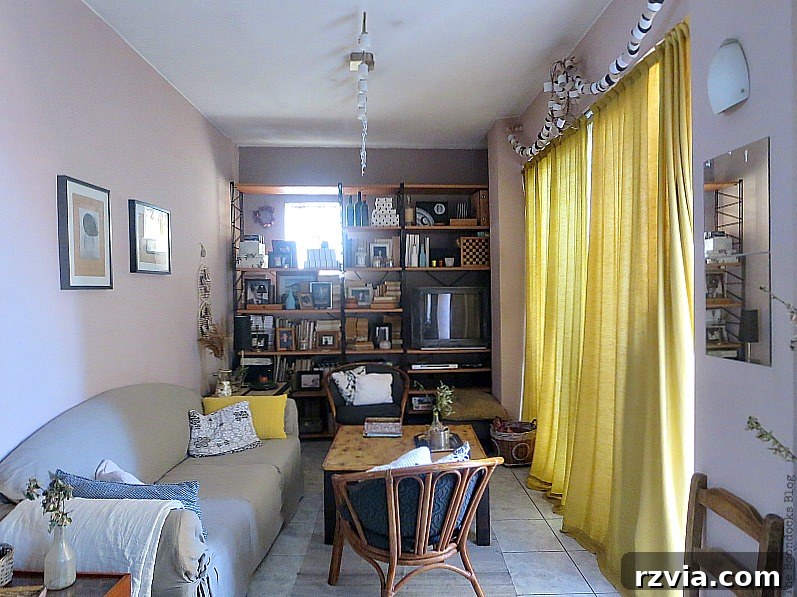
However, come summer, this beloved window transforms into an eye-straining menace. Living in Greece, a land famously blessed with an abundance of radiant sunshine, the glare becomes utterly blinding. I assure you, I am not exaggerating! The sun’s intensity can be overwhelming, turning what should be a comfortable living space into a perpetual squint-fest. That television in the corner? Practically unwatchable. Even with curtains drawn, the sheer brilliance of the sun found ways to sneak through, creating harsh contrasts and making it painful to simply exist in the room without feeling the need for sunglasses indoors.
The problem wasn’t just aesthetic; it impacted the functionality and comfort of my living room significantly. Reading became a chore, conversation felt interrupted by constant adjustments to avoid the light, and any hope of enjoying a movie or TV show was dashed by the overpowering reflections. I needed a solution that would filter the light effectively without compromising the room’s overall aesthetic or being overly complicated to implement. The challenge was finding that sweet spot between blocking the harsh rays and retaining the natural illumination that glass blocks inherently provide.
Searching for the Perfect Light Filtering Solution
When faced with a glaring problem, many people would immediately think of traditional window treatments. Curtains, blinds, or even frosted window films are common go-to solutions. However, for my glass block window, these options presented their own set of challenges.
Firstly, adding a conventional curtain felt entirely out of place. My living room decor, featuring a modern black metal and wood wall unit, leans more towards a contemporary or perhaps even industrial aesthetic, certainly not a “cottage” style that might naturally incorporate drapes over glass blocks. A curtain would have clashed, looking heavy, awkward, and detracting from the unique character of the glass blocks themselves. I wanted something that felt more integrated and less like an afterthought.
Blinds were another consideration, but they often come with installation complexities and can feel too rigid or formal for a relaxed living space. They also tend to completely block the view or light, which wasn’t my goal. I still wanted some natural light, just softened. Plus, I was looking for an *easy* fix – something I could implement quickly, without special tools, drilling, or a significant investment of time or money.
I yearned for a solution that was not only effective but also low-cost, easy to install (and remove, if needed), and added a touch of personality rather than detracting from the existing decor. This is where a little ingenuity and a rummage through my leftover supplies came into play. The best solutions often come from unexpected places, utilizing what you already have to create something new and functional.
The Ingenious DIY Fix: Repurposing & Crafting Comfort
My search led me to an unassuming piece of wood trim, a leftover from when we installed door frames. What made this particular piece perfect was its slim profile and, crucially, its pliability. It wasn’t rigid like a standard plank; it had just enough give to be bent slightly, suggesting it could be wedged into an opening without needing permanent fixtures. This was the perfect “base” for my light-filtering creation.
Gathering the Materials: Fabric Scraps to the Rescue
Next, I turned to my stash of fabric scraps. I found some lovely leftover fabric, which I believe was once a tablecloth. Its soft texture and semi-translucent quality made it ideal for filtering light rather than completely blocking it. The beauty of this approach is that you can use almost any fabric that catches your eye – old sheets, discarded clothing, or even remnants from previous sewing projects. The goal is to find something that complements your space and offers the desired level of light diffusion.
I began cutting the fabric into numerous strips. The exact length and width weren’t strictly scientific; I aimed for variety to create a natural, somewhat organic look. This “haphazard” approach contributes to the charm of the finished piece, giving it a relaxed, bohemian vibe rather than a perfectly tailored appearance. The freedom to be imperfect in this project is incredibly liberating!


Assembly: A Few Simple Knots
With my wood trim and fabric strips ready, the assembly process was incredibly straightforward and took mere minutes. I simply tied the fabric strips onto the slender piece of wood. There was no need for precise measurements or intricate knotting techniques. A simple knot sufficed, allowing the ends to hang freely and create a flowing, textured effect. I spaced them irregularly, overlapping some, leaving gaps for others, all contributing to the desired casual, “shabby chic” aesthetic. This process was not only quick but also quite therapeutic – a mindful craft that promised a tangible solution.

Installation: A Ten-Minute Transformation
The final step was the easiest of all. Taking the assembled piece, I gently bent the pliable wood trim just enough to fit it into the opening of the glass block window. Its inherent flexibility allowed it to be wedged snugly into place, holding firm without any need for screws, nails, or adhesive. This non-permanent installation was precisely what I wanted, offering versatility and ease of removal. The whole process, from cutting fabric to final installation, truly took less than ten minutes.
The Remarkable Results: Comfort, Style, and Functionality
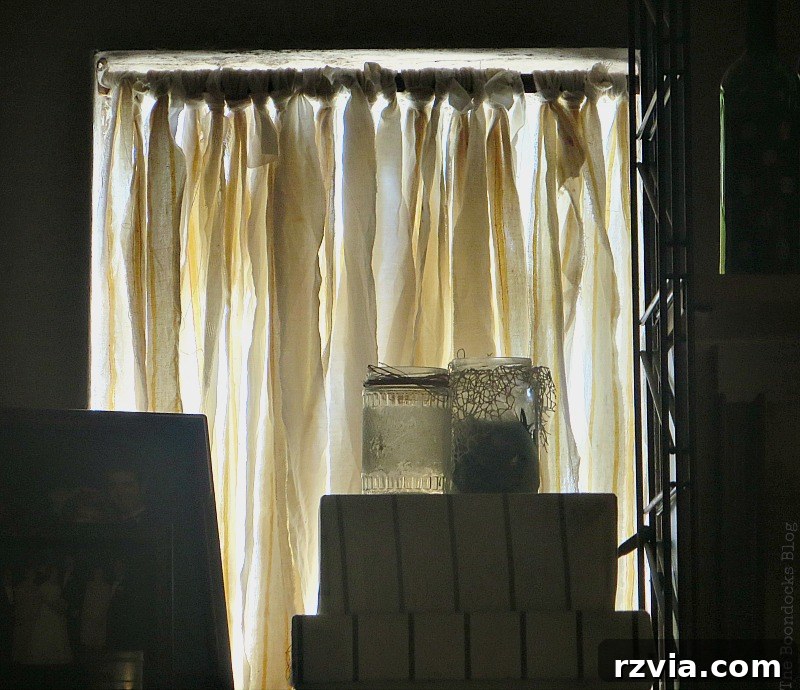
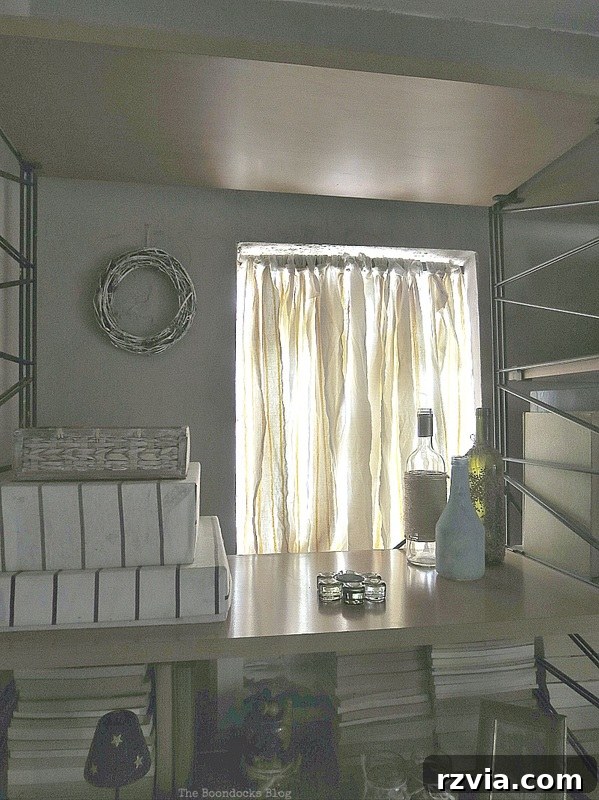
In photographs, it might not look like a significant amount of “cover,” but believe me when I say the effect in person is transformative. This simple, deconstructed curtain allows in just enough filtered light to brighten the room without the painful glare. I can now relax on my couch, read a book, or watch television without needing sunglasses or constantly repositioning myself to avoid direct sunlight. The harshness has been replaced by a soft, diffused glow that makes the entire living room feel more inviting and comfortable.
Beyond its primary function of light control, this DIY solution also adds a unique decorative element to the space. It has a charming “shabby chic” aesthetic, though I sometimes prefer to call it a “deconstructed non-curtain” for its unconventional approach. Whatever its nomenclature, it looks effortlessly cool and perfectly complements the casual elegance I aim for in my home. The texture and movement of the fabric strips add visual interest that a flat blind or heavy curtain simply couldn’t achieve.
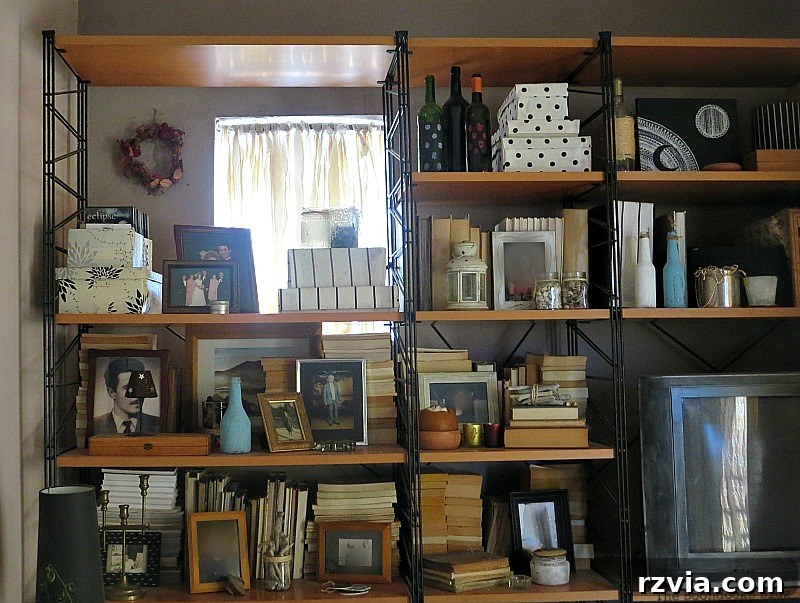
One of the greatest advantages of this solution is its versatility. When winter arrives, bringing with it shorter days and a desire for every bit of natural warmth and light, I can simply unwedge the entire piece and store it away. It’s a seasonal fix that adapts to my needs without any fuss. This flexibility is truly invaluable, ensuring that my living room remains comfortable and functional year-round, regardless of the sun’s intensity.
Capturing the subtle beauty of filtered light in photographs can be tricky, especially in that corner. However, this solution allows me to showcase my pretty bottles and frosted jars without them being overwhelmed by harsh direct light. The diffused illumination creates a much softer, more inviting backdrop for displaying decorative items, enhancing the overall aesthetic of the space.
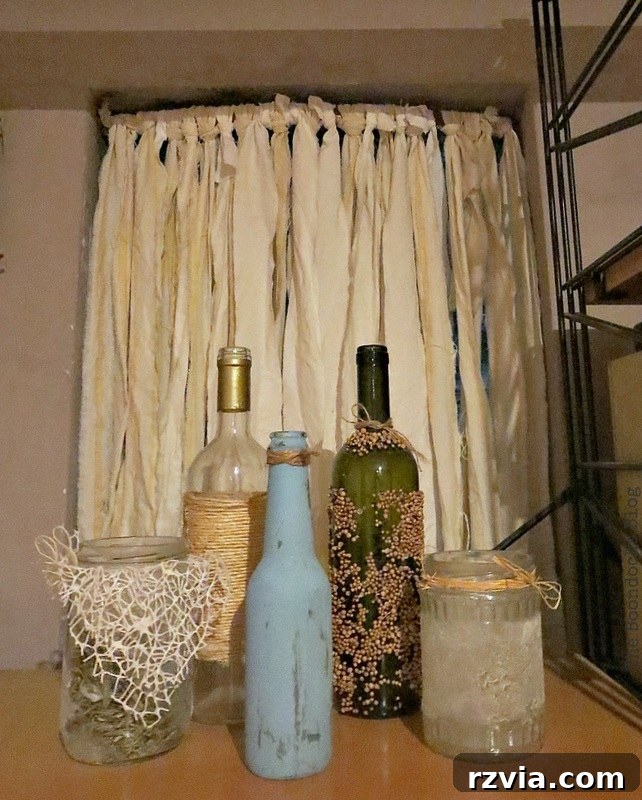
The morning light truly highlights the effectiveness of this “curtain.” You can clearly see it doing its job, softening the strong early rays. The filtered light creates a gentle ambiance, making the room feel bright and airy without being overwhelming. It’s often hard to photograph the exact nuance of light, but the change in comfort and visual ease is undeniable in person.
Your Turn: Embrace Simple Solutions
This entire project was a ten-minute fix, proving that sometimes the easiest and most affordable solutions are the most effective. It effortlessly solved my glass block problem, transforming my living room into a place of comfort and calm. No more worrying about going blind from too much light! And in the winter, it’s easily removed, allowing full light and warmth back into the space. This is a perfect example of frugal repurposing and simple DIY ingenuity.
I hope this inspires you to look around your home for similar opportunities to solve everyday problems with creative, low-cost solutions. What challenging light situations have you encountered in your home? What clever ways have you found to cover or filter blinding light from windows? Share your thoughts and experiences in the comments below – I’d love to hear your brilliant ideas!
If you enjoyed this DIY solution, please consider sharing it with your friends or saving it to your Pinterest boards for future reference. And if you’re keen to follow more of my home adventures and creative projects, subscribe to my blog to receive updates twice a week directly in your inbox!
Disclosure: The items below are affiliate links and link to Amazon.com. If you purchase any of these products through the links, I receive a small commission, which helps support this blog and allows me to continue providing you with lovely content. There is no extra charge to you for purchasing through my affiliate links.
You may also like:
<< The Lopsided Summer Wreath HOME Sweet Inspiration Link Party #10 >>
This blog is for entertainment purposes only; my DIY tutorials are not professional advice. Read my full disclaimer here.
I love it when I get your comments and I will reply to each and every one of them.