
Transforming Mid Century Modern Pieces: Achieving a Unified Bedroom Look with Milk Paint
Do you ever find yourself staring at a furniture piece, overflowing with ideas yet paralyzed by indecision? That was precisely my predicament with our bedroom, specifically two exquisite Mid Century Modern (MCM) treasures that desperately needed a refresh. I had previously shared my initial thoughts and a mood board for this space quite some time ago, and frankly, this project had been lingering on my to-do list for far too long. The dilemma wasn’t just about paint colors – grey, white, a combination? – but about how to make two distinct MCM pieces harmonize within a relatively small room. The existing array of furniture and conflicting colors created a cluttered, disconnected feeling, a far cry from the serene sanctuary I envisioned.
My goal was clear: to create a cohesive, unified aesthetic without making any single piece too dominant. I wanted these vintage beauties to complement each other effortlessly, bringing a sense of calm and order to the room. After much contemplation, planning, and a deep dive into my creative reserves, I’m thrilled to unveil the stunning transformation. Join me as I walk you through how I meticulously paired these two Mid Century Modern furniture pieces, breathing new life into them with the magic of milk paint, and achieving that sought-after unified look that elevates the entire bedroom.
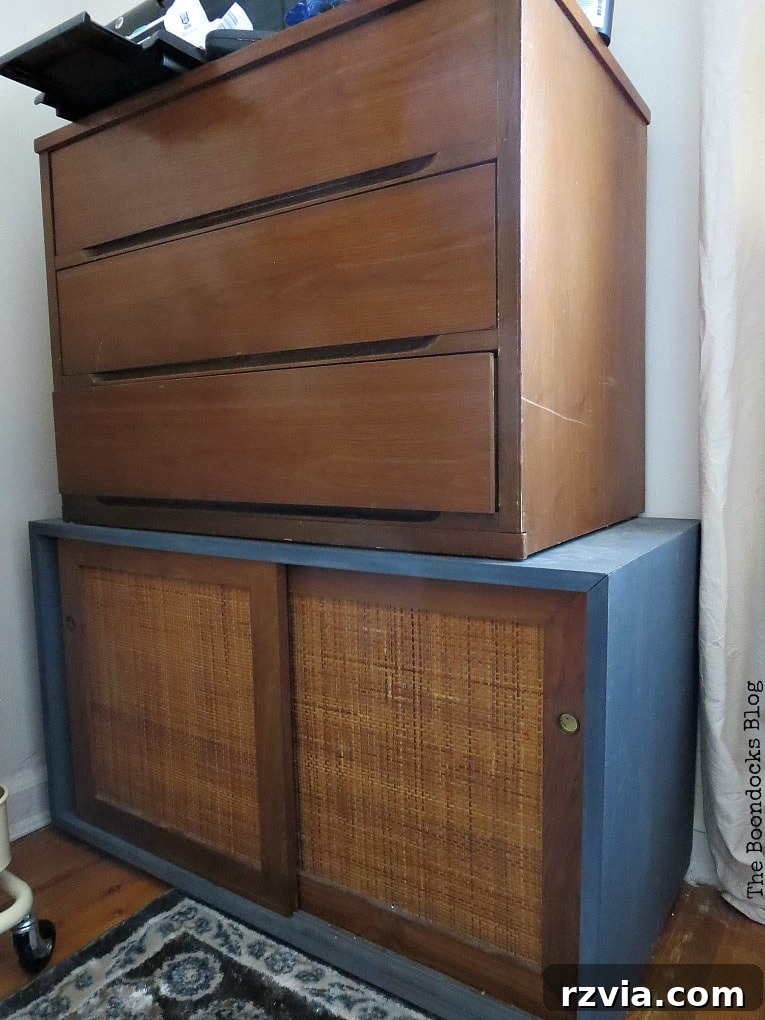
The Journey Begins: Addressing the Sideboard’s Disconnect
Our first protagonist in this furniture pairing adventure was a charming Mid Century Modern sideboard, forming the bottom half of what would become a cohesive unit. Originally, I had given it a preliminary soft grey coat of paint, hoping that would suffice. However, as often happens with creative projects, the initial attempt left something to be desired. While the grey was pleasant, the stark contrast between the natural wood sides and the painted doors was too jarring for the unified vision I had in mind. It still felt like a standalone piece rather than an integral part of a larger design scheme. I knew a more deliberate approach was necessary to bridge this aesthetic gap and make it truly blend with its future counterpart.
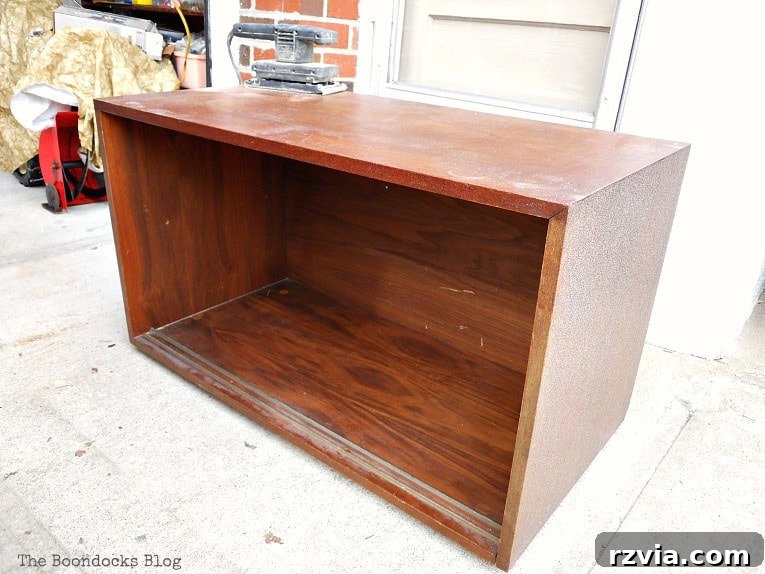
Essential Tools and Materials for Your MCM Furniture Makeover
Disclosure: This post contains affiliate links for your shopping convenience. If you purchase any of these products through the links, we receive a small commission at no extra charge to you. You can find our full disclosure here.
To embark on this exciting Mid Century Modern furniture transformation, I carefully selected high-quality materials to ensure a durable and aesthetically pleasing finish. Here’s a detailed list of everything I used:
- Old Fashioned Milk Paint in Snow White (Safepaint formula): This foundational white provides a crisp, clean base and is ideal for previously painted surfaces.
- Old Fashioned Milk Paint in Slate (Safepaint formula): A beautiful, soft blue hue that brings a sophisticated touch and complements the Snow White perfectly.
- Assorted Sandpaper: Essential for preparing surfaces, smoothing layers, and creating subtle distressed effects.
- Daddy Van’s All Natural Beeswax and Furniture Polish in Lavender: A delightful, natural wax that seals the milk paint, adds a protective layer, and imparts a subtle sheen and wonderful scent.
- High-Quality Paint Brushes: Crucial for smooth application of milk paint, ensuring even coverage and reducing brush marks.
- Waxing Brush: A dedicated round brush designed for efficient and even application of furniture wax, making the sealing process much faster and more effective.
- Soft Rags for Waxing: For buffing the wax to a beautiful, subtle finish.
The How-To: A Step-by-Step Guide to Unified MCM Furniture
Phase 1: Transforming the Sideboard
My journey to a unified look began with the sideboard. To address the previous contrast and lay a solid foundation for the new color scheme, I started by applying a generous coat of Old Fashioned Milk Paint in Snow White over the existing soft grey paint. This immediate step began to neutralize the surface and prepare it for the upcoming color layers. It’s important to note that Old Fashioned Milk Paint offers two distinct formulas: a traditional version perfect for raw, untreated wood, which creates a lovely chippy effect, and the Safepaint version. The Safepaint formula is specifically designed for surfaces that have already been painted or sealed, ensuring excellent adhesion without the need for extensive stripping. For optimal results on a previously painted surface, you can also add Extra Bond to the regular milk paint, which significantly improves its adherence to slick or previously finished surfaces.
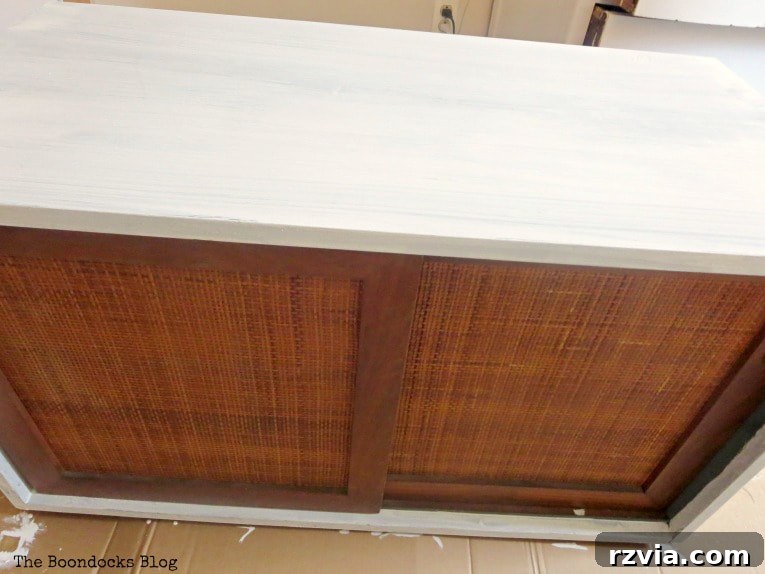
Once the Snow White base coat was dry, I moved on to applying the beautiful Slate color, a soft and inviting blue. I carefully applied two coats of this tranquil shade, using long, deliberate brushstrokes to ensure smooth and even coverage across the sideboard’s surface. The milk paint covered the white base beautifully, creating a rich, consistent hue that instantly transformed the piece. The objective here was to create a calm, foundational color that would tie into the overall bedroom aesthetic and provide a soothing backdrop for its companion piece.
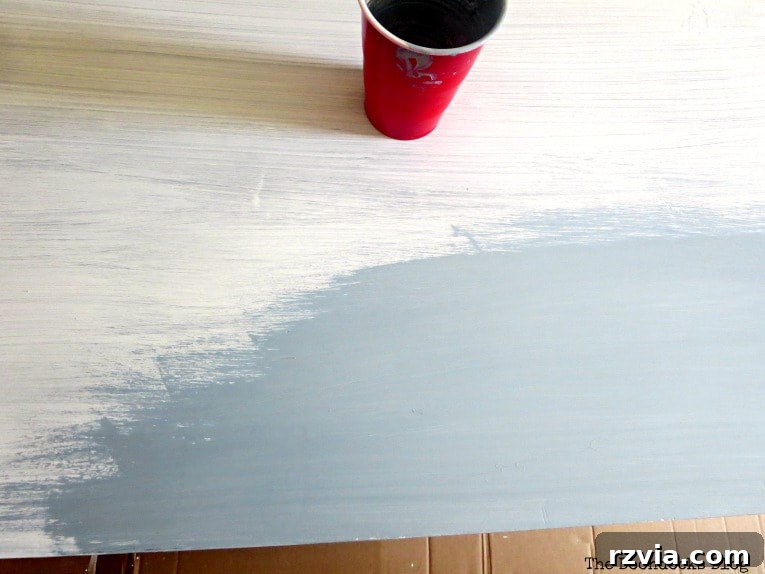
A Creative Solution for the Sideboard Doors
The sideboard doors were initially the most challenging element, as they were the part that had “stuck out like a sore thumb” in its original grey state. This was where much of my indecision had centered, pondering how to integrate them seamlessly while adding visual interest. After considerable deliberation, I opted for a two-tone approach: the outer frames of the doors were painted in the serene Slate color, harmonizing with the main body of the sideboard, while the fronts were done in crisp Snow White. This choice was crucial for creating visual continuity across the two furniture pieces I was uniting. I meticulously painted the door frames with the Old Fashioned Milk Paint in Snow White first, ensuring clean lines and a strong foundation for the subsequent steps.
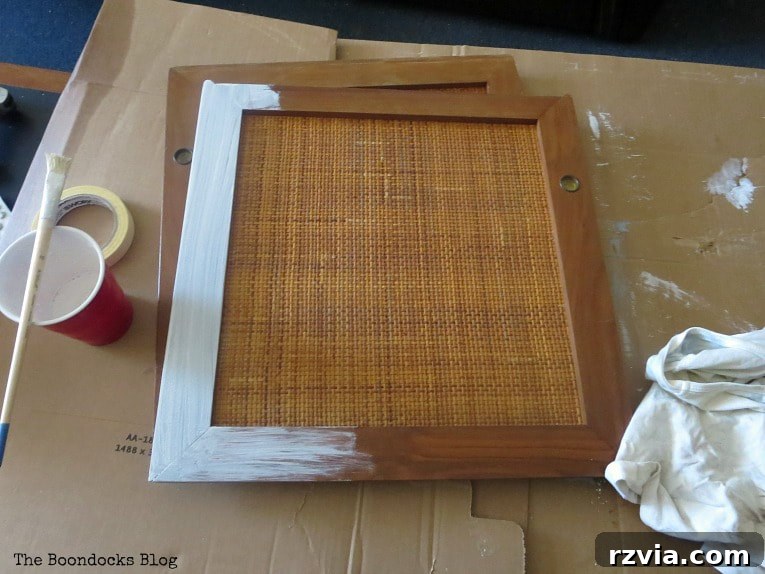
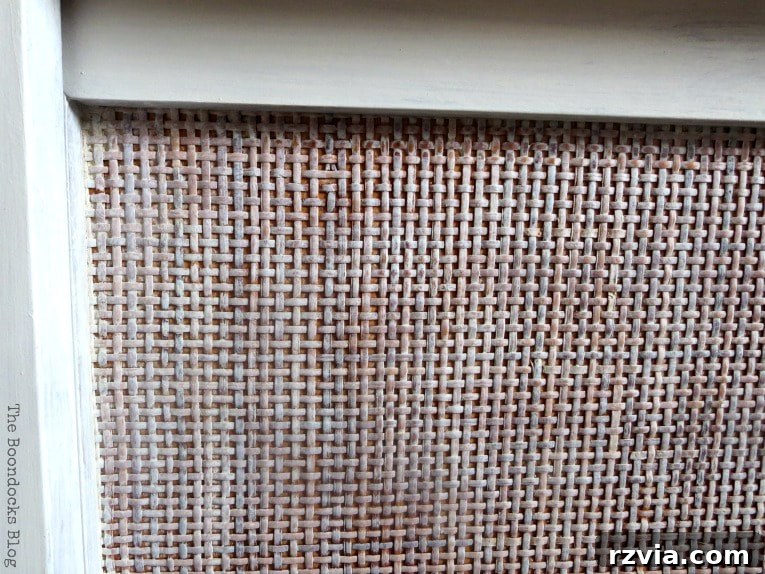
The rattan panels within the doors presented a unique opportunity for texture and softness. Instead of a full, opaque coat, I employed a dry brush technique. This involved dipping my brush lightly into the Snow White paint and then blotting most of it off onto a white rag until only a minimal amount remained. I then gently brushed this sparse paint over the rattan. This method allowed the paint to subtly kiss the surface of the rattan, leaving much of its natural texture visible while imparting a delicate, almost translucent white wash. The result was an incredibly soft, nuanced look that prevented the rattan from becoming too bold or contrasting, perfectly aligning with my goal of a unified, understated elegance.
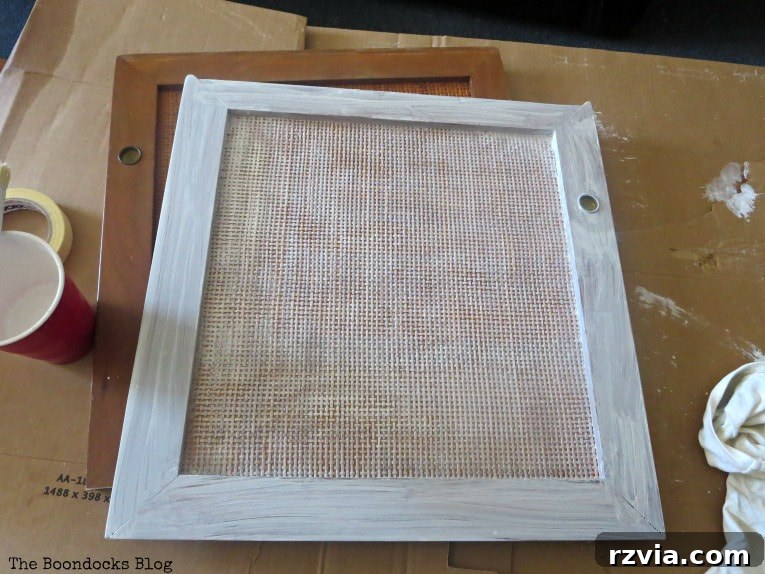
To seal in the beautiful milk paint and further enhance its gentle appearance, I applied a coat of wax. This step proved invaluable, as the wax not only protected the paint but also subtly softened the finish, allowing some of the underlying rattan texture to emerge even more beautifully as a little bit of the paint was wiped off during the waxing process. The final effect on the rattan doors was one of delicate charm and refined texture.
Phase 2: Rescuing and Revitalizing the Dresser
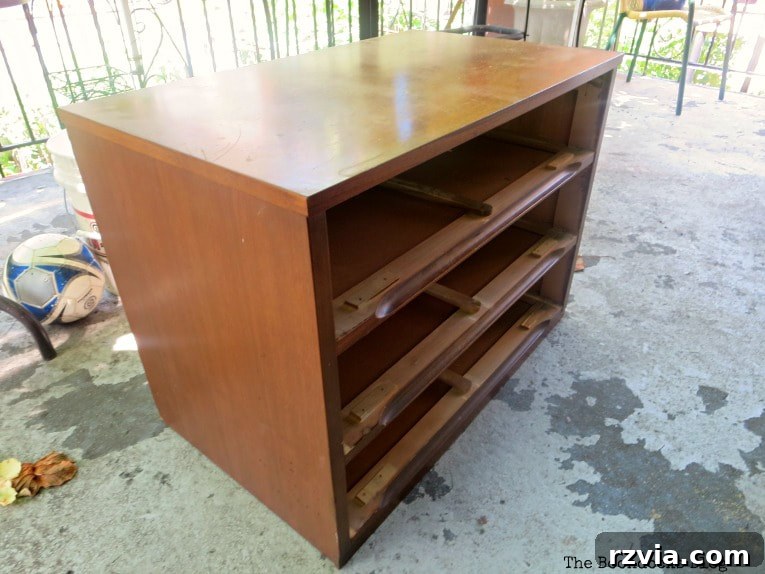
Now, let’s turn our attention to the second half of this pairing – the upper piece. This is another fantastic Mid Century Modern item, which I would best describe as a small dresser or a substantial side table, featuring three convenient drawers. But this piece comes with a bit of a backstory! I actually “rescued” it from my own father, who, in his pragmatic wisdom, was using this lovely vintage dresser to store his tools in the garage. To me, this felt like an absolute travesty, a crime against good design! One day, I simply liberated it, much to his consternation. He’s been looking for his tools ever since, and while I tried to pacify him with explanations of its vintage appeal and inherent value, he remained quite annoyed. Tool storage, it turns out, is a very serious business for him. Despite his initial displeasure, I knew this dresser deserved a better fate, destined for a stylish interior rather than a dusty workshop.
I replicated the painting process with this dresser, starting with a foundational coat of Old Fashioned Milk Paint in Snow White. This initial layer effectively covered the dresser’s original finish and prepared the surface for the subsequent color applications. Using the Safepaint formula again ensured that the paint adhered beautifully to the previously finished wood, creating a smooth and even base.
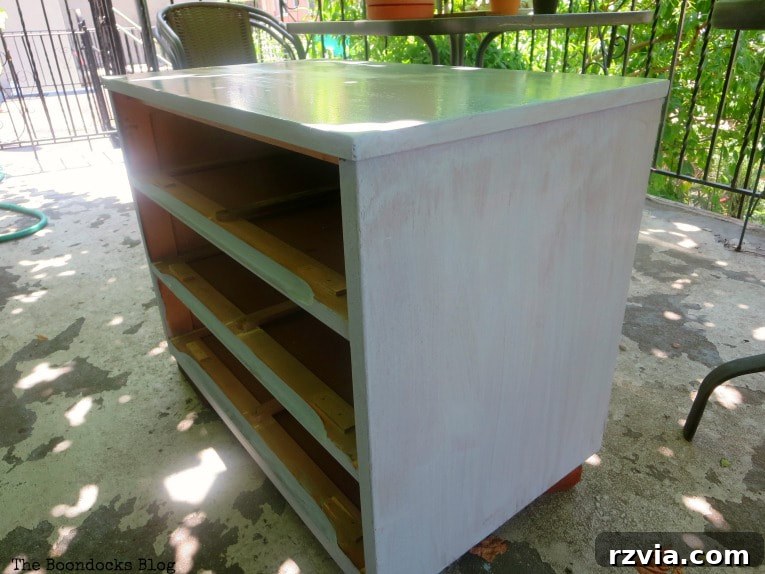
Following the white base, I applied three coats of the Old Fashioned Milk Paint in Slate. The multiple coats built up a rich, deep blue color, achieving full opacity and a luxurious finish. For the final coat, I employed long, continuous brushstrokes from one end of the dresser to the other. This technique helps to minimize visible brush marks and create a professional, seamless appearance, giving the dresser a truly polished and unified look that mirrored the sideboard below.
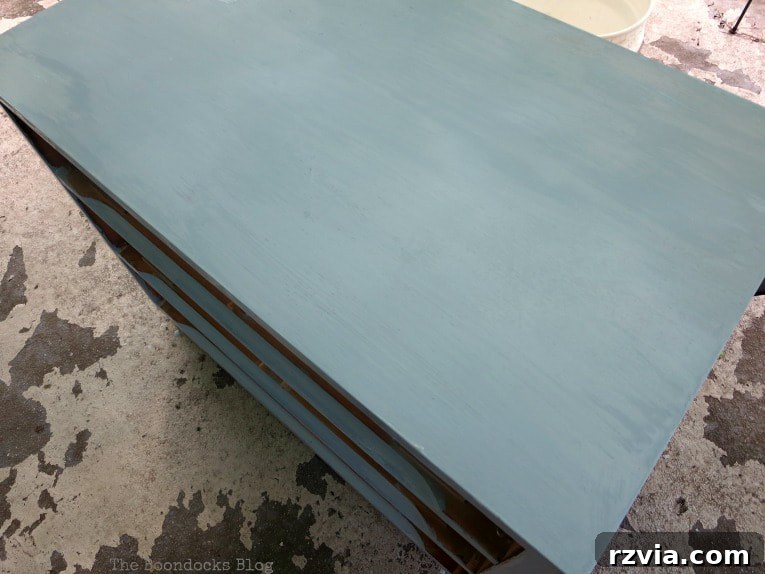
Crafting the Dresser Drawers: A Soft, Patterned Effect
The drawers of the dresser were next on my list, and just like the sideboard doors, they required thoughtful consideration to ensure a perfectly cohesive pairing. Their original state, with a simple wood finish, needed to be transformed to match the soft aesthetic developing across both pieces. Here’s a look at their starting point:
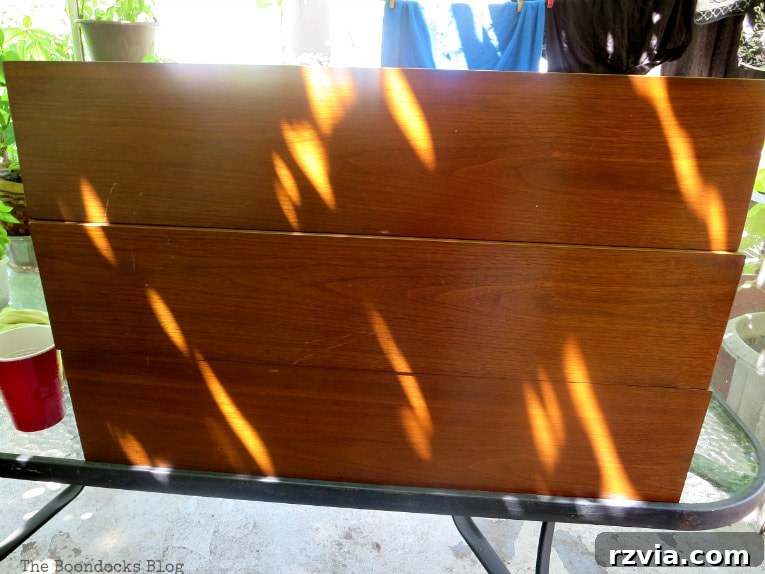
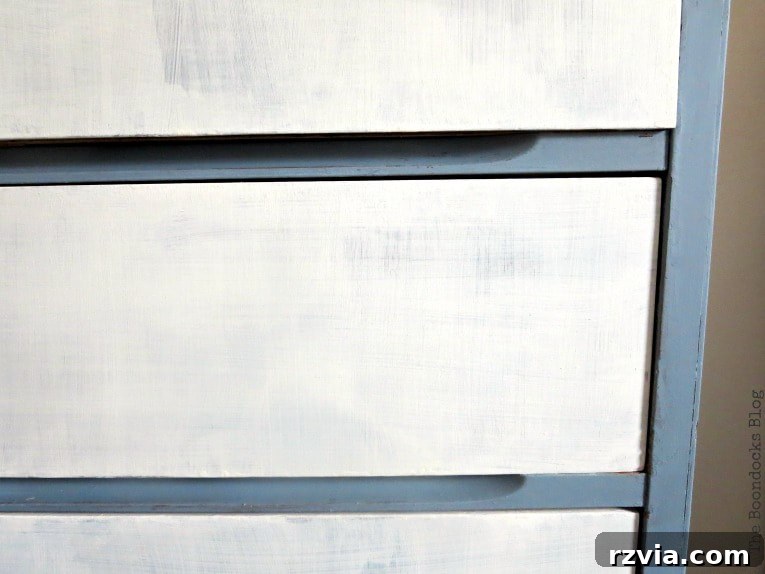
After much contemplation, I decided to paint the dresser drawers in Snow White, directly echoing the front panels of the sideboard doors. This decision was pivotal in creating a visual link between the two pieces. For all coats on the drawers, I exclusively used the Snow White milk paint, ensuring a consistent and bright finish. This mirrored approach was a key strategy in achieving the desired unified aesthetic across the entire furniture ensemble.
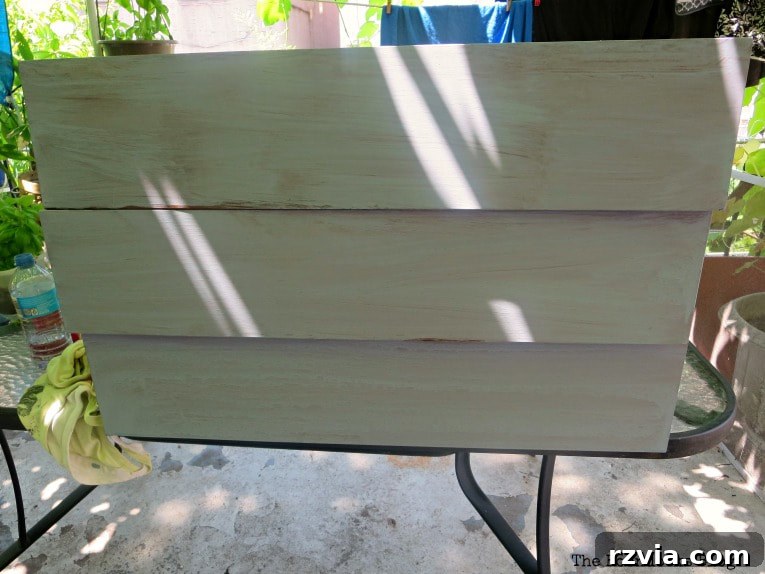
To add a subtle layer of interest and texture to the drawer fronts, I experimented with my painting technique. The first coat was applied horizontally. For the second coat, I painted in the opposite direction, vertically. I continued this alternating pattern for the third and fourth coats – horizontally, then vertically. This deliberate layering of brushstrokes, alternating directions with each coat, created a wonderfully soft, almost patterned effect on the white surface. The slight variations in paint application resulted in an ethereal, cloud-like appearance that felt both organic and sophisticated. It’s a subtle detail, but one that adds depth and character to the drawers without being overly distracting.
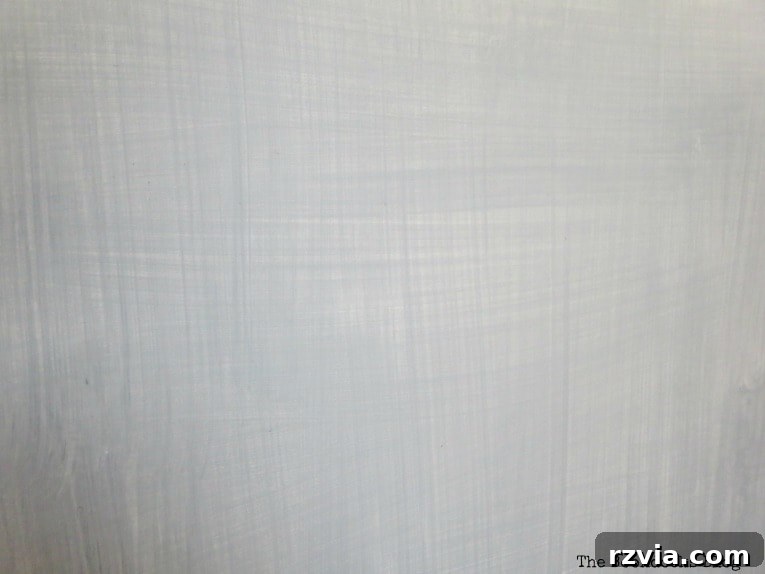
To further enhance this delicate effect and introduce a touch of visual intrigue, I very lightly sanded the drawer fronts. This gentle sanding allowed for subtle variations in the paint’s texture and color, creating a beautiful interplay of light and dark areas. This was entirely deliberate, designed to give the fronts a nuanced, almost aged appearance, adding depth and character that a perfectly smooth finish might lack. The result is a visually captivating surface that invites a closer look, contributing significantly to the overall charm and unified aesthetic of the combined pieces.
The Finishing Touch: Sealing with Beeswax
The final step for both pieces, and indeed the entire transformation, involved sealing in all that gorgeous milk paint. I used Daddy Van’s All Natural Beeswax and Lavender Furniture Polish. This not only provides a protective layer but also imparts a lovely, subtle sheen and a delightful lavender scent to the furniture. For application, I found a round waxing brush to be incredibly efficient, speeding up the process and ensuring even distribution. Once the wax was applied, I buffed it gently with a soft rag, revealing a smooth, protected surface that perfectly completed the unified look.
The Grand Reveal: A Unified Vision Achieved
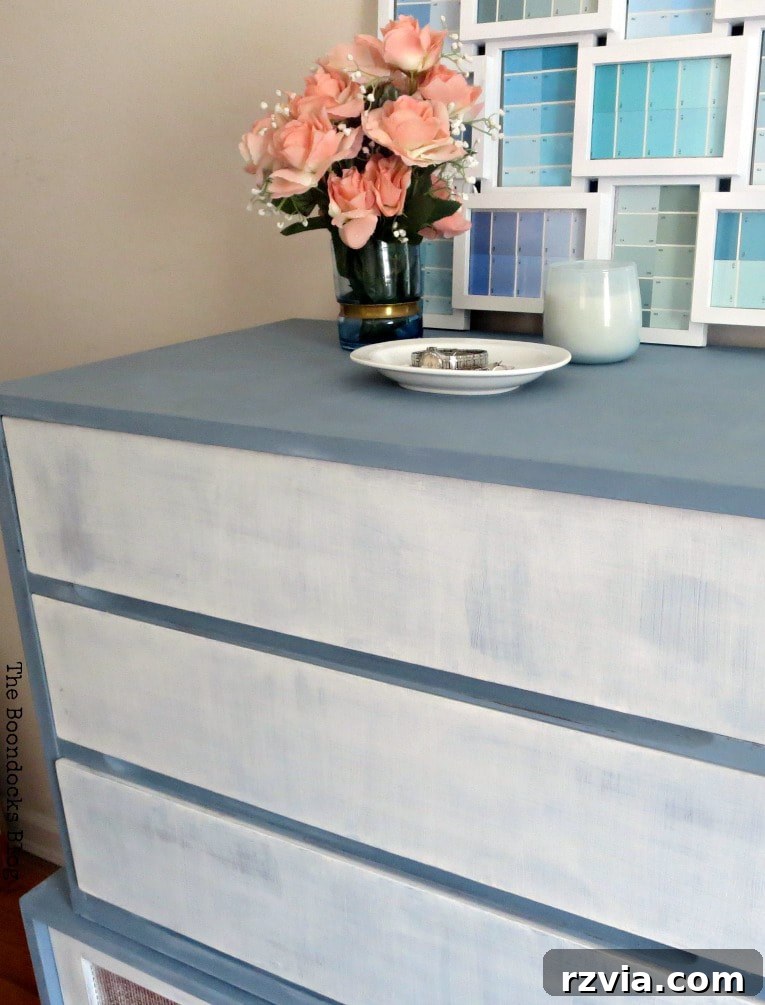
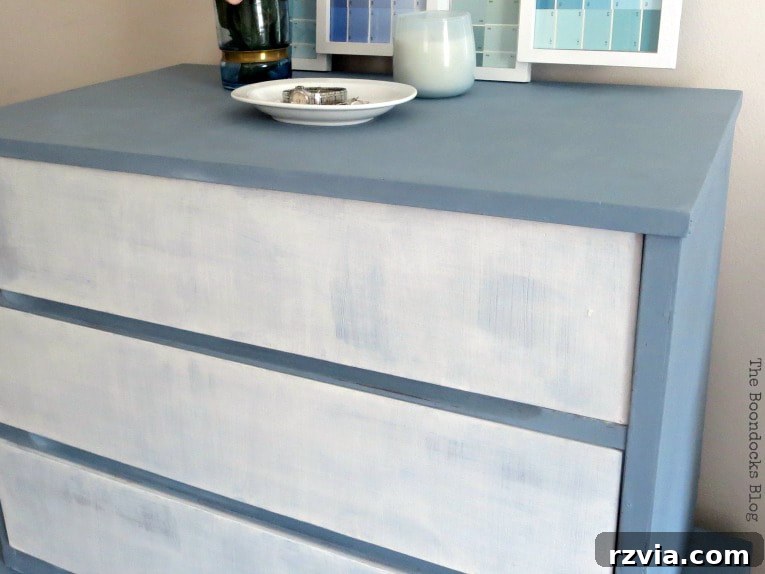
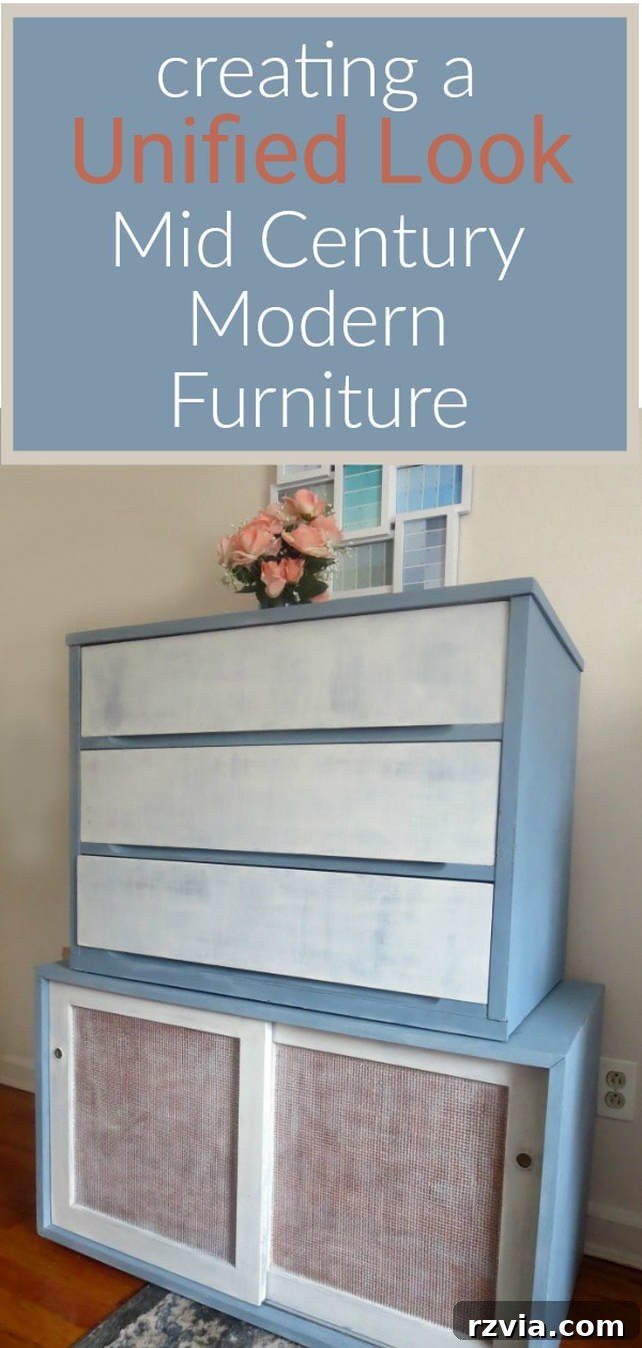
And here it is – the finished furniture ensemble! Doesn’t it look like a single, thoughtfully designed piece now? The transformation is truly remarkable. By carefully selecting the right colors and applying consistent techniques, I managed to take two distinct Mid Century Modern pieces and meld them into one harmonious unit. The front surfaces, with their soft white finishes, no longer present the harsh contrast they once did. The rattan doors, especially, have shed their jarring appearance and now blend seamlessly with the rest of the sideboard, contributing to an overall sense of calm and sophistication.
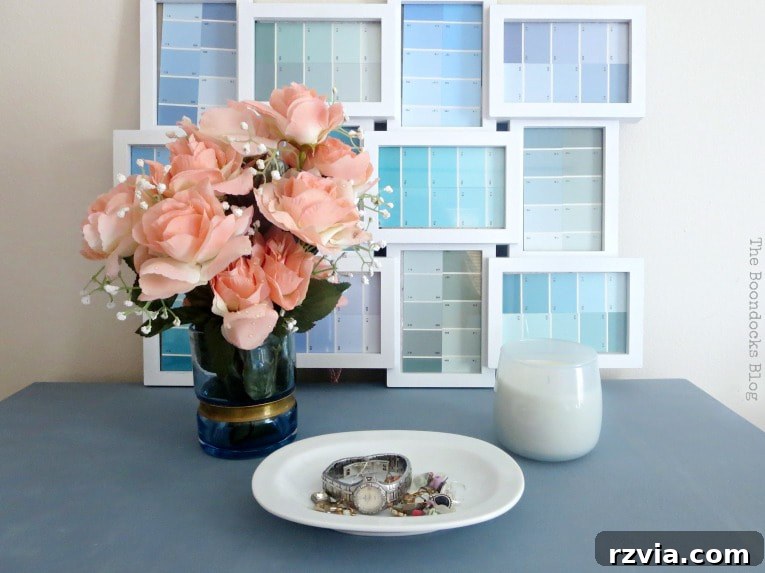
I am particularly fond of the dresser drawer fronts; their subtly patterned, sanded finish now resembles soft, ethereal clouds, adding a unique texture and visual depth that is both comforting and stylish. What’s more, the beautiful slate blue color on the bodies of both pieces perfectly matches my rug (a similar style), creating an unexpected but delightful synergy throughout the room. This cohesive color palette and unified design have truly transformed the bedroom into a more serene and intentional space.
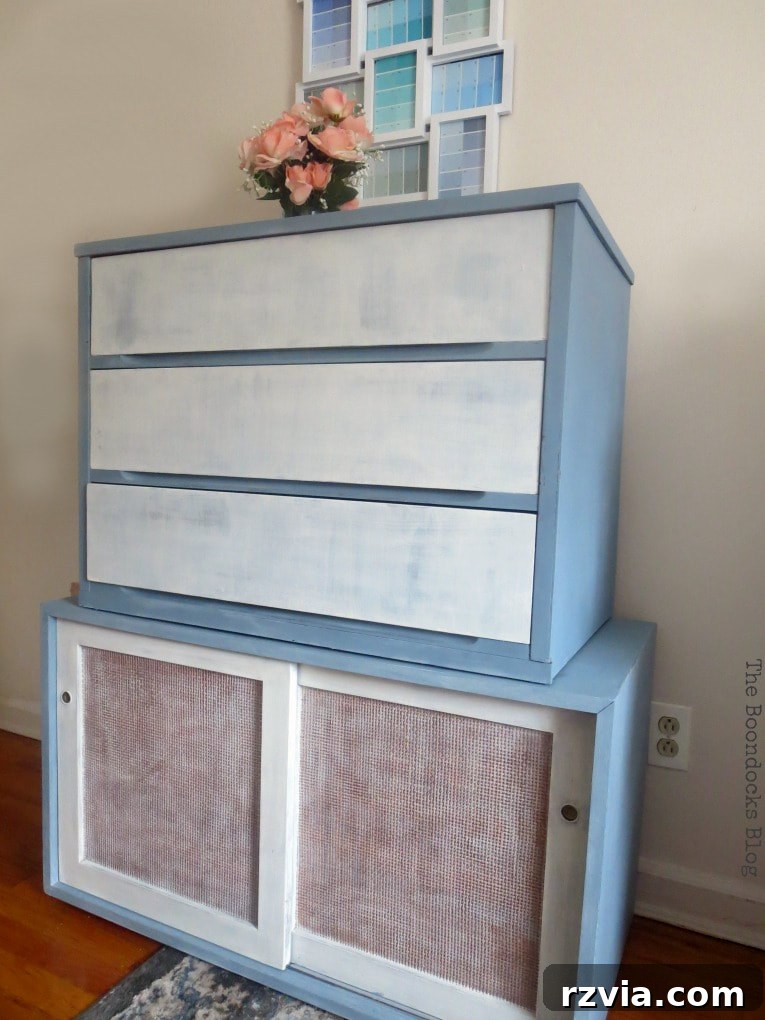
Beyond its aesthetic appeal, this newly unified furniture piece is also highly functional. I plan to utilize this two-part unit for storing all my paperwork and printing supplies, keeping my home office essentials neatly tucked away. And yes, the printer will proudly sit on top – because even the most beautiful DIY projects must also be practical and serve a purpose in our daily lives!
The ultimate seal of approval, and truly the icing on the cake for me, came from my dad. The man who had once begrudgingly stored his tools in one of these pieces came to inspect its transformation. He looked it over carefully, raised an eyebrow (a rare gesture of surprise from him), and then, to my absolute delight, a small smile crept onto his face – a smile he usually reserves only for our beloved dog! He then delivered the highest praise possible: “It came out very nice!” This heartfelt compliment, coming from someone who would have been perfectly content to continue “misusing” such a lovely piece of furniture, truly validated all the effort and indecision. It marked the successful resolution of this particular bedroom dilemma.
With these two Mid Century Modern pieces beautifully unified, my bedroom transformation is well underway. There are just a few more elements to complete before this room is truly finished. To catch up on the other projects I’ve tackled in this space so far, take a look below. I’m curious to know your thoughts: do you agree that I successfully achieved a unified look by pairing and painting these two distinct MCM furniture pieces?

Discover More Inspiring Bedroom Projects and DIY Transformations:
If you enjoyed this DIY furniture makeover and want to follow along with more of my creative adventures, be sure to subscribe to my blog! You’ll receive updates directly in your mailbox. The subscription form is conveniently located on the sidebar and at the top of the page. To review my privacy policy, please click here.
Please note that this blog is intended for entertainment purposes only, and my DIY tutorials should not be considered professional advice. Always exercise caution and proper safety measures when undertaking any DIY project. You can find my full disclaimer here.
I truly appreciate hearing from you, so please feel free to leave your comments below! I make an effort to reply to each one. To ensure your comment can be published, kindly refrain from including hyperlinks. Thank you for reading and happy crafting!