
Give your living space a complete refresh without breaking the bank! This comprehensive guide reveals how a simple yet effective refurbished coffee table idea can bring a charming rustic farmhouse touch to your home. Forget about expensive new furniture – with this step-by-step tutorial, you can transform your own dated coffee table into a stunning focal point, embracing sustainability and personal style in one delightful project.
DIY Coffee Table Makeover: From Worn Out to Rustic Chic
Every piece of furniture in a busy household tells a story, often etched with the playful chaos of everyday life. For many families, especially those with energetic children, furniture isn’t just decor; it’s a battleground. Our coffee table, once a sturdy centerpiece, bore the brunt of countless adventures – minor bumps, accidental spills, and the inevitable scratches that come from enthusiastic play. While the memories are priceless, the condition of the table often leaves much to be desired. This was precisely the challenge we faced, leading us down the rewarding path of furniture refurbishment and upcycling.
For years, our living room’s focal point was a robust vintage metal trunk. While undeniably solid and immovable – a definite plus when dealing with little ones – it eventually felt less like a traditional coffee table and more like, well, a trunk. There came a point when the desire for a “real” coffee table, one that exuded classic charm and functional elegance, became undeniable. We craved a piece that truly complemented our evolving home aesthetic, moving away from purely utilitarian pieces towards something with more character and warmth.
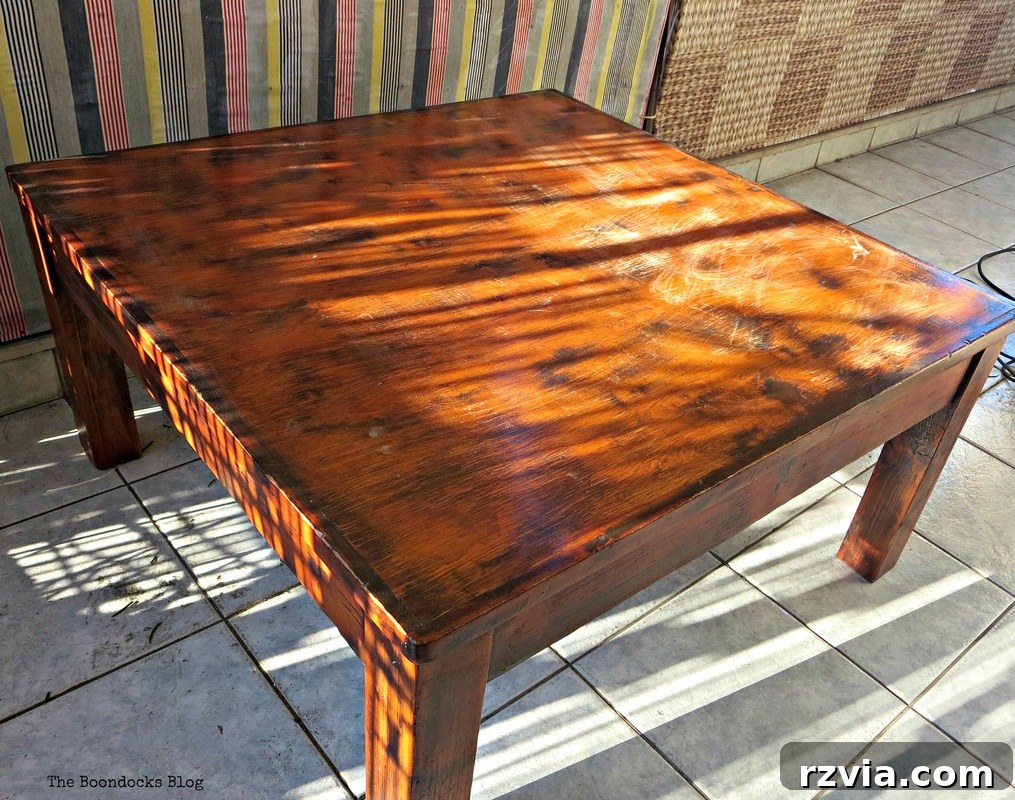
The journey began with spotting an old table that held immense potential. It wasn’t languishing in a dusty basement, but rather existing as a functional, albeit tired, piece in our home. With a bit of vision and assistance from “the hubs” to skillfully cut its legs down to the ideal coffee table height, it gained a new purpose. A decade ago, an orange-toned stain seemed like a perfectly fashionable choice, reflecting the trends of the time. It served its purpose then, blending into the decor of that era.
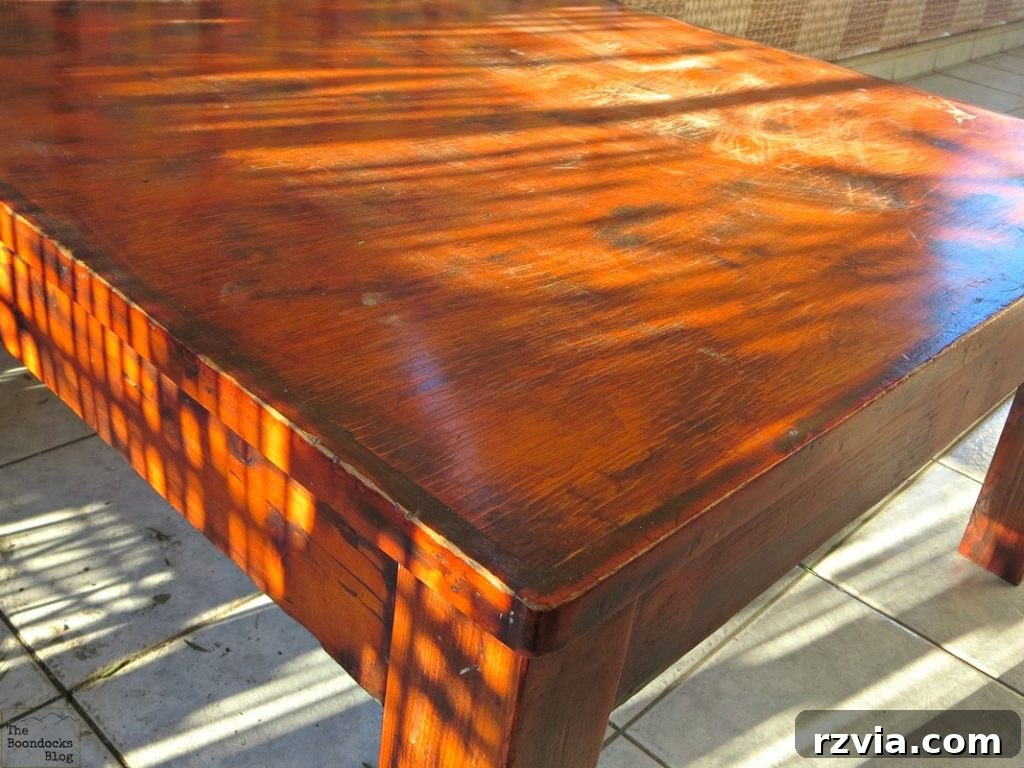
However, fashion evolves, and so do personal tastes. Looking at the table now, its once trendy “orange” hue appeared distinctly outdated, clashing with our current decor preferences. More than just aesthetic concerns, the surface was a testament to its active life – a canvas of scratches, dings, and minor cracks, courtesy of lively children. It was clear: this solid wood table desperately needed an intervention. It was time for a much-needed update, transforming it from an eyesore into a beloved, functional piece once more, suitable for a rustic farmhouse aesthetic.
Essential Materials for Your Coffee Table Upcycle
Embarking on a successful furniture refurbishment project requires a few key tools and supplies. Gathering everything beforehand ensures a smooth and efficient process, minimizing interruptions and maximizing your creative flow. Here’s a detailed list of what you’ll need to give your coffee table a brand-new lease on life:
- Old Solid Wood Coffee Table: The foundation of your project. Look for a sturdy piece, even if it has cosmetic flaws, as these can often be resolved or even embraced as part of its charm. Ensure it’s structurally sound.
- Orbital Sander and Sandpaper (various grits): Absolutely essential for stripping away old finishes, smoothing imperfections, and preparing the wood. Start with a coarser grit (e.g., 80-100) to remove stubborn layers, then progress to medium (120-150) and fine (180-220) grits for a silky-smooth surface ready for finishing.
- Dust Cloths and Drop Cloth: Critical for maintaining a clean workspace and protecting your floors, furniture, and surroundings from sanding dust and paint splatters. A tack cloth is also useful for final dust removal.
- Clear Varnish (or Polycrylic): To seal and protect your newly revealed wood top, providing durability against moisture, scratches, and everyday wear. Choose a matte, satin, or semi-gloss finish based on your desired look. A water-based polycrylic often dries faster and with less odor.
- Paint Brushes (various sizes): Invest in good quality brushes for applying varnish and paint smoothly and evenly, minimizing brush strokes. A smaller brush might be useful for detailed areas, while a larger one for broad surfaces.
- Black Chalky Paint: An excellent choice for painting furniture legs, as it adheres well to most surfaces with minimal to no priming and provides a beautiful matte, velvety finish. It’s also very forgiving for distressing techniques. Feel free to choose any color that complements your home decor.
- Protective Gear: Safety first! Always wear safety glasses or goggles to protect your eyes from dust and debris, a dust mask during sanding, and gloves to keep your hands clean during painting and varnishing.
- Screwdriver/Drill: Handy if you need to disassemble any parts of the table, such as removing legs for easier sanding or painting, and for reassembly later.
Step-by-Step Guide: How to Refinish a Coffee Table for a Farmhouse Look
Now, let’s dive into the exciting part – the actual transformation! Follow these detailed steps to achieve a professional-looking refurbished coffee table that will become a cherished centerpiece in your home.
1. Preparation and Disassembly (if needed)
Before you begin any sanding or painting, it’s crucial to prepare your workspace. Set up in a well-ventilated area, preferably outdoors or in a garage, to minimize dust and fumes indoors. Lay down your drop cloth to protect the floor from dust, paint, and varnish spills. If your table allows, consider disassembling the legs from the tabletop. This simple step can significantly ease the sanding and painting process for each component, ensuring thorough coverage and a cleaner finish.
2. The Art of Sanding: Unveiling the Wood’s True Beauty
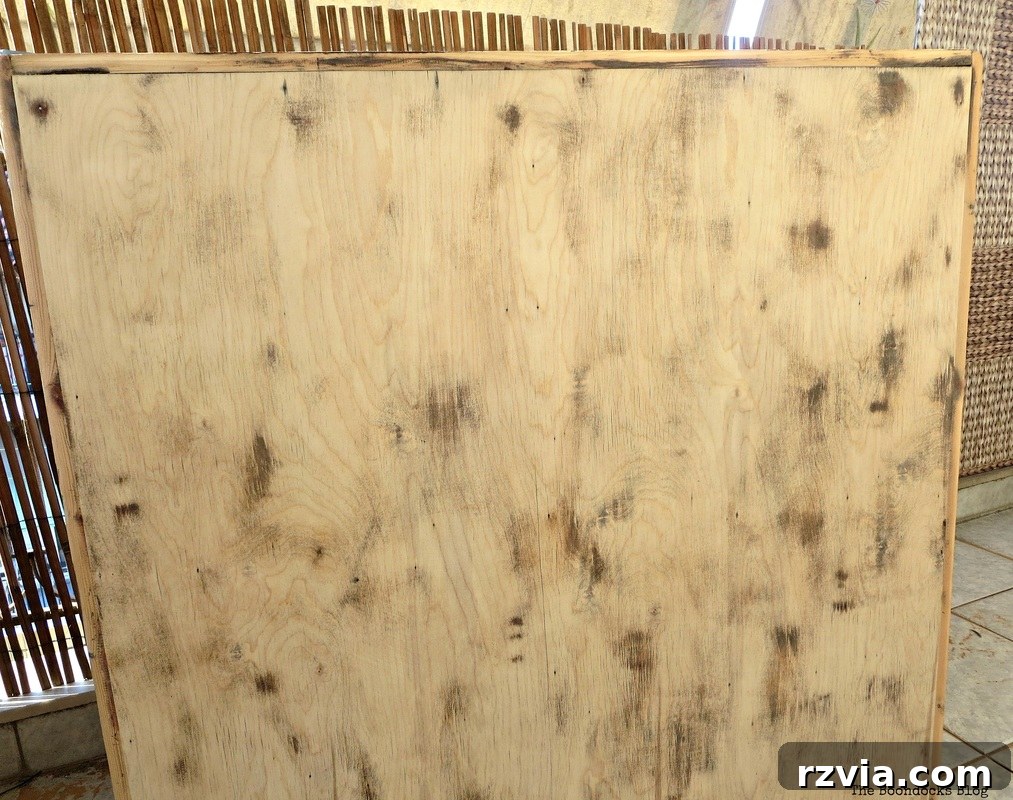
Sanding is perhaps the most crucial and labor-intensive step in any furniture makeover, as it meticulously strips away the old finish and prepares the wood for new applications. I began with a thorough sanding session, using my orbital sander. Starting with a medium-grit sandpaper (around 100-120 grit), I meticulously worked my way across the entire surface of the tabletop and legs. The primary goal was to remove all traces of the old, tenacious orange-toned stain and varnish, revealing the beautiful, raw wood beneath. This process requires patience, consistency, and a keen eye to ensure an even finish across all areas, especially around edges and corners.
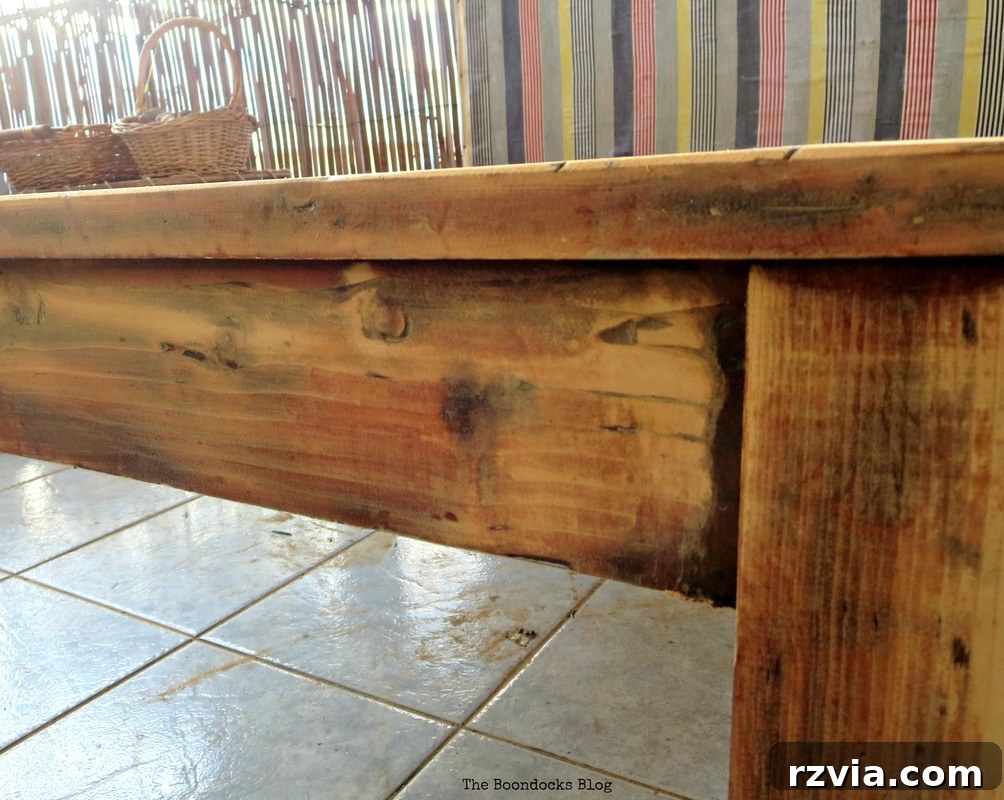
As I diligently sanded, a delightful and completely unexpected surprise began to emerge. Beneath those stubborn layers of stain and varnish, I discovered that the frame surrounding the table top was actually made from a noticeably different wood species than the main central surface. This accidental revelation was a significant turning point in the design process, inspiring a creative shift in my original plans.
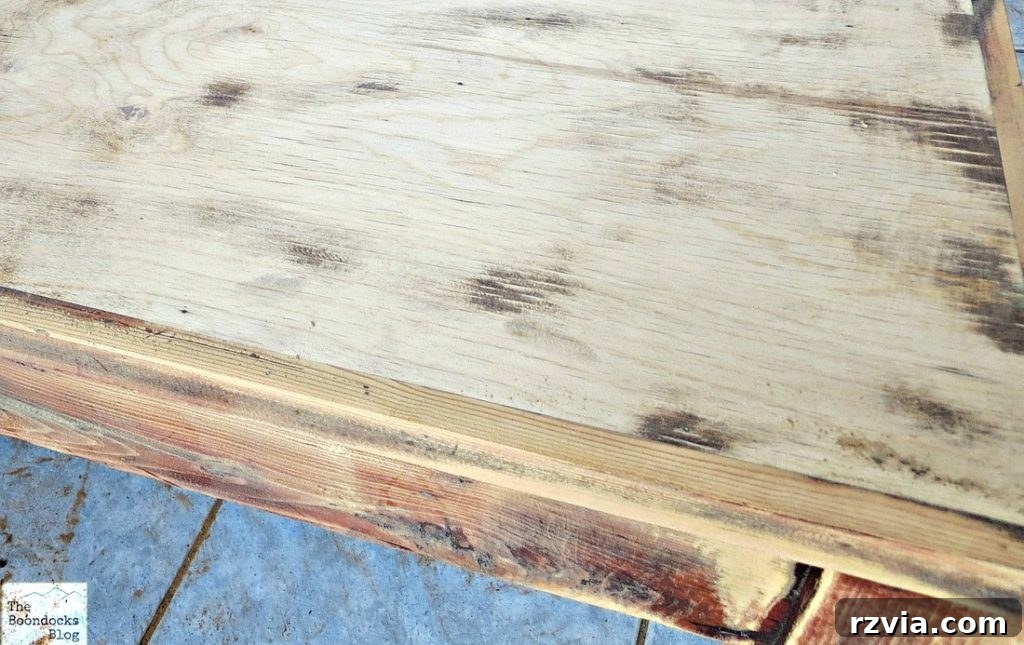
This “blonde” wood on the main surface had such a beautiful, understated elegance and fine grain that I immediately knew I wanted to preserve its natural hue. Instead of staining it a darker color as initially planned, I decided to let its inherent beauty shine through. After achieving a perfectly smooth surface by finishing with a finer grit sandpaper (180-220 grit) – always sanding in the direction of the grain – I thoroughly cleaned the entire table with a dust cloth and tack cloth to remove all sanding residue, ensuring optimal adhesion for the varnish and paint.
3. Varnishing the Tabletop: Protecting Natural Beauty
With the gorgeous blonde wood revealed and meticulously cleaned, it was time to protect it for years to come. I opted for a high-quality, colorless varnish, which incidentally had just a subtle hint of yellow to it. This tiny touch of warmth served to enhance the wood’s natural tones without altering its authentic shade significantly. Applying varnish requires thin, even coats to prevent drips, minimize bubbles, and ensure a smooth, durable finish. I used a good quality paintbrush, moving in consistent, overlapping strokes always in the direction of the wood grain.
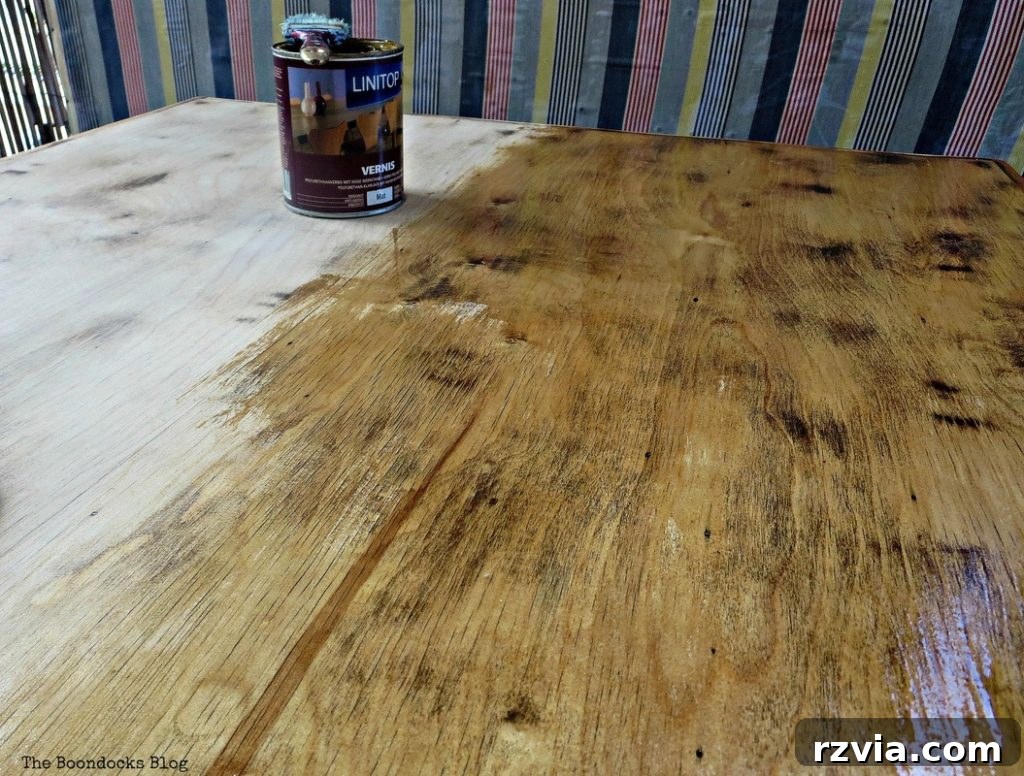
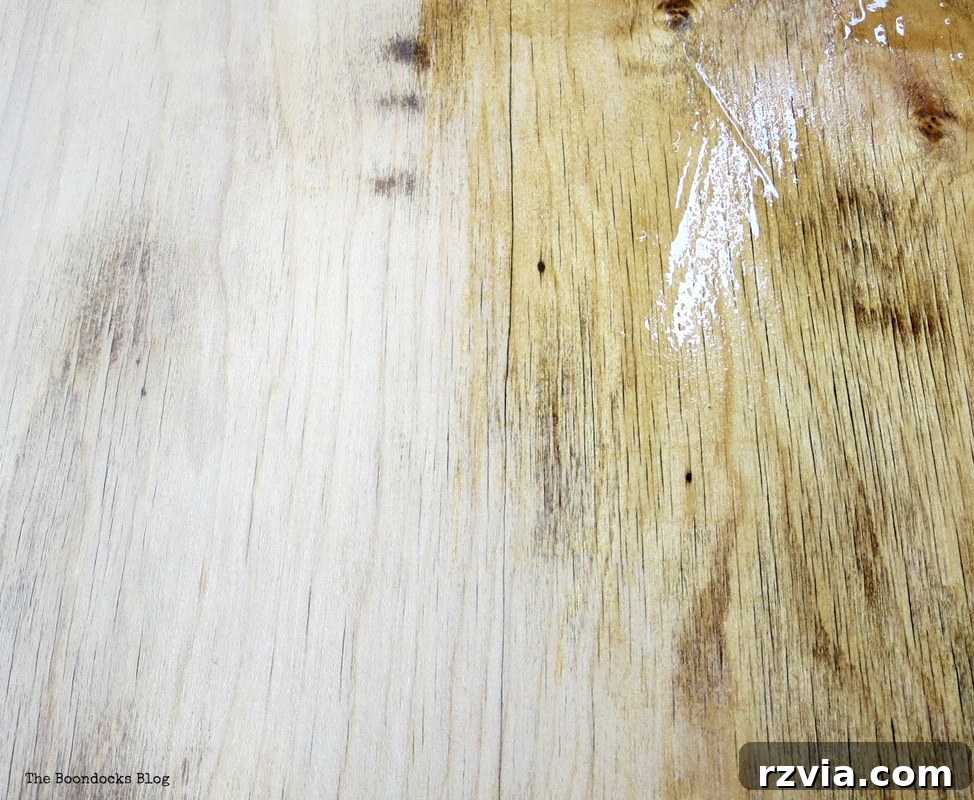
The first coat of varnish was absorbed quite rapidly by the thirsty, raw wood – a common occurrence with older, unsealed timber. This indicates that the wood is porous and ready to accept protection. I applied a total of four coats, allowing ample drying time between each application, as per the product instructions. Patience is key here; rushing can lead to tackiness, an uneven finish, or even peeling. Remarkably, it took approximately two full weeks for the wood to completely stop absorbing the varnish and fully cure, ultimately achieving a beautifully sealed, resilient, and durable finish. This extensive absorption period highlights the importance of not skipping coats and allowing proper curing time, especially with older, drier wood.
4. Painting and Distressing the Legs: Adding Rustic Charm
Once the tabletop was perfectly cured and sealed, attention turned to the legs. To create a striking contrast and enhance the rustic farmhouse aesthetic, I chose black chalky paint. Chalk paint is an excellent choice for furniture makeovers due to its matte finish, excellent adhesion (often requiring minimal to no priming), and its ease of distressing. I applied two even coats of black chalky paint to the legs, ensuring full, opaque coverage. This depth of color would perfectly complement the lighter tones of the tabletop.
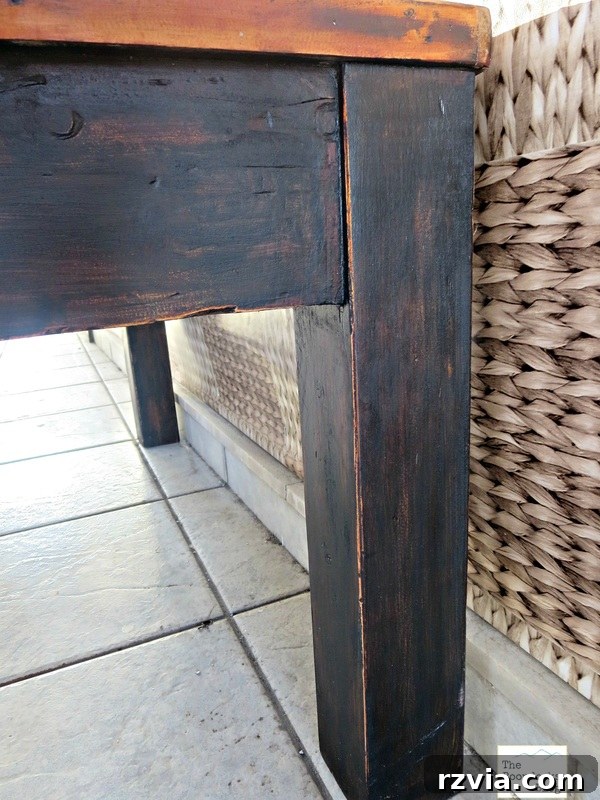
After the paint was thoroughly dry, I gently distressed the legs. This popular technique involves lightly sanding certain areas, particularly edges, corners, and raised details, to allow the original wood or a previous layer of finish to subtly show through. The goal is to create a naturally aged, worn, and well-loved look, adding character and depth to the piece, rather than a perfectly smooth, factory finish. This careful distressing process also subtly revealed the same reddish wood that was part of the tabletop’s frame, creating an even more cohesive, yet wonderfully multi-toned, design element.
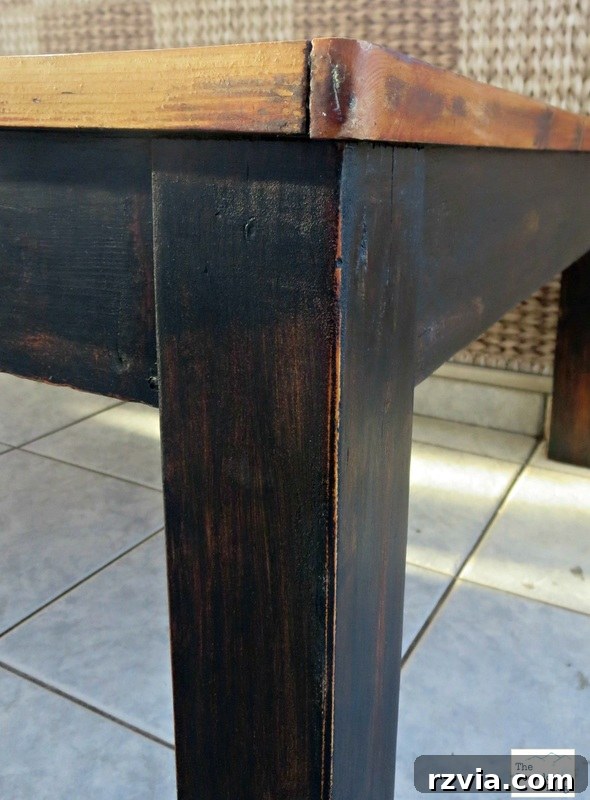
The Tri-Colored Masterpiece: A Happy Accident of Design
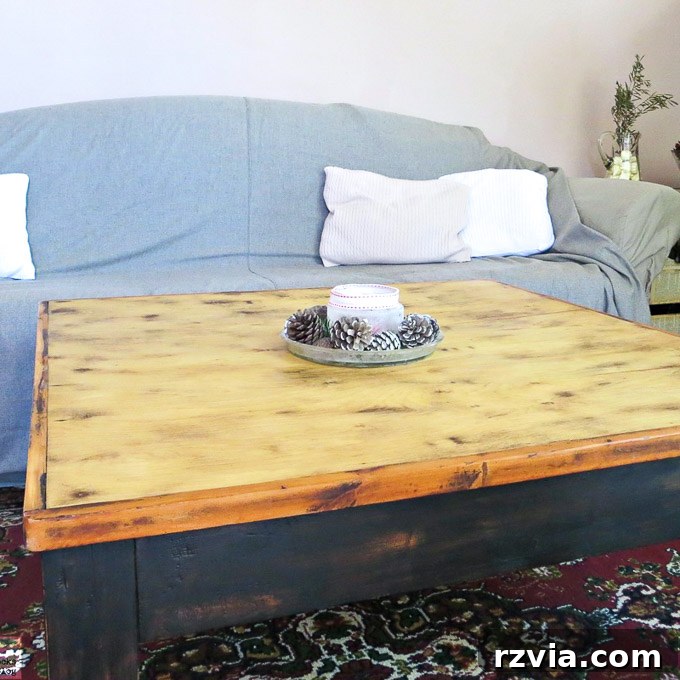
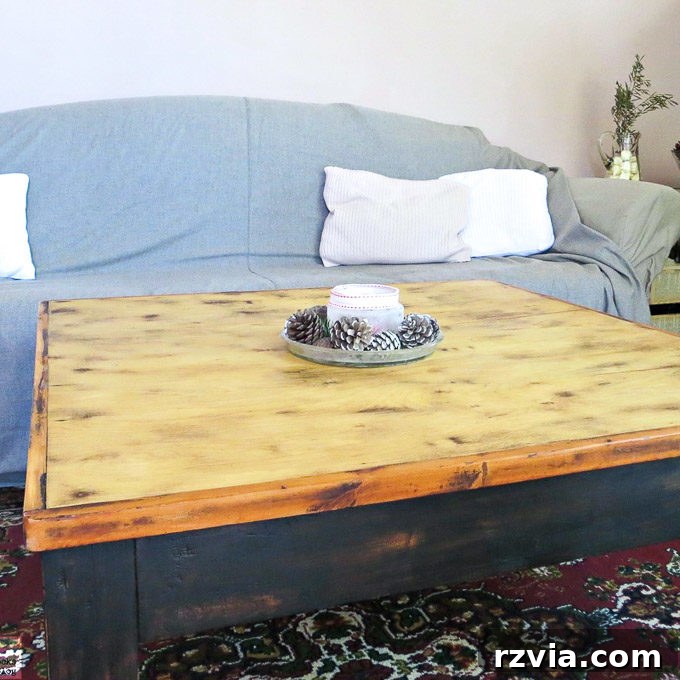
The true magic and unique charm of this refurbishment lies in its unexpected outcome. What started as a simple desire to refresh an old, dated table evolved into a stunning tri-colored masterpiece that celebrates both natural beauty and thoughtful design. The final piece beautifully showcases three distinct, yet incredibly complementary, tones: the deep, elegant black of the distressed legs, the warm, rich reddish hue of the tabletop’s frame, and the serene, inviting blonde of the main table surface. It’s a symphony of natural and painted finishes that blend seamlessly into a cohesive and truly captivating rustic farmhouse style.
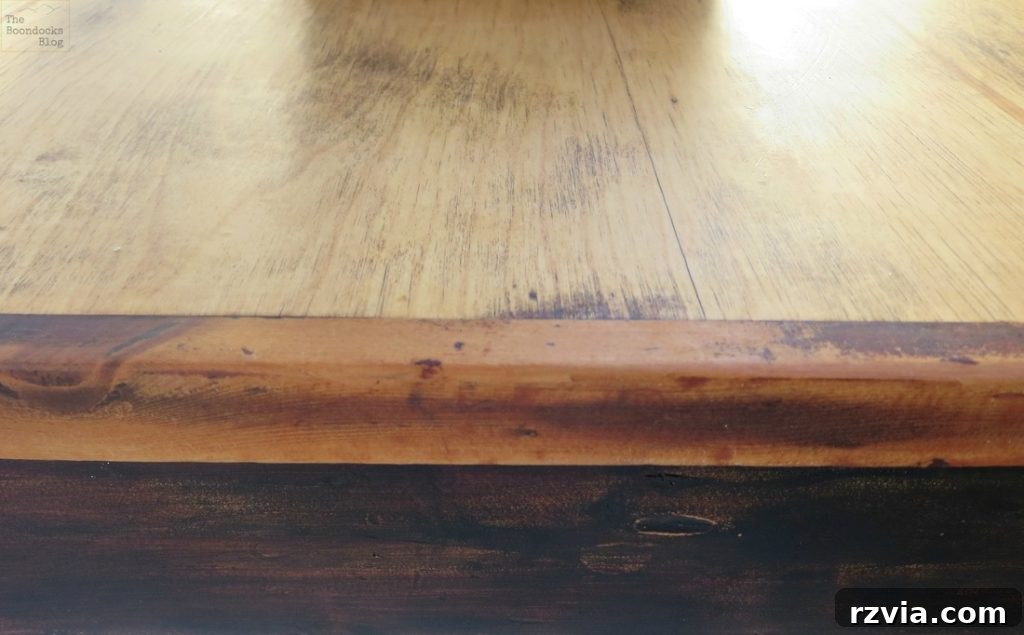
Sometimes, the most exquisite and memorable designs are born from pure serendipity. I genuinely believe I couldn’t have achieved such a unique and visually appealing result if I had meticulously planned every single detail from the outset. This project stands as a vivid testament to the beauty of “happy accidents” in DIY and creative endeavors, where embracing unexpected discoveries can lead to truly remarkable and personalized creations that resonate deeply within a home.
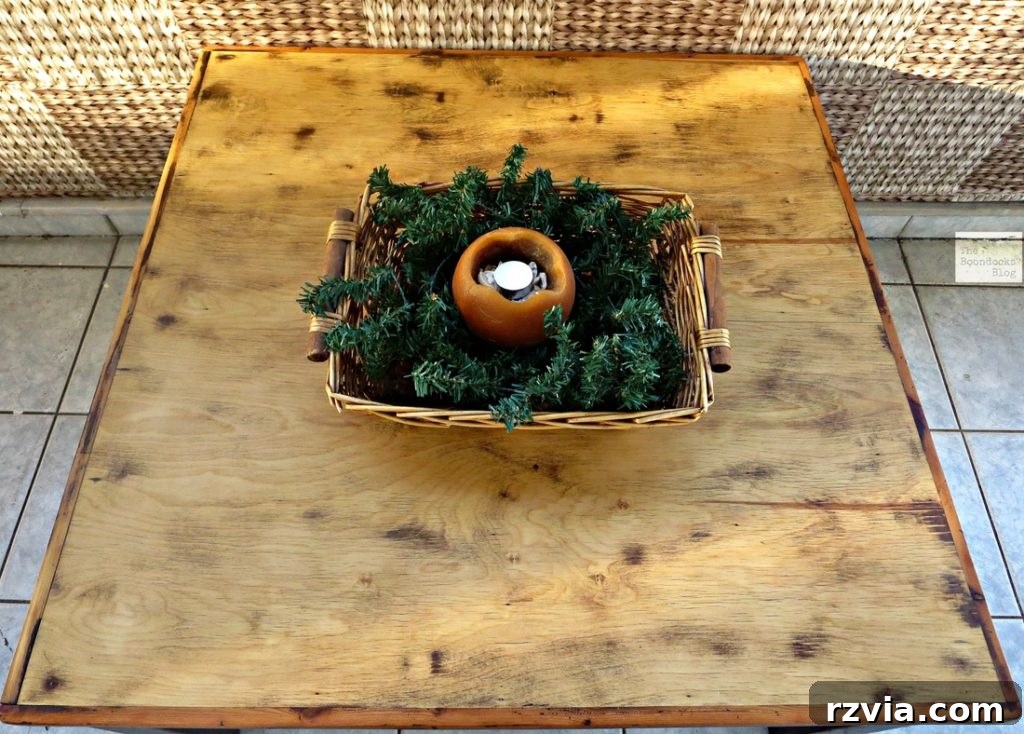
Highlighting Natural Beauty and Unique Character
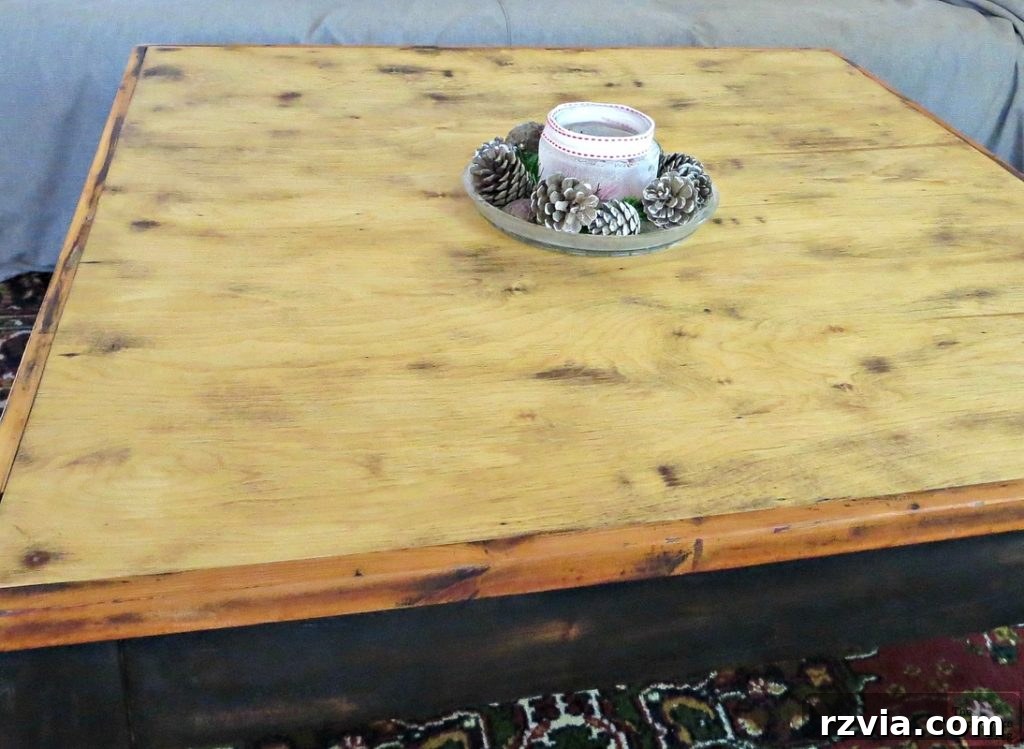
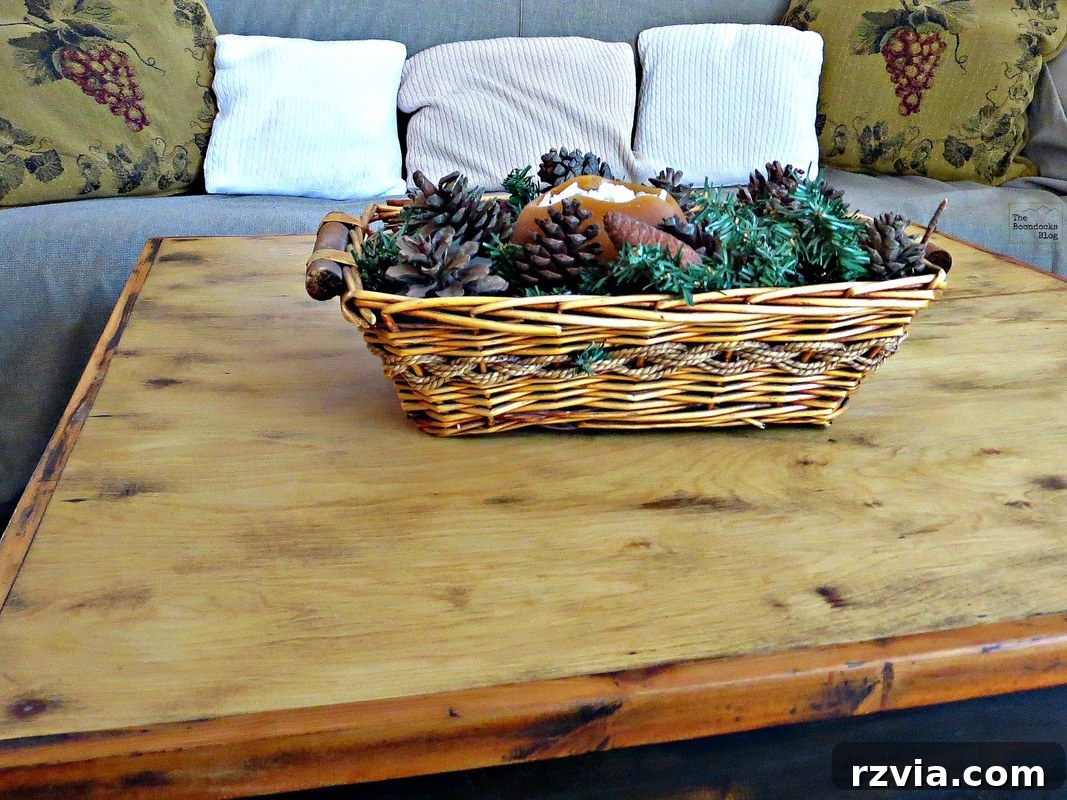
By opting for a colorless varnish on the main coffee table surface, we allowed the wood’s inherent beauty to take center stage. The exquisite natural grain patterns, subtle knots, and even unique dark spots – characteristics that were completely obscured by the old, heavy orange stain – now emerge with remarkable clarity and depth. This deliberate choice not only preserved the table’s unique history and organic charm but also added an authentic, tactile, and visually rich feel to the entire piece. It’s a subtle yet powerful reminder of the beauty often hidden beneath layers of time and previous makeovers, waiting to be rediscovered.
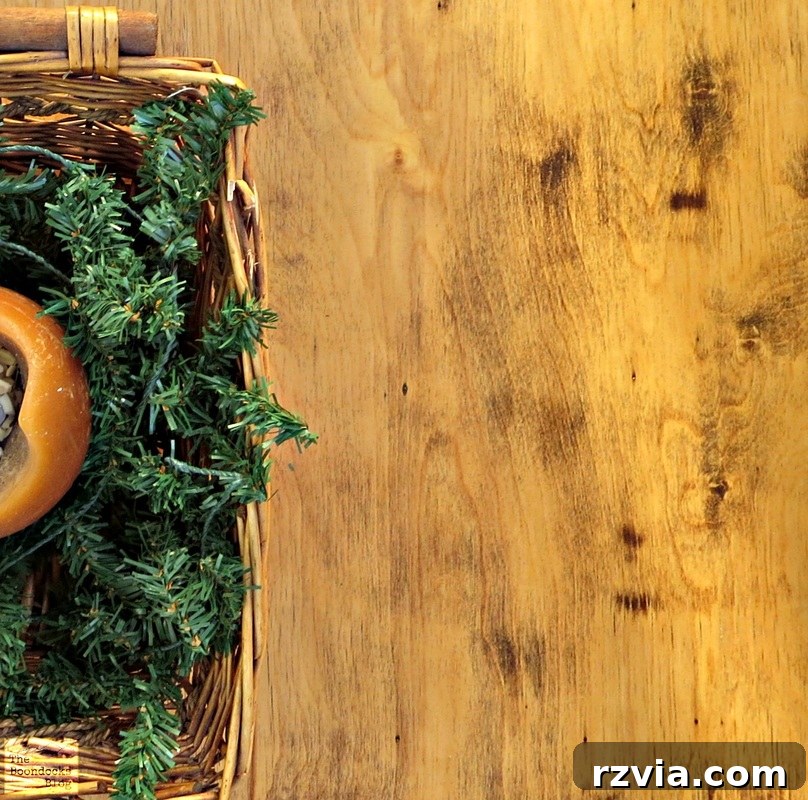
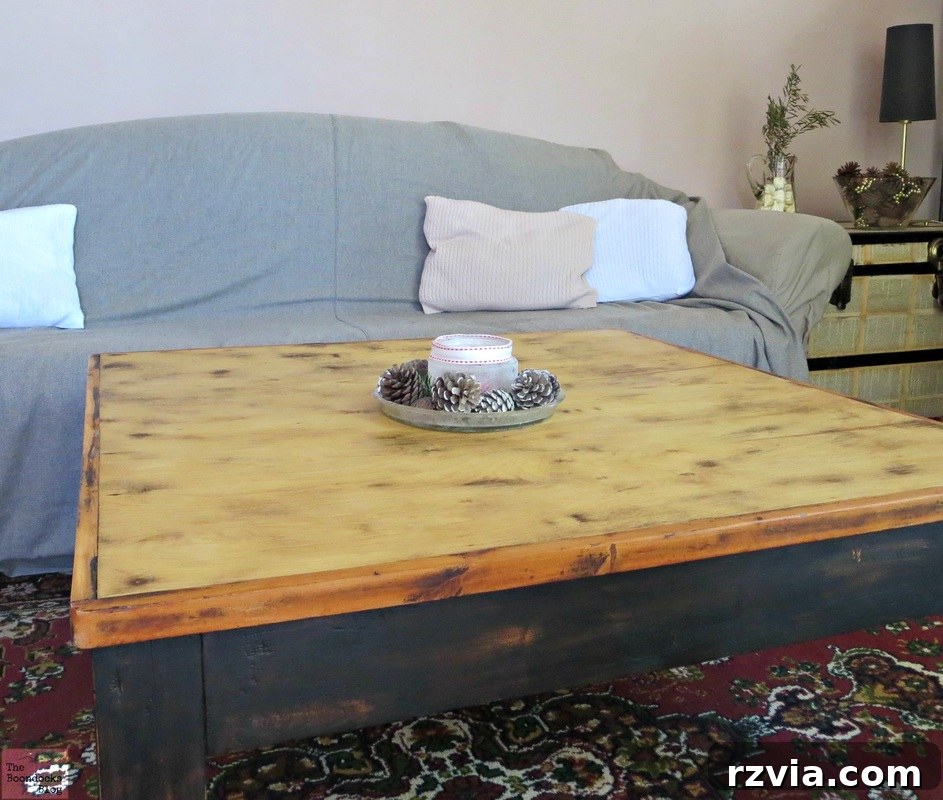
The Refurbished Coffee Table in its New Home
Seeing the refurbished coffee table settled into its natural habitat – our living room – is incredibly satisfying and rewarding. It effortlessly anchors the space, lending an air of rustic sophistication, timeless charm, and inviting warmth. The thoughtful blend of natural wood tones with the contrasting black creates a versatile piece that complements various decor styles, from classic farmhouse to modern eclectic or even industrial. It’s more than just a table; it’s a functional piece of art, a conversation starter, a testament to the power of DIY, and a beloved element that truly enhances the character of our home.
For a final, dramatic perspective, let’s take one last look at that “horrible before” image – a stark, yet crucial, reminder of the transformation’s magnitude and the journey undertaken.
And then, juxtaposed against that memory, stands the smooth, calming blonde color of the refurbished top, which now brings such tranquility and refined visual appeal to the entire room. It’s a true testament to how much a little elbow grease, creative vision, and a willingness to embrace unexpected discoveries can achieve in the world of furniture flipping and home decor.
Embracing the Journey: Happy Accidents and Lasting Beauty
This venerable table, with an estimated age of around 70 years, has now been granted a vibrant new chapter in its long life. With its refreshed colors and, thankfully, the less destructive presence of grown-up kids, it’s set to grace our home for many more decades to come. The enduring beauty of this project lies not just in its stunning final appearance, but profoundly in the journey itself – a journey filled with unexpected discoveries, creative improvisation, and the thrill of bringing an old piece back to life. I never specifically intended to create a tri-colored table, but as fate would have it, this month’s overarching theme truly became “happy accidents.” These are the defining moments that truly enrich DIY – turning initial challenges into exciting opportunities and embracing the spontaneous magic that often unfolds during the creative process.
Why Choose to Refurbish? The Sustainable Benefits of Upcycling Furniture
Beyond the immediate aesthetic appeal and the satisfaction of a job well done, choosing to refurbish furniture offers a wealth of profound benefits. Firstly, it’s incredibly budget-friendly, allowing you to achieve high-end, designer looks without the hefty premium price tag of new items. This makes stylish home decor accessible to everyone. Secondly, and perhaps more importantly in today’s world, it’s an incredibly eco-conscious choice. By rescuing and giving new life to forgotten pieces, you actively reduce waste, decrease demand for new resources, and contribute to a more sustainable, circular economy. Each upcycled piece is a small victory for the planet.
Furthermore, the personal satisfaction of creating something beautiful and functional with your own hands is unparalleled. Each scratch removed, each coat of paint applied, adds a layer of personal history, effort, and pride to the piece, making it truly unique and cherished. Finally, refurbished furniture often boasts an inherent character, superior craftsmanship, and a narrative that mass-produced items simply cannot replicate. This ensures your home truly reflects your individuality and tells a story, rather than just filling a space with generic items. This DIY refurbished coffee table project serves as a perfect example of how a little vision, elbow grease, and creative spirit can transform a tired, old piece into a cherished, stylish fixture.

This DIY refurbished coffee table project serves as a perfect example of how a little vision and elbow grease can transform a tired, old piece into a cherished, stylish fixture. It’s a rewarding process that not only enhances your home but also allows you to explore your creativity and embrace the charm of imperfections.
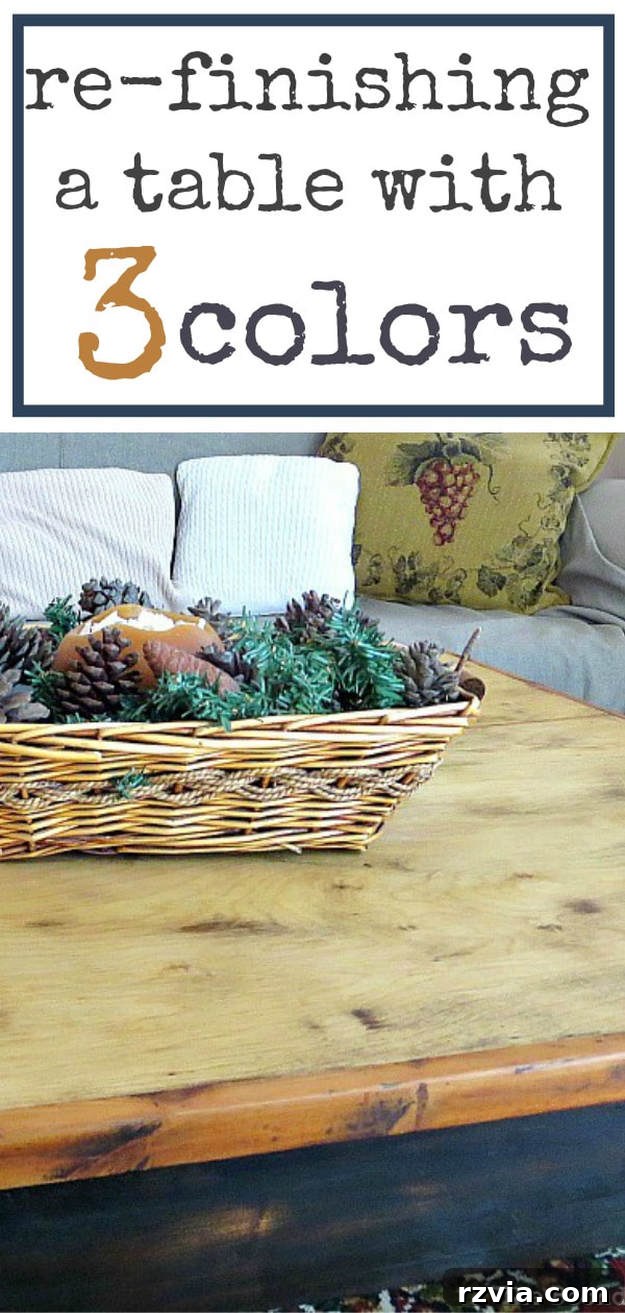
If you’re inspired by this transformation, we encourage you to share it with your friends on social media or save it for later on Pinterest. The image above is perfectly crafted for Pinterest, ready to inspire countless others and spread the joy of furniture upcycling!
For more inspiring DIY projects, innovative home decor tips, and creative adventures, consider subscribing to our blog. You’ll receive our latest insights and tutorials twice a week directly in your mailbox, ensuring you never miss out on fresh ideas. Your privacy is paramount; rest assured that your email address will never be shared with any third party. The convenient subscription form is typically located in the sidebar of our site, making it easy to join our community.
We absolutely love hearing from our passionate readers and value your engagement! Feel free to leave your thoughts, comments, and questions below in the comments section. We make it a point to reply to each and every one of them, fostering a vibrant and supportive community of DIY enthusiasts and home improvers. Your feedback truly enriches our content and helps us tailor future posts to your interests!