
Unlock Your Creativity: Easy DIY Canvas Art with Repurposed Keys
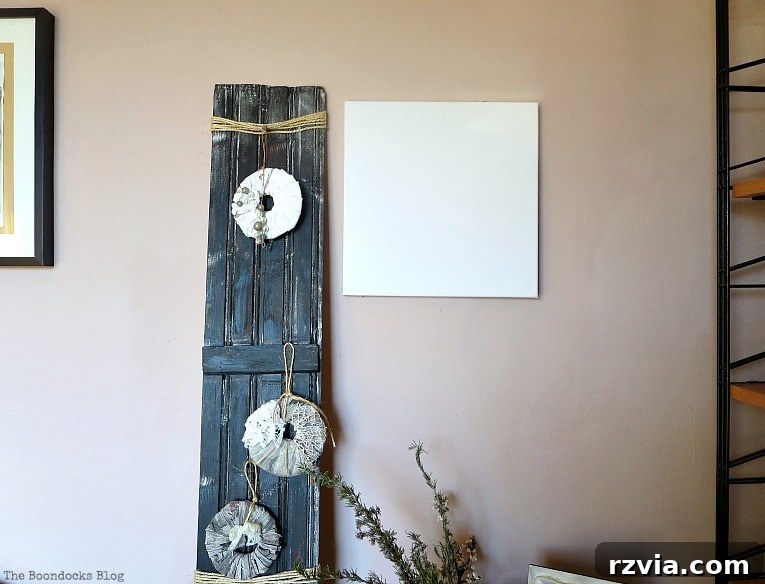
The other day, amidst a whirlwind of tidying up the living room to capture the perfect shot of my coffee table for my epic hits and epic fails post, an unexpected discovery halted my progress. Perched above my trusty chivalrous trunk, a blank canvas silently called out to me. What was this forgotten relic, and more importantly, why was it there? It turned out my daughter had left it behind after one of her creative video shoots. While the exact purpose of its prior use remained a mystery, I’ve learned never to question the artistic process!
As I contemplated the stark white surface, I couldn’t help but admire its placement. The crisp white of the canvas provided a striking contrast against the sleek black display unit and the warm, sand-colored wall. A sudden spark of inspiration ignited, pushing aside my cleaning duties. This blank slate, I realized, didn’t need to be empty. It just needed “a little something.” And just like that, the idea for a simple yet captivating canvas art piece, featuring an assortment of vintage keys, began to form.
The Unexpected Muse: A Dish Full of Stories
My inspiration for incorporating keys into this project wasn’t entirely random. It stemmed from a charming little dish in my living room, perpetually overflowing with a fascinating collection of old, forgotten keys. Each key, with its unique shape and patina, seemed to hold a silent story, a history of doors opened and secrets kept. They had always been a source of visual delight, and now, they were destined for a new artistic purpose.
These aren’t just any keys; they have a storied past in my decor journey. You might recall my “roasted Christmas tree” from a few years ago, where these very keys made their festive debut. Currently, they also hang gracefully from my light fixture, creating an intriguing, almost mobile-like display that catches the light and adds a whimsical touch to the room. Their versatility and rustic charm make them ideal candidates for countless decorative endeavors.
Crafting Your Key Canvas Art: A Simple Guide
Materials You’ll Need:
- A blank canvas (any size will do, depending on your space)
- A collection of old keys (the more varied, the better!)
- Thin twine or string
- Masking tape (or painter’s tape)
- Scissors
- (Optional) Chalk paint and brushes for distressing keys
Step-by-Step Instructions:
Step 1: Preparing Your Keys for Display
The first step is to prepare your keys. If you want to enhance their vintage appeal, consider giving them a light coat of chalk paint. I personally love how chalk paint adheres to metal, creating a soft, matte finish that highlights their intricate details and adds a touch of aged elegance. A quick brush with a lighter color can instantly transform a dull, metallic key into a captivating, antique-looking artifact. No need for perfection here; the charm lies in their rustic imperfections!
Step 2: Tying the Twine with Intent
Next, take your collection of keys and your thin twine. Cut varying lengths of twine – this is crucial for creating visual interest and a dynamic composition. I purposely tied the twine loosely around each key, allowing the ends of the rope to stick out. This seemingly small detail adds a wonderful textural element to the overall piece, preventing it from looking too rigid or uniform. The natural, organic feel of the twine complements the raw, industrial aesthetic of the keys beautifully.
Step 3: The Attachment Challenge (and Solution!)
Initially, I attempted to attach the twine-tied keys to the back of the canvas using a staple gun. My thought was that staples would provide a secure hold. However, this proved to be a classic DIY “fail.” The staples jutted out significantly from the back of the canvas frame, making it impossible for the canvas to hang flush against the wall. Lesson learned: sometimes the simplest solution is the best!
Discarding the staple gun, I turned to a much simpler and more effective method: masking tape! I carefully arranged the keys on the front of the canvas, ensuring their varying lengths created an appealing cascade. Once satisfied with the arrangement, I flipped the canvas over and secured the twine ends to the back of the frame with masking tape. This method was incredibly easy, allowed for quick adjustments, and most importantly, kept the back of the canvas perfectly flat. Easy peasy, just the way I like it!
The Unique Charm of Repurposed Keys
There’s an undeniable allure to old keys, isn’t there? Each one tells a silent story, hinting at forgotten locks and cherished memories. Their distinct shapes, sizes, and the delightful patina they acquire over time make every single key a miniature work of art. No two are ever quite alike, which is precisely what gives this DIY canvas project its unique character and depth.
As I gathered my collection, a mischievous thought crossed my mind: some of these keys might actually still be in use around the house! Shhh… let’s hope my husband isn’t frantically searching for them while admiring my latest artistic endeavor. It’s a small price to pay for such a captivating display, right?
What I adore most about these keys is how visually unique they become once painted with chalky-type paint. The paint accentuates their existing rust and the beautiful patina that has developed over time, creating a rich, textured surface that’s a feast for the eyes. They’re not just keys; they’re tiny sculptures, each with its own personality and charm, now elevated to art.
This simple piece of key art is truly a testament to the beauty found in overlooked objects and the power of creative repurposing. It’s an easy, low-cost project that yields high-impact results, adding a personalized and intriguing focal point to any room.
Disclosure: The items below are affiliate links and link to Amazon.com. If you purchase any of these products through the links, I receive a small commission, which helps me continue to provide you with lovely content. There is no extra charge to you for purchasing through my affiliate links.
And just like that, my easy piece of art was complete, ready to grace my living room wall!
Styling Your New Key Art and Embracing Versatility
Here it is, beautifully integrated into my living room, positioned next to the wooden display I previously used for my Christmas cards. This project perfectly illustrates my philosophy of reusing and re-styling decor for all seasons. Even the homemade “Christmas” ornaments I’ve crafted often have a transitional quality, looking fantastic when displayed year-round, not just for the holidays.
Nearby, you’ll also spot the miniature painting of “Pumpkin Man,” a beloved celebrity in our home! My talented friend, Michelle of A Crafty Mix, actually drew his portrait and sent it to me as a thoughtful gift. While the original pumpkin man may not last forever (it’s incredible he’s still around!), his charming spirit will live on indefinitely in this beautiful painting, adding another layer of personality to my decor.
One of the truly wonderful aspects of this super easy DIY project is its incredible flexibility. The masking tape method allows for instantaneous changes. Should I desire a different look or wish to use the canvas for another project, I simply peel off the tape, and the canvas returns to its original blank state. I absolutely adore projects that serve multiple purposes and adapt to evolving tastes and seasons. It’s decor that works as hard as you do!
Conclusion: Let Inspiration Guide You!
I hope you’ve enjoyed this tutorial on how to make simple yet impactful art with keys. Do you ever find yourselves, like me, being struck by creative inspiration right in the middle of a mundane task like cleaning? It’s often in those unexpected moments that the best ideas spring forth!
Now, about those keys… I sincerely hope they aren’t any vital ones! What should I do if my husband discovers I’ve “borrowed” his keys for this charming art project? Perhaps a fresh set of key duplicates is in order, just in case!
If you like what you see, please share it with your friends or save it on Pinterest. The image above is perfectly Pinterest-worthy!
If you truly enjoy my content, consider subscribing to my blog! You’ll receive my latest adventures and DIY projects twice a week directly in your mailbox. The subscription form is conveniently located on the sidebar, and rest assured, your email will never be shared with any third party.
More Fun Art Projects to Inspire You:
<<Epic Hits and Epic Fails – IBC HOME Sweet Inspiration Link Party #50 >>
Linking up to these Link Parties
This blog is for entertainment purposes only; my DIY tutorials are not professional advice. Read my full disclaimer here.
I love it when I get your comments and I will try to reply to them or visit you on your blog. Please do not add a hyperlink to your comment, otherwise we cannot publish it.