Are your old bookshelves looking tired, dated, or simply uninspiring? Don’t rush to buy new ones! Discover the incredible power of upcycling to breathe new life into your existing furniture. With a dash of creativity, a simple color change, and an ingenious application of wrapping paper, you can transform ordinary, worn-out pieces into stunning focal points. Learn how painted bookshelves can make a monumental difference, elevating your living space from mundane to magnificent, creating a truly pretty and modern aesthetic that reflects your unique style.
Painted Bookshelves: A Fresh, Modern Makeover for Any Room
There’s nothing quite like the satisfaction of a successful home decor project, especially when it involves transforming something old into something wonderfully new. My journey to revitalize a pair of lackluster bookcases began during a visit to my sons in bustling New York back in 2017. While these visits are always a joy, they often become an opportunity for me to “reorganize” – or, as I playfully put it, “wreak havoc” – on their living spaces. This particular trip was no exception, as I embarked on a mission to repurpose and upcycle a variety of items, infusing their apartment with fresh energy and personalized charm.
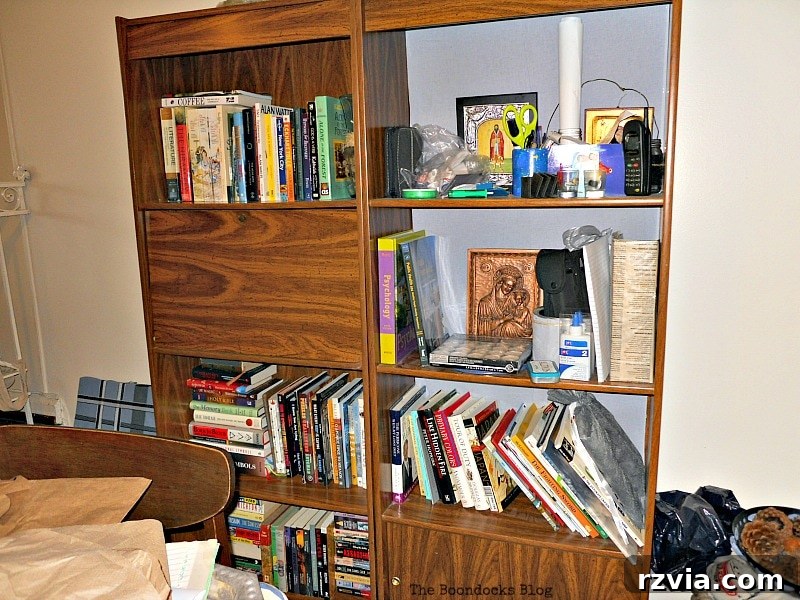
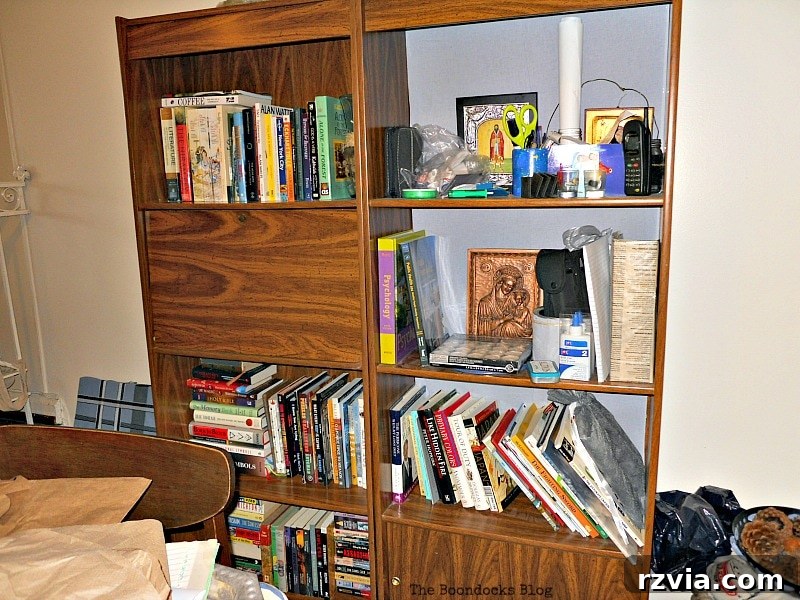
Among my ambitious projects, the most significant undertaking involved their dining room bookshelves. These units were in desperate need of a facelift, presenting a drab and cluttered appearance that detracted from the room’s overall potential. My vision was clear: to transform these everyday storage units into elegant, eye-catching features using the magic of chalky paint and decorative gift wrapping paper. The “before” state of their dining room was, to put it mildly, a bit chaotic. It was clear that only a complete makeover, starting with a fresh coat of paint, could truly elevate these bookcases and the room they inhabited.
From Drab to Dreamy: Why These Bookcases Needed a Paint Job
My initial intention was simply to organize the books more neatly, but as I stood back, surveying the scene, it became glaringly obvious that organization alone wouldn’t suffice. The sheer volume of dark wood and the medley of book spine colors created a visually heavy and somewhat overwhelming impression. While one of the bookcases featured a subtle blue background, offering a slight visual break from the dominant wood tone, it wasn’t enough to achieve the bright, airy feel I envisioned. My creative instincts kicked in, loudly declaring, “I want to paint!” It’s amazing how truly transformative painted bookshelves can be, completely altering the ambiance of a space.
My father, observing my enthusiasm, wasn’t entirely convinced by my sudden urge to paint, especially given it was the dead of winter. He questioned why I would voluntarily take on such a “headache” project during the coldest months. Yet, once the idea took root, there was no stopping me. I began by strategically moving the bookcases apart, creating ample space between them. I had a clear plan forming in my mind, a vision of how these separate units would eventually come together to form a cohesive, beautiful display.
Essential Supplies for Your Bookshelf Painting Project
Disclosure: This post contains affiliate links for your shopping convenience. If you purchase any of these products through the links, we receive a small commission at no extra charge to you. You can find our full disclosure here.
Embarking on a DIY project like painting bookshelves requires a few key materials to ensure a smooth and successful transformation. For this particular makeover, I relied on a combination of readily available items and specialty products:
- Leftover Latex Paint: A fantastic way to save money and use what you already have. This formed the base of my homemade chalky paint.
- Water: Used to thin the paint and mix with Plaster of Paris for the chalk paint recipe.
- Plaster of Paris: The secret ingredient for creating a durable, chalky finish that adheres beautifully to various surfaces without extensive prep work.
- Chip Brushes: Inexpensive and effective for applying chalk paint, known for their ability to create textured finishes.
- Sandpaper: Essential for smoothing surfaces and creating a distressed look if desired. I opted for a finer grit for a subtle finish.
- Scotch Tape: Handy for securing the decorative wrapping paper inserts later in the process.
- Creme Wax: A crucial step for sealing and protecting the chalk-painted surface, adding durability and a soft sheen.
- Wrapping Paper: For adding a unique, removable decorative backing. I used this birch-patterned paper, which added a natural, elegant touch.
A Step-by-Step Guide to Painting Your Bookshelves
With my homemade chalky paint, the same concoction I had successfully used for a previous dictionary stand upcycle, I was ready to begin. It’s important to note that these weren’t high-end, solid wood bookcases. In fact, they were quite the opposite: inexpensive particle board units covered in a laminate imitation wood grain. This detail was actually liberating, as it meant there was virtually no risk of “ruining” them. The forgiving nature of chalk paint is particularly well-suited for such surfaces, often eliminating the need for extensive sanding or priming.
Preparation and First Coats: Laying the Foundation for Beautiful Bookcases
Before any paint could touch the surface, I first cleared the wall space. The bookcases were carefully moved, revealing the bare wall where they once stood. This allowed me to place the distressed dictionary stand, which would become the central feature of the redesigned wall unit. Once the area was prepped, the painting began. Just like the dictionary stand, the bookshelves underwent a meticulous process of painting, sanding, and waxing.
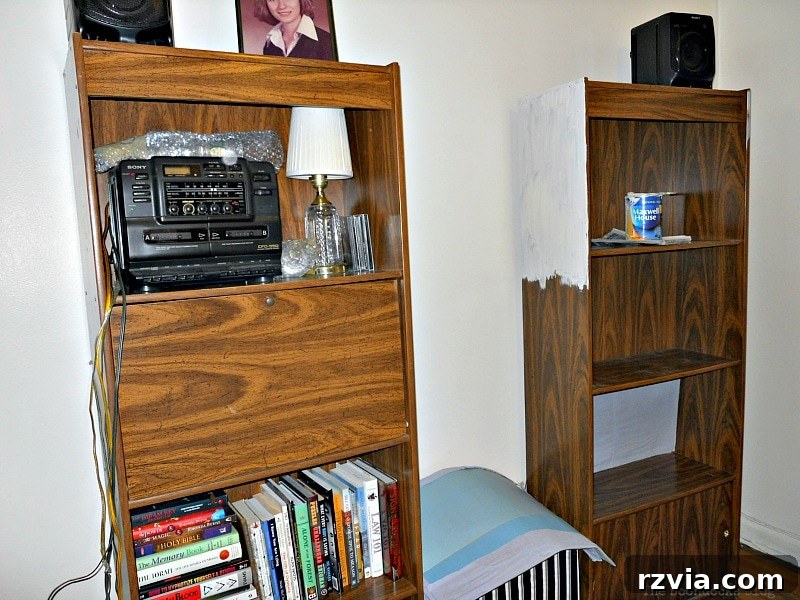
Achieving full, even coverage on these laminate surfaces required three generous coats of my homemade chalky paint. A common question when working with chalk paint is about sanding. For this project, I made a conscious choice to only sand at the very end of the painting process, rather than between coats or before applying the initial layer. This wasn’t due to laziness, but a strategic decision. My goal was to avoid removing the laminate, and the chalk paint’s inherent properties meant that the surface wasn’t smooth between coats, rendering intermediate sanding unnecessary. This approach saved time and effort while still ensuring a beautiful, consistent finish.
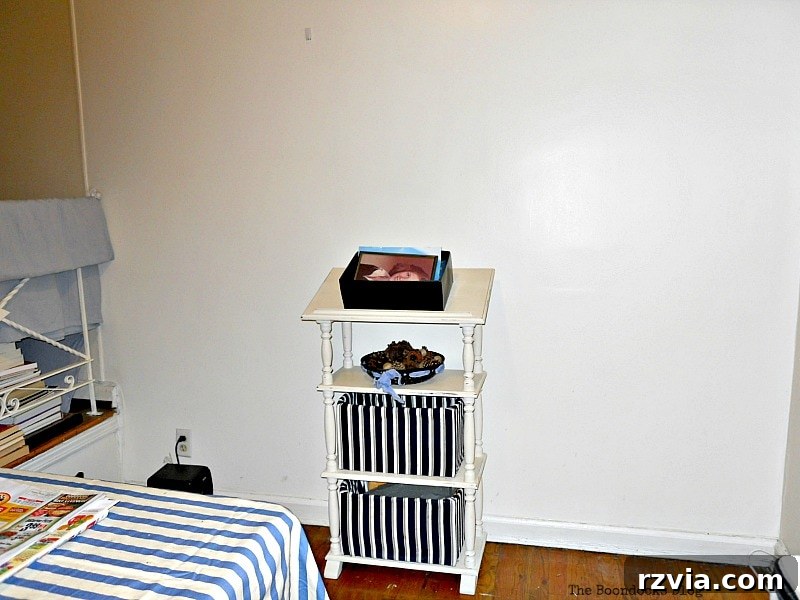
The entire painting and finishing process spanned a few days, primarily because I prioritized allowing each coat of paint ample time to dry thoroughly. Given that it was winter, ensuring proper drying was crucial for the longevity and durability of the finish. Once all coats were applied, dried, and waxed, I carefully repositioned the two newly transformed bookcases, flanking the dictionary stand to create a unified and balanced wall display. You can see one of the units taking its place in the picture.
Adding Unique Visual Interest: The Removable Wrapping Paper Backing
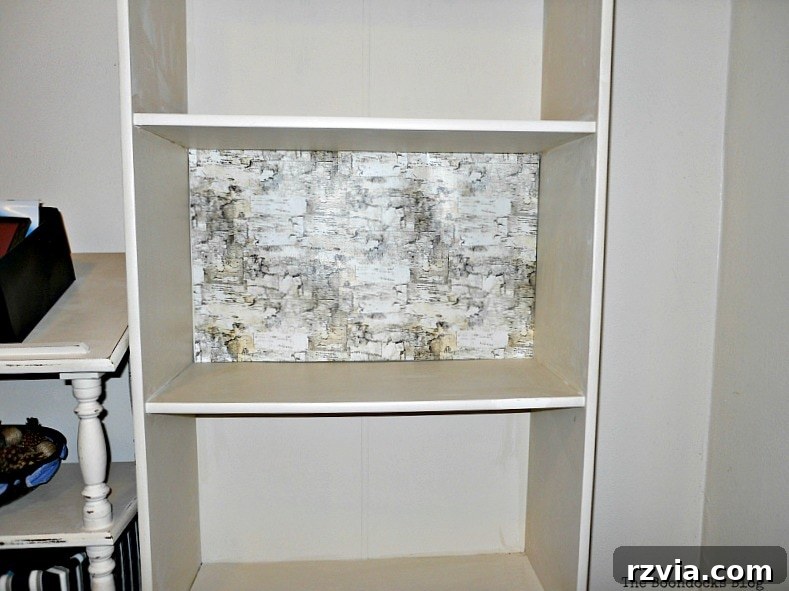
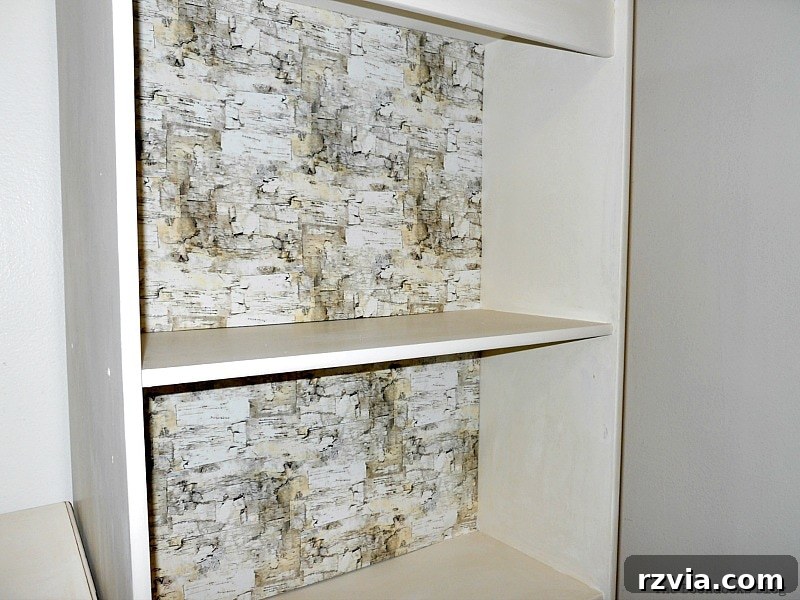
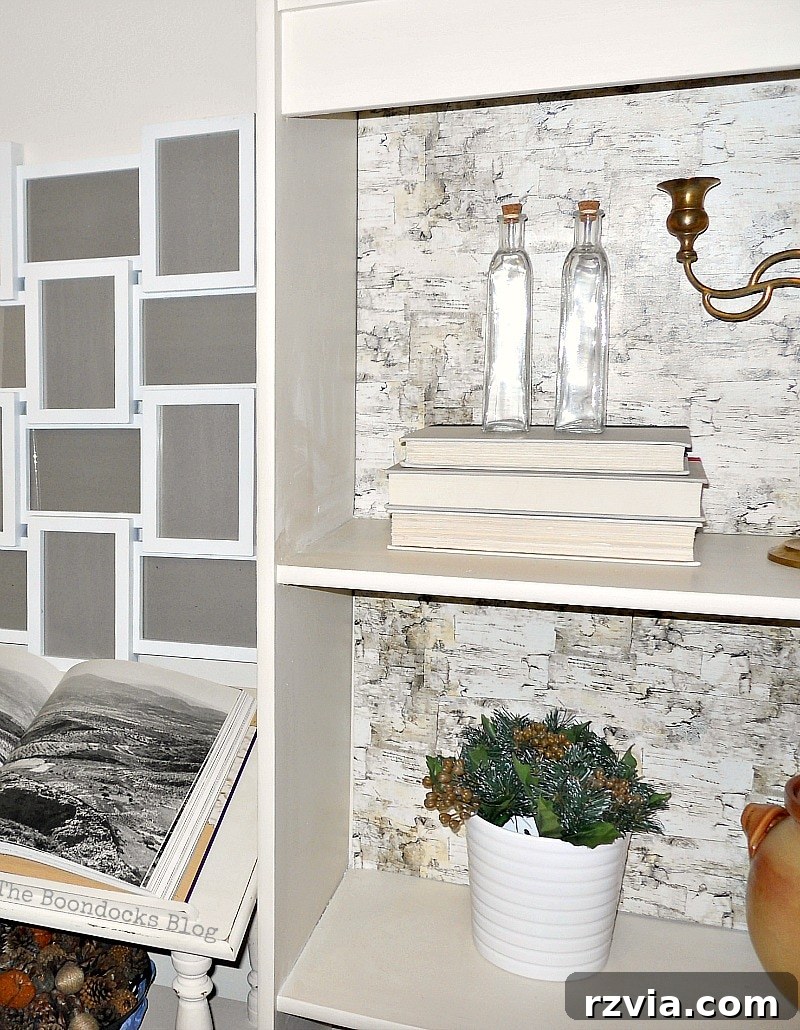
As I admired the freshly painted, pristine white bookshelves, an idea sparked – how could I add a layer of unique visual interest to prevent the all-white aesthetic from feeling too stark? The solution came in the form of a beautiful roll of gift wrapping paper, featuring an elegant birch tree pattern. Those who know me understand that I rarely use wrapping paper for traditional gift wrapping. Instead, I saw its potential for repurposing, envisioning it as a charming backdrop for the interior of the bookcases, adding texture and depth.
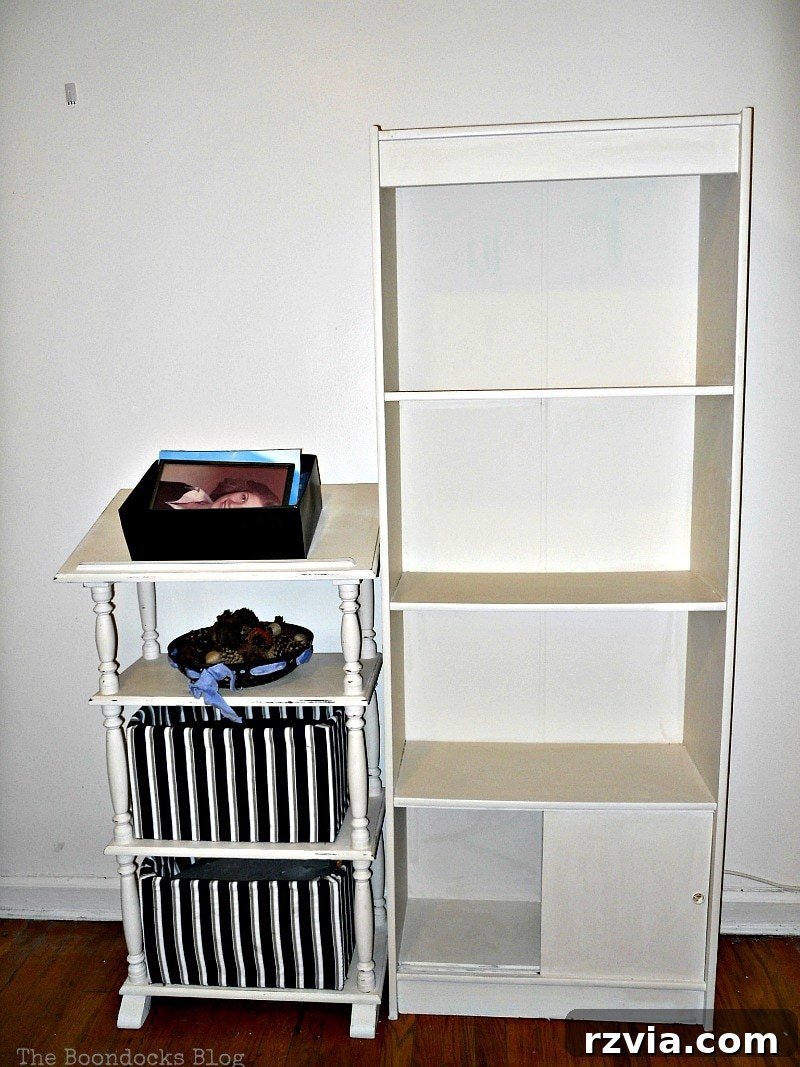
The truly innovative aspect of these decorative inserts is their complete removability. That’s right – they aren’t permanent fixtures. In my philosophy of home decor, nothing should be set in stone. If I ever tire of the birch pattern or wish to refresh the look, I can simply remove the inserts and replace them with something new. This flexibility is a recurring theme in my projects, much like my recent Framed Heart Craft or my Card Displayer, where adaptability is key to maintaining a dynamic and evolving aesthetic.
Crafting Your Own Removable Bookshelf Backings
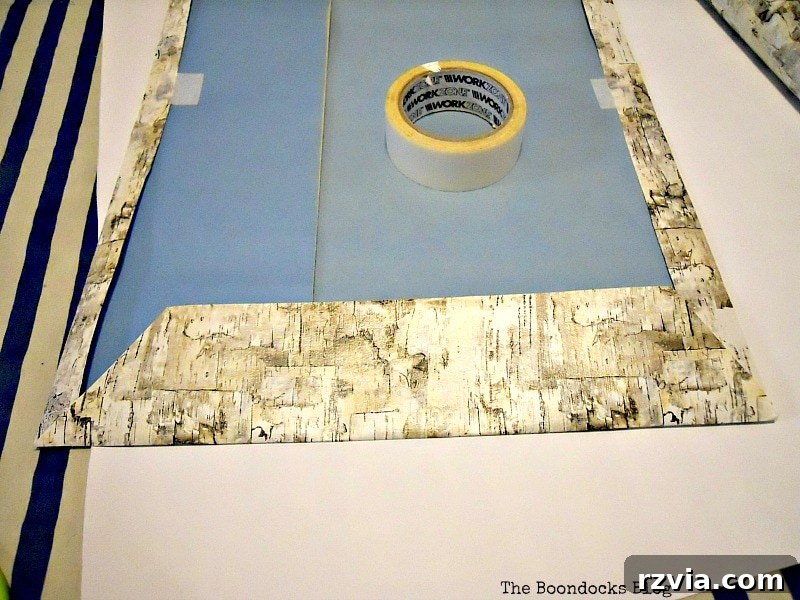
Creating these bespoke backings was remarkably straightforward. First, I carefully measured the interior dimensions of each bookcase section. Then, I cut pieces of sturdy cardboard to fit perfectly within these spaces. Next, I took the birch-patterned wrapping paper, cut it to size, and meticulously folded it over the edges of the cardboard. The paper was then secured on the back of the cardboard using scotch tape, ensuring a neat and taut finish. For added durability and strength, especially for the larger inserts, I sometimes reinforced them with a piece of blue cardboard folded for extra rigidity, as seen in the image. This simple yet effective method meant that four out of the six inserts I needed were of identical size, streamlining the process.
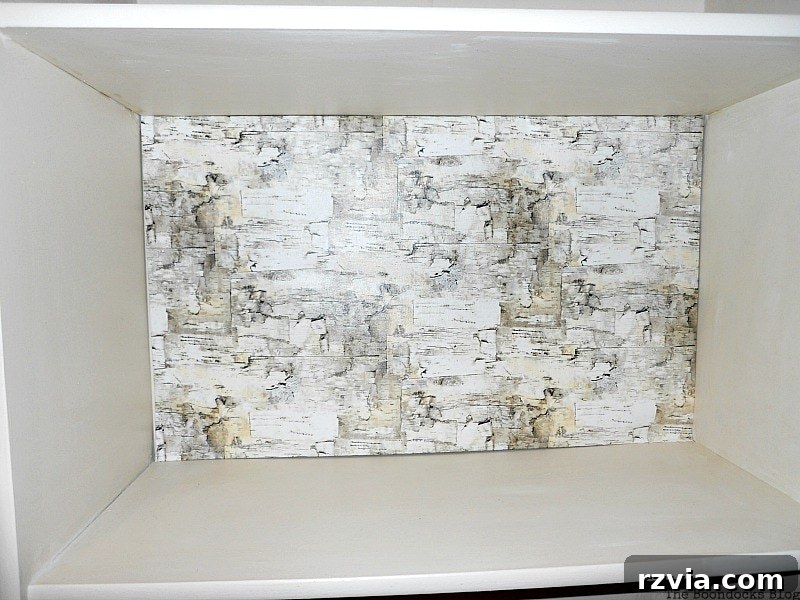
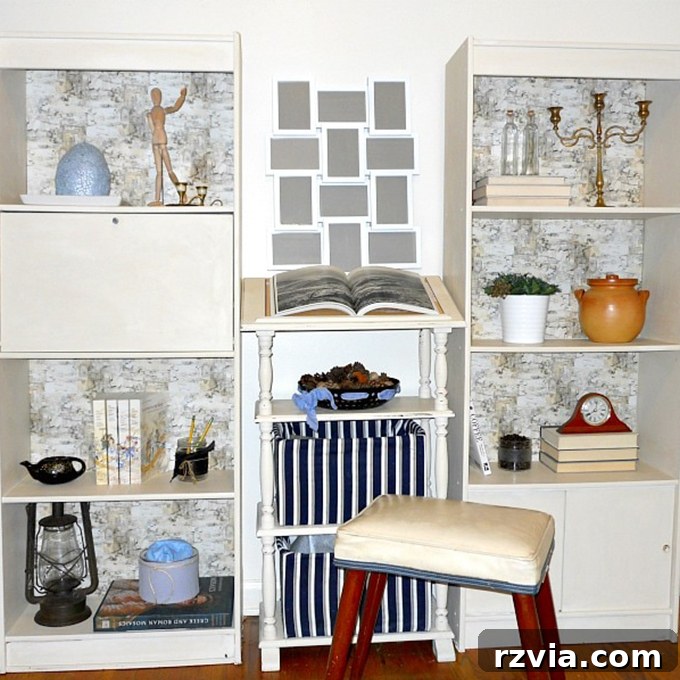
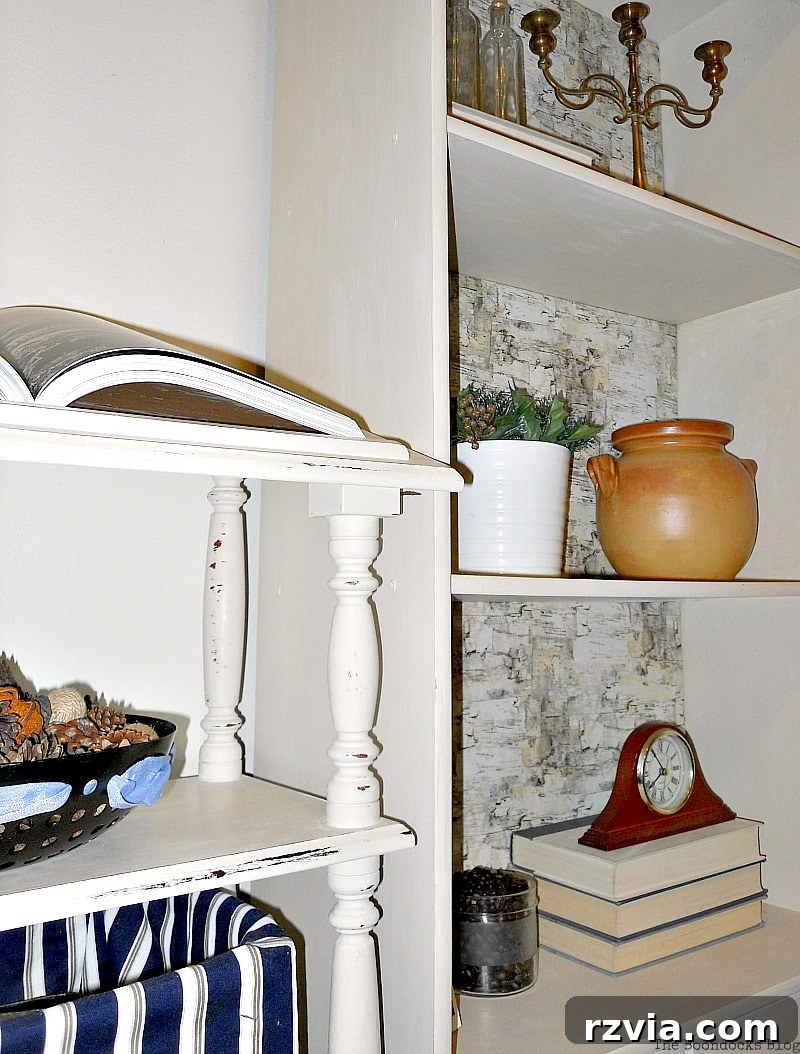
The transformation was instant and dramatic. The birch paper added a beautiful natural element and a subtle pattern that broke up the expanse of white, creating a much more engaging visual experience. It’s a simple trick, but one that truly elevates the overall design, proving that creativity doesn’t have to be complicated. Now, isn’t this far more intriguing than the plain white backs of the newly painted bookshelves?
Styling Your Upcycled Bookshelves: Bringing Personality to Your Decor
With the structural and aesthetic foundation complete, the real fun began: styling the bookshelves. This is where personal touches and cherished items come into play, transforming mere storage into a curated display. I approached the styling with an eye for balance, varying heights, and a blend of functional and decorative pieces.
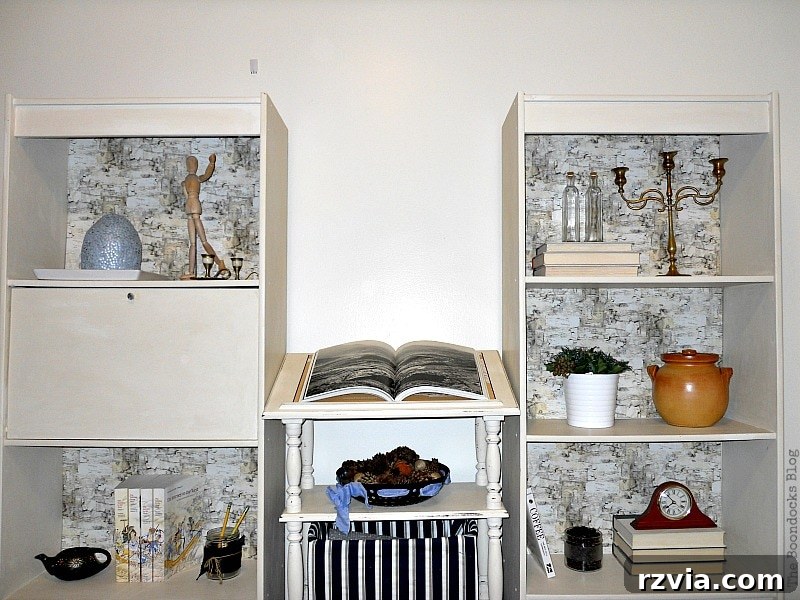
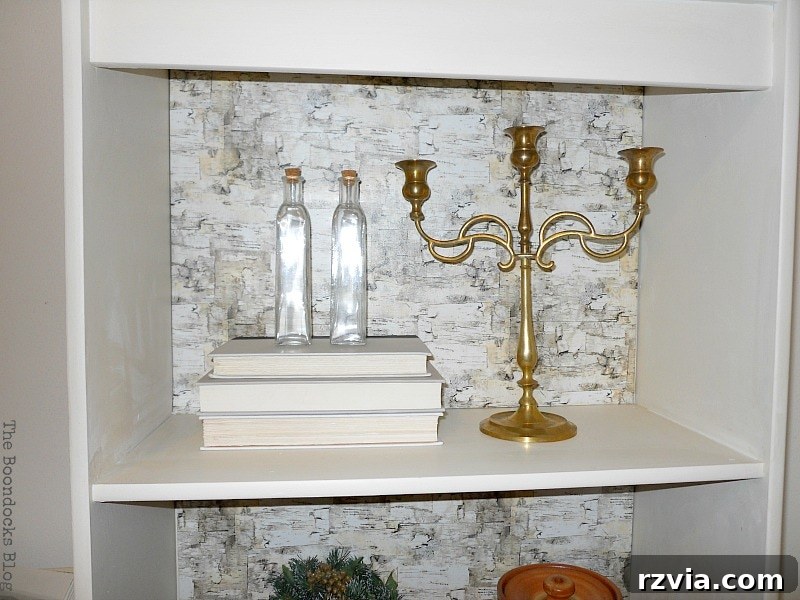
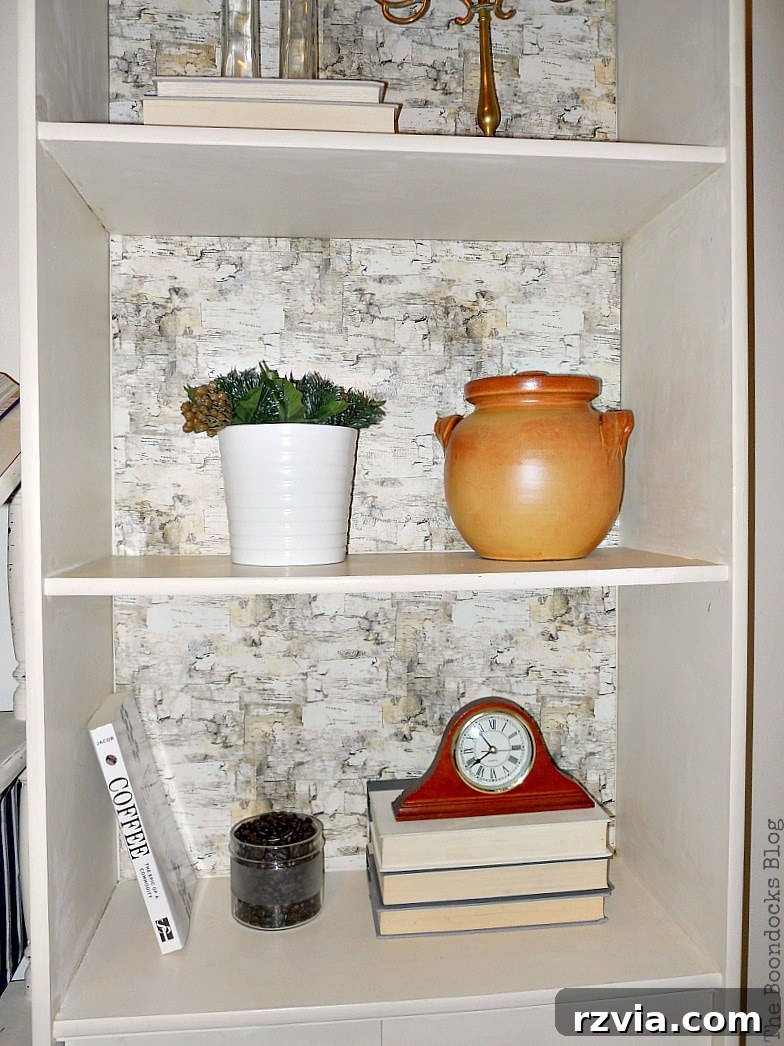
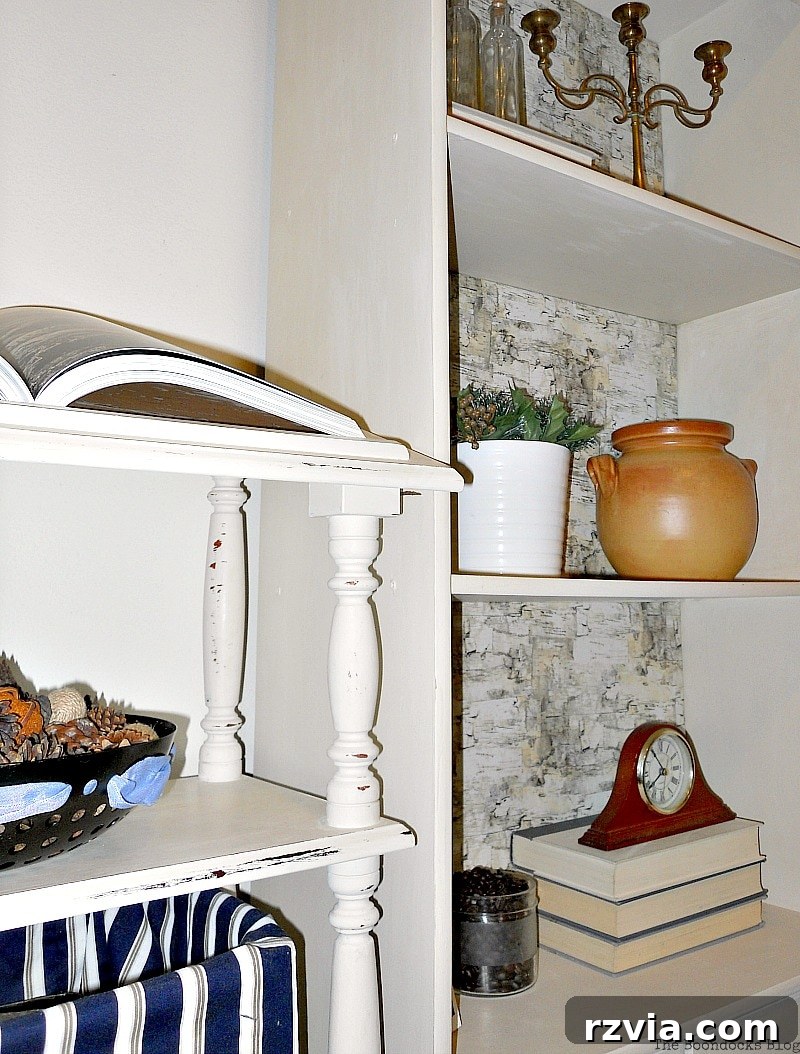
On one shelf, a beautiful brass candelabra added a touch of classic elegance and warmth. Its metallic sheen contrasted beautifully with the white paint and birch backdrop, creating a sophisticated visual anchor.
Next to it, a rustic clay cooking pot, a cherished souvenir brought over from Greece, added an authentic, worldly touch. Its earthy tones and unique texture provided a lovely counterpoint to the more refined elements. And, of course, no display would be complete without my whimsical coffee with tea light, a quirky little piece that always brings a smile.
To infuse a sense of history and industrial charm, I incorporated a vintage gas lamp, a fascinating find from my dad’s ever-surprising basement. It’s amazing what treasures you can unearth when you delve into family archives! This piece, with its unique form and material, became an instant conversation starter.
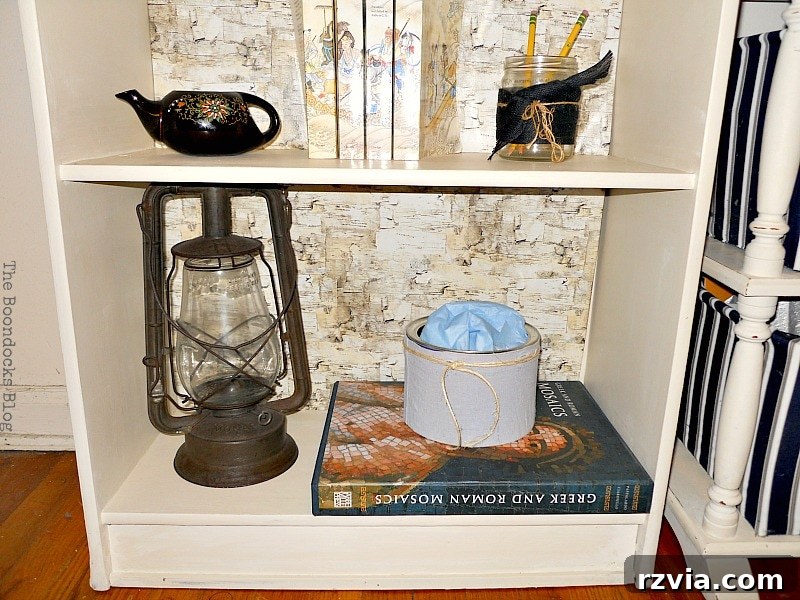
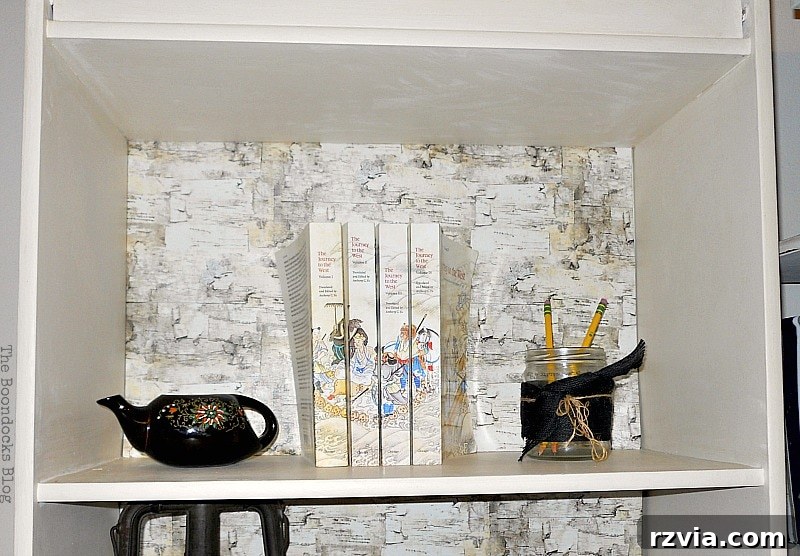
Amongst a small sampling of my son’s books, a little milk pourer stood out, an unusual and charming piece that I believe serves this purpose. Please correct me if I’m mistaken! Its delicate form offered a break from the linear arrangement of books.
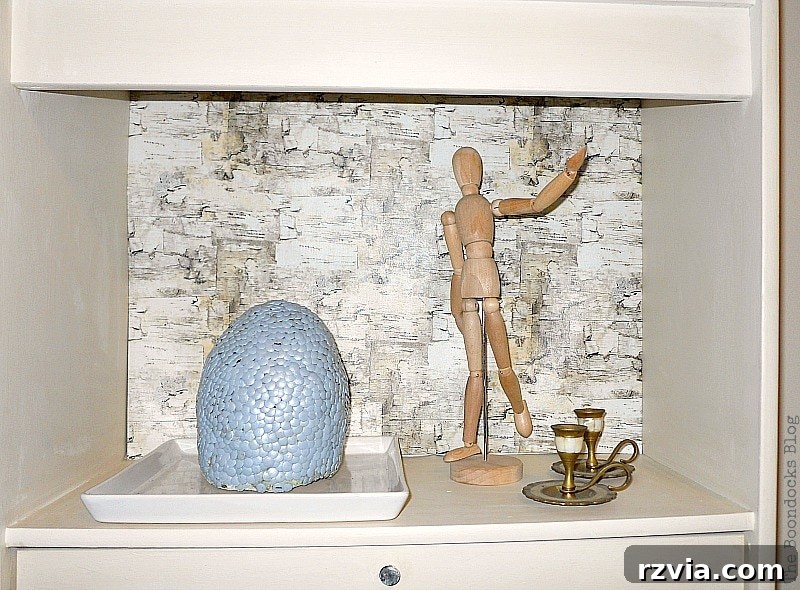
For those of you who have been following me on Facebook, you’ll recognize that striking blue object instantly. For everyone else, allow me to introduce it: a craft project my son and I made years ago – a magnificent dragon egg! We crafted it from clay, then painstakingly applied countless thumbtacks to create the illusion of scales, finishing it with a captivating silvery-blue paint. It’s a wonderful reminder of shared creativity.
The dictionary stand, positioned centrally between the two painted bookshelves, became a pedestal for a grand art book, adding a layer of intellectual curiosity to the display. Below the stand, two large cardboard boxes, meticulously covered in attractive fabric, served a dual purpose. Not only did they provide valuable hidden storage, but their substantial presence also helped to anchor the entire composition, grounding the wall unit with a sense of stability and elegance.
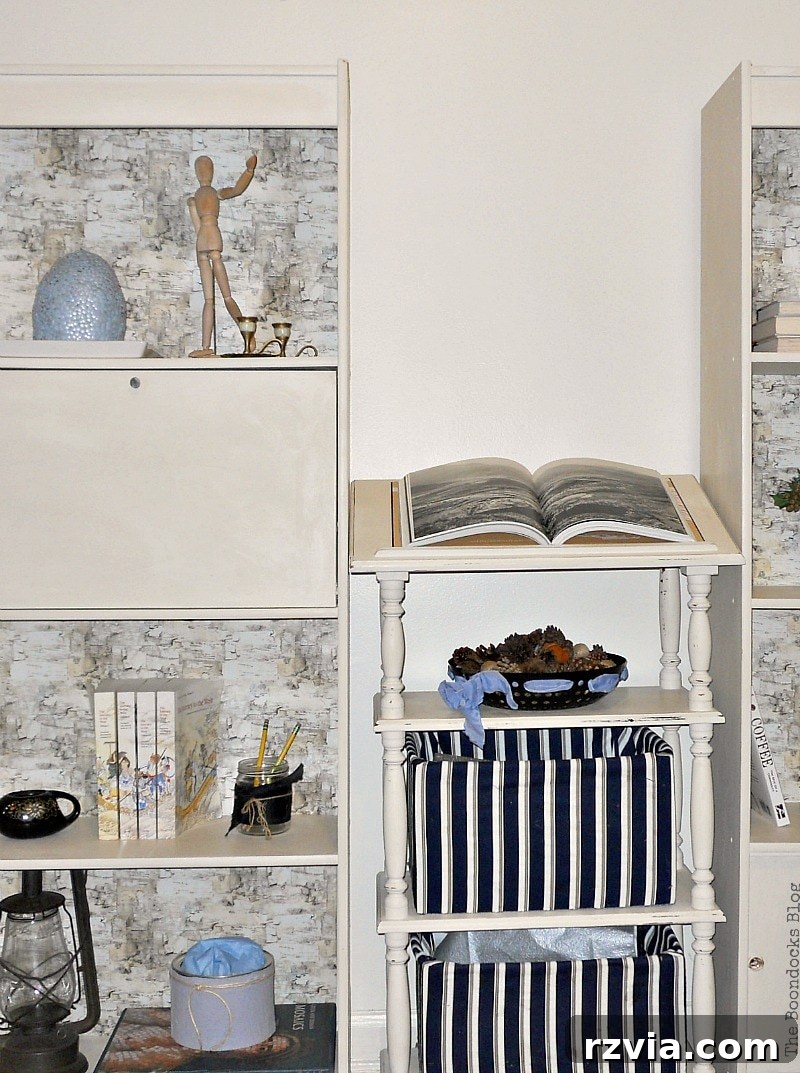
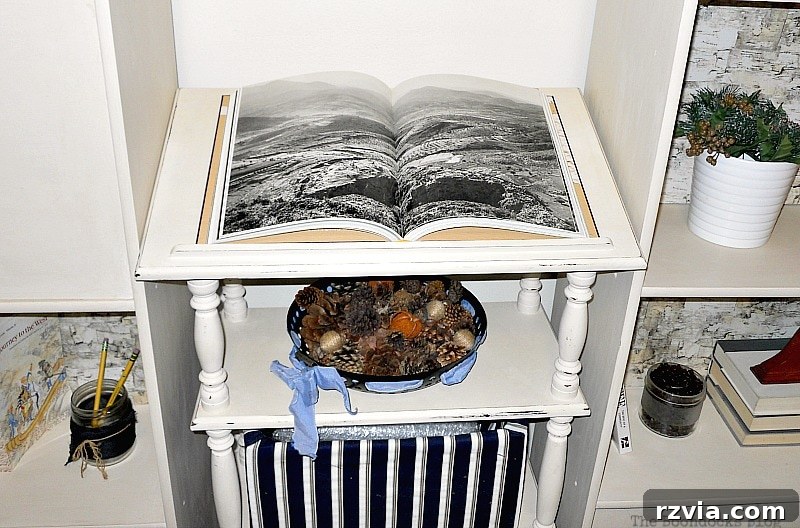
Unlike the distressed finish on the dictionary stand, I intentionally chose a simpler, clean look for the bookshelves. The goal was a fresh, modern aesthetic, and the subtle glamour provided by the birch effect inserts was more than enough to add visual interest without overcomplicating the design.
To complete the ensemble, I integrated one of those currently popular empty frames. I find that these frames, left with a simple grey background, add a cool, contemporary dimension without introducing additional color or clutter, ensuring the overall bookshelf display remains balanced and not overly busy.
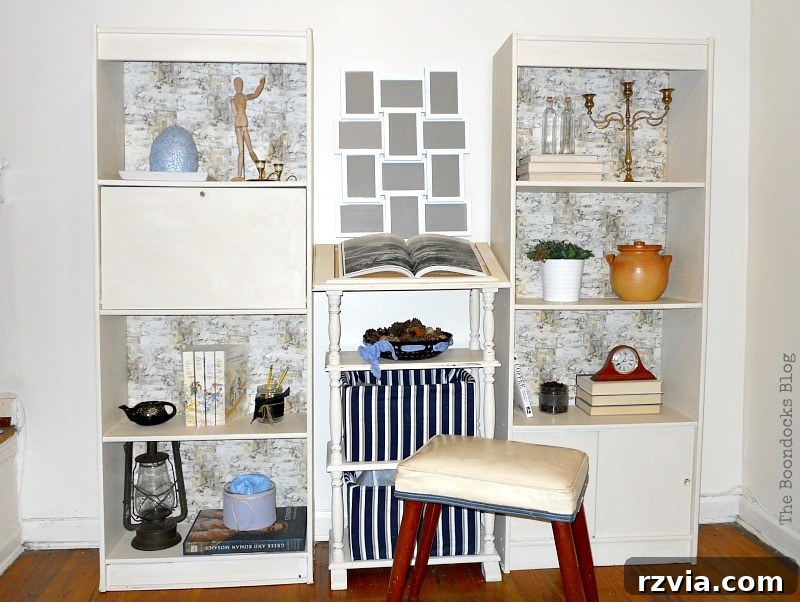
I genuinely appreciate the subtle depth they offer. However, I must confess that this entire arrangement, while beautiful, was largely staged for the photos. I’m currently working on a more permanent art piece destined for that spot, which should be ready soon. Once it’s in place, you’ll get a glimpse of the room’s true, everyday aesthetic.
The Unmistakable Impact: Before & After Painted Bookshelves
At this stage, it’s truly worth revisiting the “before” image. The stark contrast created by the new white color is simply astonishing. It completely transformed the entire room, making it appear significantly larger, brighter, and infinitely more inviting. The impact was so profound that even my dad, who was initially skeptical of the project, was incredibly impressed with the final result – and that, coming from him, is high praise indeed!
And so concludes the tale of how these ordinary bookcases were lovingly upcycled with chalky paint and charming gift wrapping paper. Both my dad and I are thrilled with the outcome. My son, on the other hand, is still trying to locate some of his books amidst the newly styled shelves, but that, as they say, is a subject for another post! (wink)
If you’re curious to see where some of those relocated books ended up, you can visit my project on the mirror makeover, where you might spot both the bookcases and a few familiar titles. Rest assured, no books were harmed in the making of this project!
To discover where these transformed bookshelves are residing now, and to see more of their journey, click here.
Do you, like me, find yourself “wreaking havoc” (in the best possible way!) every time you visit your kids’ apartments, turning ordinary into extraordinary?