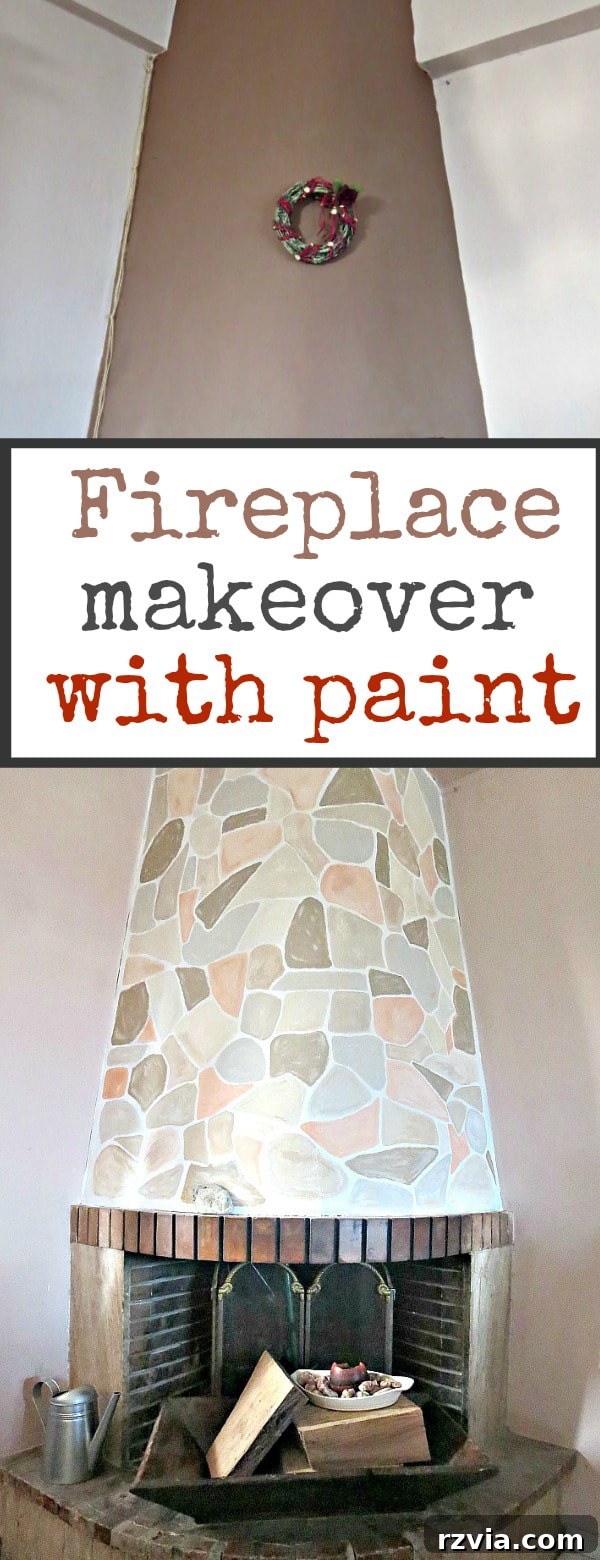
The Ultimate DIY Fireplace Makeover: Achieving a Faux Stone Finish with Paint
Every home has that one project, that one nagging eyesore you promise yourself you’ll tackle “someday.” For me, that “someday” for my fireplace felt like an eternity. It truly was the long overdue fireplace makeover, a transformation that lingered on my to-do list for far too long, casting a dark, gloomy shadow over my living space. But finally, after much contemplation, research, and a healthy dose of procrastination, I decided it was time to reclaim my hearth and turn it into a beautiful focal point.
The vision for this makeover first sparked last winter, right after I completed a project repurposing a vintage wash tub for wood storage. As I admired the rustic charm of the cleaned-up tub, my gaze inevitably drifted to the fireplace – a dark, uninspiring monolithic structure that screamed for attention. Its drab, oppressive color had always bothered me, making the entire room feel heavier and less inviting. I knew deep down it needed a change, a significant lightening and brightening to truly complement the cozy aesthetic I was striving for.
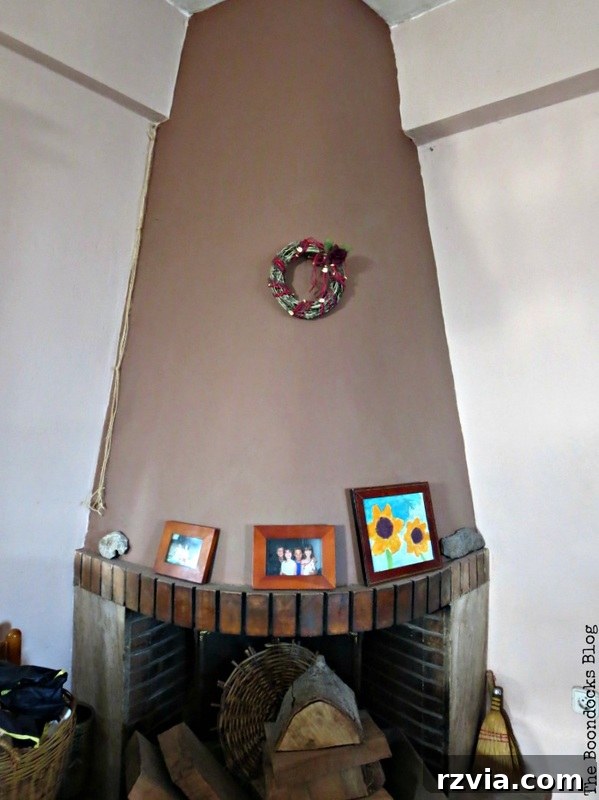
Yet, despite these persistent thoughts and the undeniable urge to transform it, I found myself delaying. Weeks turned into months, and it wasn’t until November arrived, bringing with it the crisp chill that necessitated lighting the fireplace, that the full force of my dislike for its appearance hit me once again. As the flames flickered against the dark, featureless backdrop, I remembered exactly why I loathed it. That was the moment. The decisive point where procrastination finally gave way to determination. This winter, things would be different.
Finding My Spark: Inspiration for a Painted Stone Fireplace
The journey from decision to action involved extensive research and, admittedly, a bit more procrastination. I scoured blogs, Pinterest, and home decor magazines, seeking inspiration that would resonate with my aesthetic and seem achievable for a DIY enthusiast. It was during this exploration that I stumbled upon Melissa’s incredible fireplace makeover at Dancing Dog Cabin. Her approach to creating a faux stone look with paint was nothing short of brilliant, transforming an ordinary fireplace into a masterpiece with layers of texture and natural appeal.
I was instantly captivated by the sophisticated yet rustic charm of her design. The way she used various shades and techniques to mimic the natural variations of stone was exactly what I envisioned for my own fireplace. Her tutorial provided the perfect roadmap, giving me the confidence to believe that I too could achieve such a dramatic transformation. With my inspiration firmly in place, it was time to gather my supplies and begin the much-anticipated makeover.
Prepping for Perfection: Essential Steps Before the First Brushstroke
Before diving into the exciting world of paint, proper preparation is paramount for any successful DIY project, especially one involving a prominent feature like a fireplace. My first step was a thorough cleaning. Years of soot, dust, and general household grime had accumulated, and a clean surface is crucial for paint adhesion. I used a stiff brush and a mild cleaning solution, ensuring every crevice was free of debris. Once clean, I allowed it ample time to dry completely.
Next, I protected the surrounding areas. Painter’s tape was meticulously applied along the edges where the fireplace met the wall and floor, creating crisp lines. Drop cloths were spread generously across the floor and nearby furniture to guard against any errant drips or splatters. With the area prepped and protected, I was ready to move on to the actual painting phase, starting with the base coat.
The Foundation: Applying the Chalk Paint Base
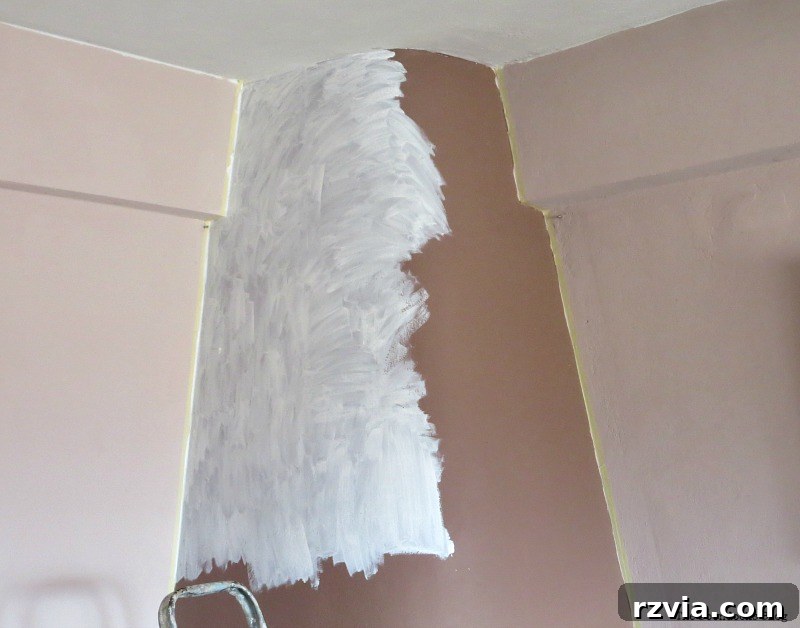
Following Melissa’s lead, I decided to start with two coats of chalk paint. Chalk paint is an excellent choice for fireplace makeovers because of its fantastic adhesion properties – it often adheres well to various surfaces without the need for extensive sanding or priming, making it a dream for DIY projects. Its matte finish also provides a beautiful, slightly textured base, ideal for building up the faux stone effect.
I chose a light, neutral shade of chalk paint, aiming to completely cover the old, dark color and create a bright canvas for the stone detailing. Applying the first coat was surprisingly satisfying, watching the dreary old fireplace begin to disappear under a fresh, clean layer. I allowed the first coat to dry thoroughly according to the manufacturer’s instructions, which typically takes a couple of hours. Then, I applied a second coat, ensuring full, opaque coverage. This light base was critical; it would act as the “grout” lines between the painted stones, making them pop and giving the illusion of real masonry.
Bringing the Stone to Life: Drawing and Painting the Faux Stones
Once the chalk paint base was completely dry, the real artistry began: drawing the shapes to mimic a stone fireplace. This step was both exciting and a little daunting. The goal was to create irregular, organic shapes that resembled natural stones, avoiding any sense of uniformity or artificiality. I started sketching freehand with a pencil, aiming for varied sizes and interlocking patterns.
I quickly realized that achieving a truly natural look was more challenging than it appeared. My initial attempts felt a bit too geometric or uniform, definitely not the rustic, authentic stone look I was aiming for. I erased, redrew, and adjusted, reminding myself that imperfections are part of nature’s charm. It’s okay if they weren’t perfect; real stones aren’t. The key was to make them look believable, with varying sizes and edges, mimicking the way stones are laid in a traditional hearth.
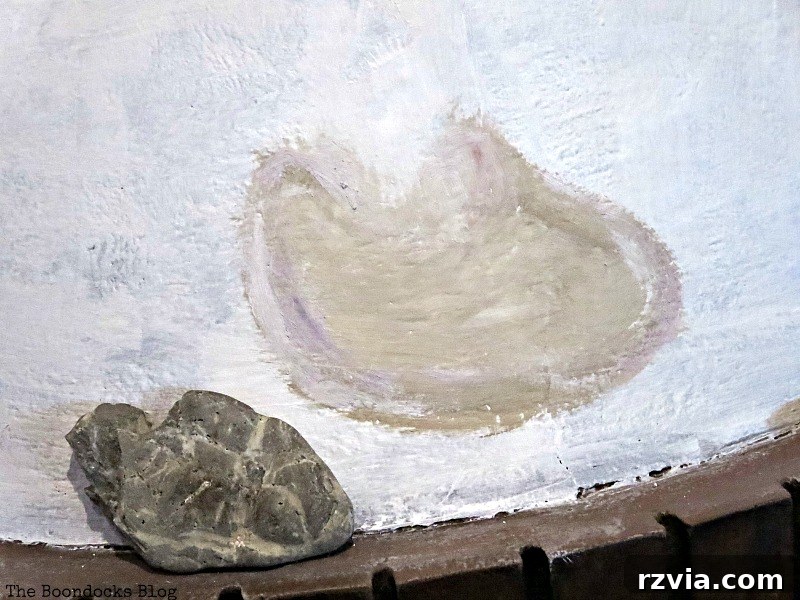
With the outlines mostly to my liking, there was no turning back. I began filling in the shapes using various colors of acrylic paint. I didn’t stick to a rigid palette; instead, I mixed many shades together as I went along, directly on my palette or even blending them on the fireplace itself. I primarily used grays, browns, and off-whites, playing with different ratios to create a diverse range of stone colors. Some stones received a warmer brown tone, others a cooler gray, while a few were tinged with creamy off-white, just like natural stone formations.
The trick was to apply the paint in thin, somewhat translucent layers, allowing the chalk paint base to peek through slightly in places, especially around the edges, to further enhance the grout effect. I used various brush sizes, from larger flat brushes for the main body of the stones to smaller, finer brushes for the edges and detailing. This layering and blending technique was crucial for avoiding a flat, painted look and achieving the desired depth and texture.
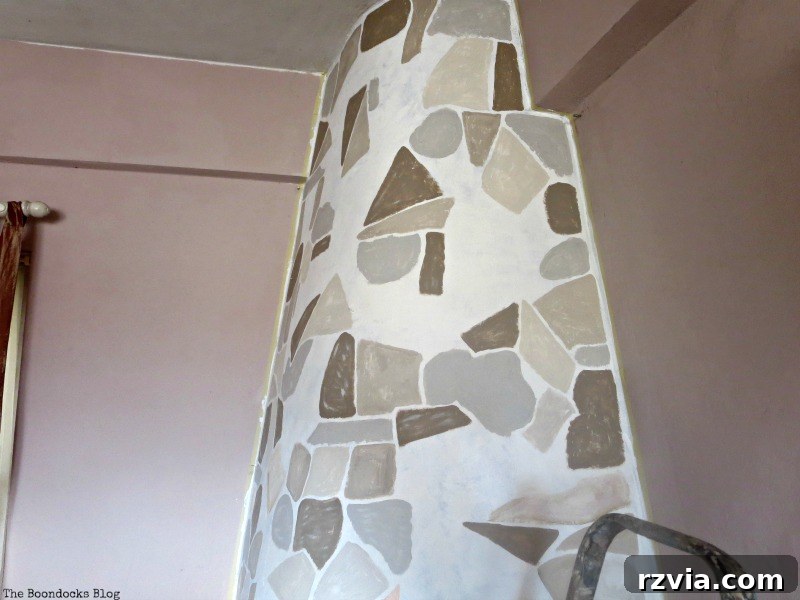
Adding Depth and Dimension: Highlights and Shadows
The real magic of the faux stone effect came with the application of highlights and shadows. This step is what truly transforms flat painted shapes into three-dimensional stones. I carefully observed where natural light hit the fireplace and imagined where shadows would fall if these were real, protruding stones. With lighter shades of acrylics (whites, very light grays, and pale creams), I gently dabbed and brushed along the upper and outer edges of each “stone,” simulating where light would catch them. This created a subtle, elevated effect.
Conversely, I used darker shades (darker grays, muted browns, and even a touch of black mixed sparingly) to create shadows. These were applied along the bottom and inner edges of the stones, giving the illusion of depth and recession. The contrast between the highlights and shadows was key to making the stones appear to pop out from the surface, adding realism and character. I worked meticulously, stepping back frequently to assess the overall effect and ensure consistency.
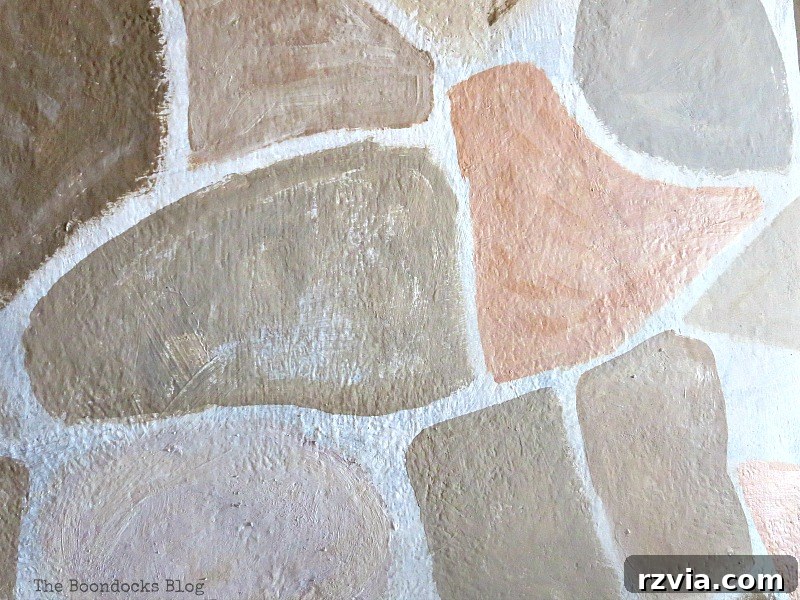
This intricate detailing, combined with my inherent indecisiveness, meant that the painting process actually stretched over a couple of days. I would paint for a few hours, then step away, come back with fresh eyes, and make adjustments. Sometimes I felt a stone was too dark, other times too uniform. It was an iterative process of layering, blending, and refining until I was satisfied with the natural variation and perceived texture. This patient approach is often necessary for DIY projects, as rushing can lead to results that fall short of expectations.
The Final Touch: Curing and Sealing for Durability
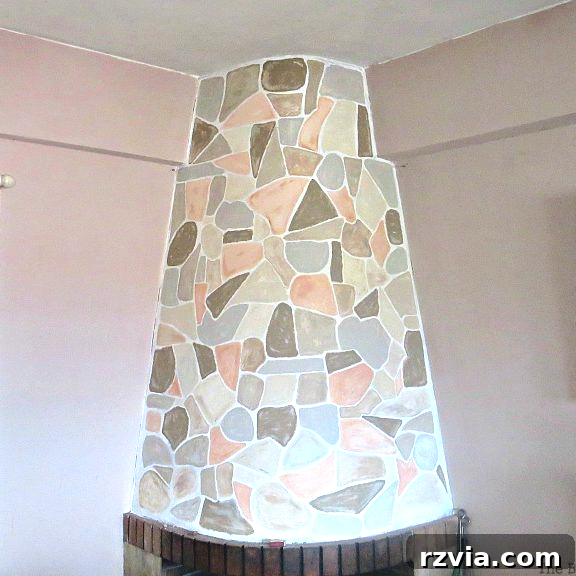
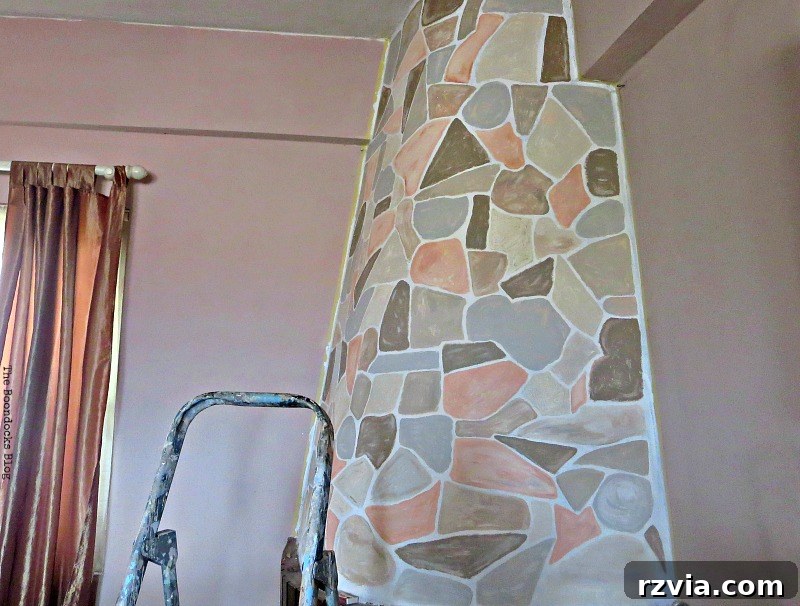
And then, finally, it was done! The last stroke of paint was applied, and I stepped back to admire the transformation. The dark, dated fireplace was gone, replaced by a beautiful, rustic faux stone hearth that breathed new life into the room. However, the project wasn’t truly complete just yet. To ensure the longevity and durability of my hard work, especially in an area prone to dust and potential heat, two crucial steps remained: curing and sealing.
I planned to wait at least a week to let the paint fully cure. Curing is a different process than drying; it allows the paint to harden completely and achieve its maximum durability. Rushing this step can compromise the finish. Once fully cured, I would seal it with a protective varnish. This varnish is essential for several reasons: it provides a protective barrier against wear and tear, makes the surface easier to clean, and helps prevent the color from rubbing off – a particular concern for a fireplace that will inevitably get dirty from use. This protective layer ensures that my beautiful new fireplace will withstand the test of time and maintain its charm for years to come.
While I eagerly awaited the curing time to apply the varnish and capture the final, sealed look, I simply couldn’t wait to share my excitement! The change was so dramatic, so refreshing, that I had to provide a sneak peek. I promise to upload updated pictures with the varnish a bit later, showing the full, protected glory of this transformation. In fact, there’s even a part two to this makeover, delving into even more details!
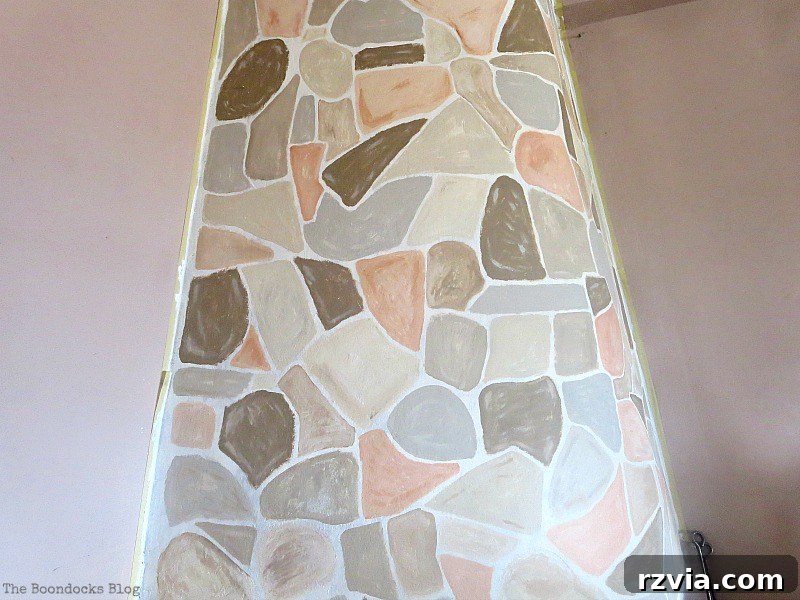
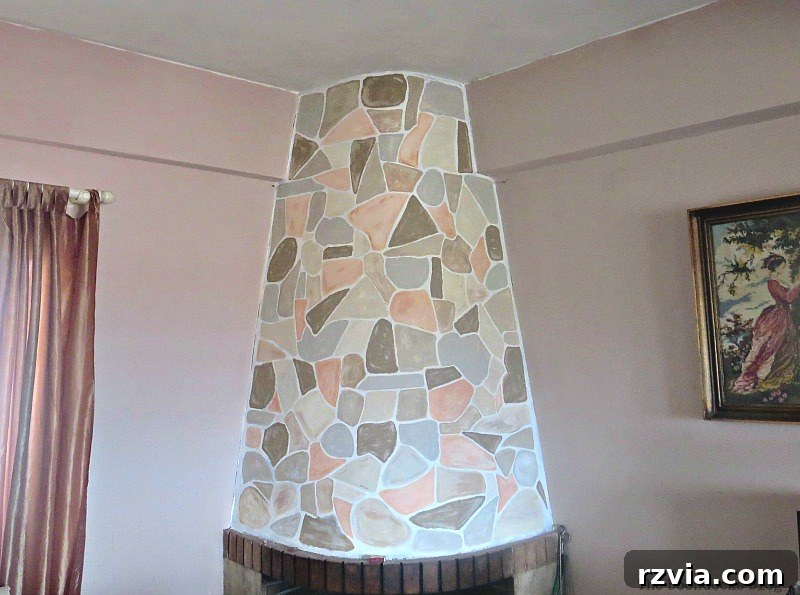
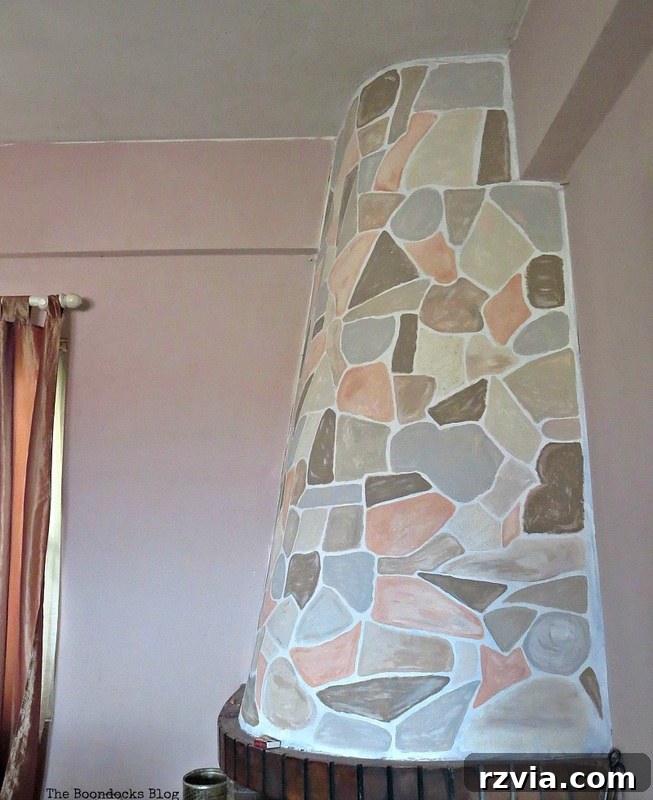
Just for a dramatic comparison, here’s a quick look at the “before” again, to truly appreciate the incredible transformation that took place:
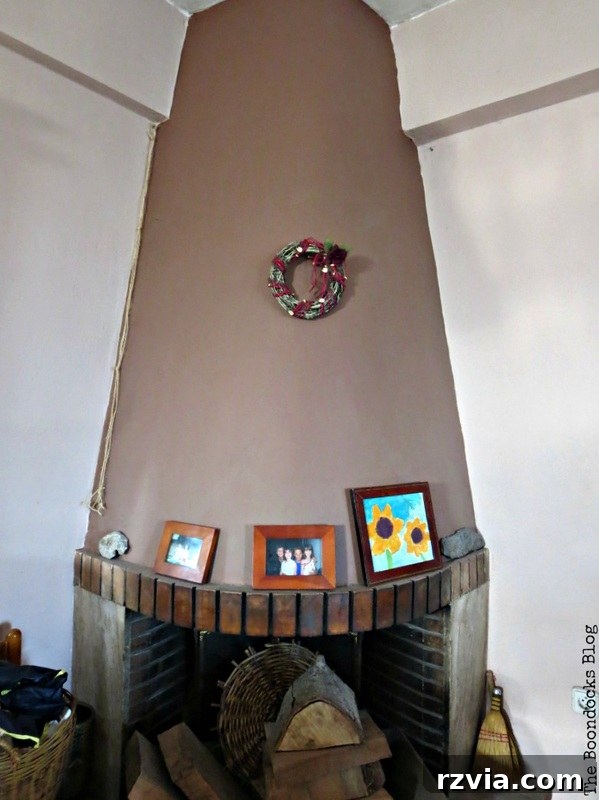
I must admit, the pictures still don’t fully capture the essence of the finished piece. In person, it possesses so much more depth and nuance, with the subtle variations in color and texture truly bringing the faux stone to life. I definitely need to work on my photography skills to better convey the beauty of my DIY projects! But even through the lens, the difference is undeniable.
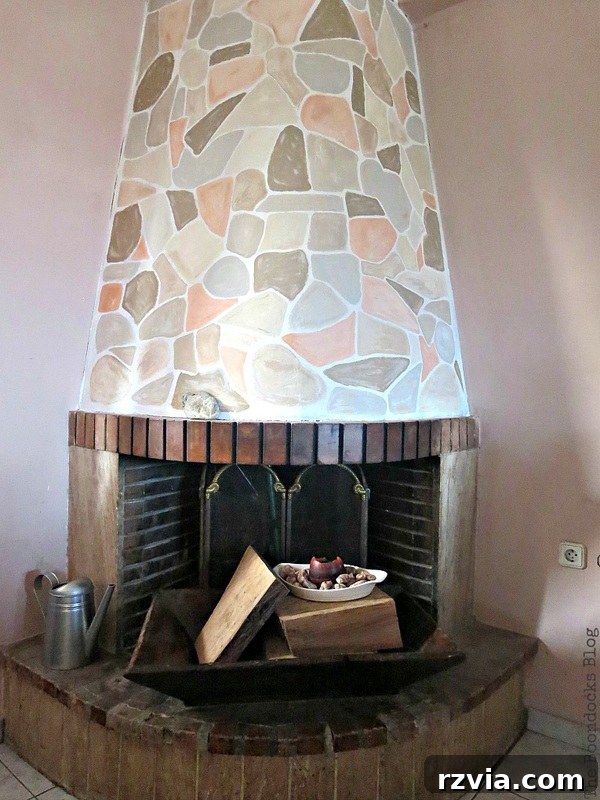
As mentioned, there’s even a delightful part two to this fireplace makeover here, where I cover additional details and styling tips that further enhance the new look. Be sure to check it out for more inspiration and insights!
Reflections on a DIY Journey: Better Late Than Never!
When I proudly showed the finished photos to my son, his immediate reaction was, “You should have done this years ago!” And he’s absolutely right! While the procrastination was real, the satisfaction of finally tackling this “long overdue fireplace makeover” is immense. It’s a powerful reminder that sometimes, the projects we put off the longest yield the most rewarding transformations. The new fireplace has completely revitalized our living room, turning what was once a dark, overlooked area into a bright, inviting focal point that truly enhances the warmth and character of our home.
This project serves as a testament to the power of paint and a little perseverance. With the right inspiration, some basic supplies, and a willingness to embrace the process, anyone can achieve a significant home improvement without a massive budget. It’s not just about painting a fireplace; it’s about transforming a space and, in a way, transforming your relationship with your home. The confidence gained from completing such a project is invaluable, inspiring even more DIY adventures down the line.
Do you ever find yourself in a similar situation, with a project in mind that just keeps getting pushed to the back burner, much like my fireplace makeover? Share your stories of procrastination and ultimate triumph in the comments below! It’s comforting to know we’re not alone in our DIY journeys, and sometimes, a little encouragement is all it takes to finally tackle that long-awaited transformation.