
Transforming Found Treasures: A DIY Shutter Art Project (Even When Things Go Wrong!)
Sometimes, the most extraordinary home decor pieces find us when we least expect them. For ages, I yearned to create a unique piece of wall art, something with character and a story, but nothing ever felt quite right. That is, until an ordinary day turned into an unexpected treasure hunt. While patiently waiting for my dad in a quiet corner of New York, a beautiful, weathered shutter appeared, seemingly out of nowhere, waiting to be rescued and transformed into something truly special.
This journey wasn’t without its challenges, and I’m here to share not just how I crafted this beautiful shutter art with a stencil, but also the inevitable detours and valuable lessons learned along the way. Think of it as a guide on how to approach a DIY project, even if you, like me, might start doing it “the wrong way” before discovering the perfect solution!
Disclosure: This post contains affiliate links and I received product compensation for its creation. All opinions expressed are genuinely my own, reflecting my love for the products I use and wholeheartedly recommend to fellow DIY enthusiasts.
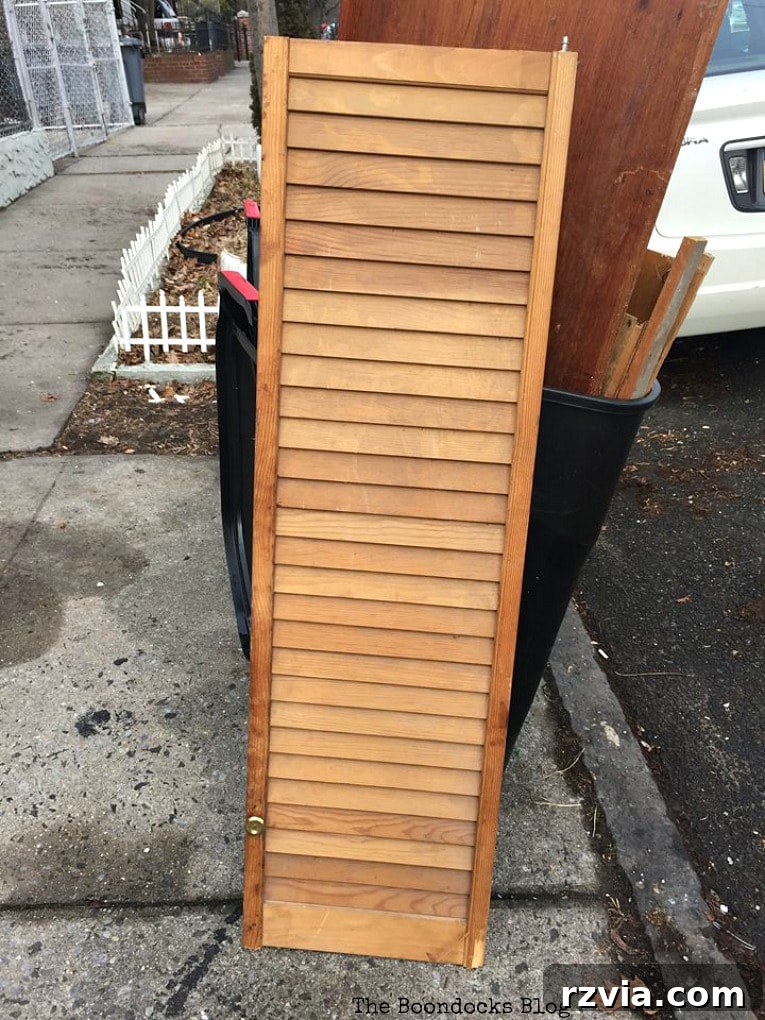
Every great DIY project often begins with an even greater backstory. This particular adventure started on a day I was driving my dad to the hospital for a visit. Finding parking in bustling New York City is always an ordeal, and I ended up a few blocks away, nestled in a spot that unexpectedly gifted me with my next project. As I sat there, observing the city life, a man emerged from a building and placed this incredible wooden shutter on the curb, ready for disposal. My heart skipped a beat!
I couldn’t believe my luck. A beautiful, solid shutter, just waiting for me. I waited patiently, ensuring the man was well out of sight – you never know, he might have had a change of heart! Then, with a surge of adrenaline, I leapt out of the car and wrestled the large shutter into the back. It was a tight squeeze, requiring a bit of maneuvering and determination, but as the old adage goes, where there’s a will, there’s a way. This shutter was destined for a new life as a unique piece of wall art in my home, and I was thrilled to be its rescuer.
Disclosure: This website contains affiliate links. If you purchase any of these products through the links provided, I may receive a small commission at no extra cost to you. This helps support my blog and allows me to continue sharing inspiring content and DIY tutorials.
Essential Tools & Materials for Your Shutter Art Project
To embark on your own shutter art journey, here’s a comprehensive list of the tools and materials I used. Even if you encounter a few “wrong turns” like I did, having the right supplies is the first step towards a successful and beautiful outcome.
- DecoArt Americana Chalky Finish Paint in Everlasting: My go-to for a smooth, matte finish that adheres beautifully to various surfaces.
- Chip Brush: Excellent for applying base coats and getting into nooks and crannies.
- Pounce Sponge Brush: Initially chosen for stenciling, it presented some challenges on this textured surface, as you’ll soon learn!
- Fine Tip Brush: Essential for more controlled application and intricate details, especially on uneven surfaces.
- Stencil with Swirls: Choose a design that complements your desired aesthetic and furniture.
- Americana Decor Matte Metallics in Soft Silver: Provides a subtle shimmer and adds a touch of elegance to the stenciled design.
- Sandpaper: For light distressing or smoothing any rough areas.
- DecoArt Americana Creme Wax Finish: To seal and protect your painted surface, giving it a soft, durable finish.
- Round Brush for Waxing: Specifically designed for applying wax evenly.
- White Rag for Waxing: For buffing the wax to a beautiful sheen.
The Step-by-Step DIY Guide: Turning a Shutter into Stenciled Wall Art
This project began with what seemed like a straightforward plan. But as many DIYers know, plans often evolve. Here’s how my shutter art project unfolded, including the initial missteps that ultimately led to a truly unique and personalized creation.
Step 1: Preparation and Painting the Base Coat
First things first, preparation is key for any successful paint project. I meticulously wiped down the entire shutter to remove any grime, dust, or hidden cobwebs it might have collected during its previous life. Once clean and dry, it was time for the first coat of paint. I opted for my favorite chalky finish paint in “Everlasting”. This paint is a dream to work with, offering excellent coverage and a beautiful, matte finish that sets the perfect foundation for any decorative work.
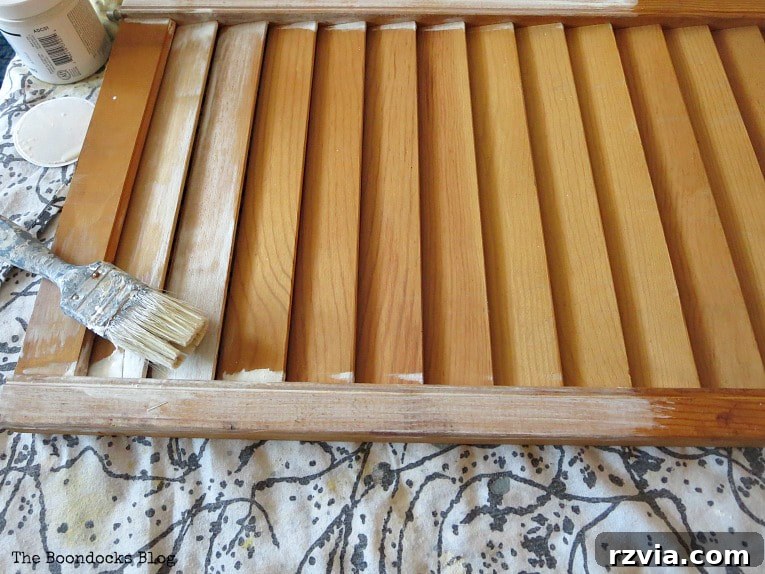
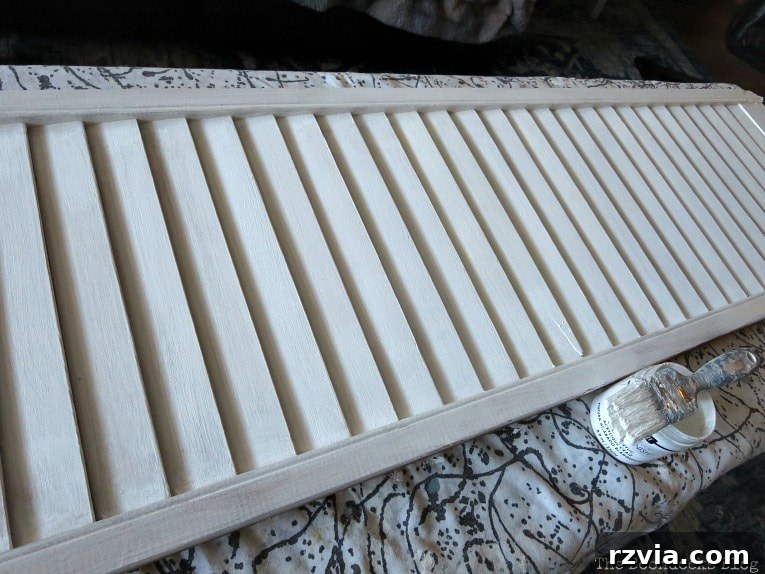
Two coats were sufficient to achieve a solid, even white. The entire painting process, despite the numerous slats, took only about half an hour thanks to the fast-drying nature of chalk paint. Painting around the individual slats required a bit of patience and a smaller brush to ensure every surface was thoroughly covered, creating a pristine canvas for the stencil work to come.
Step 2: Finding Inspiration and Choosing Your Stencil Design
The inspiration for this specific design stemmed from a beloved piece in my living room: a vintage TV cabinet adorned with exquisite scroll detailing. Since the shutter would hang on a wall directly opposite my accent wall, I wanted to create a sense of cohesion and carry that elegant swirl theme across the room. This visual connection helps tie the entire space together, making each piece feel intentional and harmonious.
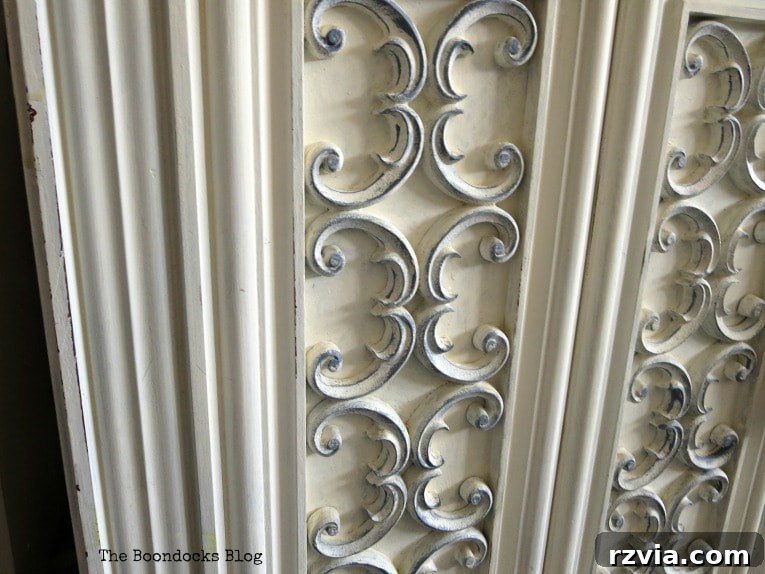
Initially, I considered a Fleur de Lis stencil, but after careful consideration, I opted for a stencil I found at Michael’s that featured a beautiful swirling pattern. This design more closely echoed the delicate curves of my TV cabinet, ensuring the new shutter art would perfectly complement the existing decor. Here is a similar one if you’re looking for something similar.
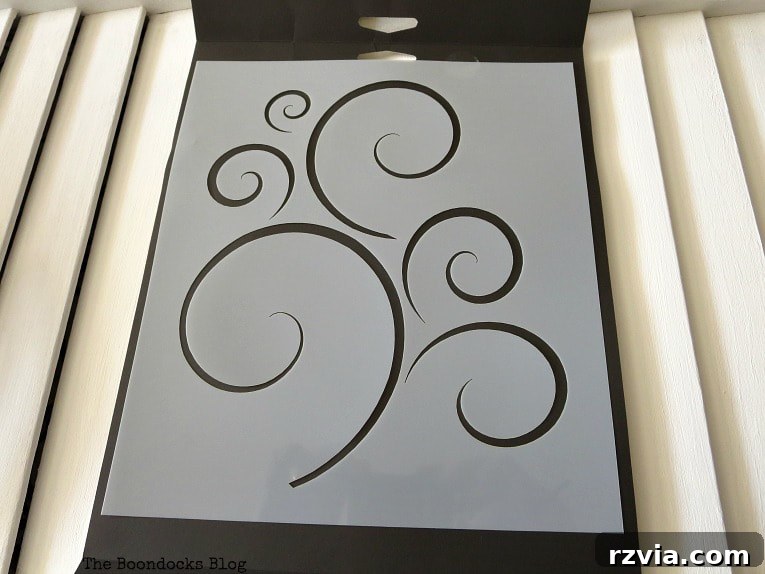
Step 3: The Stenciling Process – Learning from My Mistakes
Having successfully tackled stenciling projects before, I approached this shutter with a healthy dose of overconfidence. “This will be a breeze,” I thought, “even simpler than the Fleur De Lis design I skipped!” Oh, how wrong I was. A crucial lesson in DIY, one I frequently relearn, is to never underestimate a project or overestimate your own skills. This past project, for instance, taught me a humbling lesson about being too smug!
My initial plan involved using my trusted pounce sponge brush. It had proven effective for other projects, and given its widespread acclaim among crafters for stenciling, I assumed it would be perfect for this shutter. I meticulously prepared my workspace, laying out my paint, brushes, and a plastic dish with a paper towel to dab off excess paint – all the hallmarks of a confident crafter.
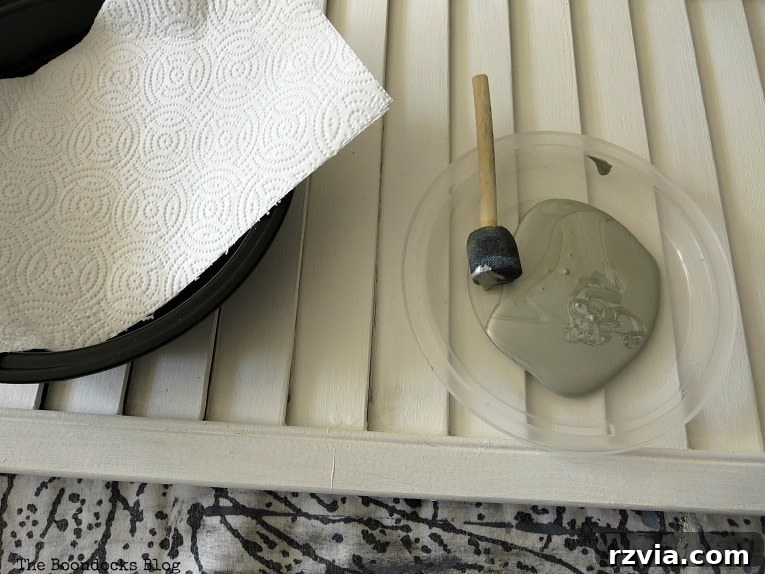
For the stencil design, I chose a soft metallic silver paint. My vision was for the shutter itself to be the primary focal point, with the stenciled design offering a subtle, complementary shimmer rather than overpowering the piece. The metallic sheen would catch the light beautifully without demanding too much attention. I taped the stencil along one end of the shutter, carefully positioning it, and pressed down, ready to apply the paint.
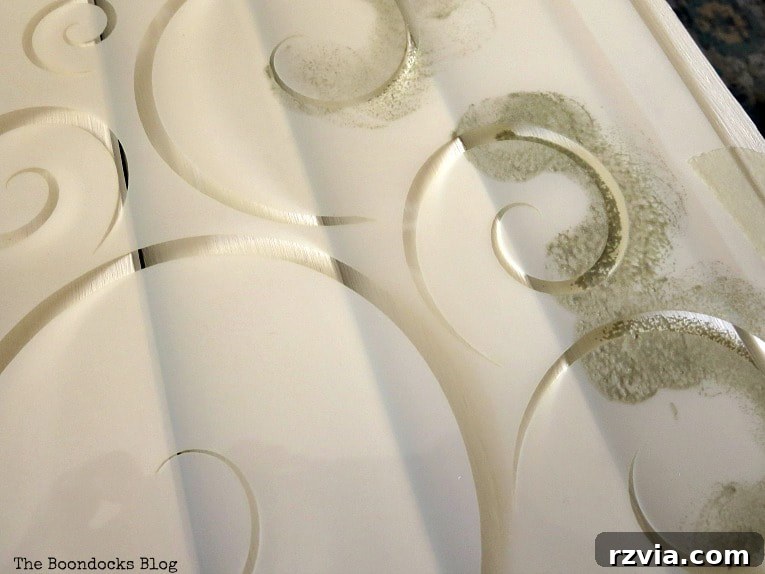
As you might have predicted, things did not go according to my perfectly laid plans – again! I had completely, inexplicably, overlooked the most obvious feature of the shutter: its slats. They were right there, staring at me, practically mocking my oversight. The stencil simply refused to lay flat across the uneven surface, and despite carefully dabbing off most of the paint, it bled underneath the stencil, resulting in thick, messy lines.
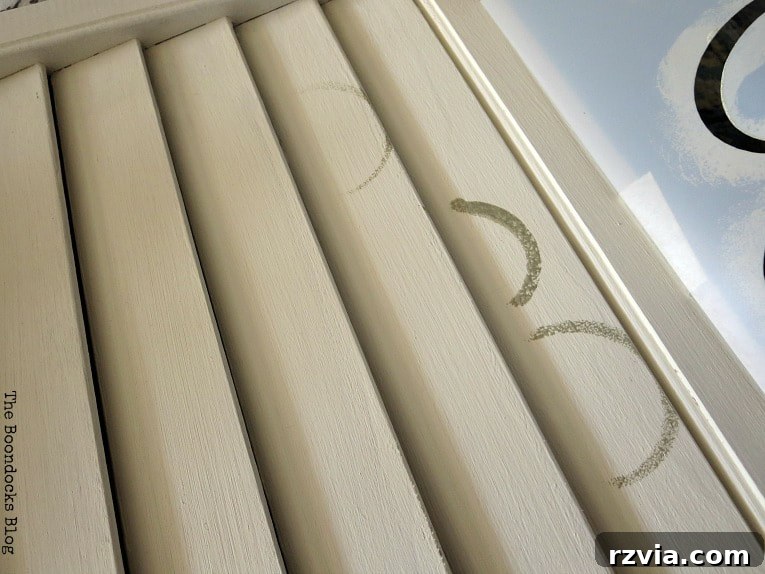
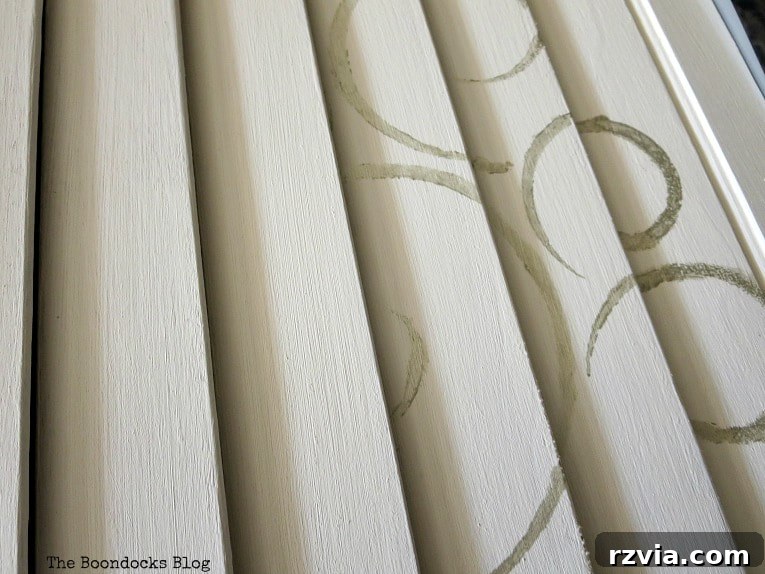
Undeterred, I tried again, this time switching to much thinner brushes, believing they would offer greater control over the paint. I hoped that by carefully applying the metallic silver, I could achieve the crisp, clean lines I desired for the swirling pattern.
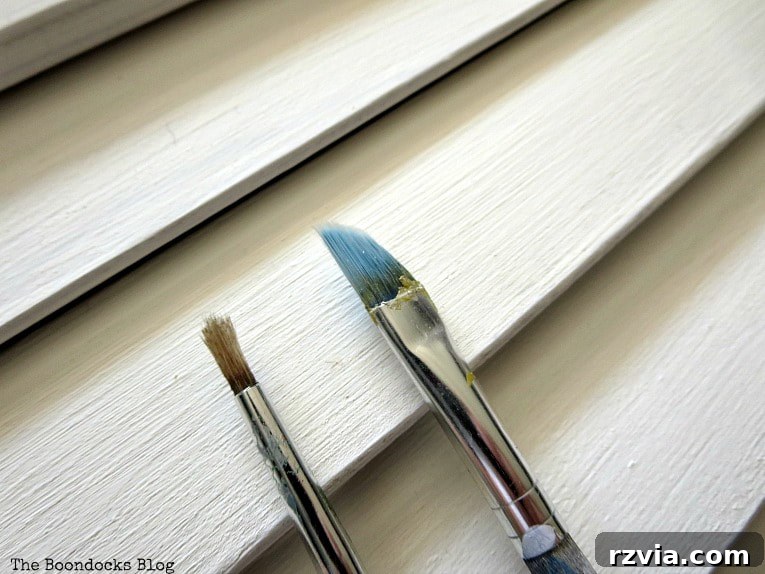
Step 4: Discovering “The Right Way” to Stencil a Shutter
Here’s a look at my subsequent attempt. It certainly looked better than the first, with less bleeding, but it still wasn’t perfect. The stencil design wasn’t fully captured on each slat, leaving gaps and an incomplete pattern. Another partial fail!
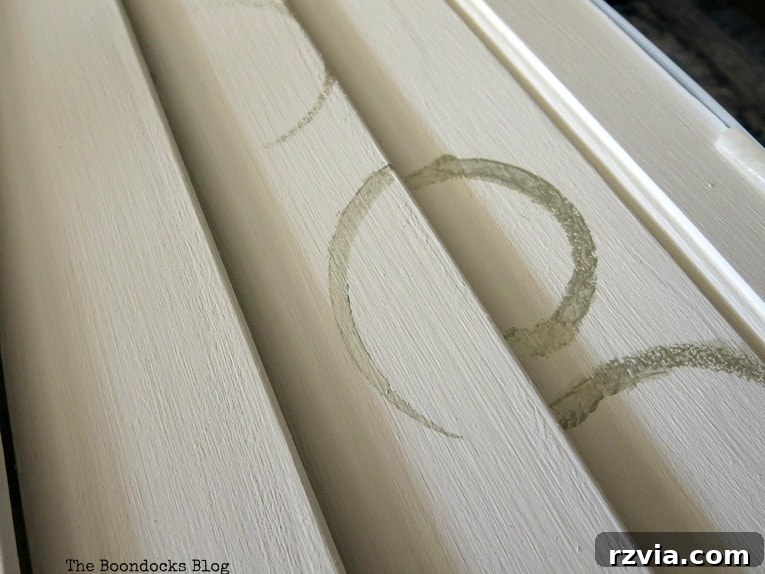
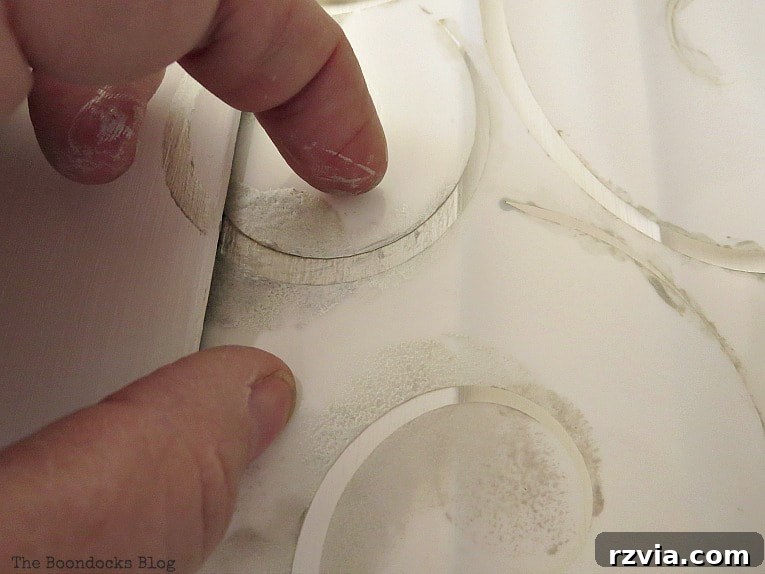
It was at this point that the lightbulb finally went off: I realized the only way to get the design to lay flat and achieve full coverage on each slat was to physically insert the stencil *between* the slats. This meant gently bending the stencil to conform to the curvature and depth of each individual wooden piece, ensuring direct contact with the surface. What was meant to be a quick, ten-minute project was clearly going to take significantly longer – a surge of frustration was definitely building!
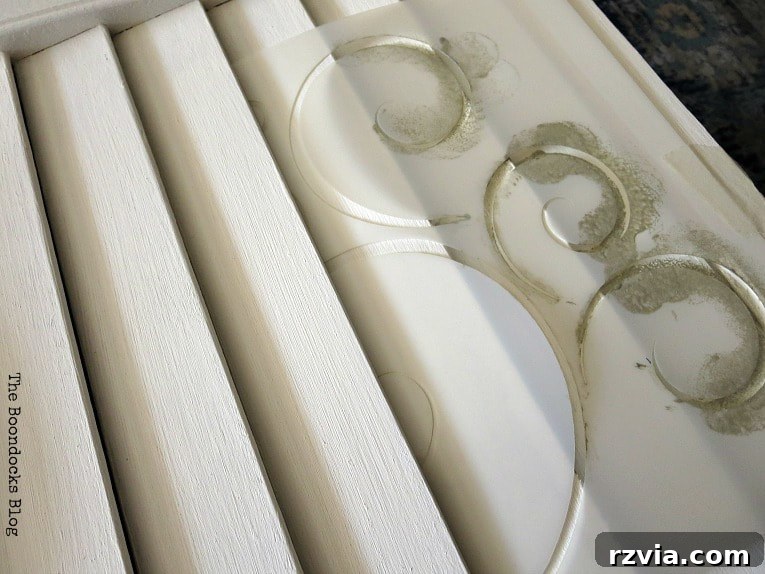
This method required extreme patience. To ensure the stencil stayed perfectly in place while I painted, I had to hold it firmly with my fingers, sometimes even using an extra brush to press it down into the contours of the slat. It was tedious work, but finally, the metallic silver design began to appear crisp and defined, exactly as I had envisioned. The satisfaction of seeing the pattern emerge correctly was immense, even if it meant my ten-minute project was now pushing into hours!
Step 5: Refining the Design for Balance and Visual Interest
Finally, after considerable frustration and a lot of meticulous work, the central section of the shutter was stenciled. The metallic silver paint created a wonderfully subtle effect, shimmering gently rather than boldly standing out. However, gazing at it, I felt it looked a little unfinished, perhaps a bit too sparse.
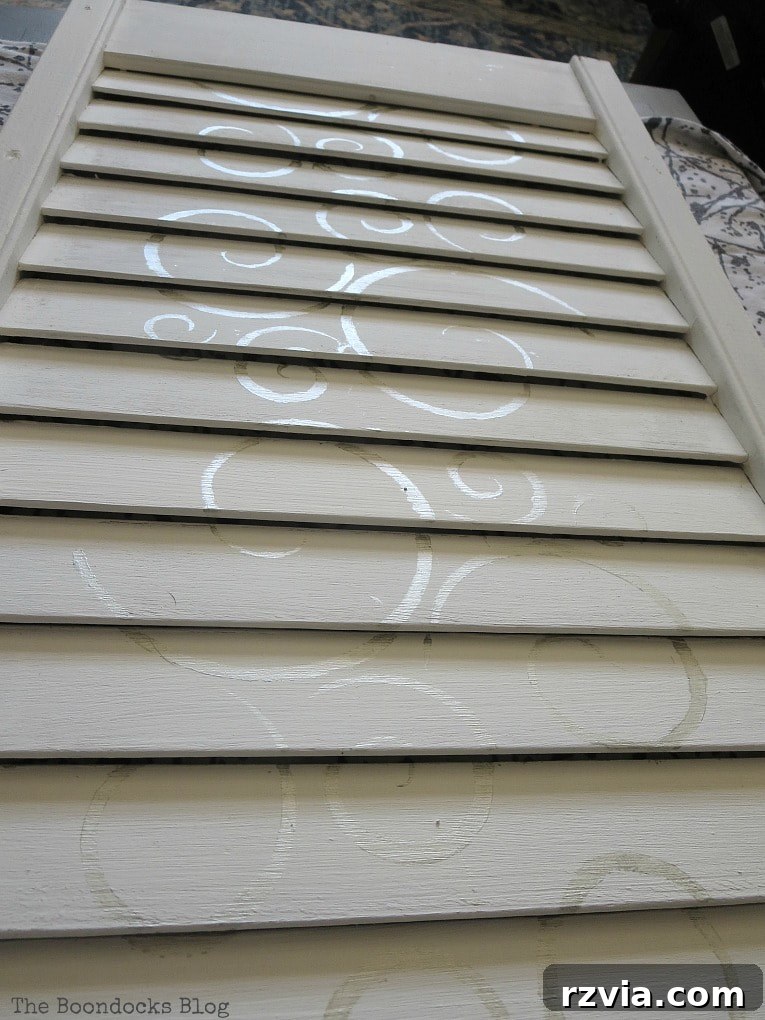
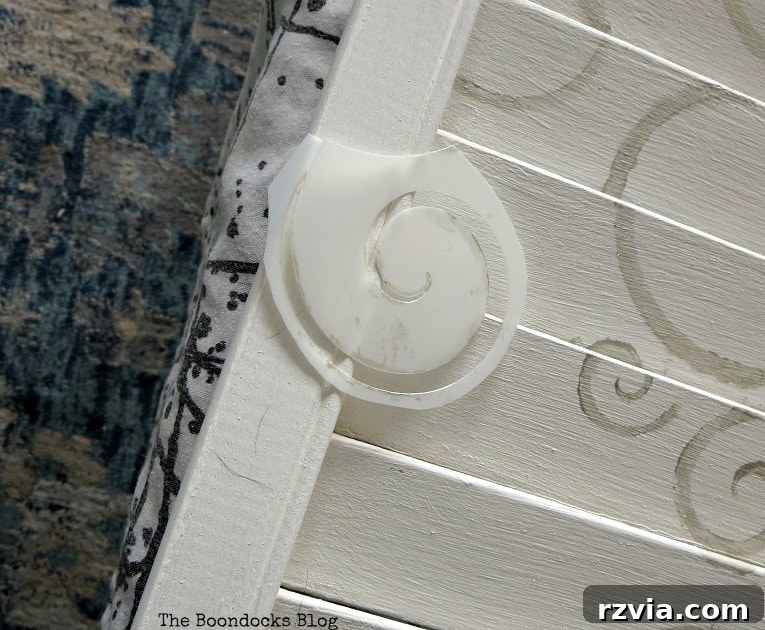
Since stenciling the individual slats down the center hadn’t taken me nearly long enough (insert heavy sarcasm here!), I decided to enhance the design further. I carefully cut out smaller swirl patterns from the stencil and applied them along the two sides of the main design. This thoughtful addition was intended to give the overall look more balance and less empty space, creating a richer, more cohesive pattern. Of course, this creative improvisation added another half an hour to my (initially estimated) ten-minute project, but the improved aesthetic was well worth the extra effort!
Step 6: Sealing and Hanging Your New Shutter Art
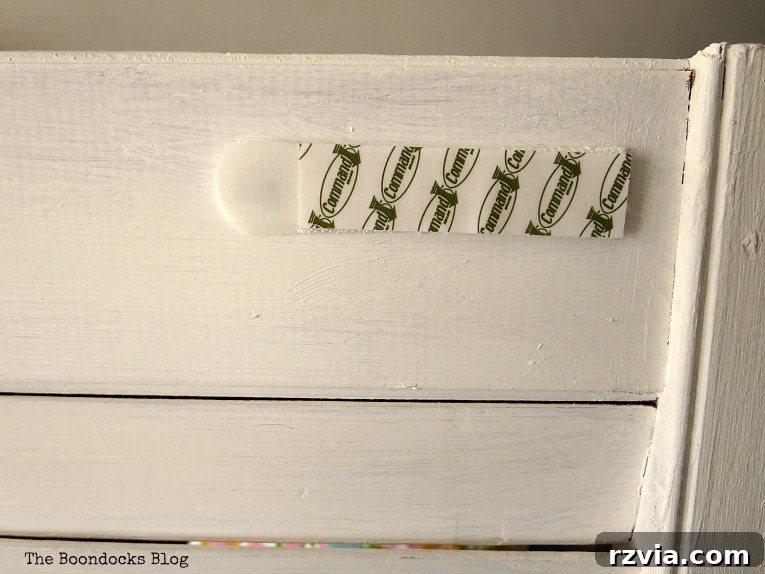
With all the stenciling complete, the final step was to protect my hard work. I applied a top coat of creme wax. This not only seals the paint and stencil, providing a durable finish, but also imparts a lovely, subtle sheen that enhances the overall look. After buffing it gently with a white rag, the shutter was ready for its new home. To hang it securely without damaging my walls, I opted for a collection of Command Strips, perfect for hanging decorative pieces without the need for nails or drilling.
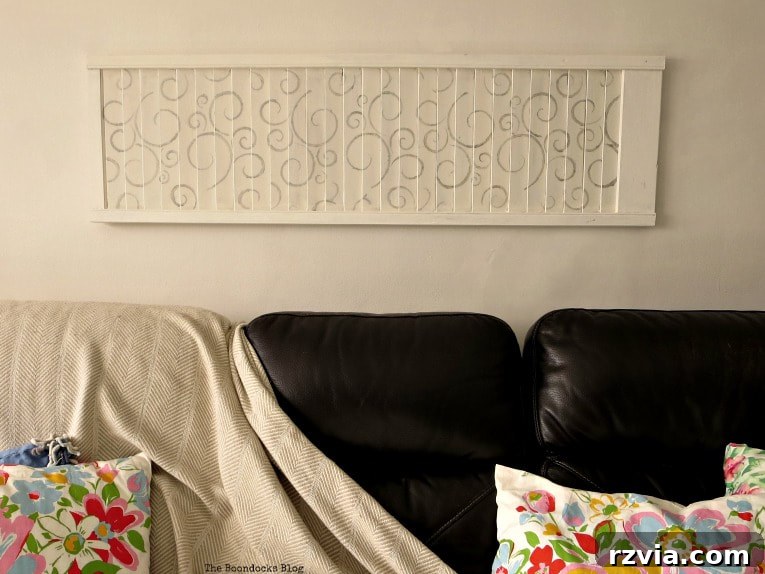
The Finished Shutter Art: A Triumph of Persistence
Finally, after what began as a perceived ten-minute stenciling project stretched into several hours of trial, error, and ultimate triumph, it was done! Was all that effort truly worth it? I could have easily gone out and bought some generic wall art, hung it up, and called it a day. But where’s the joy in that? For me, the true satisfaction lies in the process, in tackling the challenges, and in knowing I created something unique with my own hands.
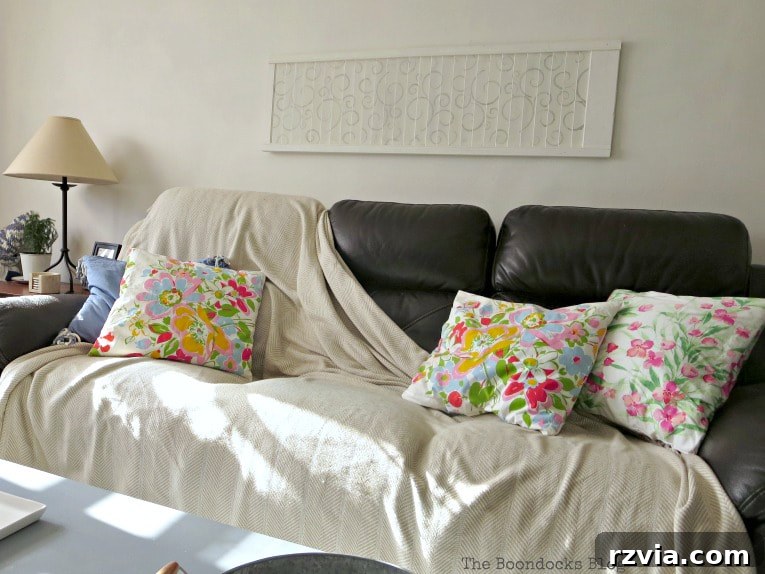
There’s a popular meme that playfully points out how we often spend $90 making something we could have bought for $10. In my case, it wasn’t about the money, but the time. Yet, the reward is immeasurable. This bespoke piece fills a specific need: I desperately needed something horizontal to elegantly fill the space above my sofa, and this upcycled shutter delivers perfectly.
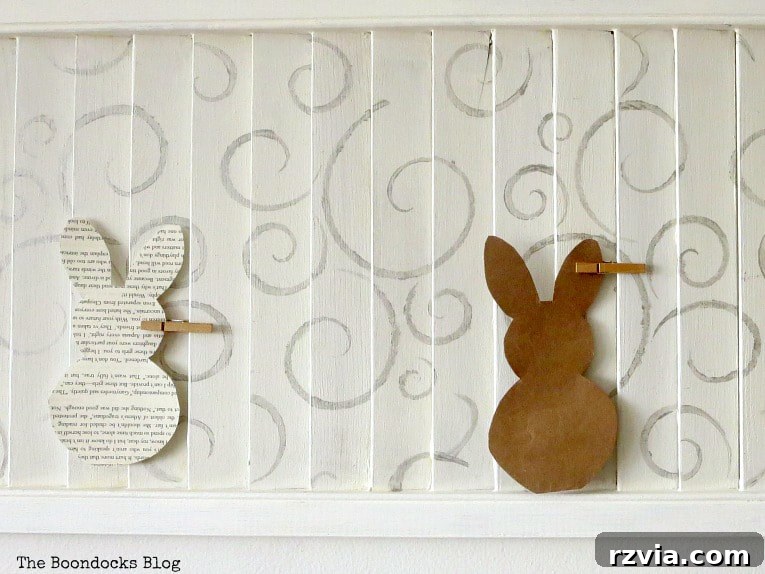
Seasonal Versatility and Subtle Elegance
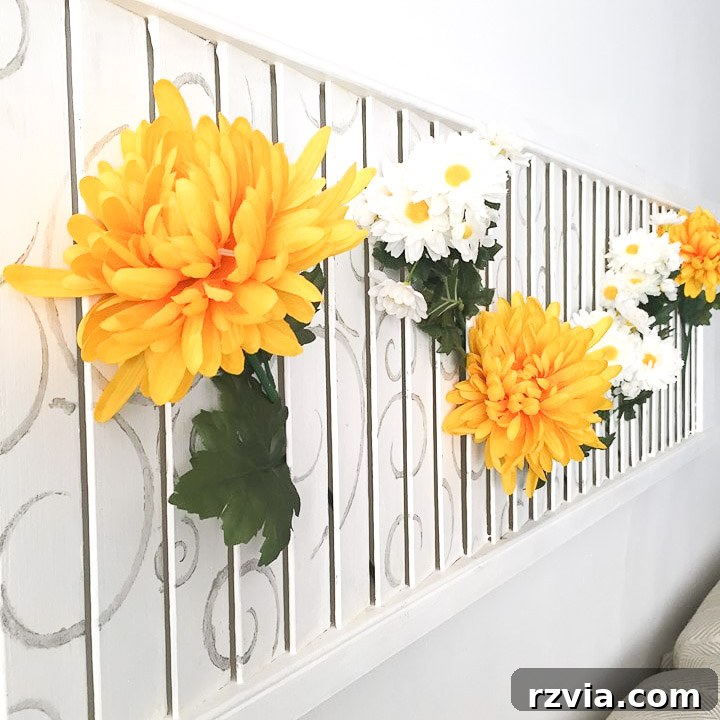
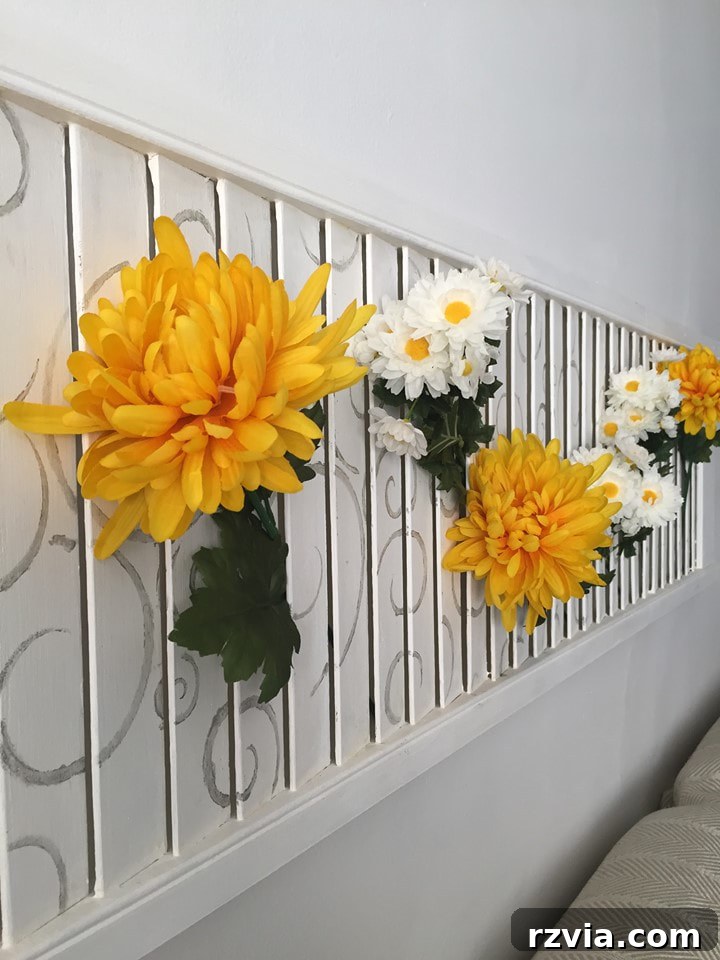
One of the delights of this shutter art is its versatility. Below, you can see how effortlessly it integrates with my Easter decor. I was inspired by Lisa of The Purple Hydrangea’s creative ideas, and it truly is an easy way to refresh your decor for any season or holiday. Simply hang new accents from the slats, and your wall art instantly transforms.
Now, let me elaborate on my aesthetic choices for this piece. I sought a design that offered presence without being overtly dominant. Remember, we still have that striking accent wall on the opposite side of the room, and I wanted to avoid overwhelming the space. The goal was to subtly fill the wall, adding texture and visual interest in a refined manner. Are you following my vision?
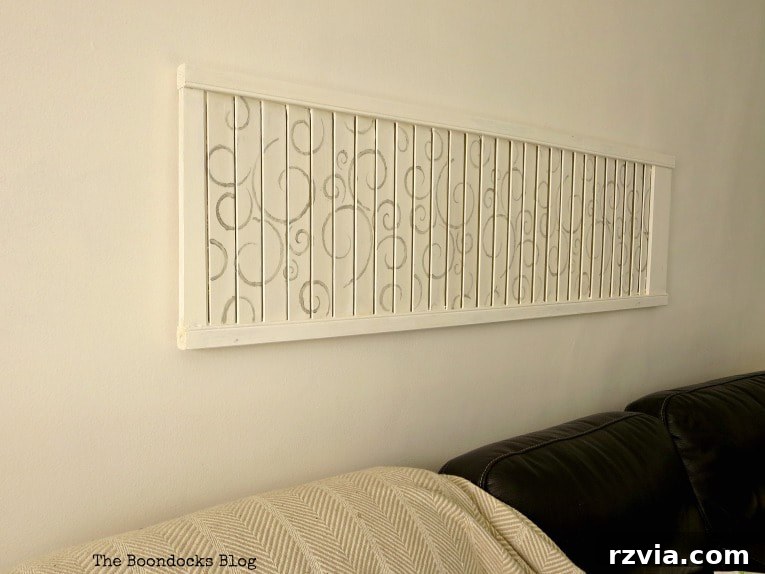
In fact, the metallic finish of the stencil adds an almost ephemeral quality. If you view the shutter from one end, particularly when facing the windows, the design shimmers and almost disappears, creating a delicate interplay of light and shadow. It’s a truly subtle effect, precisely what I aimed for. To me, the structural slats do the heavy lifting in terms of defining the piece, and the elegant swirls are simply a beautiful bonus, enhancing its depth and charm.
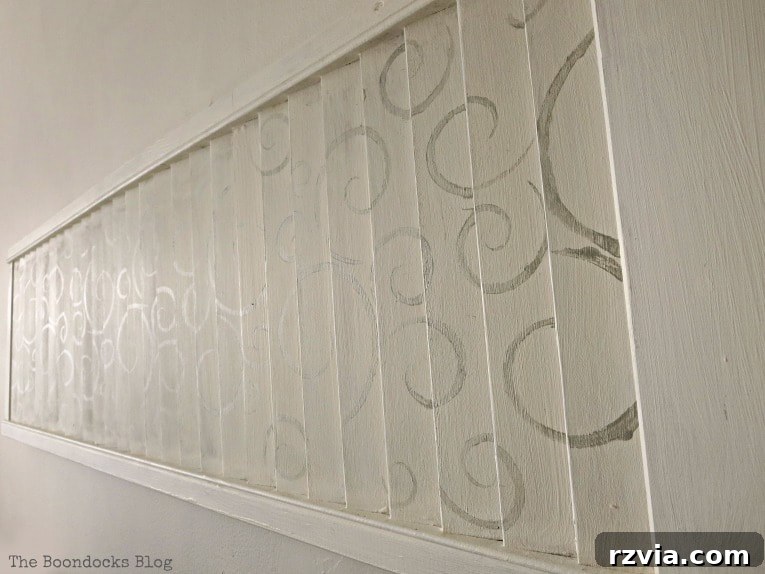
Lessons Learned and the Joy of Imperfect DIY
All kidding aside, I genuinely adore my new shutter art decor. It serves as a beautiful focal point, but in a soft, understated way that complements my home rather than shouting for attention. So, what invaluable wisdom have I gleaned from this episode of making things far more complicated than they needed to be?
Should pounce brushes be feared? Absolutely not. They have their rightful place in the crafting world, just not on the uneven surfaces of louvered shutters! Ultimately, I’ve learned (yet again) that I don’t always absorb lessons from my previous mistakes on the first try. It seems I need to repeat them a few times before the full realization truly sinks in and my cheeks flush with the mild embarrassment of a seasoned DIYer. Or perhaps, three times is the (un)lucky number, meaning I still have one more delightful blunder to make!
Here’s an update on how I styled it after Easter, demonstrating its incredible adaptability. You can genuinely add anything to it, effortlessly adapting it to suit the current season or your evolving decor style.
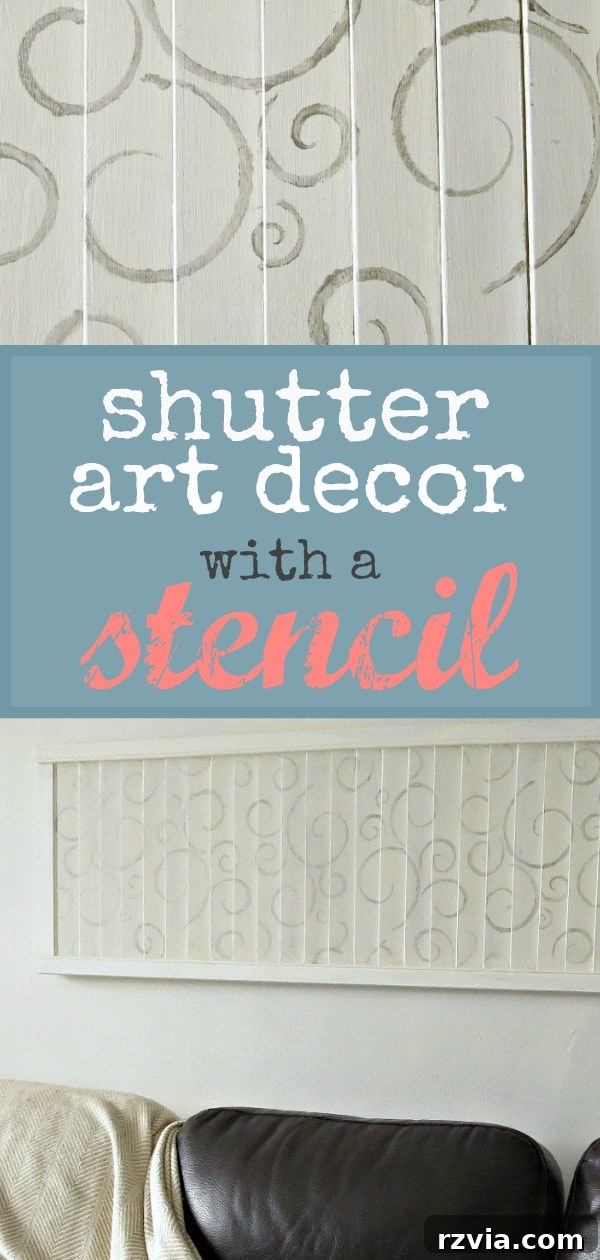
In the end, I achieved exactly what I desired (and perhaps deserved after all the effort!) This tutorial on how to make shutter art – even if I started “the wrong way” – was a lengthy process, much longer than anticipated, but the outcome fills me with immense satisfaction. I genuinely couldn’t find another piece quite like this anywhere, and believe me, I scoured Pinterest for inspiration! How many mistakes do you typically need to make before a lesson truly sticks?

If you enjoyed this transformation and want more DIY adventures delivered straight to your inbox, subscribe to my blog! You’ll find the form in the sidebar or at the top of the page. To learn more about my privacy policy, please click here.

Explore More Creative Wall Decor Projects:
<< Looking up in Manhattan HOME
Linking up to these Link Parties
This blog is for entertainment purposes only; my DIY tutorials are not professional advice. Read my full disclaimer here.
I truly appreciate your comments and will do my best to reply to each one. Please remember not to include a hyperlink in your comment, as this may prevent it from being published.