
Transform Your Home: A DIY Guide to Upcycling a Dictionary Stand with Homemade Chalk Paint
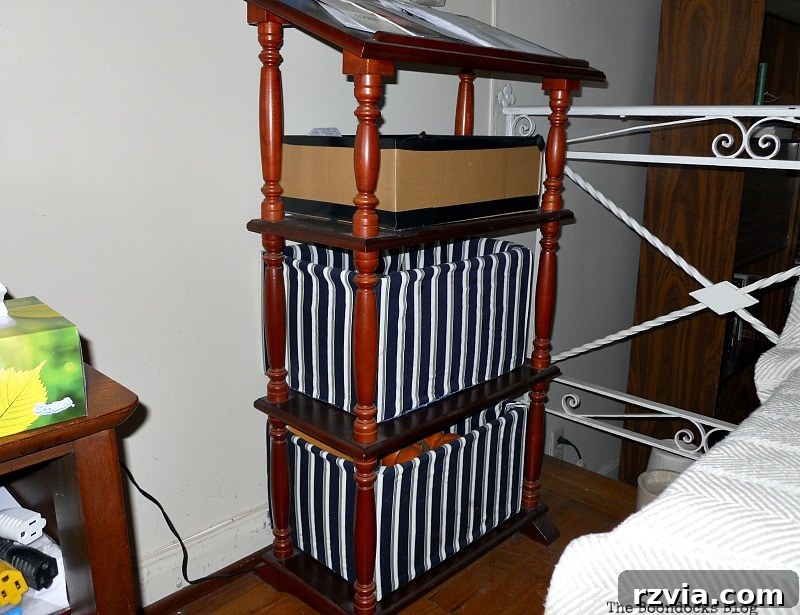
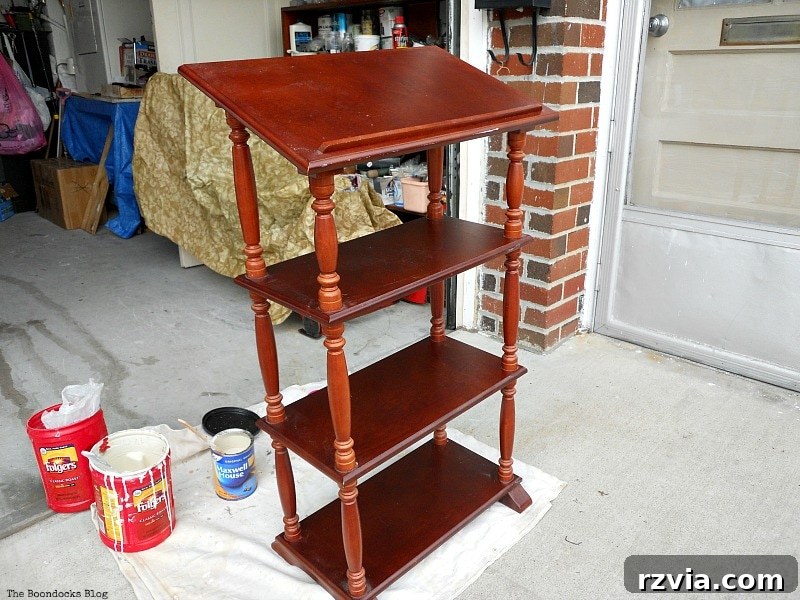
Every home has that one piece of furniture that, despite its sentimental value, just doesn’t quite fit the aesthetic. For me, it was this dictionary stand. It had resided in our home for at least six years, a mystery of its origin but a firm favorite of my son’s. While its presence was cherished, its vibrant cherry-red finish was a stark contrast to my apartment’s carefully curated palette of blacks, beiges, and deep blues. My furniture collection largely consists of dark woods and understated tones, making the bright red stand out like a solitary poppy in a field of subtle wildflowers. It was clear: this beloved but mismatched piece was ripe for a stunning upcycle, and I knew exactly the medium to achieve it – chalk paint.
The idea sparked a familiar thrill, the kind only a dedicated DIY enthusiast understands. This wasn’t just about changing a color; it was about integrating a cherished object seamlessly into our living space, giving it a fresh lease on life without sacrificing its inherent charm. And what better way to accomplish this than with a budget-friendly, hands-on approach using the magic of chalk paint? Join me as I walk you through this inspiring furniture makeover, perfect for anyone looking to revitalize old pieces and add a personal touch to their home decor.
Inspiration Strikes: A Nod to My Father’s Legacy and the Joy of DIY
As a passionate DIYer, faced with this aesthetic dilemma, my thoughts immediately turned to a solution I could craft myself. While a trip to a craft store like Michael’s might offer a quick fix, my creative spirit, largely inherited from my dear father, always pushes me towards a more personal approach. My dad, a house painter for many years, might not be conventionally seen as an artist by some, but his hands transformed countless surfaces. Our childhood home was a testament to his creativity, adorned with many hand-painted pieces that bore his unique touch. He instilled in me the value of working with your hands and the satisfaction of seeing a vision come to life.
Of course, his era of furniture painting predominantly featured enamel paint – that thick, often gooey substance known for its durability but also its tendency to drip and demand meticulous application. It provided a hard, glossy finish that certainly had its place and was a staple for generations. However, I saw this dictionary stand upcycling project as a wonderful opportunity. It was time to introduce him to the revolutionary world of chalk paint – a medium that offers a velvety finish, requires minimal prep, and opens up a whole new realm of distressing and aging techniques that were less accessible with traditional enamel. My goal wasn’t just to repaint a stand; it was to share a new creative adventure with my greatest inspiration, showcasing how modern DIY techniques can blend seamlessly with a legacy of craftsmanship and create truly stunning results with less effort.
The beauty of chalk paint lies in its forgiving nature, making it ideal for beginners and seasoned crafters alike. Unlike enamel, which often requires extensive sanding, priming, and multiple precise coats to avoid brush strokes, chalk paint adheres well to most surfaces without much fuss. This meant I could achieve a professional-looking finish with less time and fewer headaches, proving to my father that innovation can simplify, not just complicate, the art of painting. This project truly became a bridge between classic painting wisdom and contemporary DIY practices, making the transformation even more meaningful.
Crafting Our Own Chalk Paint: The DIY Recipe and Application Process
One of the most appealing aspects of chalk paint is the ability to create your own, transforming ordinary acrylic paint into a versatile, matte finish. Our house, much like any dedicated DIY enthusiast’s, is a treasure trove of paint cans, so finding a suitable acrylic base was no problem. For this project, I used a simple yet effective recipe that is perfect for achieving that signature chalky texture: 1/3 cup warm water, 1/3 cup Plaster of Paris, and a full cup of the acrylic paint. The Plaster of Paris is the key ingredient here, as it provides that distinctive matte texture and allows the paint to adhere beautifully to almost any surface without extensive sanding or priming – a stark contrast to my father’s traditional methods and a huge time-saver.
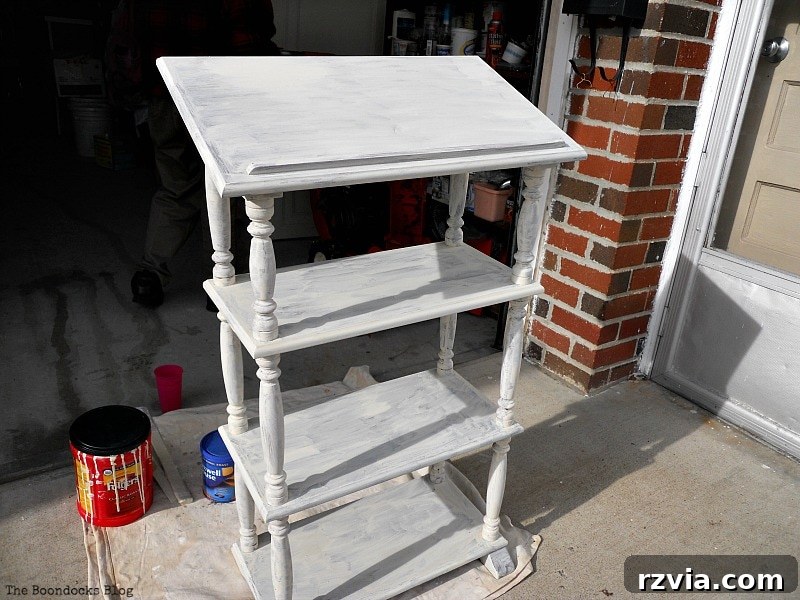
Initially, my dad was, shall we say, highly skeptical. As I began applying the first coat, his commentary was exactly what many of you who’ve embarked on a furniture painting journey have likely heard: “You’re ruining a perfectly good piece of furniture!” This familiar refrain often accompanies any deviation from conventional methods, but I knew what magic chalk paint could deliver. I carefully mixed the ingredients until smooth, ensuring no lumps, and then began the transformation. The paint went on effortlessly, covering the stark cherry red with a soft, uniform layer. The coverage was remarkable, even over the dark existing finish, a testament to the paint’s excellent adhesion properties.
To achieve a deep, rich color and a durable finish, I applied three thin coats, allowing each to dry sufficiently before the next. The beauty of chalk paint is its quick drying time, which makes multi-coat projects much more efficient. However, for thorough curing and optimal results, I always recommend letting the piece dry overnight after the final coat. This allows the paint to fully harden and prepare for the next steps.
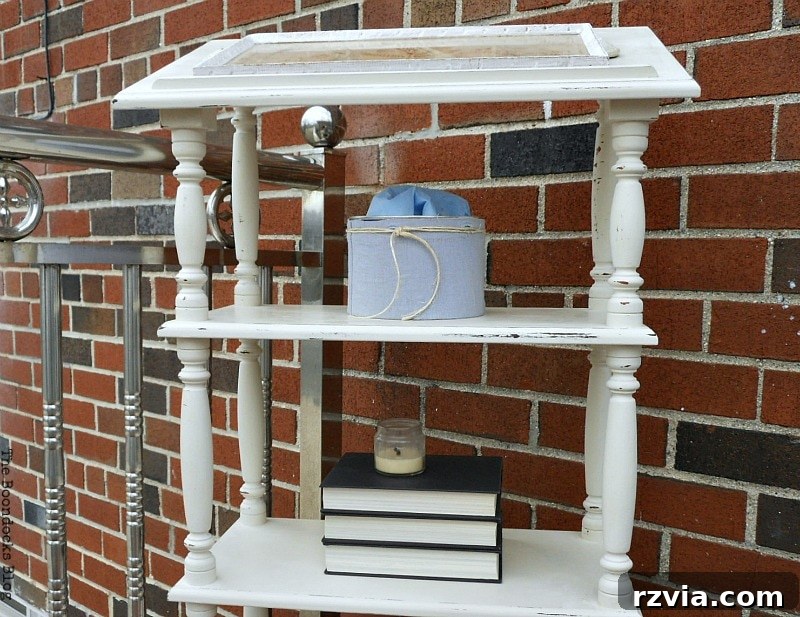
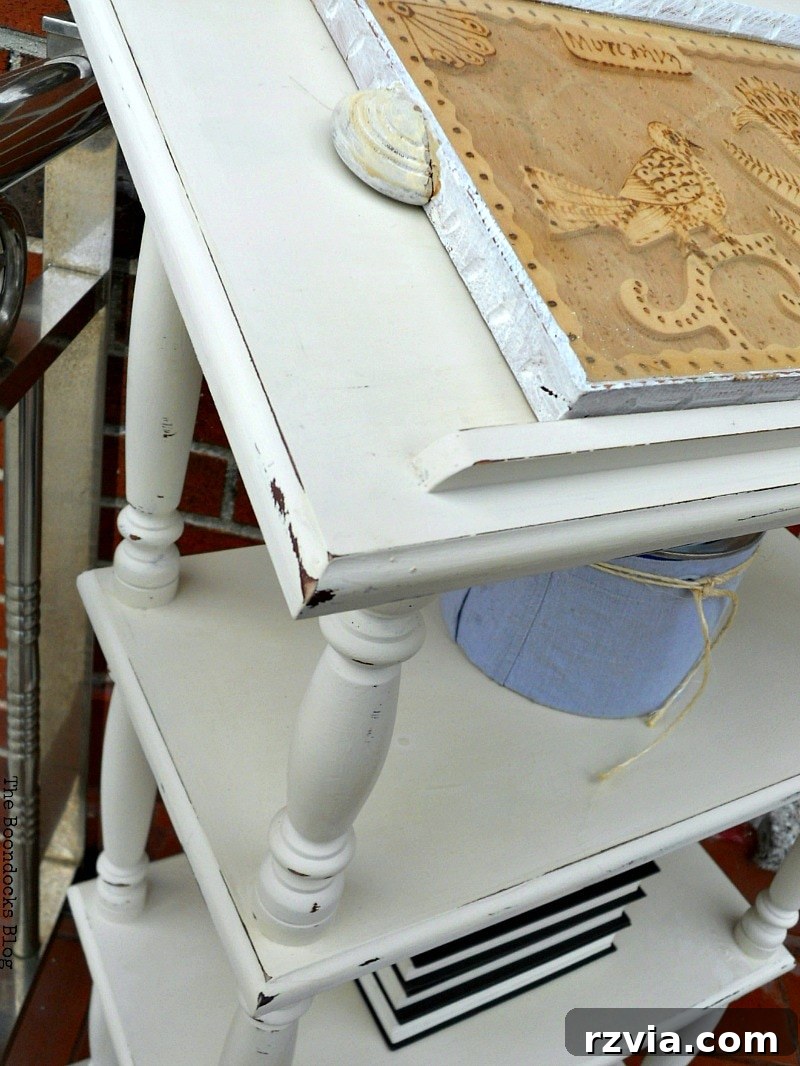
The next day, the stand was ready for its finishing touches. I lightly sanded it, just enough to create a subtle, distressed look and enhance the smooth feel. This gentle distressing is key to achieving that charming, aged aesthetic that chalk paint is famous for. It highlights the details and adds character, making the piece look like it has a rich history. To protect the newly painted surface and deepen its finish, I then applied a layer of cream wax from DecoArt. This step not only seals the paint, making it more durable and resistant to everyday wear and tear, but also imparts a beautiful, soft sheen, elevating the overall appearance and giving it a professional, polished look. This technique has proven successful in previous projects, such as my bed frame makeover and the delightful blue beach table, demonstrating the versatility and reliability of DIY chalk paint in achieving stunning furniture transformations.
Disclosure: The items mentioned below may contain affiliate links to Amazon.com. Should you choose to purchase any of these products through the provided links, I may receive a small commission. This helps support my blog and allows me to continue providing valuable content, at no additional cost to you for purchasing through my affiliate links.
My father’s skepticism, of course, lingered until the moment of truth arrived, the true test of this “new-fangled” paint.
I encouraged him to run his hand across the freshly waxed top of the dictionary stand, inviting him to feel the finish.
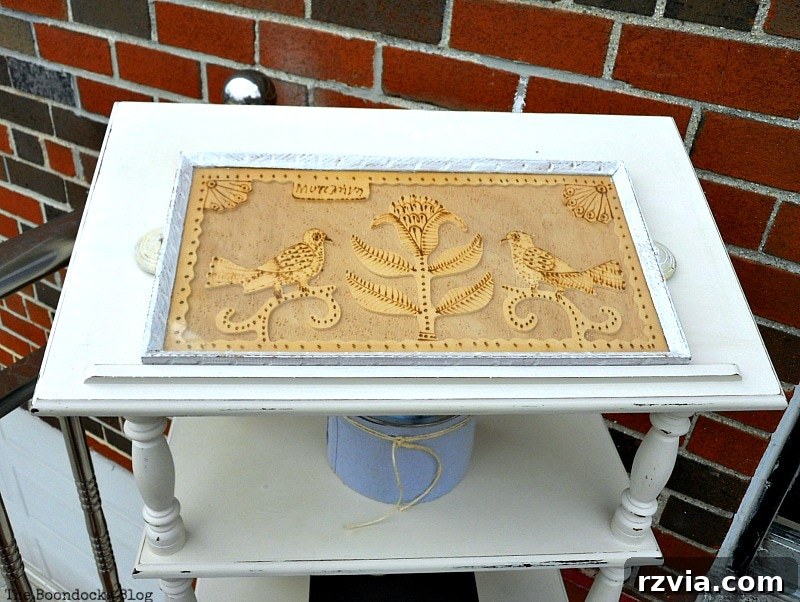
That’s when I finally heard the words I was hoping for, delivered with a tone of genuine surprise and appreciation: “Oh, it is really smooth!”
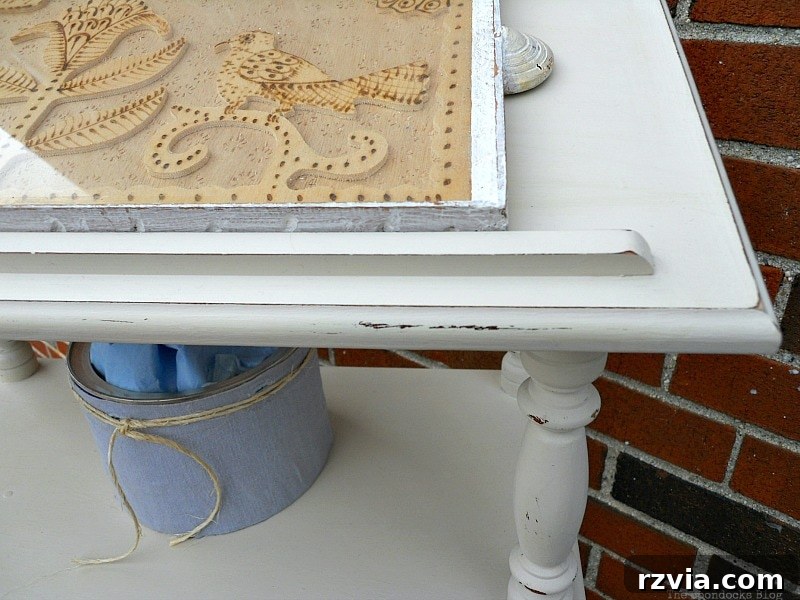
The Unveiling: From Skepticism to Admiration
His initial tactile assessment quickly led to a visual one. After carefully examining the entire piece, he conceded, “And… it does look much better now!” This was music to my ears, the ultimate validation from a seasoned craftsman. His appreciation wasn’t just for the improved aesthetics, but also for the cost-effectiveness of the project, especially given that we used paint we already had on hand and easily accessible Plaster of Paris. “He was also very impressed with the price tag!” I could tell he genuinely liked the distressed finish, a charming technique that adds character and depth, making the piece feel aged and sophisticated rather than just newly painted. This approval from someone with a lifetime of painting experience was truly gratifying.
The transformation was truly remarkable. The soft, matte finish of the chalk paint had replaced the jarring cherry red with a sophisticated, understated tone that now perfectly complements the apartment’s decor. The gentle distressing around the edges and on the spindles highlighted the stand’s original lines and carvings, giving it a story and a sense of history that a uniform, factory-fresh finish simply couldn’t achieve. It was no longer just a stand; it was a conversation piece, a testament to the power of a thoughtful makeover and the beauty that can be uncovered in old, forgotten items. The once awkward piece now exuded a quiet elegance, seamlessly blending with its surroundings while still retaining its unique identity.
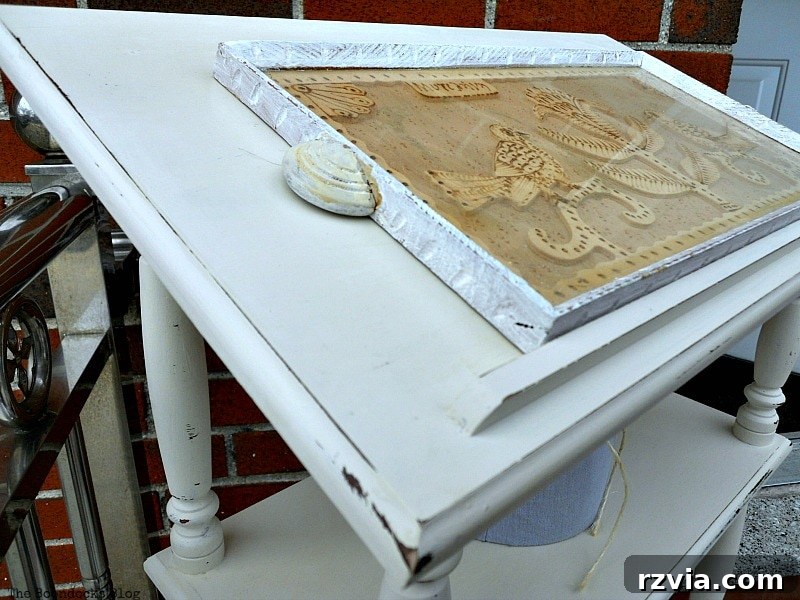
His enthusiasm for the transformation and the distressed effect was truly rewarding, marking a successful introduction to new painting methods and a beautiful outcome.
Adding Personal Touches: The Story of the Wooden Tray and Unified Aesthetics
Perched atop the newly transformed dictionary stand is a beautiful wooden tray, a piece with its own rich history and sentimental value. For those interested, this tray was actually featured in one of my very first blog posts, along with some picture frames, marking the beginning of my blogging journey. It holds a special significance as it was handcrafted in my hometown in Greece, a place steeped in a long and proud woodworking tradition. The intricate details, the sturdy construction, and the warmth of the natural wood speak volumes about the artisanal heritage of the region, making it more than just a decorative item – it’s a piece of my personal history, a tangible connection to my roots and a reminder of skilled craftsmanship.
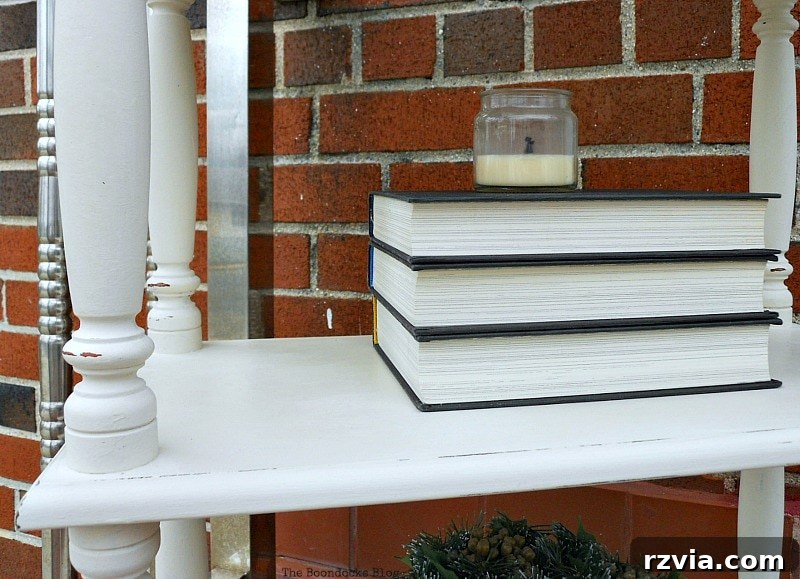
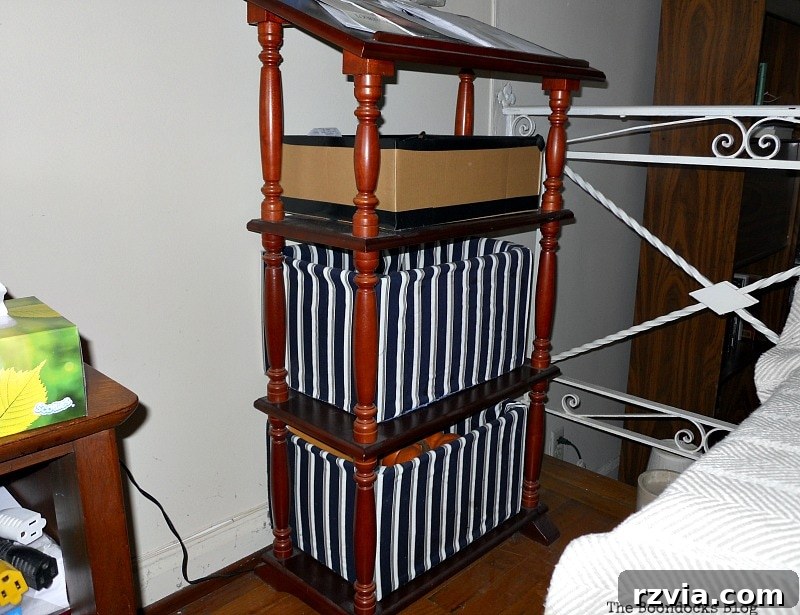
Taking a moment to revisit the “before” state of the dictionary stand, I’m struck by how different it looked. It’s almost as if the spindles and the shelves were crafted from varying types of wood, resulting in subtle differences in their original cherry finish and creating a slightly disjointed appearance. This slight inconsistency, though minor, contributed to its overall awkwardness within the room’s color scheme. However, the unifying power of the homemade chalk paint effortlessly corrected this, cloaking the entire piece in a cohesive, elegant finish that belied its previous mismatched tones. This transformation highlights chalk paint’s incredible ability to harmonize disparate elements, creating a polished and unified look that makes the entire piece feel intentionally designed and beautifully balanced. It’s truly amazing how a simple coat of paint can solve such aesthetic challenges, bringing cohesion to an otherwise eclectic collection.
A final glance at the original state reveals the stark contrast, particularly the differing wood tones which are now beautifully unified under the new paint finish.
More Than Just a Makeover: The Strategic Introduction of Chalk Paint
With the dictionary stand finally complete and looking absolutely stunning, the mission was accomplished on multiple fronts. Not only had I rescued a beloved piece from its aesthetic purgatory, transforming it into a cohesive and elegant part of our home decor, but I had also successfully introduced my dad to the undeniable beauty and ease of chalk paint. It’s a wonderful reminder that learning truly is a lifelong endeavor; no matter your age or experience, there’s always something new to discover and master in the world of DIY and craftsmanship. My father, with decades of hands-on painting experience, was genuinely impressed, which speaks volumes about the merits and revolutionary nature of this versatile medium. His approval meant the world, symbolizing a bridge between traditional and modern techniques.
You might be wondering why I went to such lengths to convince “dear old dad” about the virtues of chalk paint. Was it simply to share a new technique, or was there a deeper, more strategic motive behind my “painting madness”? The truth is, this dictionary stand was merely the first, smaller step in a much grander plan for home renovation. Our home has several larger pieces of furniture – dressers, tables, and cabinets – that are next in line for a chalk paint transformation. By easing him into the process with this manageable project, demonstrating its simplicity, quick drying time, minimal prep, and ultimately, its beautiful results, I aimed to secure his buy-in and perhaps even enlist his seasoned expertise for these upcoming, more ambitious endeavors. This little stand was a successful proof-of-concept, paving the way for future home decor adventures that promise to bring fresh life to our living spaces, piece by piece, and ideally, with a collaborative spirit. There’s a method to my madness, and it involves a beautifully coordinated home!
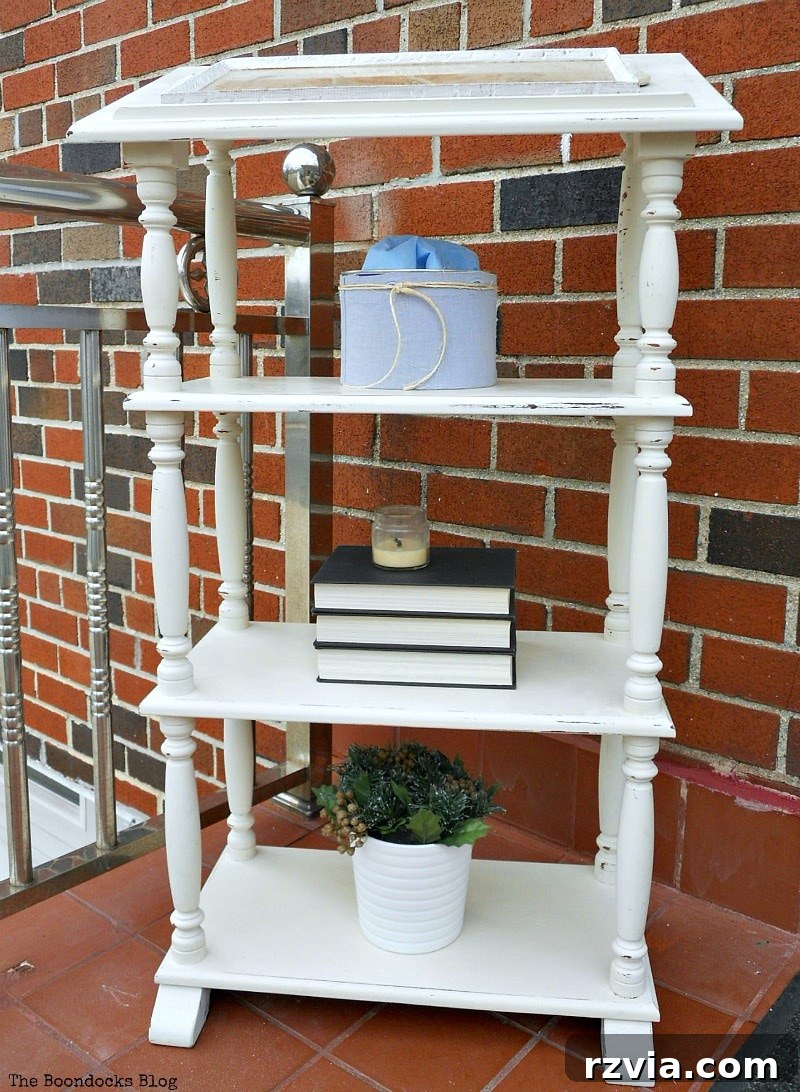
I hope you’ve enjoyed following this detailed guide on how to upcycle a dictionary stand with homemade chalk paint. The project was a resounding success, not just in terms of aesthetics, but also in bridging a generational gap in DIY techniques and proving the power of a simple, effective method. Dad is certainly satisfied, and now, fueled by this success, I’m eagerly preparing to tackle even more projects, currently painting up a storm in my son’s apartment! But more exciting details on that will come later – so stay tuned!
Have you ever ventured into making your own chalk paint, or tackled an upcycling project that initially faced skepticism but ultimately won over your critics? Share your experiences, challenges, and tips in the comments below! I’d love to hear about your creative journeys and the transformations you’ve brought to life in your own homes.
If you found inspiration in this transformation, please consider sharing it with your friends or saving it to your Pinterest boards. The image above is perfectly crafted for Pinterest, ready to inspire others!
For more DIY adventures, home makeovers, and creative insights delivered directly to your inbox twice a week, I invite you to subscribe to my blog. You’ll find the subscription form conveniently located on the sidebar, and rest assured, your email address will always remain confidential and never shared with any third party. Don’t miss out on upcoming projects and tips!
Explore More DIY Projects:
<< Sweet Inspiration Link Party #40 HOME My Favorites from Around Town >>
Linking up to these Link Parties
This blog is intended for entertainment purposes only; my DIY tutorials do not constitute professional advice. Please read my full disclaimer here.
I genuinely appreciate all your comments and will do my best to reply to them or visit your blog in return. To ensure your comments can be published, please refrain from including hyperlinks within your message.