
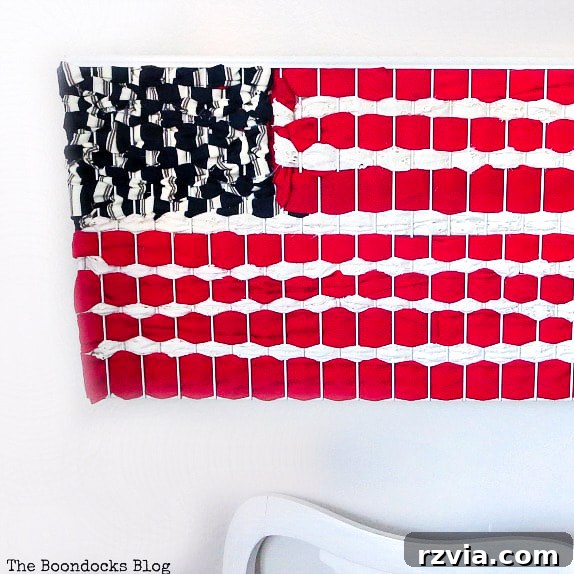
As the vibrant hues of summer emerge and the air hums with anticipation, our thoughts invariably turn to cherished national holidays. For me, almost a year back on American soil, the urge to express patriotism through creativity has been steadily building. While a flag or two might adorn the interiors of our homes, the approaching Fourth of July presents a perfect opportunity to truly immerse ourselves in the spirit of independence. This year, I felt a particular calling to craft something truly special – unique, heartfelt patriotic art that celebrates our nation’s heritage and adds a touch of personalized charm to our living spaces. It’s about more than just decoration; it’s about infusing our homes with a sense of pride and community, reflecting the enduring spirit of America through tangible, handmade beauty.
Unleash Your Creativity: An Easy DIY Patriotic Art Idea
There’s an undeniable joy in transforming everyday items into extraordinary pieces of decor, especially when it comes to celebrating national pride. Today, I’m thrilled to share a wonderfully simple yet impactful method for creating stunning DIY patriotic art using nothing more than humble fabric scraps. We often focus on outdoor decorations for holidays like the Fourth of July, adorning our porches and yards with flags and buntings. However, the interior of our homes offers an equally important canvas for expressing our festive spirit. Bringing patriotic flair indoors creates a cohesive celebratory atmosphere, making every corner of your home feel festive and inviting. This project not only allows you to craft a beautiful piece of decor but also encourages sustainable practices through the art of upcycling.
Imagine a vibrant piece of art, rich with texture and personal history, that speaks volumes about your love for your country. This project delivers exactly that. It’s an opportunity to create a one-of-a-kind representation of the American flag or another patriotic motif, tailored to your aesthetic and crafted with your own hands. The beauty of working with fabric scraps lies in the endless possibilities for color, pattern, and texture, ensuring that no two pieces of art will ever be exactly alike. Let’s dive into how you can bring this vision to life and create an eye-catching display that will be admired by all your guests.
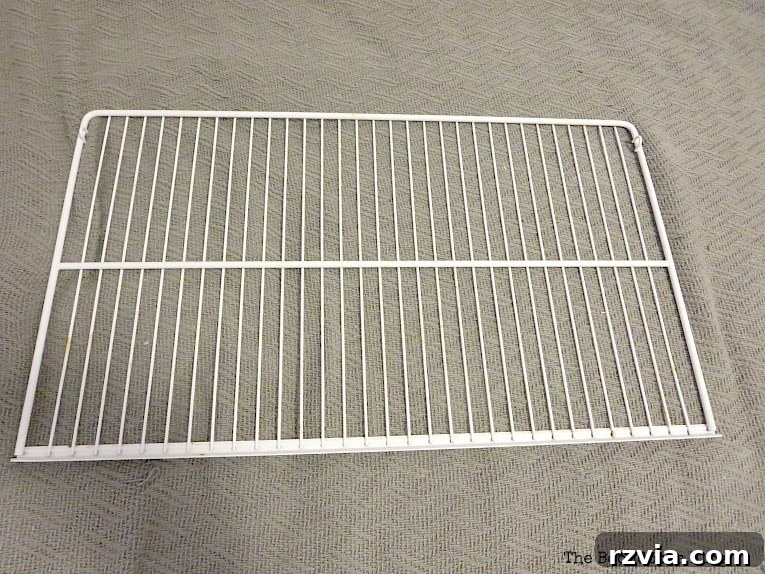
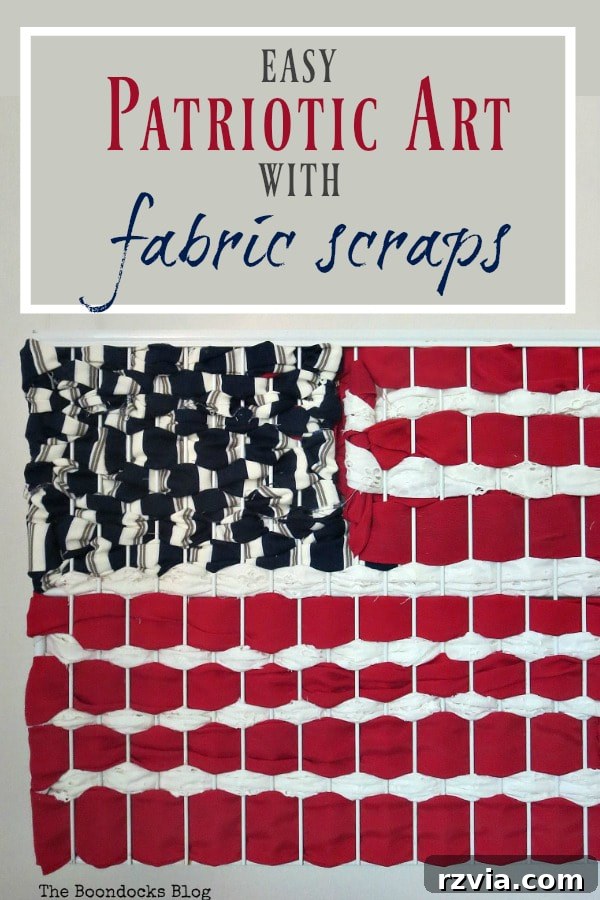
My personal quest was to create a distinctive flag, but with an innovative twist. Instead of a traditional sewn or painted flag, I sought to repurpose an unexpected item as the foundation for my artwork. The chosen item was a wire shelf, salvaged from an old refrigerator we no longer used. This seemingly mundane object, with its grid-like structure, proved to be an ideal canvas for weaving. The beauty of this approach is its flexibility: if you don’t have an old refrigerator shelf handy, don’t fret! Any item with a series of holes or a grid pattern—such as an old oven rack, a wire fence section, a cooling rack, or even a sturdy piece of cardboard with holes punched through it—can serve as a fantastic base. The key is to find something that allows you to thread or weave fabric through it, providing a stable structure for your creative vision. This act of repurposing not only breathes new life into discarded items but also adds a layer of character and sustainability to your handmade patriotic decor.
Essential Materials for Your 4th of July Decor Project
Gathering your supplies is the first exciting step in any creative endeavor. For this particular Fourth of July craft, the list is surprisingly short and often involves items you might already have around the house, making it a budget-friendly and eco-conscious project. Here’s what you’ll need to transform a simple wire rack into a magnificent piece of patriotic art:
- Wire Rack: As mentioned, a discarded refrigerator shelf is perfect due to its sturdy construction and consistent grid. However, feel free to explore alternatives like an old oven rack, a small wire fence panel, or even a robust cooling rack. The important aspect is a framework with openings for weaving.
- Various Fabric Pieces: This is where your creativity truly shines! Hunt through your fabric stash, old clothing (think denim, cotton shirts, patterned scarves), or visit a thrift store for inexpensive textile treasures. You’ll need a good mix of red, white, and blue fabrics to represent the flag accurately, but don’t be afraid to incorporate different shades or subtle patterns for added depth and visual interest. Cut these fabrics into strips; the width can vary depending on the desired texture and the size of your rack openings, but aim for consistency within each color section for a neater look. Approximately 1-2 inches wide usually works well.
- Needle and Thread: While optional for securing the ends, a needle and thread can provide a more permanent and tidy finish, especially if you plan to display your art for an extended period or outdoors. Matching thread colors to your fabric scraps will help them blend seamlessly.
- Hot Glue Gun and Glue Sticks (Optional, but highly recommended): For a quicker and more secure method of fastening fabric ends, a hot glue gun is invaluable. It provides an instant bond, making the weaving process smoother and ensuring your fabric strips stay exactly where you want them. Always exercise caution when using hot glue.
Having these materials on hand ensures a smooth crafting experience. Before you begin weaving, it’s a good idea to sort your fabric strips by color. This will make it easier to visualize the flag’s design and ensure you have enough of each color for the red and white stripes and the blue field. This project is not only about creating a beautiful piece of American flag art but also about the satisfaction of transforming materials into something meaningful and decorative.
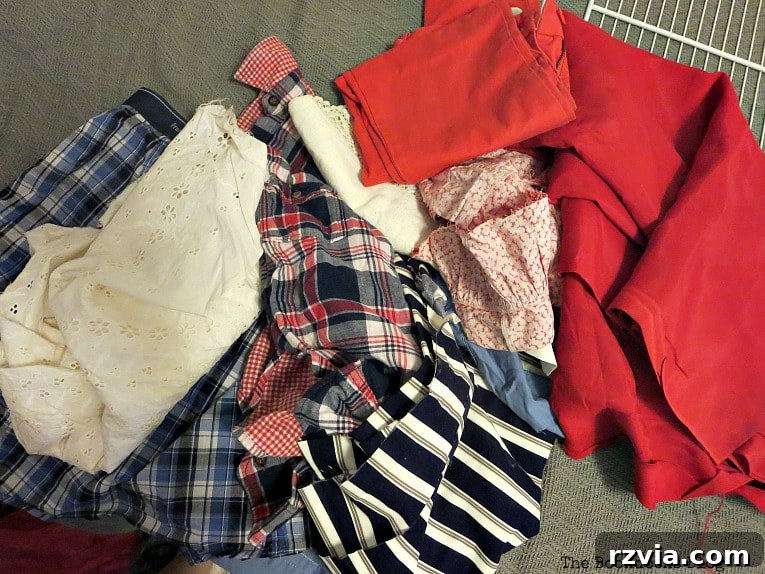
Crafting can often be a solitary activity, but it’s always more enjoyable with a little company, especially from a furry friend! My feline assistant, Tatou, gracefully settled into the fabric pile, offering a charming (and utterly unhelpful) form of assistance. While Tatou’s specific contribution was limited to smoothing out the fabric with her body weight, the presence of a pet can add immeasurable warmth and amusement to your crafting session. Whether it’s a purring cat on your lap, a dog napping at your feet, or even just the peaceful background sounds of your home, these small details make the creative process all the more delightful. Remember, crafting is as much about the journey and the experience as it is about the final product, and sharing that journey, even implicitly, can truly enhance the fun.

Step-by-Step Guide: Crafting Your Upcycled Patriotic Art
This upcycled patriotic project is deceptively simple, making it accessible to crafters of all skill levels. While the repetitive nature of weaving might seem a bit tedious at first, it quickly becomes a meditative and enjoyable process. It’s the perfect kind of project to undertake while engaging in another relaxing activity, like listening to an audiobook, catching up on your favorite podcast, or even watching a captivating documentary. During my crafting session, I found myself engrossed in “Grand Designs,” a show about individuals who ambitiously (and often torturously) strive to build their perfect homes on less-than-perfect budgets. This provided a perfect backdrop, offering both inspiration and a gentle reminder that not every project needs to be flawless.
Preparing Your Fabric Strips and Wire Rack
Before you begin weaving, ensure your fabric strips are prepared. You can opt for strips of uniform width and length for a neat, structured look, or vary them for a more organic, textured appearance. If your fabric frays easily, a quick hem or using pinking shears can help, though for a rustic charm, frayed edges can add to the appeal. Clean your wire rack thoroughly to remove any dust or grime. Decide which direction you want your stripes to run – horizontally or vertically – as this will dictate your weaving pattern.
The Weaving Process: Bringing the Flag to Life
The core of this project involves weaving your fabric strips through the wire rack. Start with your red and white strips for the flag’s stripes. Take one end of a fabric strip and thread it over one wire, then under the next, and so on. Continue this over-under pattern, moving across the width of your rack. Once you reach the end of a row, simply fold the strip and begin weaving in the opposite direction for the next row, or start a new strip. The goal is to create dense, vibrant stripes by pushing the woven fabric close together. This “any which way” approach to folding and weaving gives the piece a lovely, handmade texture that machine-made items simply can’t replicate. The key is to keep a consistent tension as you weave, ensuring your fabric stays snug but not overly stretched.
Securing the Ends
Once you’ve woven a strip across a section, you’ll have loose ends on the back. You have two primary options for securing these:
- Tucking: For a quick and easy method, simply tuck the loose ends firmly behind the nearest wire. For added security, you can tie a small knot around a wire.
- Hot Glue: For a more permanent and polished finish, apply a small dab of hot glue to the end of the fabric strip and press it against the wire or another piece of fabric on the back. This is particularly useful for preventing fraying and ensuring the art piece remains robust.
As I progressed, a delightful mistake emerged – I had added too much white fabric where the blue field of stars should have been. This happy accident served as a perfect reminder that art is often about embracing imperfections and finding creative solutions. It also underscored the value of paying attention, something that might have been compromised by the compelling “Grand Designs” episodes! However, in DIY, there are no real “mistakes,” only opportunities for unique artistic expression. This moment of realization led to a pause and a rethinking of the blue section, which ultimately made the project more engaging and the final piece more distinctive.
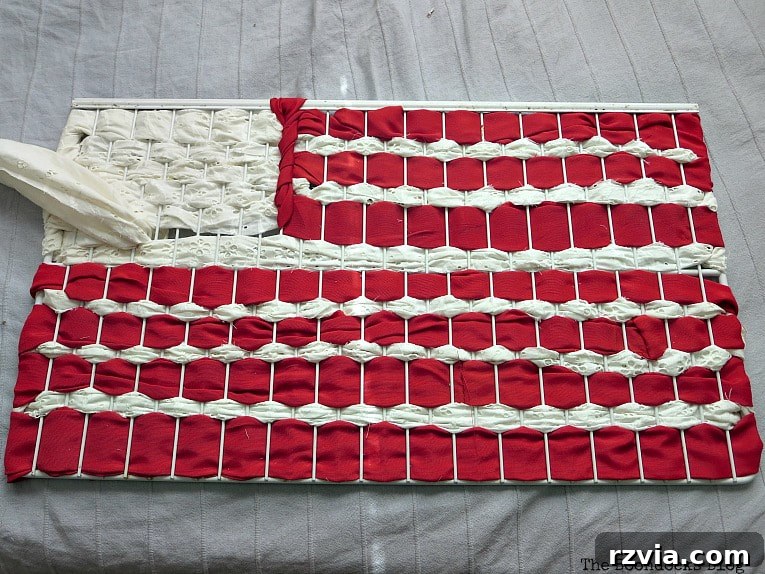
Faced with my “design challenge”—a significant section mistakenly filled with white fabric where the blue field for the stars should have been—I pondered my next move. My options were clear: I could meticulously remove the white strips and weave in entirely blue fabric, subsequently adding small white elements for the stars. This would be the traditional route, ensuring accuracy to the flag’s design. Or, I could embrace a more creative, time-saving “cheat” by using a single fabric that already incorporated both blue and white. This would give a more abstract, artistic interpretation of the star field, perfectly aligning with the spirit of handmade art.
To make the crucial decision, I enlisted the help of my daughter, a true connoisseur of all things blue. Her discerning eye and innate preference for the color made her the perfect consultant for this artistic dilemma. Her input not only added a personal touch to the creation process but also ensured the final piece would be a collaborative family effort, making it even more special.
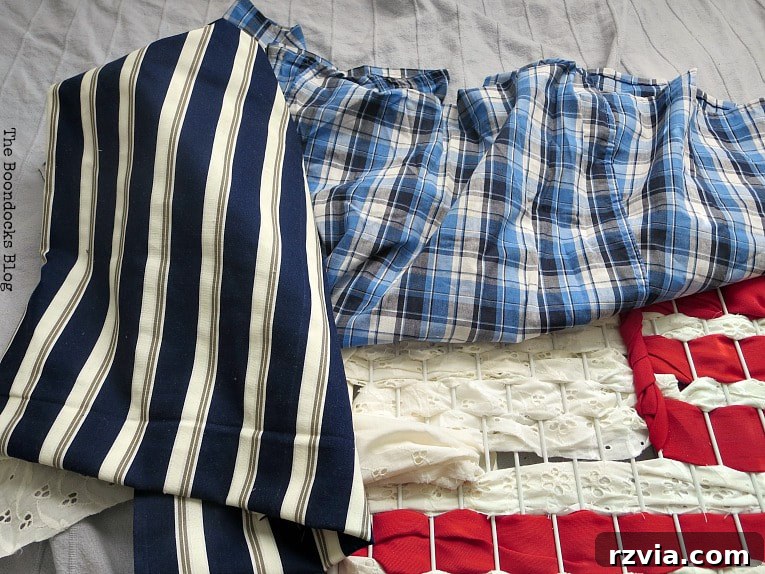
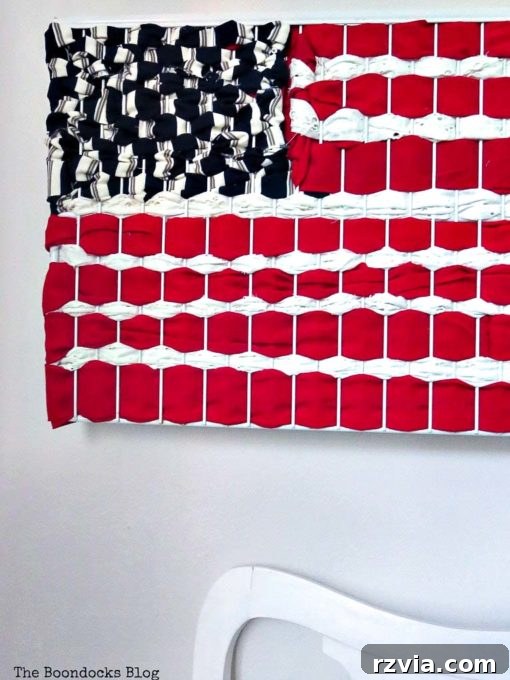
Her choice was decisive: the blue and white striped fabric. This selection was a stroke of genius, offering a unique solution to the “stars” dilemma. Instead of individually adding white stars to a solid blue background, the existing white stripes within the fabric would create a scattered, star-like effect. I carefully wove this fabric into the designated blue section, intentionally varying the position of the white stripes so they wouldn’t align perfectly. This deliberate randomness created a wonderfully abstract and dynamic appearance, evoking the scattered sparkle of stars against a deep blue sky. The result was less about literal representation and more about artistic impression, perfectly encapsulating the handmade charm of the piece. It gave the impression of countless tiny white specks, much like the fifty stars, without the painstaking effort of individual placement.
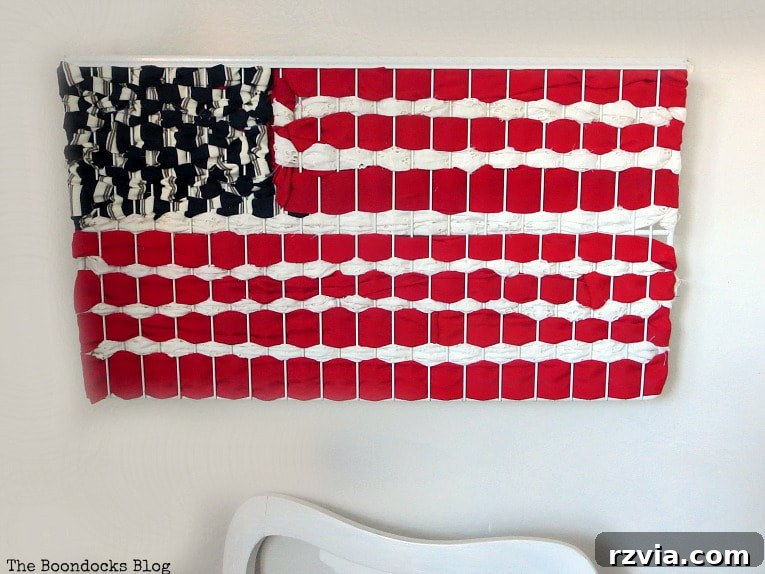
This approach beautifully conveyed the essence of the fifty stars, without needing to cut or affix individual star shapes. The seemingly random white spots peppered across the blue section created a visual texture that was both intriguing and harmonious. It captured the spirit of the stars in a subtle, artistic manner, adding depth and interest to the overall design. This method is a fantastic example of how embracing a creative workaround can lead to an equally compelling, if not more unique, outcome. It underscores the principle that in art, perfection often lies in interpretation rather than strict adherence to form. The result is a tactile and visually engaging representation that sparks conversation and appreciation for its ingenuity.
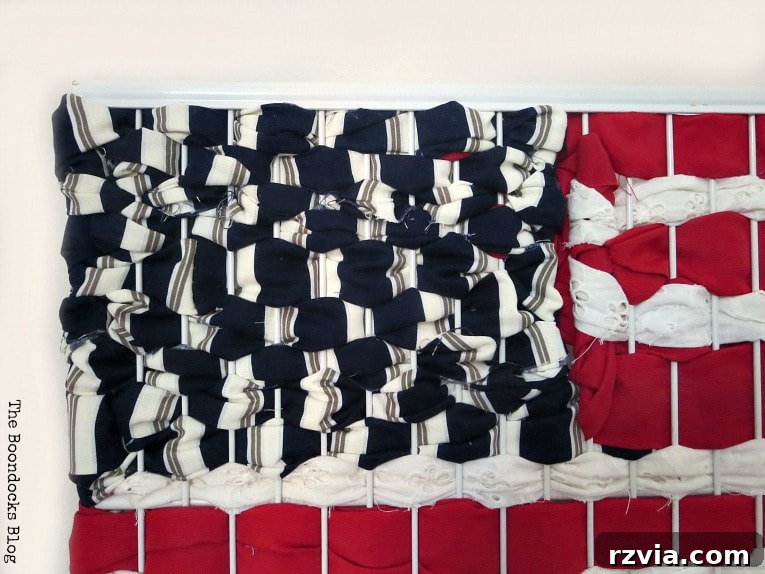
It’s important to acknowledge that this piece, like much of handmade art, isn’t mathematically perfect, but that’s precisely its charm. The beauty of creating something with your own hands is that it inherently carries a unique character, often embracing slight imperfections as part of its story. This unique fabric scrap art is a testament to the idea that art doesn’t have to be flawless to be meaningful or beautiful. In fact, its handmade quality is what makes it truly special and distinct from mass-produced decorations. It’s a celebration of effort, creativity, and the joy of making.
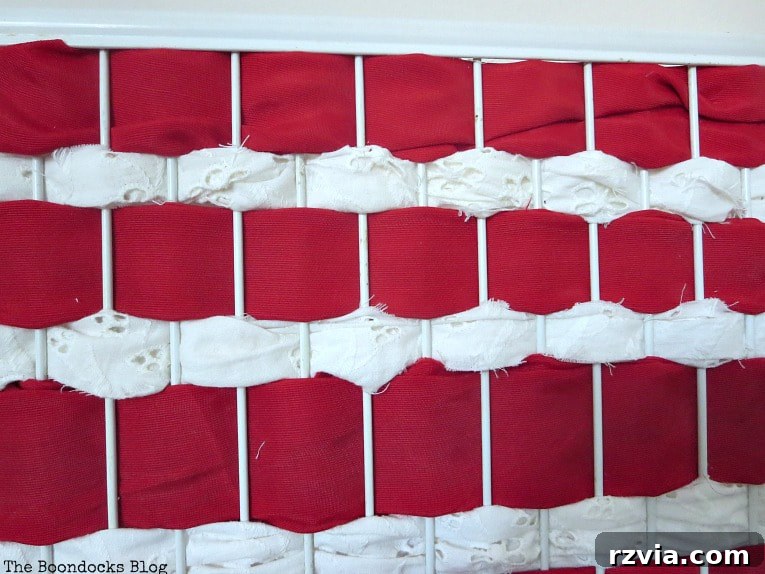
Now, for a little fun, can you spot another charming imperfection? Beyond the abstract stars, there’s a small detail that might surprise a keen observer. While I likely achieved the correct total count of stripes, the bottom full stripes should ideally have been two fewer to maintain the flag’s exact proportions. This minor discrepancy is a delightful consequence of being deeply engrossed in a particularly riveting television show – in this case, the captivating “Grand Designs” proved too good to pause for meticulous stripe counting! But honestly, unless you’re a flag historian scrutinizing every stitch, it’s unlikely anyone will notice. And if you don’t mind, then I certainly won’t tell! It simply adds to the unique, one-of-a-kind narrative of this upcycled patriotic art piece, a subtle reminder of the relaxed and enjoyable process behind its creation.
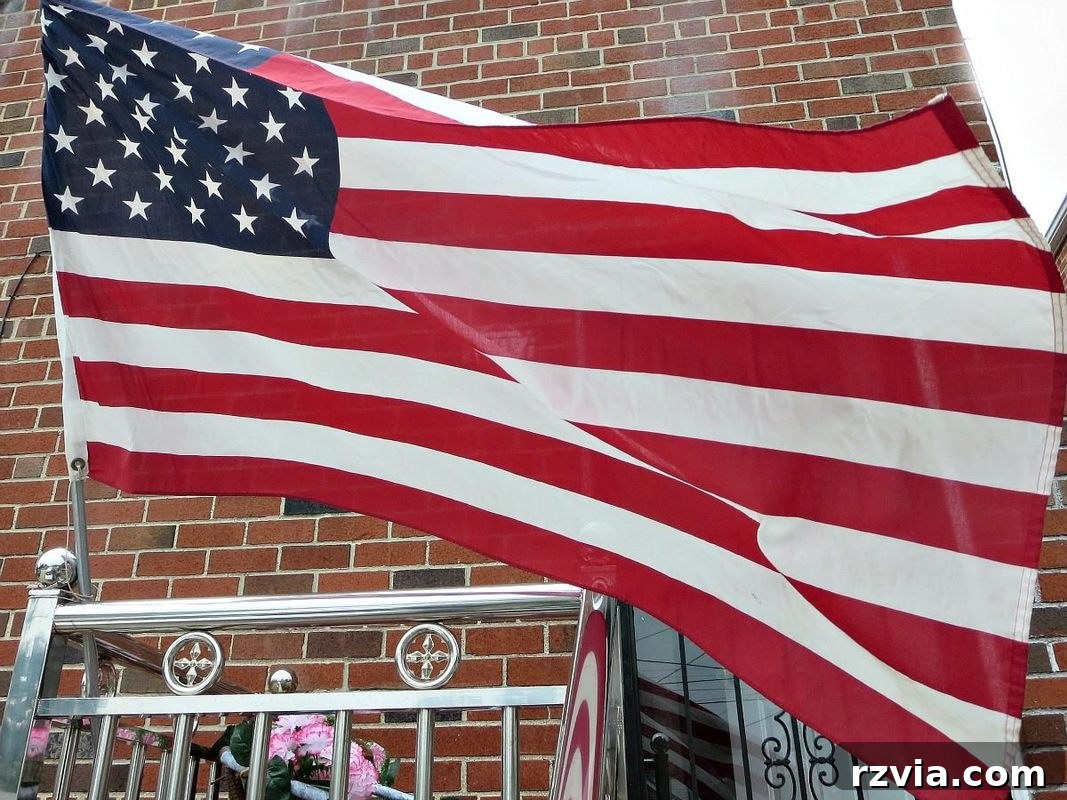
For my international friends, or anyone interested in a brief refresher on American symbolism, the design of the U.S. flag is rich with history and meaning. The flag proudly displays 13 horizontal stripes, alternating red and white, which powerfully represent the 13 original colonies that bravely declared independence from Great Britain. Each stripe serves as a historical marker, connecting us to the foundational principles of liberty and self-governance. In the upper left canton, a vibrant blue rectangle known as the “union” features 50 white stars. Each star is a symbol of one of the 50 states that collectively form the United States of America. Together, these elements tell a compelling story of unity, growth, and enduring freedom, making the flag a profound symbol of national identity and aspiration.
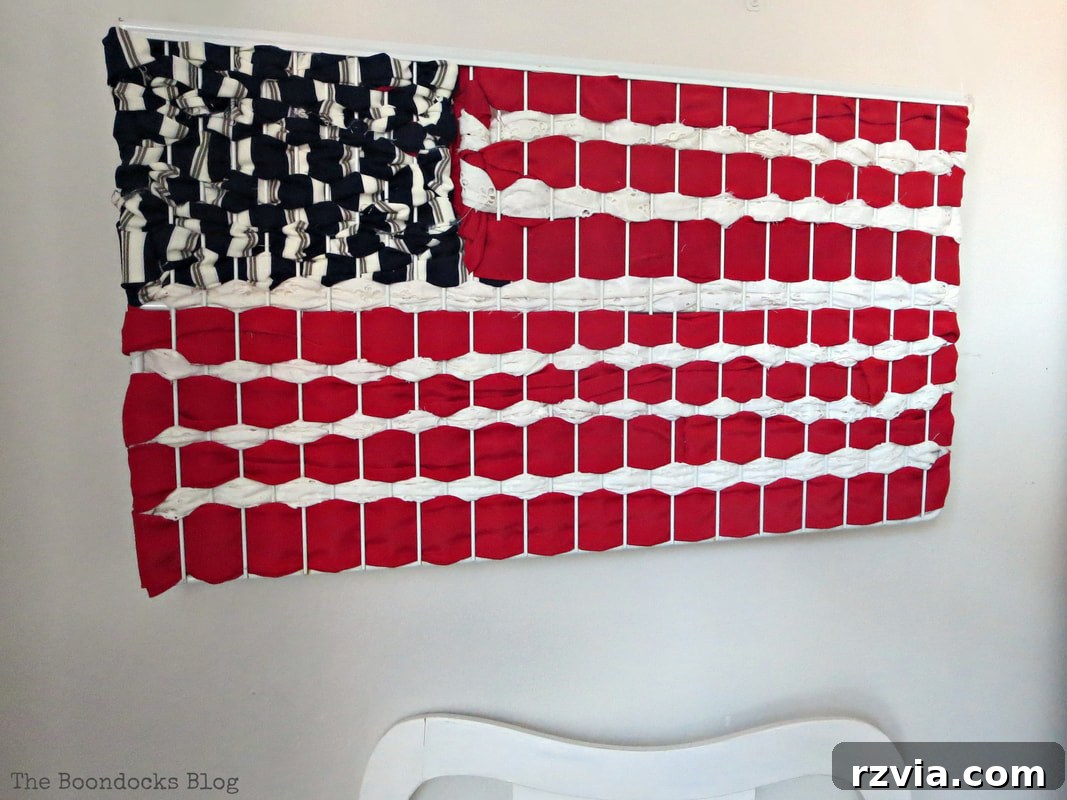
Now, my completed handmade patriotic art proudly hangs on the wall, and I find myself pausing every time I catch a glimpse of it. It possesses an unexpected allure, resembling a vibrant Pop Art piece. The bold interplay of colors and textures, particularly that bright, striking red, instantly brings to mind the iconic works of artists like Andy Warhol, especially his famous soup cans. There’s a distinct visual punch to it that transcends traditional craft, elevating it to a statement piece. This unexpected “Pop Art” quality adds another layer of appreciation for its unique design and the way it reinterprets a classic symbol with a fresh, modern aesthetic.
The placement of the art piece couldn’t be more perfect; it truly comes alive positioned next to the sleek white chair. The crisp, clean lines of the chair provide a stunning contrast to the textural richness and vibrant colors of the fabric flag, allowing both pieces to shine. This thoughtful arrangement highlights the art’s dynamic qualities and integrates it seamlessly into the existing decor, demonstrating how a simple DIY project can dramatically enhance the visual appeal of a room. It creates a focal point, drawing the eye and adding a burst of patriotic fervor without overwhelming the space.
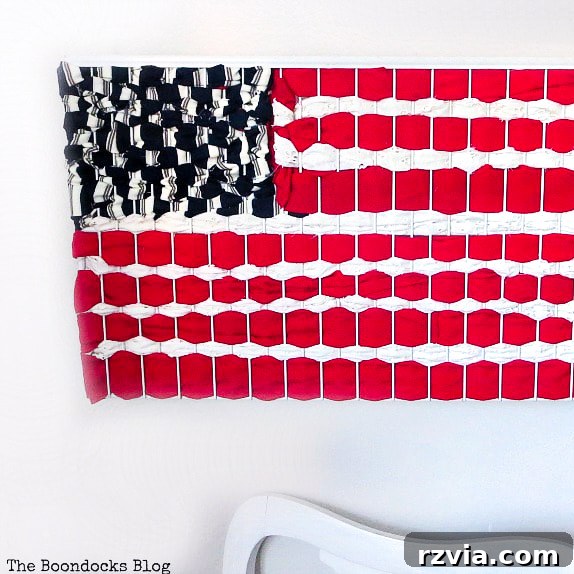
All in all, the experience was a delightful blend of creativity and distraction. My primary takeaway, and one I heartily pass on to you, is this: while it’s tempting to multitask, I highly recommend dedicating your full attention to your upcycled patriotic art project, especially if you’re watching a show as captivating as “Grand Designs.” Fewer distractions generally lead to fewer “happy accidents” (or outright mistakes!) and a more precise final product. Nevertheless, the charm of handmade pieces often lies in these unique quirks. So, armed with this wisdom, I’m now off to catch up on the remaining episodes of that fantastic show, this time with no craft project in hand, ensuring full immersion! My hope is that my journey and the resulting easy patriotic art with fabric scraps have inspired you to embark on your own creative adventure.
Finally, I’d love to hear your thoughts! When the Fourth of July rolls around, do you focus your decorating efforts primarily on the exterior of your home, with flags flying high and festive buntings adorning your porch? Or do you, like me, enjoy extending the celebration indoors, creating a festive and patriotic atmosphere throughout your living spaces? Share your traditions and ideas in the comments below – I’m always eager to discover new ways to celebrate this vibrant holiday!

If you truly enjoy the creative projects and insights shared here, consider subscribing to my blog to receive all my latest adventures directly in your mailbox. You’ll find the subscription form conveniently located on the sidebar and at the top of the page. For information regarding my privacy practices, please click here.
This blog content is provided for entertainment purposes only, and the DIY tutorials presented are not intended as professional advice. Readers should exercise their own judgment and discretion when undertaking any project. For a comprehensive understanding of my full disclaimer, please click here.
Your comments and feedback are genuinely appreciated, and I make every effort to reply to each one. To ensure your comment can be published, please refrain from including any hyperlinks within your submission. Thank you for being a part of this creative community!