
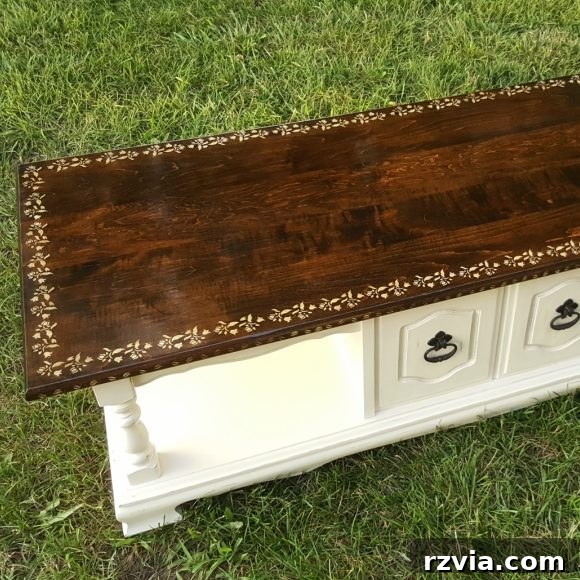
Today marks a truly special occasion here at The Boondocks Blog! We are absolutely thrilled to host a visit from my incredibly talented friend, Keri from Repurposing Junkie. Keri and I embarked on our blogging journeys around the same time, forming a bond as fellow “newbie bloggers” and offering each other constant support and inspiration. Her specialty lies in the magical art of repurposing – a skill she masters so brilliantly that I’ve affectionately dubbed her “The Queen of Repurposing.” Prepare to be amazed as Keri unveils yet another of her many talents today, demonstrating how to breathe new life into an abandoned piece with her stunning curbside coffee table makeover. She possesses an extraordinary ability to envision potential where others see only discard, transforming forgotten items into genuine treasures. Read on, and you’ll soon understand why her reputation as a visionary repurposer is so well-deserved.
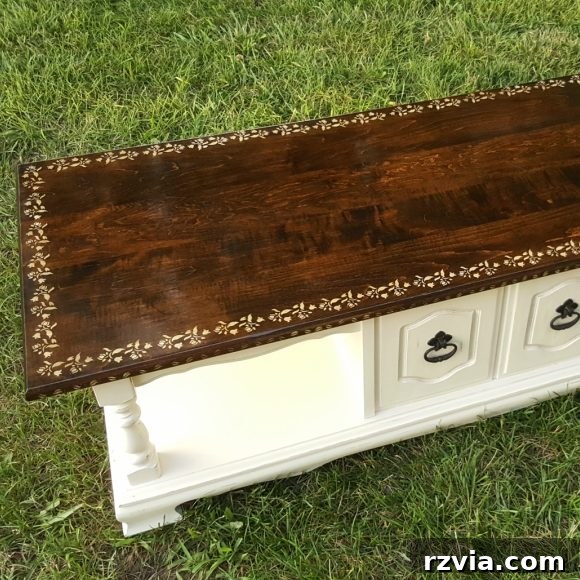
From Curbside Find to Chic Centerpiece: Painted Coffee Table Makeover Ideas
Note: This inspiring DIY furniture transformation project was originally published in July 2016. Its timeless appeal and clever techniques continue to inspire!
Hello everyone! My name is Keri, and I’m delighted to be here today as a guest on Mary’s wonderful blog, The Boondocks Blog. By way of introduction, I’m a wife, mother, blogger, and a passionate repurposer, furniture refinisher, and, I must confess, a bit of a frame and stencil addict from my own creative space, Repurposing Junkie. I’m incredibly grateful to Mary for inviting me to share one of my favorite recent projects with you all: the detailed journey of this beautiful coffee table makeover!
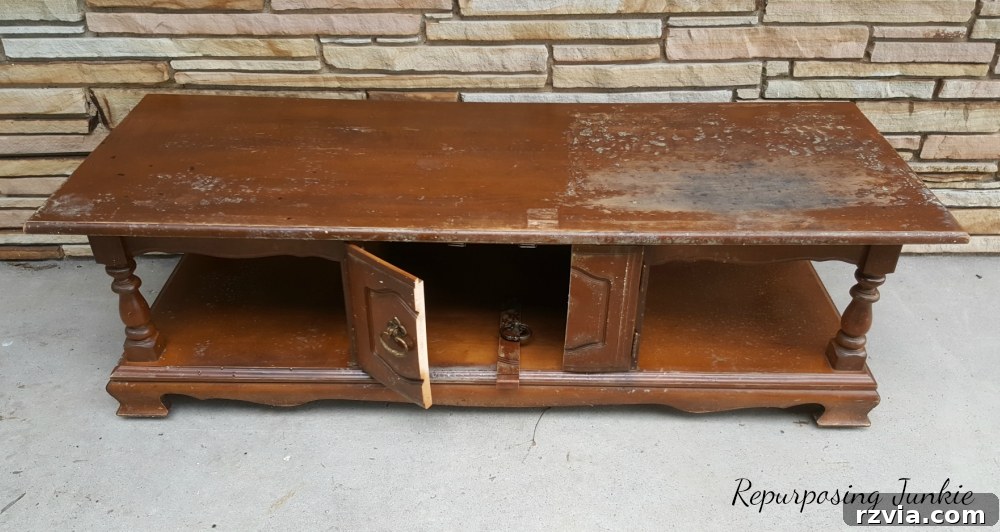
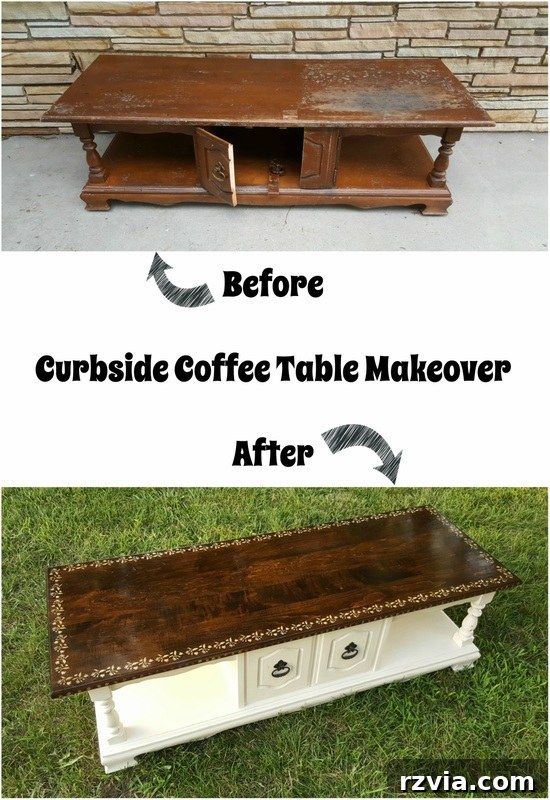
The story of this table began on a rainy 4th of July morning. I was out on a quick errand to the store when, to my absolute delight, I spotted this gem sitting patiently on the curbside. Despite the drizzly weather, which had unfortunately left some noticeable water damage on its surface, its solid structure and unique design immediately caught my eye. This coffee table featured a rather interesting design: one side boasted functional, opening doors, while the opposite side had fixed, decorative doors. The area with the opening doors was clearly broken, indicating why it had been discarded. While many might have seen only a damaged piece of junk, I saw immense potential – a diamond in the rough waiting for a second chance at glory.
Prepping for Perfection: Sanding and Surface Preparation
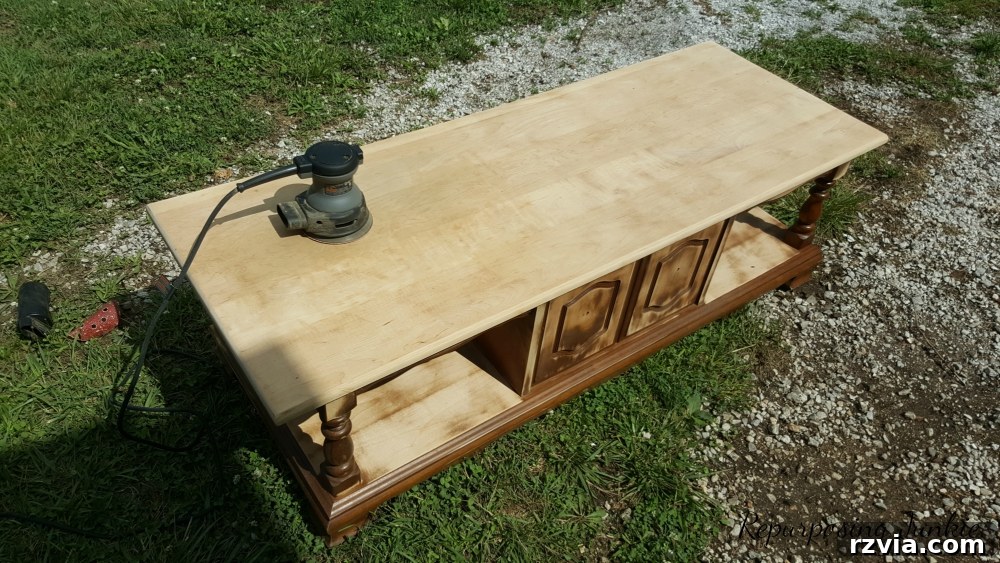
To begin this exciting coffee table transformation, the first crucial step was thorough surface preparation. I tackled the tabletop first, using an orbital sander to completely strip it down to the bare, beautiful wood. This process not only removes old finishes and imperfections but also creates an ideal surface for new stain application. For the rest of the coffee table’s body, I used the orbital sander where possible, ensuring a smooth and even texture. Any intricate areas or corners that the orbital sander couldn’t reach were meticulously hand-sanded. This ensures a consistent finish across the entire piece. What truly delighted me about this curbside find was discovering that the entire table was crafted from solid wood – a testament to its quality and a promising foundation for a lasting makeover. Proper sanding is the cornerstone of any successful furniture refinishing project, ensuring that subsequent layers of paint or stain adhere beautifully and endure over time.
Crafting the Base: Painting and Distressing for Character
Once the sanding was complete and every trace of dust was wiped away, it was time to bring color and life back to the table. I decided to paint the lower half of the coffee table first. I applied several coats of a custom-mixed satin latex paint in a warm, inviting off-white shade. This neutral base would provide a sophisticated contrast to the natural wood top and allow for future decorative elements to truly pop. Applying multiple thin coats, rather than one thick one, ensures a smooth, durable, and professional-looking finish. Between each coat, I allowed ample drying time and sometimes lightly sanded with fine-grit sandpaper for ultimate smoothness, although I opted for a slightly more rustic look here.
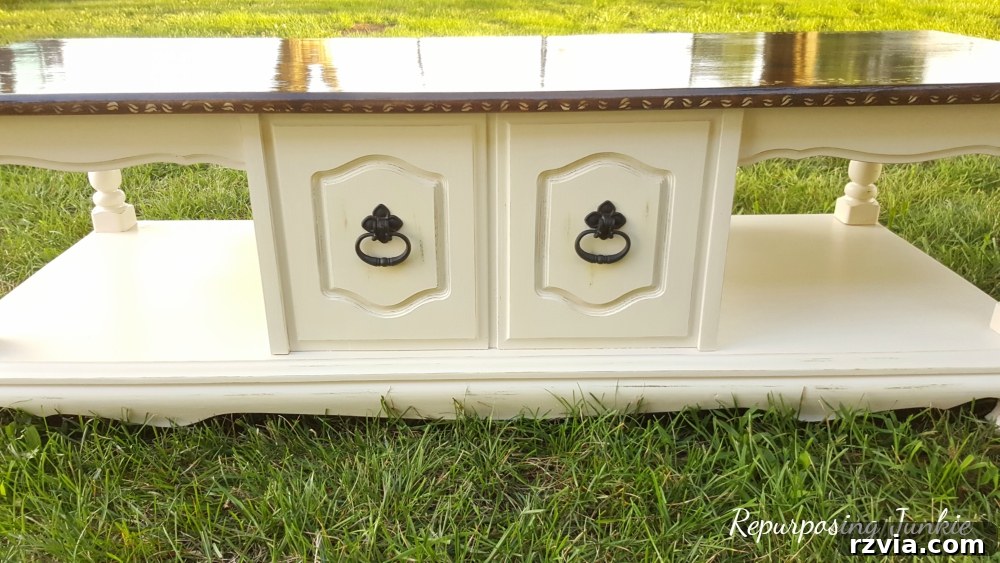
To infuse the painted coffee table base with additional texture and a charming, aged aesthetic, I strategically distressed the painted surface. Using 220-grit sandpaper, I gently sanded along the edges, corners, and raised details. This technique subtly removes small amounts of paint, allowing the darker wood beneath to peek through, creating a wonderfully worn and authentic look. Distressing adds depth and character, transforming a freshly painted piece into something that feels as though it has a rich history. It’s a fantastic way to add personality to any furniture makeover.
Hardware Revival: A Touch of Black Elegance
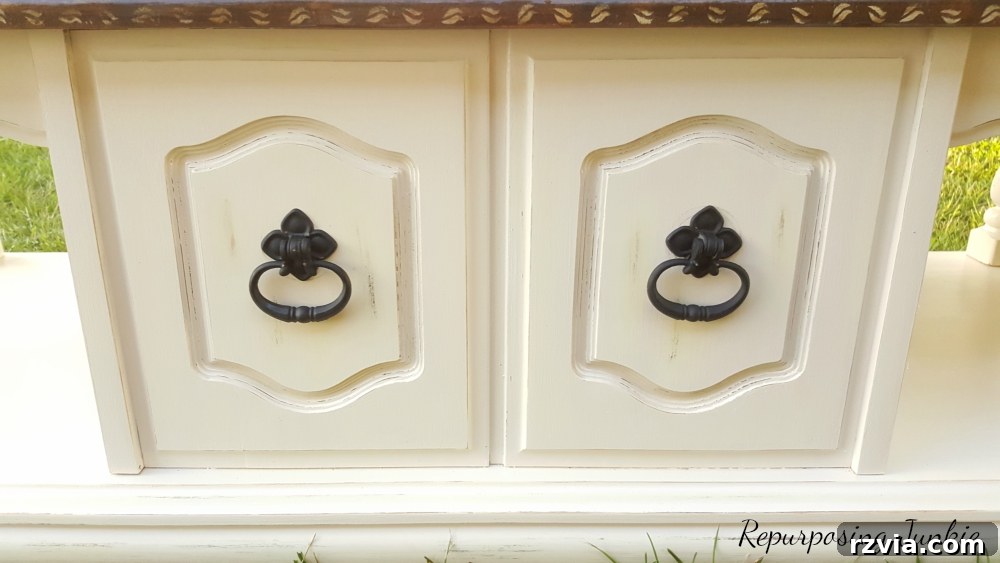
While the paint was drying, I turned my attention to the existing hardware on the fixed doors. These small details can make a significant impact on the overall look of a piece. I carefully removed them and gave them a fresh, modern update with black spray paint. This simple step transformed the dull, old hardware into sleek, contrasting accents. Once the paint was dry, I reattached the newly painted hardware by hand, ensuring each piece was perfectly aligned. A little anecdote from the project: if you look very closely at the image, you might notice some minor scuff marks around the hardware. My curious daughters, finding these “fun-looking things” in the living room, couldn’t resist spinning them around before I had a chance to fully tighten them with a screwdriver. A valuable lesson learned for any DIY parent: keep enticing hardware away from tiny, inquisitive hands! Rest assured, those scuff marks will be touched up soon enough.
Creative Solutions: Embracing the Open Side
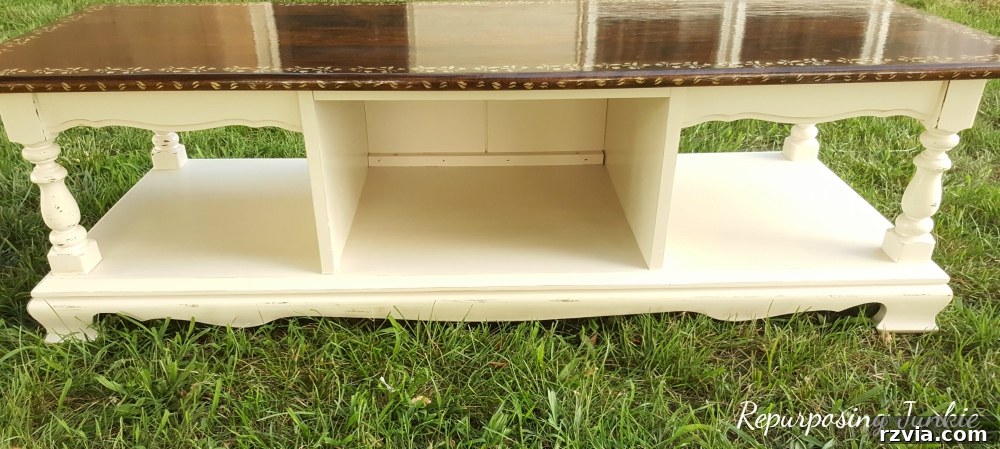
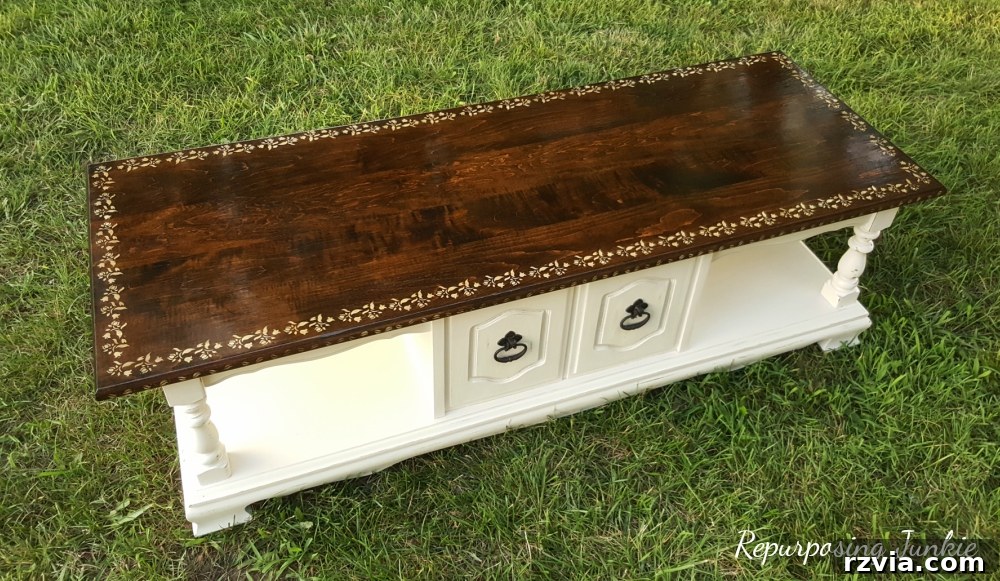
The side of the coffee table that originally featured broken, opening doors presented a unique design opportunity. Rather than attempting a complex repair, I embraced its imperfection and removed the damaged doors entirely. I then filled in the screw holes left behind by the hardware, creating a clean, open space. This decision not only simplified the makeover but also introduced a practical storage solution. I envision a beautiful woven basket nestled perfectly in this vacant space, offering a stylish way to store blankets, magazines, or remote controls. This thoughtful adaptation turns a former flaw into a functional and aesthetically pleasing feature, adding versatility to the coffee table’s design. This open cubby could also be perfect for displaying decorative items, books, or even a small plant, allowing for personalized styling.
The Artful Top: Staining, Stenciling, and Sealing
With the base meticulously painted and distressed, I shifted my focus to the star of the show: the table top. This is where the true artistic transformation took place, blending natural wood tones with delicate design elements.
- First, I applied Minwax Dark Walnut Stain to the entire sanded top. This rich, deep stain beautifully enhanced the natural wood grain, bringing out its inherent beauty and providing a warm, inviting tone. I applied the stain evenly, wiping off any excess to prevent tackiness and ensure a consistent finish.
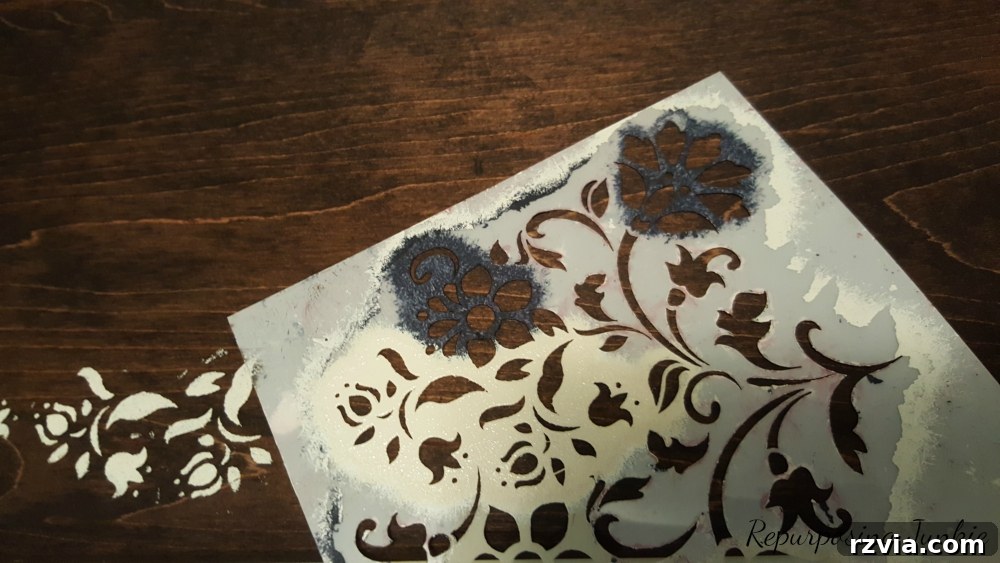
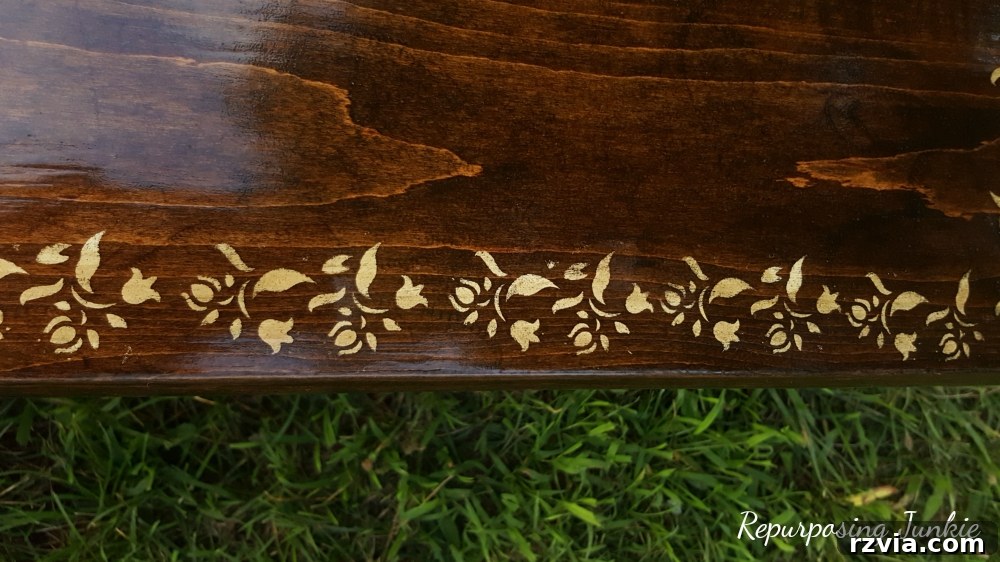
- Once the stain was thoroughly dry, I introduced an elegant stenciled design. I utilized a section of a lovely floral stencil to create a delicate pattern around the edge of the tabletop. This is the same charming design I previously incorporated into my Hope Sign project, demonstrating how versatile a single stencil can be across different pieces. Careful application ensures crisp lines and a professional look.
- After the stencil paint had dried, I once again picked up my trusty 220-grit sandpaper. This time, I very carefully and lightly went over the stenciled areas to subtly distress them. This step softens the edges of the design, making it appear more integrated with the wood and less starkly applied. It also helps to remove any minuscule excess paint that might have bled under the stencil, ensuring a clean, aged effect.
- Following the light distressing, I wiped away any dust generated and then applied another thin layer of the Minwax Dark Walnut Stain over the distressed areas. This step helps to blend the distressed parts seamlessly with the rest of the stained top, ensuring a unified and rich appearance. I immediately wiped off any excess stain to avoid darkening the stencil too much.
- Finally, to protect this beautifully restored surface and ensure its longevity, I applied several coats of polyurethane. Polyurethane provides a durable, protective seal against spills, scratches, and everyday wear and tear. Crucially, I lightly sanded between each coat with very fine-grit sandpaper (around 320-400 grit) to create a smooth, even surface and promote better adhesion for subsequent layers. This meticulous sealing process guarantees that this curbside treasure will remain stunning for years to come.
The Grand Reveal: A Transformed Coffee Table
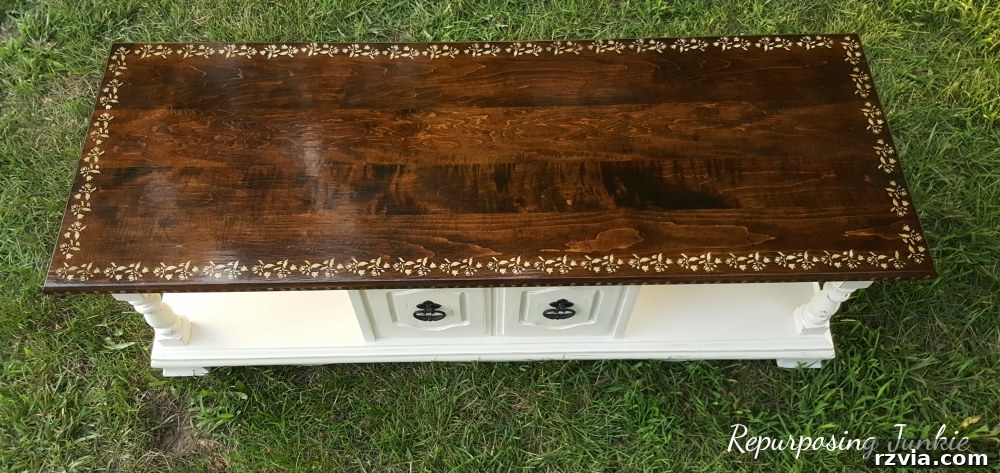
And here it is – the magnificent finished coffee table! Doesn’t the beautiful wood grain, subtly peeking through the rich stain, harmonized with the elegant stenciled accent, simply capture your heart? I am absolutely captivated by the combination of stain, stencil, and paint right now, and I knew instinctively that this particular piece called for this distinctive aesthetic. This technique breathes so much character into furniture. I’ve successfully applied this very same painted, stenciled, and stained approach on several other projects, including a charming little side table, a fantastic $5 dresser makeover, and even our own kitchen table (which I’m still planning to blog about!). This recent coffee table endeavor has truly reignited my passion and inspired me to embark on refinishing some of the other furniture pieces in my living room, even those I painted not too long ago. The transformation possibilities are endless! Have you seen how Mary herself transformed her own coffee table with paint? It’s another fantastic example of creative repurposing!
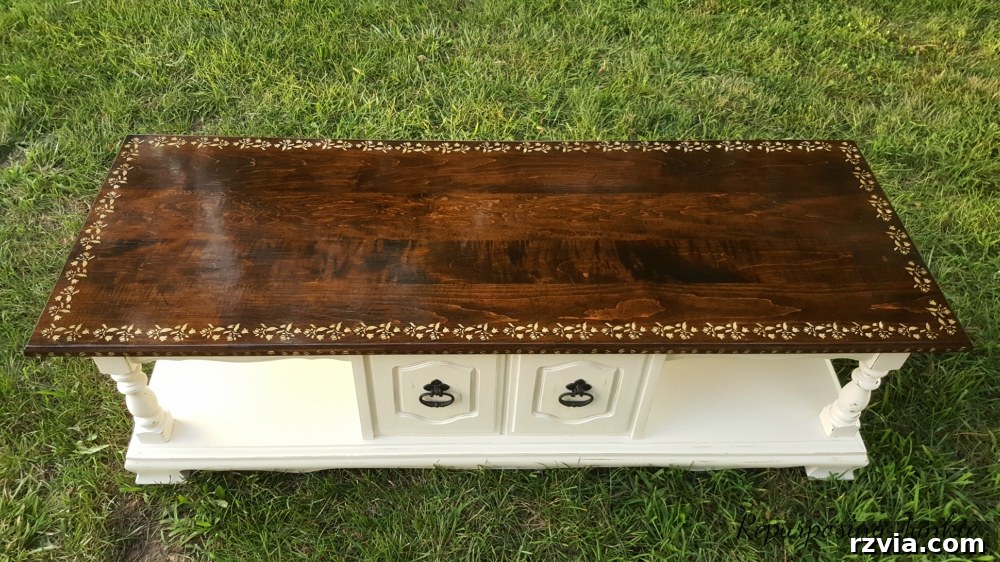
When I first spotted and rescued this coffee table from the curb, my initial intention was to give it a loving makeover and then sell it. However, as the project progressed and the table’s undeniable charm emerged, my plans quickly changed. This piece has completely stolen my heart, and we’ve decided it’s staying right here in our home, replacing our old coffee table. It’s truly a testament to how a discarded item can become a cherished possession. Given its stunning transformation, what would you do? Would you keep this beautiful repurposed coffee table for your own home, or would you be tempted to sell it?
Once again, my heartfelt thanks go out to Mary for generously allowing me to share this inspiring project with all of you here on The Boondocks Blog! It’s always such a pleasure to be a guest on her platform, and I am truly honored by the invitation to connect with her wonderful community.
If you found inspiration in this curbside coffee table makeover and appreciate the beauty of repurposed furniture, please consider sharing it with your friends and fellow DIY enthusiasts! Your support means the world. Thank you so much!

Keri, that truly gorgeous table, which now bears absolutely no resemblance to its initial curbside state, is unequivocally a keeper. The incredible transformation reminds me so much of my own laminate table makeover using gel stain – the power of vision and a little elbow grease is truly remarkable. I’m absolutely delighted to hear that this magnificent piece has found its permanent home in your living room. Thank you, from the bottom of my heart, for sharing this incredible curbside find of yours and, more importantly, for demonstrating so brilliantly how anyone can take a discarded item and transform it into a cherished treasure. I only wish we lived closer, Keri, so we could embark on epic curbside shopping adventures together, turning neglected pieces into beautiful additions for our homes!
Now, dear readers, you’ve all had the wonderful opportunity to witness firsthand just how exceptionally talented Keri truly is. Her blog, Repurposing Junkie, is an absolute goldmine, brimming with inspiring makeovers, clever DIY tips, and even more astonishing repurposing projects. I wholeheartedly encourage each and every one of you to hop on over to her fantastic blog and explore the endless creativity she shares. And to show our immense appreciation for her wonderful visit and this amazing tutorial, let’s all take a moment to pin this beautiful coffee table makeover! On that note, I’m curious: have you ever discovered anything out on the curb or rescued a discarded item and brought it home for a thrilling makeover? Share your stories in the comments below!
If you’re inspired by what you’ve seen today, please consider sharing this post with your friends on social media, or saving it to your favorite Pinterest boards for future inspiration. If you truly love the unique content and creative adventures we share, I invite you to subscribe to my blog and receive my latest projects and stories directly in your mailbox twice a week!
Please note: This blog is intended for entertainment purposes only; my DIY tutorials and suggestions are not professional advice. Always prioritize safety and proper techniques when undertaking any DIY project. You can read my full disclaimer here.
I absolutely adore reading your comments and engaging with you all. I make it a point to reply to each and every one, either directly here or by visiting your own blogs.