
DIY Lamp Makeover: Transform Old Lamps with Paint for a Stylish New Look
Moving into a new home is always an adventure, but relocating into a ‘new/old’ home that’s already bustling with family brings its own unique set of challenges and delightful surprises. Instead of starting with a blank canvas, I found myself navigating a house that, while full of warmth, was also overflowing with accumulated treasures – or rather, a lot of ‘stuff’ from my dad, who also lives here. While much of it is destined for a spring garage sale, a few diamonds in the rough caught my eye, brimming with untapped potential.
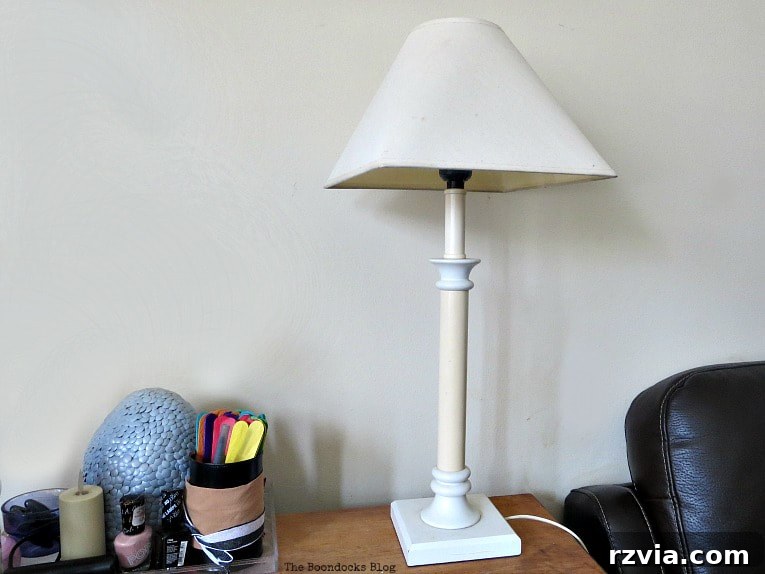
Case in point: this pair of lamps you’re about to see. Tucked away amongst forgotten items, I spotted two lamps that immediately sparked an idea. With a vision for my daughters’ room already taking shape, I knew these lamps, despite their dated appearance, could be transformed into the perfect, chic accent pieces. Join me as I walk you through how I gave these old lamps a dazzling new life, proving that sometimes, the best decor is simply a fresh coat of paint away.
Disclosure: I was compensated for creating this post with product. However, all the opinions expressed here are entirely my own. I only recommend and use products that I genuinely love and believe will be beneficial to my readers.
The items listed below are affiliate links and connect to Amazon.com. If you choose to purchase any of these products through my links, I will receive a small commission. This support helps me continue to provide you with inspiring and helpful content, at no extra cost to you when purchasing through my affiliate links.
What You’ll Need for Your Lamp Transformation
Embarking on a DIY project is always more enjoyable when you have all your materials ready. For this lamp upcycling project, I kept the list simple, focusing on high-quality paints that deliver impressive results. Here’s what I used to breathe new life into these forgotten lamps:
- DecoArt Americana Decor Satin Enamels in Black
- DecoArt Americana Decor Chalky Finish in Everlasting
- High-quality paint brush (for smooth application)
- Optional: Painter’s tape (for crisp lines)
- Optional: Drop cloth or old newspapers (to protect your workspace)
- Optional: Fine-grit sandpaper (for a smoother finish on the shade, if desired)
- Optional: Wax (to seal chalk paint, if desired)
Choosing the right paints is crucial for a successful makeover. The Satin Enamels are perfect for durable, slightly glossy finishes, while the Chalky Finish offers a beautiful matte texture, ideal for lamp shades where a softer look is desired.
The Transformation Process: Bringing Lamps Back to Life
Prepping the Lamp Bases for Painting
Before any paint touches your project, a little preparation goes a long way. My lamps had a somewhat peculiar base design – a mix of elegant white wooden parts and sections made of an off-white plastic. The plastic, with its dull, almost beige tone, clashed noticeably with the crisp white wood. This contrast immediately informed my decision: the plastic parts had to go black.
While I didn’t heavily sand for this particular project due to the paint’s excellent adhesion, for most upcycling endeavors, I always recommend a light cleaning and scuff sanding. Ensure your lamp base is free of dust and grime. If there are any loose flakes of old paint or rough patches, a quick pass with fine-grit sandpaper will create a better surface for your new paint to adhere to, ensuring a long-lasting finish.
Painting the Lamp Bases: A Bold Black Statement
This truly has to be one of the easiest and most satisfying paint projects I’ve ever tackled. My goal was to transform those drab plastic sections into a striking black feature. Using the DecoArt Americana Decor Satin Enamels in Black, I carefully painted only these specific parts, leaving the existing white wooden elements untouched. This created an instant, dramatic contrast that felt both modern and timeless.
The application was incredibly straightforward. I applied about three thin coats within the space of an hour, allowing each coat to dry to the touch before adding the next. One of the most impressive qualities of this paint is how it self-levels and dries to a beautifully hard, satiny shine. I confess, when I was initially applying the first coat, I wasn’t convinced it would provide full coverage. However, I was completely wrong! The paint built up beautifully, creating a rich, opaque black finish that exceeded my expectations.
I left the lamp bases to harden overnight, ensuring maximum durability. The result was a sleek, almost lacquered appearance that perfectly complemented the original white wood. What’s even better is the versatility of this paint – it’s durable enough for cabinets too! You can bet I’ll be reaching for this particular paint a lot more now that I’ve discovered its incredible performance.
Preserving the Original Charm: White Parts Left Untouched
Sometimes, the best design decision is to know what to leave alone. The existing white wooden sections of the lamp base were already in excellent condition and boasted a wonderfully crisp color. There was no need to repaint them; they provided the perfect foundation for the new black accents. This strategic decision saved time and highlighted the beauty of the original craftsmanship, letting the newly painted black areas pop even more.
Revamping the Lamp Shades with Chalky Finish Paint
Next up were the lamp shades. They were a dull, off-white beigey color that simply didn’t align with the crisp, modern aesthetic I was aiming for. To transform them, I chose DecoArt Americana Decor Chalky Finish paint in “Everlasting.” This paint is fantastic for creating a soft, matte look with a beautiful textural quality. You can clearly see the striking difference between the unpainted shade and the one in the background, which has already received its fresh coat of Everlasting white.
The process was simple yet effective. Using a paintbrush, I applied several coats of the chalky paint. I started by brushing across the shade, then followed with strokes going up and down, ensuring complete coverage. This technique not only ensured every part of the shade was painted but also helped build up the subtle texture characteristic of chalk paint. I absolutely adored the transformation from that dreary, uninspiring beige to a bright, refreshing white. In fact, this isn’t my first time giving a shade a makeover; I’ve painted a shade before, that time with a stylish black trim!
Embracing Texture: A Unique Finish for Your Shades
Here’s a close-up of the finished shade, allowing you to appreciate the deliberate texture. It looks wonderfully rough and full of character, which was precisely the effect I was going for. The beauty of chalk paint lies in its ability to create different finishes. If you prefer a smoother, more refined look, you can easily achieve it by lightly sanding down the shade after the paint has dried, and then adding a protective layer of wax. However, for this project, I was absolutely captivated by the raw, tactile texture as is! It adds an artisanal, handcrafted feel that perfectly complements the modern black and white palette of the lamps.
The Finished Look: A Stunning Black and White Statement
A Modern Aesthetic
I genuinely believe this bold black and white combination is infinitely more captivating and stylish than the original, rather monotonous white and off-white look. The contrast is crisp, clean, and effortlessly chic, breathing a contemporary elegance into these once-forgotten pieces. It’s amazing how a simple color palette can elevate an entire item, turning it from drab to fab in just a few steps.
Don’t they look absolutely transformed and so much better? These lamps are no longer just functional items; they are now statement pieces, ready to enhance any space with their renewed charm.
Perfect for the Girls’ Room Makeover
These beautifully upcycled lamps are destined for my daughters’ room, which is undergoing an exciting transformation. Naturally, they want their space to be primarily black and white – a timeless and versatile palette that allows for endless creative possibilities. These lamps will serve as a fantastic starting point for the room’s aesthetic, providing both ambient lighting and a touch of sophisticated charm.
I’m incredibly excited to share many more projects from their room in the coming months. These lamps are just the beginning of what promises to be a fun and stylish black and white decor journey!
Adding a Touch of Hygge
To further enhance the cozy and personal feel of the space, I added a lovely picture frame to the background. Inside, I featured a wonderful Hygge printable from my friend, Katrin of KreativK. You can also get one for yourself here. I absolutely adore the crisp whiteness of the paper, beautifully highlighted against the linen mat fabric that I meticulously placed behind it. It’s these small details that truly bring a room to life, and let’s be honest, who doesn’t love to embrace a little Hygge, especially during the colder winter months?
Conclusion: Your Next Upcycling Adventure Awaits!
This lamp makeover represents the first exciting step in transforming my daughters’ room, establishing a strong, stylish foundation with these statement-making lamps. It’s a testament to the power of paint and a little imagination – proving that you don’t need to spend a fortune to achieve high-end, personalized decor.
Have you ever considered giving a new life to your old lamps or other forgotten home accessories? It’s truly much easier and more rewarding than you might think! Upcycling is not only kind to your wallet but also a fantastic way to create unique pieces that reflect your personal style and reduce waste. I encourage you to look around your home, or perhaps visit a local thrift store, and see what treasures are waiting to be reimagined. A little paint and creativity can go a long way in transforming ordinary items into extraordinary home decor.
If you enjoyed this transformation and want to follow more of my creative adventures, please subscribe to my blog! You’ll get my latest projects and ideas delivered directly to your mailbox. The subscription form can be found on the sidebar and at the top of the page. Rest assured, your email address will never be shared with any third party.
More Inspiring Upcycle Projects
If you loved this lamp makeover, you might be interested in some of my other popular upcycling projects that demonstrate the magic of creative reuse:
<< Sweet Inspiration Link Party #90 HOME Photos of the Day for Nov/Dec >>
Linking up to these Link Parties
This blog is for entertainment purposes only; my DIY tutorials are not professional advice. Read my full disclaimer here.
I love it when I get your comments and I will try to reply to every one of them. Please do not add a hyperlink to your comment, otherwise, it cannot be published.