
Rescuing and Revamping a Beach-Found Lifesaver: A Coastal Decor DIY Project
Join us on a journey to transform a discarded ocean treasure into a unique piece of coastal home decor, blending functionality with aesthetic charm. This DIY project breathes new life into a damaged lifesaver, proving that with a little ingenuity, anything can be given a second chance.
A Serendipitous Beach Stroll and an Unexpected Find
One beautiful afternoon, my husband and I embarked on one of our favorite pastimes: a leisurely walk along the shoreline. The rhythmic crash of waves against the sand, the gentle breeze carrying the scent of salt, and the endless expanse of the ocean always inspire a sense of peace and discovery. As we ambled along, enjoying the tranquility, something peculiar caught my eye amidst the usual flotsam and jetsam the tide often leaves behind. It was a substantial, weathered object, partially buried in the sand, hinting at a past life spent at sea.
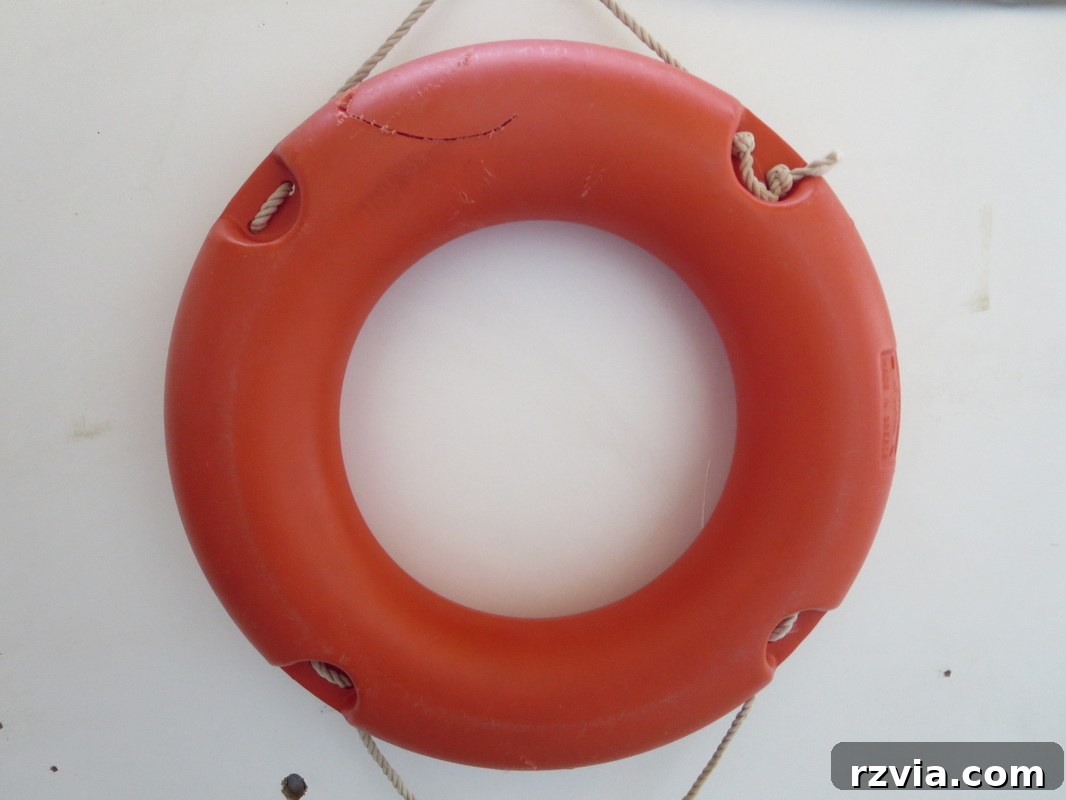
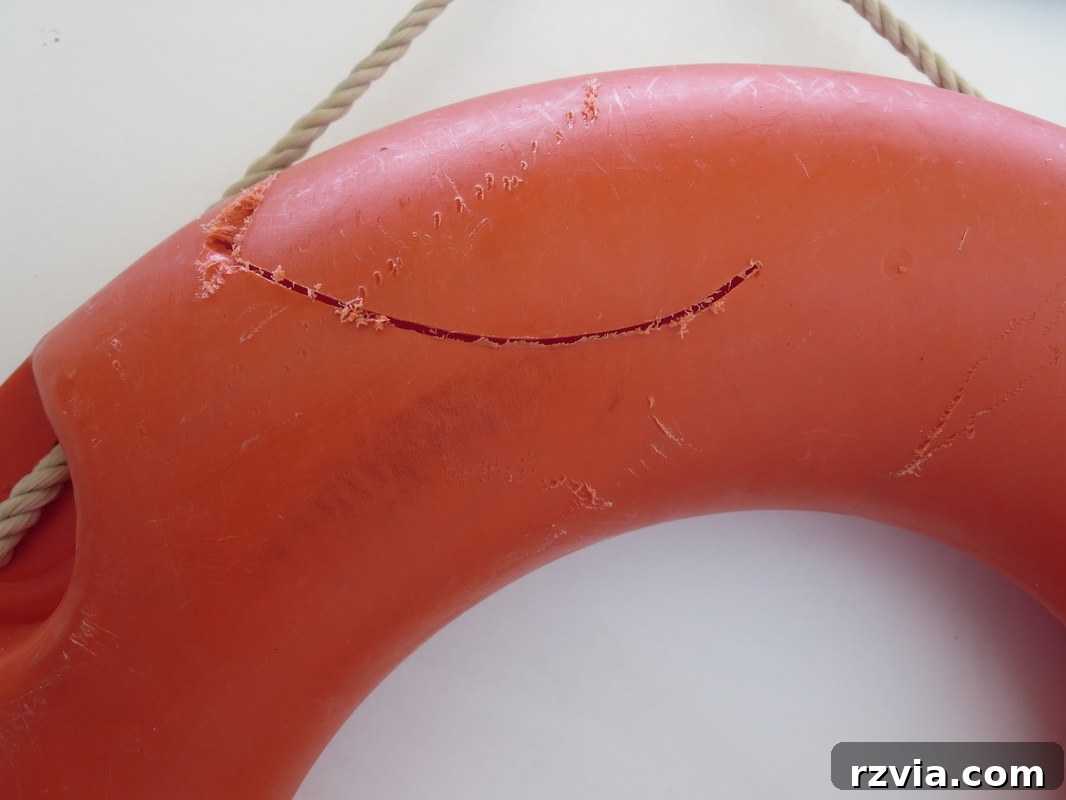
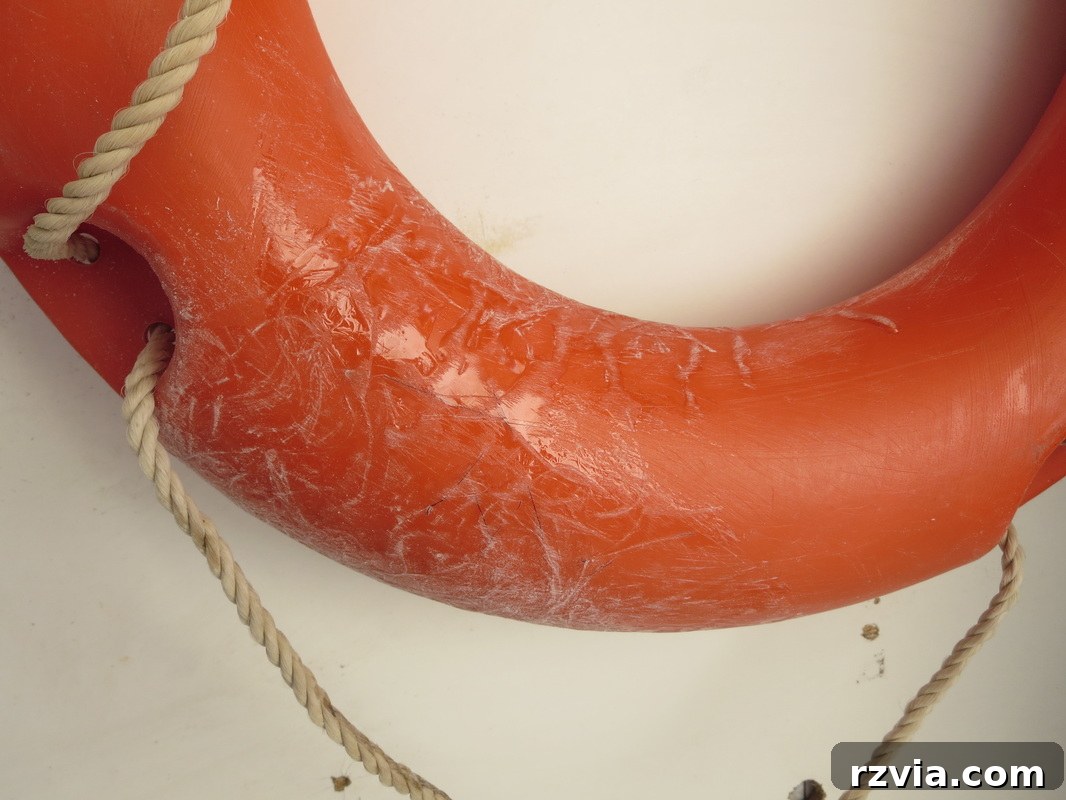
Upon closer inspection, we realized we had stumbled upon a damaged but still recognizable lifesaver. Its once vibrant colors were faded, bearing the marks of sun, sea, and time, and it had a noticeable crack, rendering it unfit for its original life-saving purpose. But for us, it wasn’t just a piece of broken marine equipment; it was a canvas, a potential treasure waiting to be rescued and repurposed. There was an immediate, unspoken agreement between us: this forgotten lifesaver deserved a new lease on life. We decided, then and there, that we would save it and embark on an exciting DIY adventure.
The Fisherman’s Assessment: From Rescue to Repurpose
My husband, a passionate and experienced fisherman, immediately took charge, his eyes lighting up with a mix of curiosity and practicality. He’s always had a knack for seeing potential in things others might overlook, especially anything related to the sea. He carefully picked up the lifesaver, turning it over in his hands, his expert gaze examining every inch of its worn surface. The extent of the damage became apparent – a significant crack that compromised its structural integrity for immediate use on his boat. If not for this flaw, it would have been a prime candidate for his vessel, a reliable backup in case of emergency.
However, the damage didn’t deter him. In fact, it ignited a different kind of spark. While it couldn’t serve as a primary safety device, he instantly recognized its value as a potential spare once repaired, or even better, a unique piece of decor for our home. His enthusiasm was contagious. We both believe strongly in the power of upcycling and the joy of transforming discarded items into something beautiful and useful. This broken lifesaver was more than just debris; it was an opportunity to create something truly special, infused with the story of its discovery. The challenge was set, and our collective DIY spirit was ready to tackle it head-on.
Embracing the DIY Ethos: No Fear of Flaws
Since when have we ever shied away from a little damage? My husband and I are seasoned partners in the thrilling world of DIY projects, fearlessly confronting defects and transforming them into unique features. We’ve tackled countless renovations and crafts, each imperfection simply another opportunity for creative problem-solving. This lifesaver was no different. We exchanged a knowing glance, a silent affirmation that echoed our shared philosophy: “Game on!” We thrive on the challenge of taking something broken and making it whole again, adding our personal touch in the process.
Our home is a testament to this philosophy, filled with pieces that tell stories of rescue and transformation. We believe in sustainable living and the immense satisfaction that comes from repurposing items rather than discarding them. This project perfectly aligned with our passion for upcycling and our love for all things coastal. The idea of nursing this “baby” back to health, not just structurally but also aesthetically, filled us with excitement. It was more than just a repair; it was an act of creative reclamation, turning a potential hazard into a cherished nautical accent. This lifesaver wasn’t just going to be fixed; it was going to be celebrated.
The Restoration Process: Structural Repair with Fiberglass
Applying Polyester Resin and Fiberglass for Durability
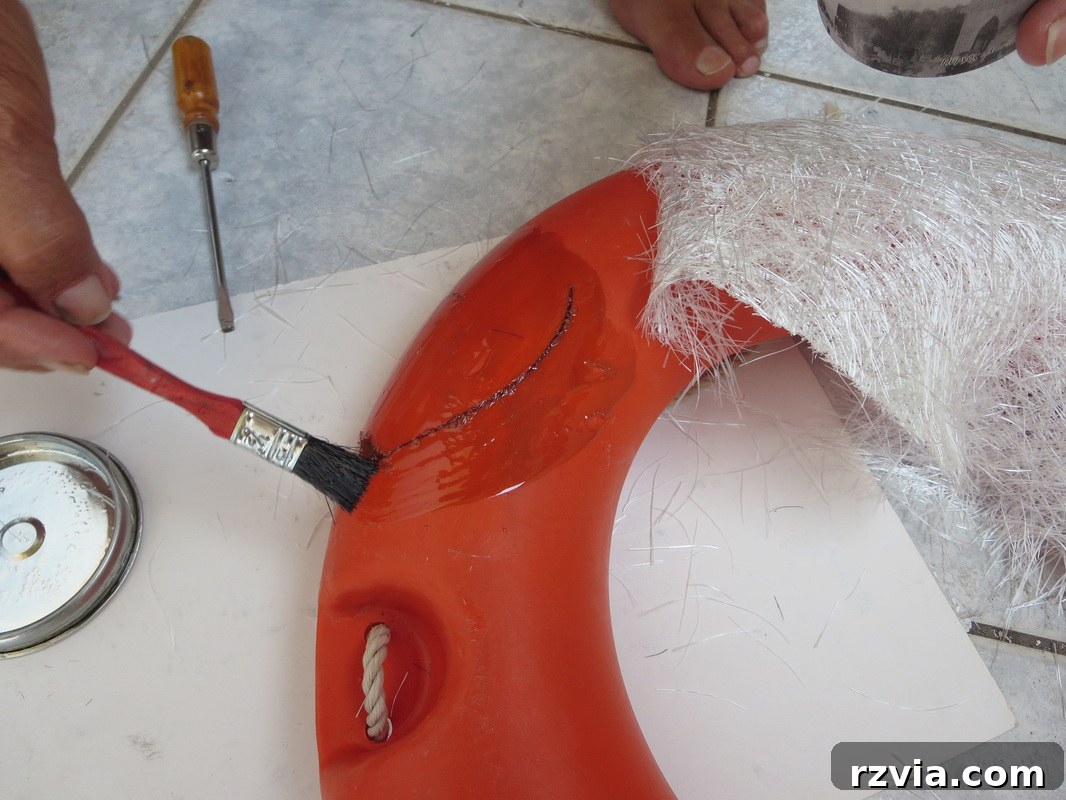
The first crucial step was to address the structural damage. My husband, with his extensive experience working with marine equipment, knew exactly what was needed: a robust fiberglass repair. He meticulously prepared the area, ensuring it was clean and dry for optimal adhesion. Wearing appropriate safety gear, he carefully applied a layer of high-quality polyester resin directly to the damaged section. This resin, a powerful adhesive when cured, would form the foundation of our repair.
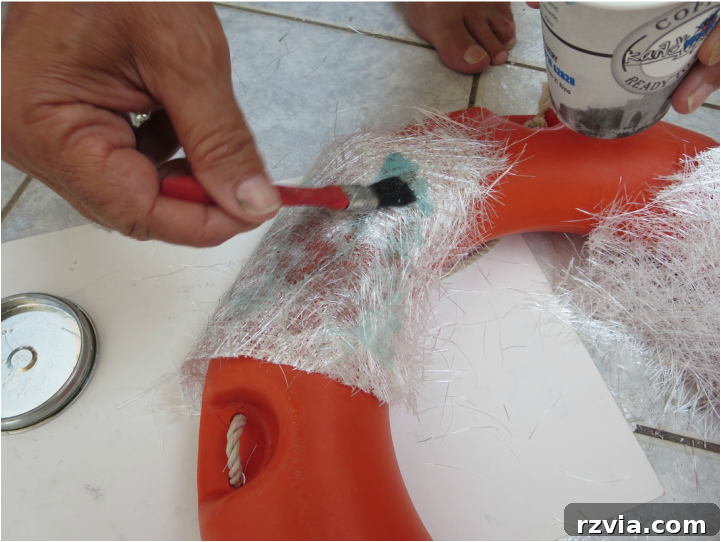
Immediately after the initial resin application, he carefully placed a sheet of fiberglass mat over the treated area. Fiberglass sheets are composed of woven or randomly oriented glass fibers, providing immense tensile strength once impregnated with resin. He then applied a generous second coat of polyester resin, ensuring the fiberglass sheet was thoroughly saturated. It’s vital for the resin to fully soak into the fibers, allowing them to bond together seamlessly. This process creates a solid, incredibly strong fiberglass material that is not only waterproof but also remarkably durable, ready to withstand the elements should it ever return to a marine environment.
Layering, Curing, and Finishing for a Seamless Repair
To ensure maximum strength and a completely seamless repair, my husband applied a total of three layers of fiberglass sheets, each thoroughly saturated with polyester resin. This multi-layered approach guarantees that the repaired section is not only as strong as, but potentially even stronger than, the original material. Once all the layers were in place and fully soaked, we set the lifesaver aside in a well-ventilated area to cure overnight. The curing process is essential, allowing the resin to harden completely, transforming the flexible fiberglass mat into a rigid, impenetrable patch.
The next morning, the repair was solid. The once-jagged edges of the fiberglass were now sharp and rigid, so the next step involved careful sanding. My husband meticulously sanded down the newly formed patch, smoothing out any rough spots and sharp edges. This not only made the lifesaver safe to handle but also created a clean, even surface, preparing it for its decorative transformation. With the sanding complete, the structural damage was officially vanquished! Our salvaged lifesaver was once again structurally sound, ready for its next chapter.

Adding Artistic Flair: The Decorative Makeover Begins
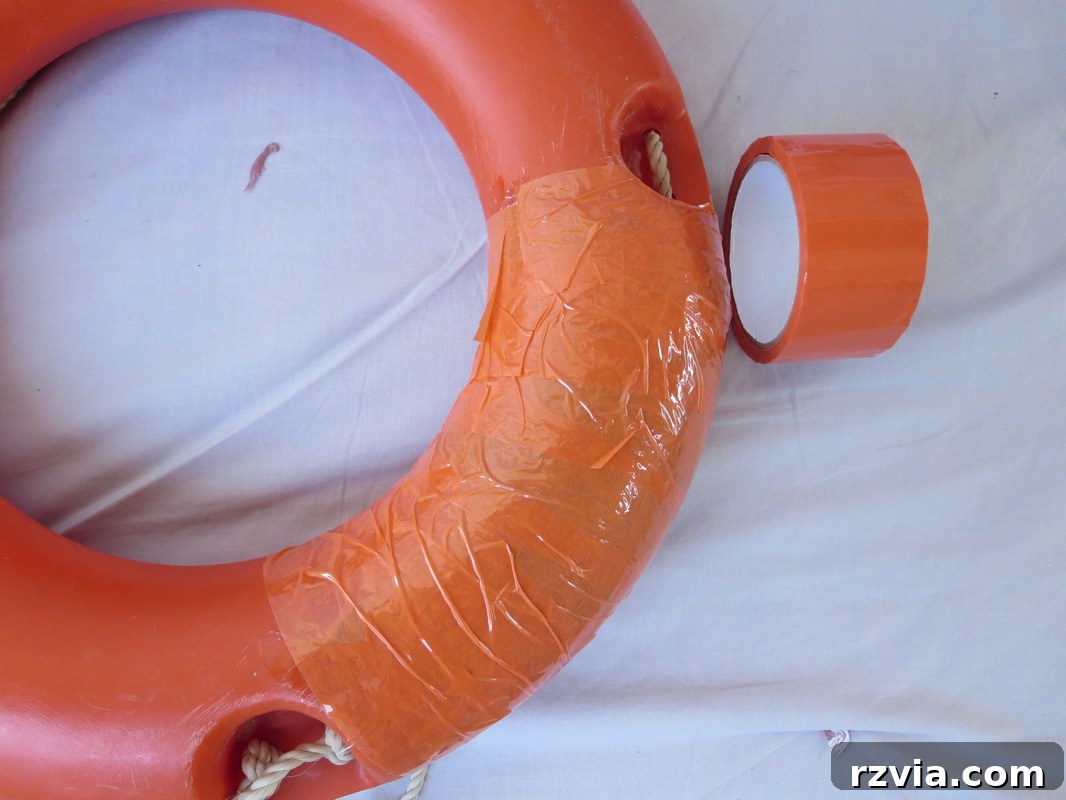
With the structural repairs expertly handled by my husband, it was my turn to take the reins and infuse the lifesaver with artistic flair. Before embarking on the decorative phase, I decided to add an extra layer of protection and refinement. I carefully sealed the newly repaired fiberglass area with some strong adhesive tape. This wasn’t just for aesthetics; it provided an additional barrier, ensuring no stray fiberglass fibers would prick unsuspecting fingers and creating a smoother base for the upcoming fabric work.
At this point, the lifesaver was technically ready for practical use. My husband could have easily taken it to his boat, keeping it as a functional spare. However, with no immediate need for it at sea, we struck a deal. He would have a fully repaired, ready-to-use lifesaver for when he eventually needed it, but until then, it would become a decorative centerpiece in our home. This agreement perfectly encapsulated our collaborative spirit; he provided the brawn and expertise for the repair, and I would lend my creative touch to make it a beautiful, eye-catching piece of coastal decor. Now, the fun truly began!
Upcycling Denim, Twine, and Ribbon for Coastal Charm
My vision for the lifesaver’s new aesthetic was a rustic, beachy feel, something that would evoke the casual elegance of coastal living. To achieve this, I turned to my ever-growing stash of upcycling materials. For years, ever since I started this blog and delved deeper into the world of DIY, I’ve found myself “hoarding” interesting fabrics, ribbons, and bits and bobs that others might discard. Is this a good thing? My storage bins certainly seem to think so!
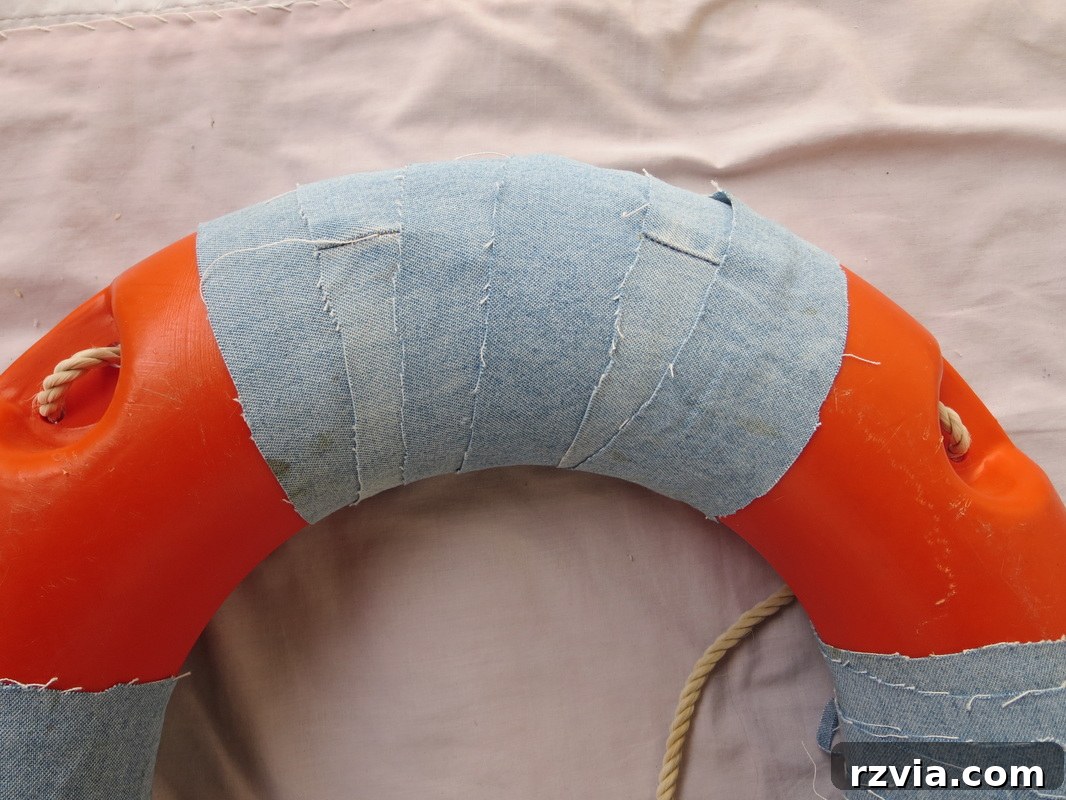
For this project, an old denim dress, long past its wearable prime, became the star. I carefully cut the denim into long, even strips, ready to wrap around the lifesaver. Denim provides a wonderful texture and a classic, durable look that perfectly complements a nautical theme. I began wrapping the strips tightly around the lifesaver, securing them with a bit of fabric glue where necessary to prevent unraveling. The process was meditative, slowly transforming the utilitarian object into something soft and inviting.
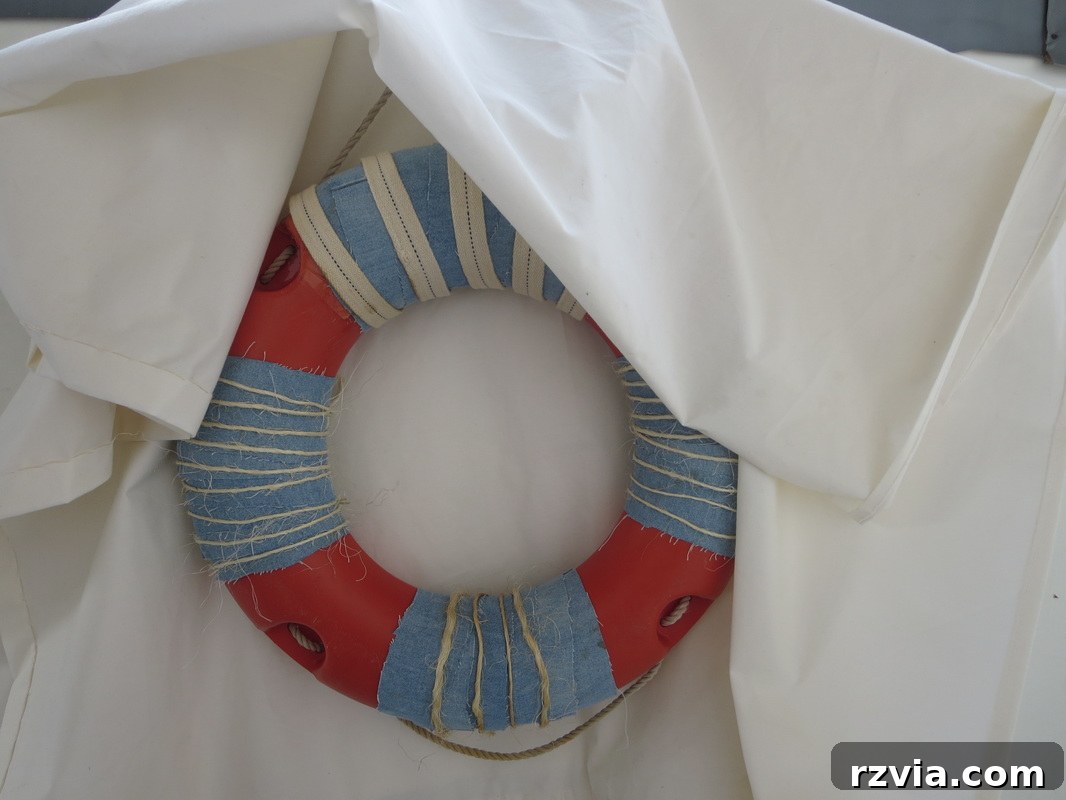
To further enhance the rustic charm, I incorporated natural twine, artfully winding it around the denim-covered lifesaver, creating visual interest and an authentic maritime touch. Finally, a carefully selected ribbon added a subtle pop of color and a touch of refinement, tying the whole look together. The combination of the sturdy denim, organic twine, and delicate ribbon created a harmonious blend of textures, achieving that desired beach-cottage aesthetic. It’s truly amazing what you can create with materials destined for the donation bin or landfill.
The Finished Masterpiece: A Touch of Nature’s Interruption
And here we have it, the culmination of our efforts – the beautifully revamped lifesaver! It’s incredible to see how a little imagination and elbow grease can utterly transform something. I was so excited to capture its new glory in a series of photographs, showcasing its rustic charm and coastal appeal. However, as is often the case when working with nature and aiming for that perfect shot, sometimes nature has its own ideas!
During my photography session, a curious visitor decided to make a cameo appearance, inadvertently adding a touch of playful realism to the shot. My initial thought was, “Oops! Nature getting in the way of my photography session!” But in hindsight, it only added to the authentic, outdoor-inspired narrative of the piece. After all, this lifesaver’s journey began outdoors, so a natural interruption felt perfectly fitting for its reveal. What do you think? Did I achieve that rustic, beachy feel I was aiming for? I truly believe its new look evokes the serene beauty of the seaside, making it a perfect addition to any coastal-themed space.
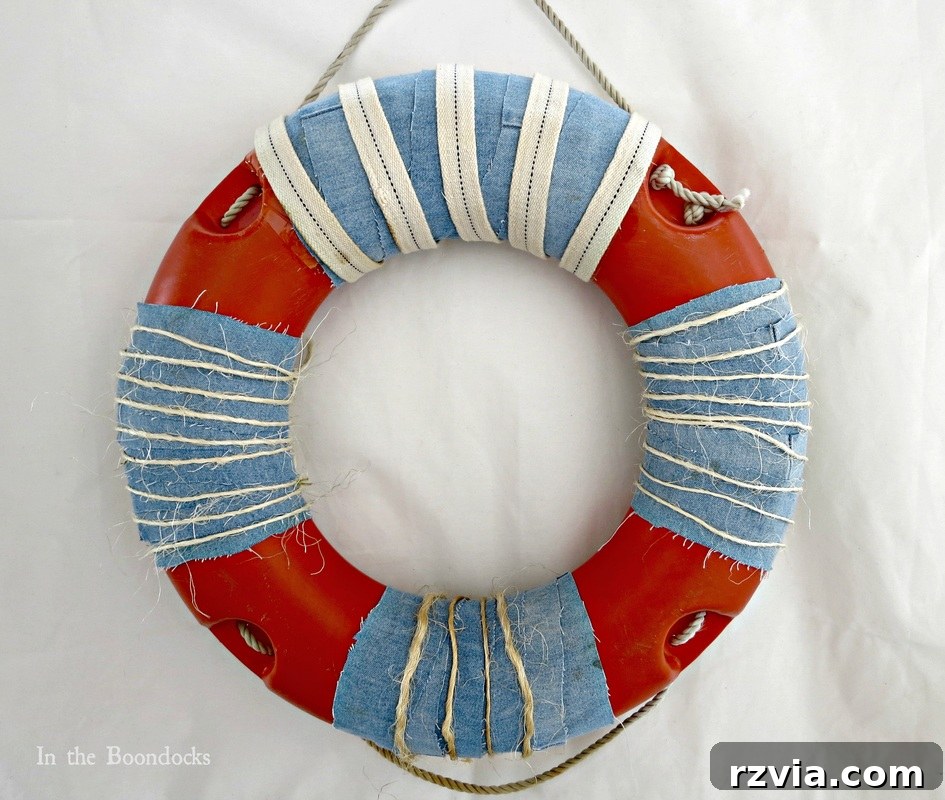
Before and After: A Stunning Transformation
Sometimes, words aren’t enough to convey the full impact of a DIY transformation. A side-by-side comparison truly highlights the journey this lifesaver has undergone, from a damaged and discarded object to a cherished piece of decor.
Before:
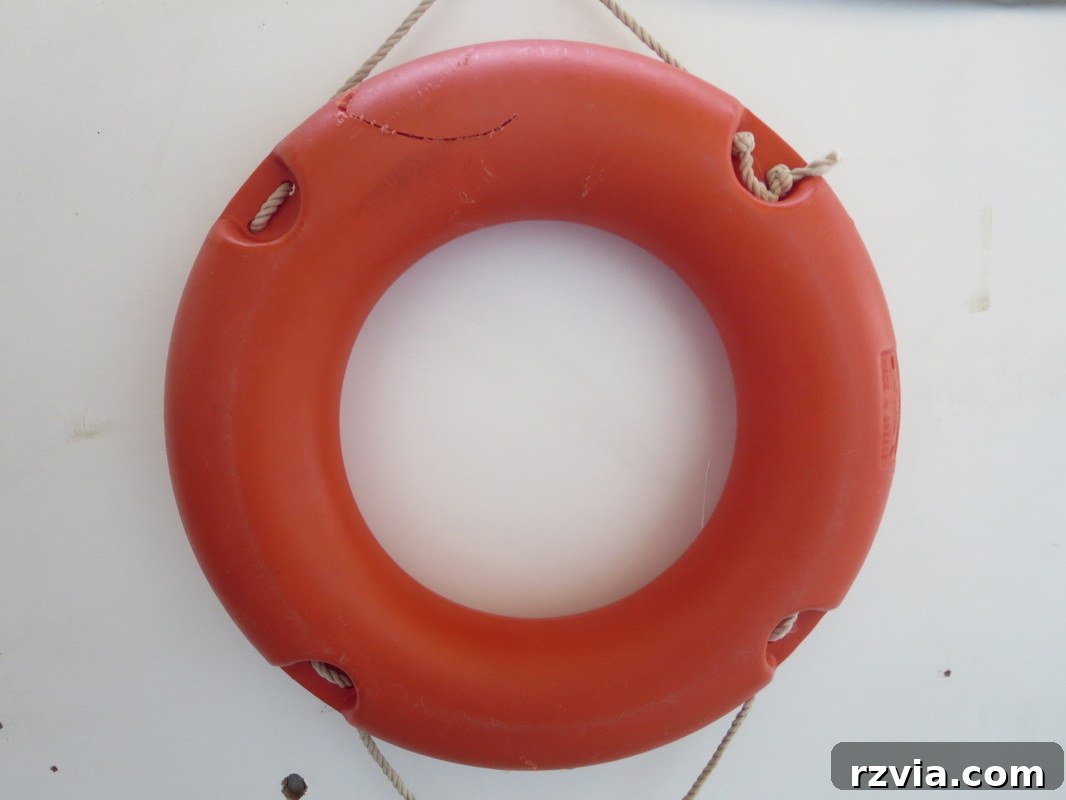
What started as a poor, lost, and severely damaged lifesaver, found abandoned on the beach, has been skillfully repaired and lovingly transformed. We’ve not only rescued it from oblivion but also repurposed it into a striking, entirely free wall decoration for our home. The satisfaction of taking something destined for waste and giving it such a beautiful new purpose is immeasurable.
And the best part? Thanks to my husband’s expert fiberglass repair work, if the need ever arises, he now has a perfectly sound spare lifesaver for his boat. After all, he did half the work, meticulously restoring its functionality, so the least I can do is share the finished product and the story of its remarkable comeback!
If you’ve enjoyed seeing this lifesaver’s transformation, don’t keep it to yourself! Share it with your friends on social media, or better yet, save it to your favorite Pinterest board for future inspiration. We’ve created a Pinterest-worthy image just for you!
If you’re as passionate about creative DIY projects and discovering new adventures as we are, consider subscribing to our blog! You’ll receive our latest posts and unique ideas twice a week directly in your inbox. Our subscription form is conveniently located on the sidebar, and rest assured, your email will always remain private and will never be shared with any third party.
Related Posts You Might Enjoy
<< The Anglophile Desk | HOME | Six Month Blogoversary >>
This blog content is provided for entertainment purposes only; my DIY tutorials do not constitute professional advice. Please read my full disclaimer here.
I genuinely appreciate and love receiving your comments, and I make every effort to reply to them or visit your blog in return. To ensure your comment can be published, please refrain from adding a hyperlink directly within your comment text. Thank you for being a part of our creative community!