
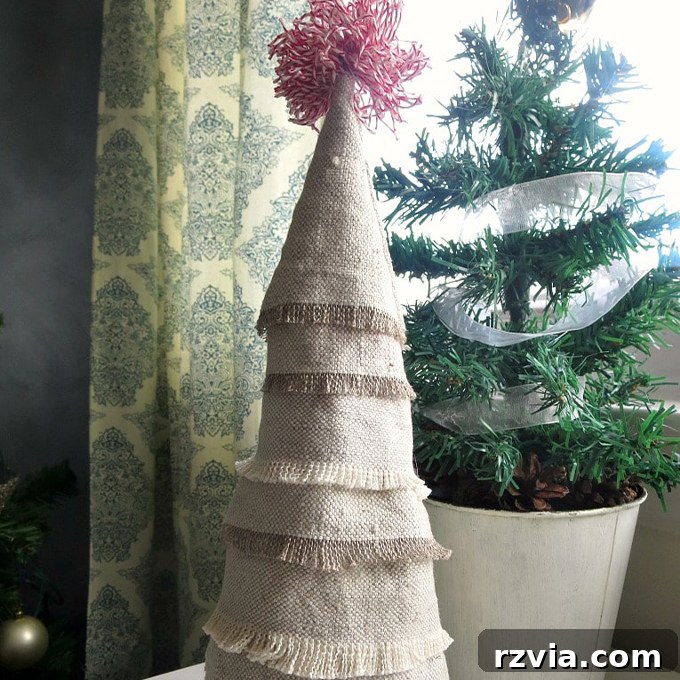
Transforming your home for the holidays doesn’t have to break the bank or involve discarding perfectly usable items. If you have an old tinsel tree from the dollar store gathering dust, don’t just toss it! Instead, embark on a delightful DIY project to upcycle it into a charming, personalized mini Christmas tree. With just a few fabric scraps and a sprinkle of creativity, you can craft a unique holiday accent that perfectly complements your festive decor and expresses your individual style.
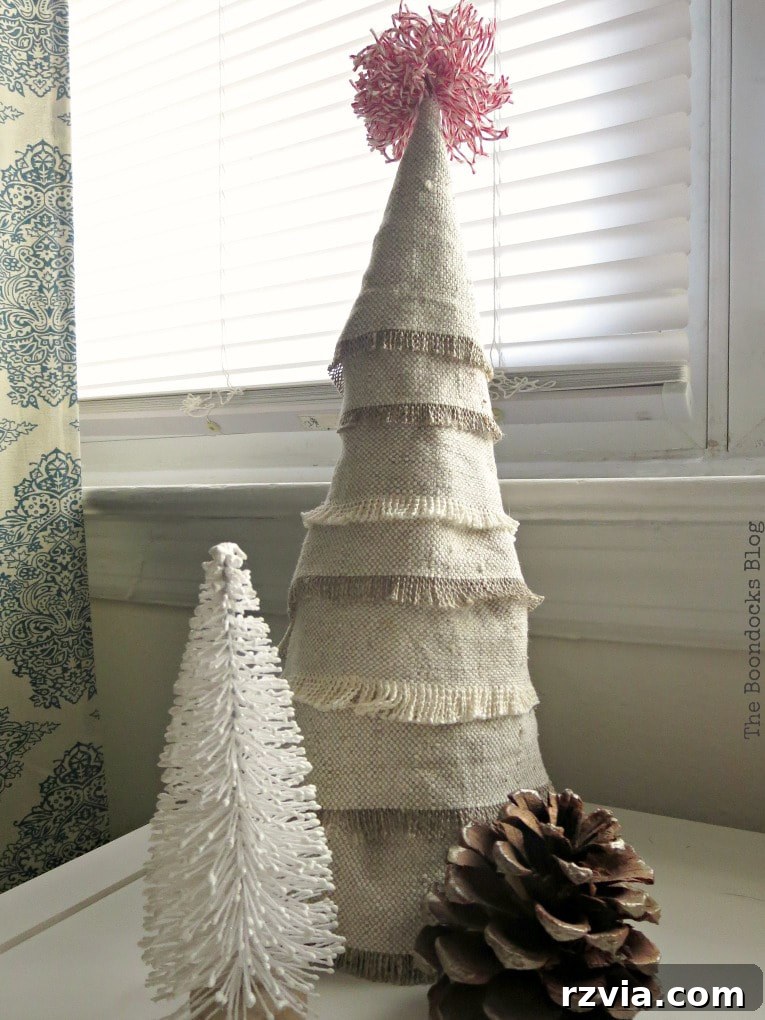
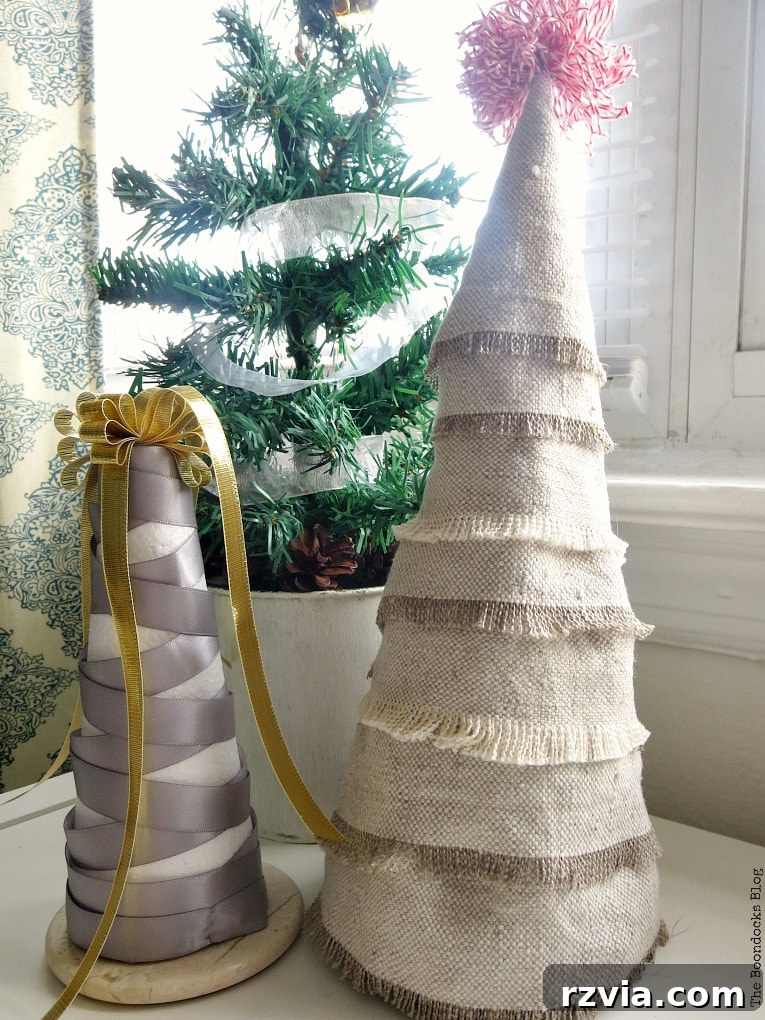
Last week, I dabbled in creating a mini Christmas tree adorned with ribbon. While it offered a pleasant touch, I envisioned something with a bit more texture, character, and a truly distinctive look. That quest for something “better” is precisely what inspired today’s exciting Christmas craft idea: learning how to make a beautiful, budget-friendly fabric scrap mini Christmas tree using a simple dollar store find. This project isn’t just about crafting; it’s about seeing potential in the ordinary and turning it into something extraordinary.
Today, I’m thrilled to be collaborating with a wonderful group of fellow crafters for a special dollar store edition of Christmas crafts. Be sure to scroll to the very end of this post to discover the ingenious holiday creations my friends have whipped up, proving that festive decor can be both stunning and affordable.
Disclosure: This post contains affiliate links for your shopping convenience. If you purchase any of these products through the links provided, we may receive a small commission at no extra charge to you. You can find our full disclosure policy here, ensuring transparency in our recommendations.
Craft Your Dream Mini Christmas Tree: An Easy Fabric Scrap DIY
Embrace the holiday spirit by crafting a unique and personalized mini Christmas tree from fabric scraps. This delightful DIY project offers a fantastic way to upcycle an inexpensive dollar store tree, transforming it into a charming piece of holiday decor that truly reflects your personal style. Whether you’re aiming for a rustic farmhouse look, a whimsical boho vibe, or a modern minimalist aesthetic, this project is incredibly versatile and allows for endless creative expression. It’s not just about making a tree; it’s about infusing your home with handmade warmth and character while keeping your budget in check.
Why Choose an Upcycled Fabric Scrap Tree for Your Holiday Decor?
There are countless reasons to fall in love with this DIY fabric scrap Christmas tree project. Beyond its aesthetic appeal, it champions several wonderful principles:
- Sustainable Decor: Give new life to an old tinsel tree and make use of fabric remnants that might otherwise go to waste. It’s a small step towards more eco-conscious decorating.
- Unleash Your Creativity: This project is a blank canvas! The choice of fabric scraps, colors, patterns, and embellishments allows for endless customization, ensuring your tree is truly one-of-a-kind.
- Budget-Friendly: Starting with a dollar store base and utilizing fabric scraps means you can create high-impact decor without a hefty price tag. Perfect for decorating on a dime!
- Personalized Touch: Match your tree perfectly to your existing holiday theme, a specific room’s decor, or even use fabrics that hold sentimental value. It’s decor with a story.
- Beginner-Friendly: No advanced crafting skills are required. If you can cut fabric and use a pin, you can create this beautiful mini tree.
Gather Your Essential Supplies: What You’ll Need
One of the best aspects of this DIY is how few materials it requires, many of which you might already have on hand. Here’s a comprehensive list to get you started on your fabric scrap mini Christmas tree:
- Mini Tinsel Christmas Tree: The humble base for our transformation. Look for one approximately 12-18 inches tall at your local dollar store or craft supply shop. Any color will do, as it will be covered.
- Fabric Scraps: This is where the magic happens! Gather an assortment of fabric scraps in colors and patterns that align with your desired aesthetic. Cotton, linen, flannel, or even repurposed clothing pieces work wonderfully. Ensure you have enough to cut strips for the entire tree – a good variety of textures can add depth.
- Pins: Standard sewing pins are perfect for securing the fabric to the tinsel tree. The more you have, the better, as you’ll be using quite a few to keep everything in place.
- Bakers Twine: Ideal for crafting a charming pompom tree topper. Red and white twine offers a classic touch, but feel free to choose colors that match your fabric.
- A Piece of Craft Wire: A short length of thin floral wire or craft wire (about 4-6 inches) will be used to secure your pompom topper firmly to the tree.
- Scissors: A sharp pair of fabric scissors will make cutting your strips much easier and ensure clean edges, especially if you opt for a fringed look.
As mentioned, this project proudly belongs to our dollar store craft edition. My initial search for inspiration for these mini Christmas trees was a bit challenging. I wanted something more than just glitter and tinsel, but felt a creative block until I stumbled upon this particular tinsel tree at the dollar store. It was simple, inexpensive, and full of potential – the perfect blank slate for my vision.
There was absolutely nothing inherently “wrong” with the original dollar store tinsel tree; it simply didn’t resonate with my personal decorating style. This might sound amusing coming from someone who typically loves to deck her main Christmas tree with an abundance of sparkle and glitter! However, for this mini project, I envisioned something softer, more natural, and with a distinct handcrafted charm. This little tree, despite its plain appearance, sparked an idea for a beautiful transformation that would bring warmth and character to my holiday display.

Step-by-Step Guide: How to Craft Your Boho-Chic Mini Fabric Christmas Tree
1. Preparing Your Fabric Scraps: The Foundation of Your Tree
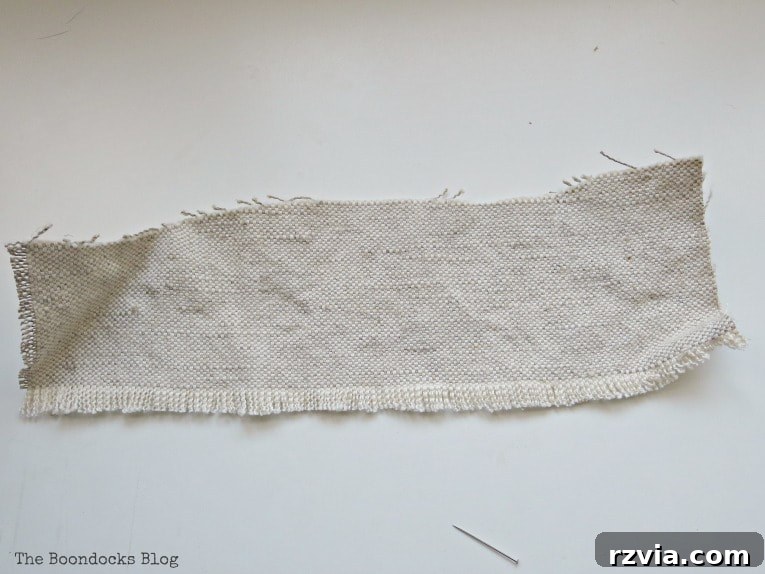
The journey to your unique mini Christmas tree begins with selecting and preparing your fabric. I had an abundance of a lovely, neutral-toned fabric left over from previous projects. If you’ve been following my crafting adventures, you might recall seeing this fabric featured in a charming fall wreath and more recently in a collection of cozy fabric remnant pillows. What did both of those projects share in common, besides the same delightful fabric? Fringed ends!
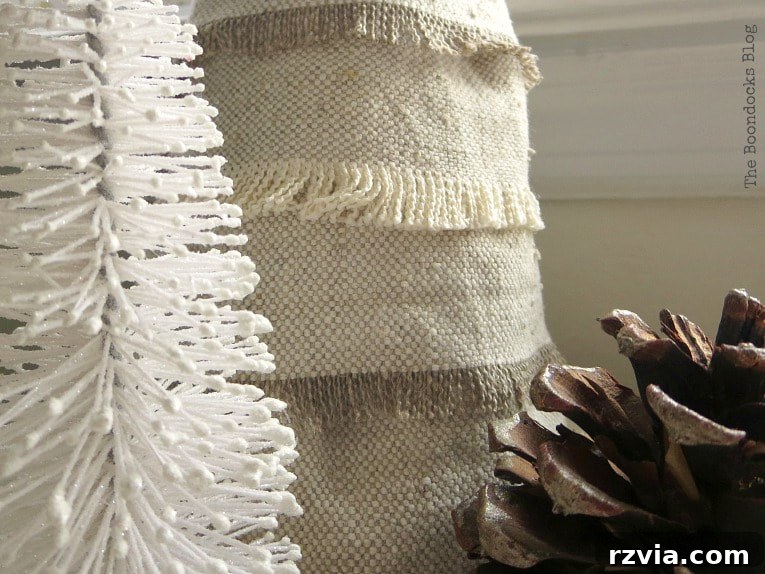
This distinct texture is what I decided my mini Christmas tree would also feature, adding a wonderfully soft and organic feel. To achieve this, I cut my fabric into strips, each approximately two inches in width. The exact length will vary depending on the size of your tree, but aim for pieces long enough to wrap comfortably around the base, gradually shortening as you move up the tree. Once cut, I carefully fringed one of the two long edges of each fabric strip. To fringe, simply make small, even cuts perpendicular to the length of the strip, about a quarter to half an inch deep. This creates a beautiful, frayed edge that adds delightful texture and movement to your finished tree. If you prefer a cleaner look, you can skip the fringing step or use pinking shears for a decorative zig-zag edge.
2. Dressing Your Tree: Attaching the Fabric Strips
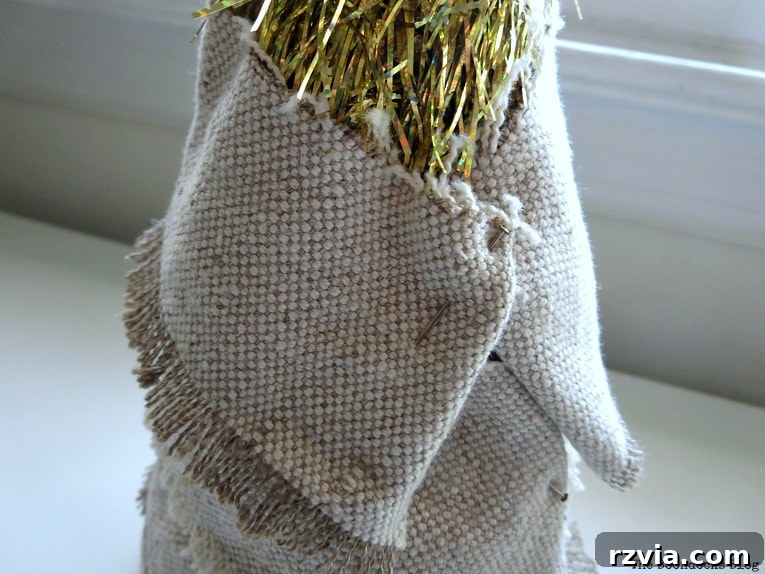
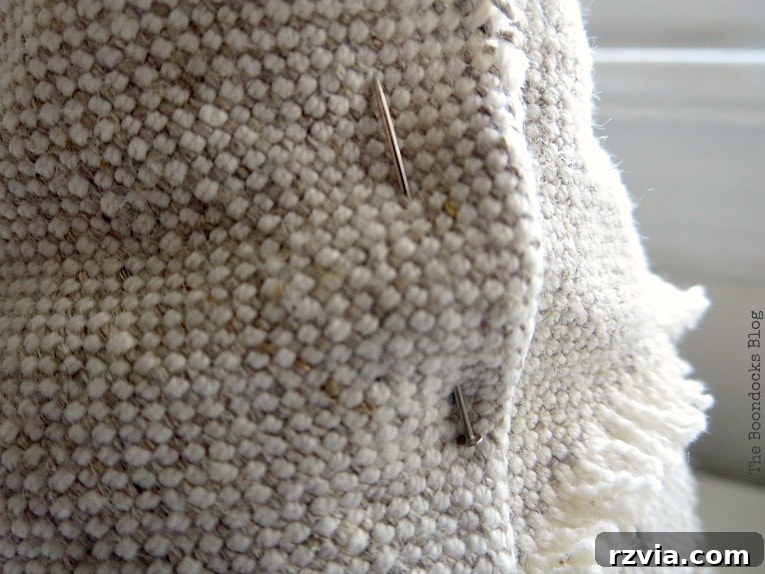
With your fabric strips prepared, it’s time to begin transforming your dollar store tinsel tree. Starting from the bottom of the tree, carefully wrap the first fringed fabric strip around the base, ensuring the fringed edge points downwards for a natural, cascading effect. Once positioned, simply secure the fabric in place with a pin, pushing it into the underlying tinsel structure. You’ll want to overlap the fabric strips slightly as you work your way up the tree, ensuring full coverage and creating a lush, full appearance. Each successive fabric piece should be cut a little shorter than the last, allowing the tree to taper naturally as you ascend towards the top.
Continue this process, overlapping and pinning each strip, rotating the tree as you go to ensure even coverage. Don’t worry too much about perfection at this stage; the overlapping nature of the fabric will help to disguise minor imperfections. Focus on securing each strip firmly so it doesn’t shift. The beauty of using pins is that you can easily adjust the placement of your fabric until you’re satisfied with the look. This technique not only conceals the existing tinsel but also builds a wonderful layered texture, giving your mini tree a charming, dimensional quality.
3. Crafting the Perfect Topper: A Playful Pompom
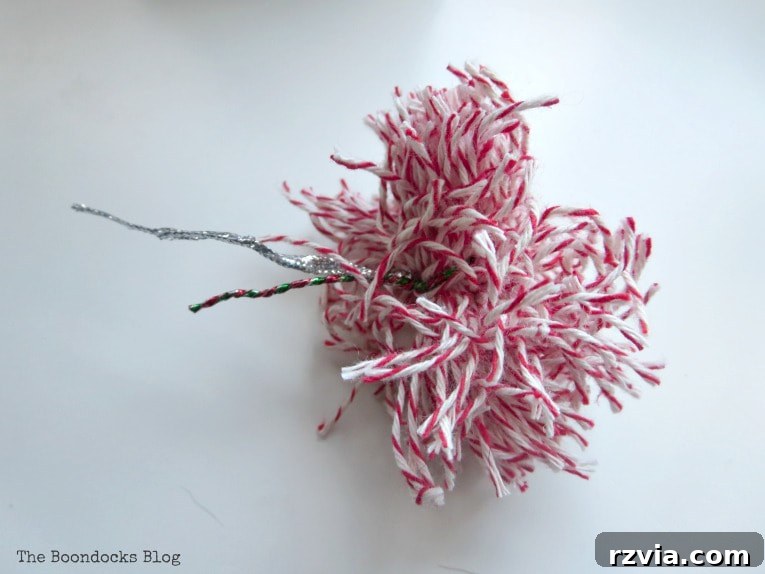
No Christmas tree, no matter how mini, is complete without a festive topper! For this fabric scrap tree, I opted for a whimsical pompom crafted from baker’s twine. To make your pompom, simply wrap the baker’s twine around two fingers (or a pompom maker if you have one) numerous times until it’s quite thick. The more wraps, the fuller your pompom will be. Carefully slide the wrapped twine off your fingers, then tie another short piece of twine tightly around the center, securing the loops. Cut through all the loops on both sides, then fluff and trim your pompom until it’s a neat, round shape. This playful addition brings a touch of softness and charm to the pinnacle of your tree. For added stability and to make it attachable, I secured a small piece of craft wire directly into the center of the pompom, twisting it firmly to create a sturdy stem.
4. Creating a Seamless Finish: The Conical Top Piece
To give the very top of the tree a clean, finished look and to seamlessly integrate the pompom topper, I created a small, cone-shaped piece from a leftover fabric scrap. This conical piece serves as a cap for the peak of your tree, helping to hide any exposed tinsel and providing a neat anchor for the pompom. Simply cut a small circle from your fabric, then cut a slit from the edge to the center. Overlap the cut edges and form it into a cone, securing it with a small amount of fabric glue or a tiny pin. This ensures a smooth transition to the tree’s crowning glory.
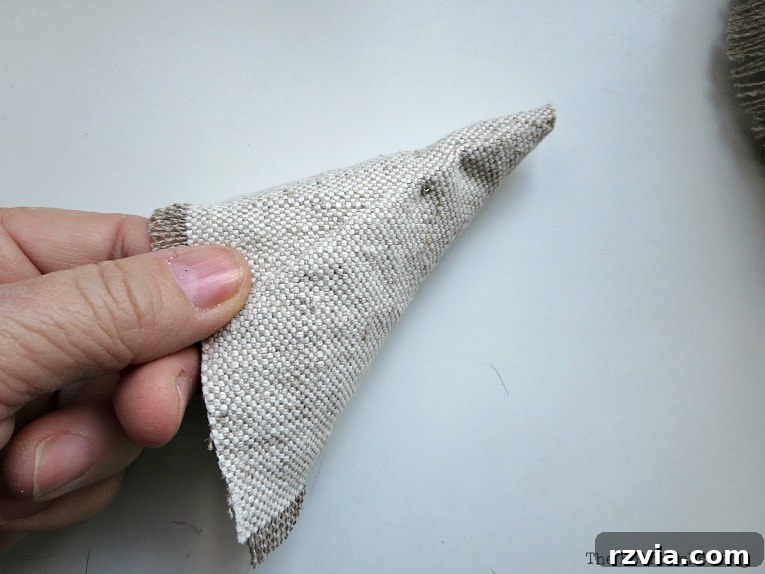
Crucially, ensure you leave a tiny opening at the very top of this fabric cone. This small aperture is vital for the next step, as it will be where the craft wire from your pompom topper is inserted. This design allows the pompom to sit perfectly atop the cone, creating a polished and integrated look for your finished mini Christmas tree.
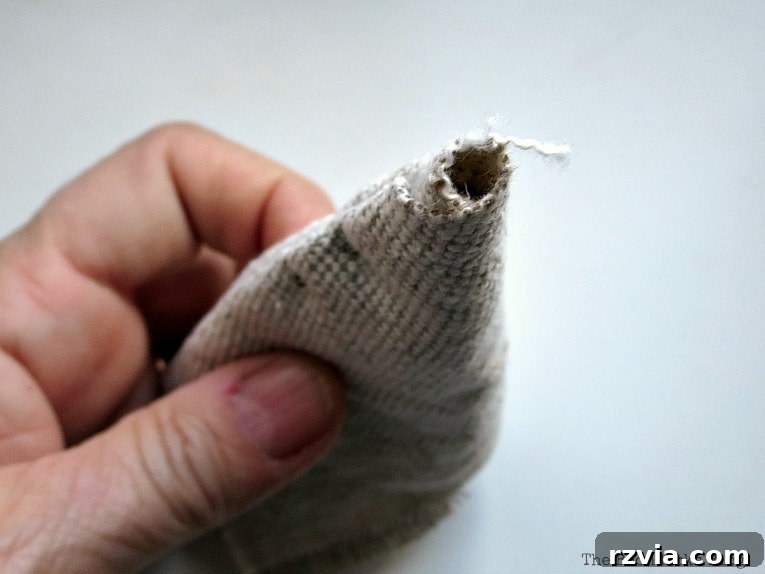
5. Assembling the Topper and Final Touches
With your pompom and fabric cone ready, it’s time to bring everything together. Carefully insert the craft wire, which you’ve already attached to your pompom, into the tiny opening at the top of the fabric cone. Push the wire down into the core of the tinsel tree, securing the pompom firmly in place. You can twist the wire around the existing tinsel branches inside the cone to ensure it’s stable and upright. And just like that, with the pompom proudly in place, your little scrap fabric mini tree is complete!
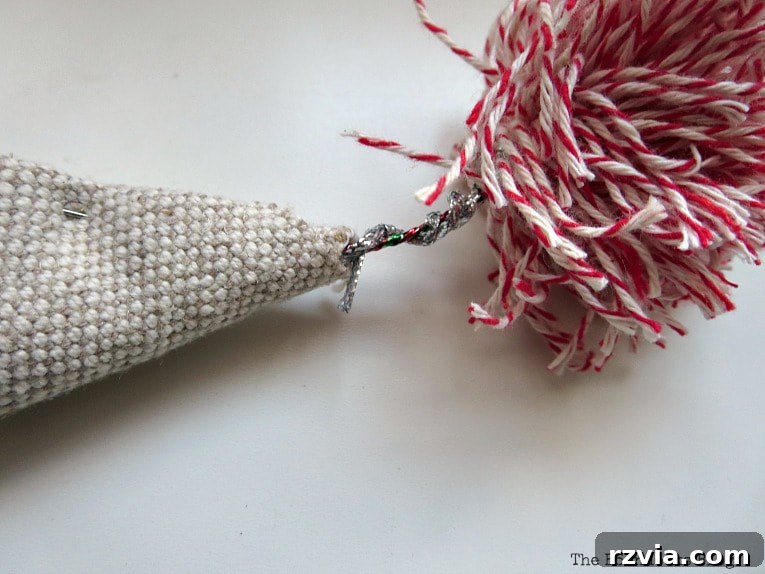
Your Transformed Mini Christmas Tree: A Touch of Whimsy and Style
The transformation is truly remarkable. From a generic dollar store tinsel tree to a charming, unique piece of decor, this fabric scrap tree exudes character. It has a delightful, whimsical quality, almost looking like something straight out of a Dr. Seuss book – playful, unexpected, and utterly enchanting. Just think of the endless possibilities for customization! Depending on the type of fabric you choose – be it a vibrant print, a soft linen, a rustic plaid, or a luxurious velvet – you can create so many different styles and atmospheres, ensuring each tree is a reflection of your unique taste.
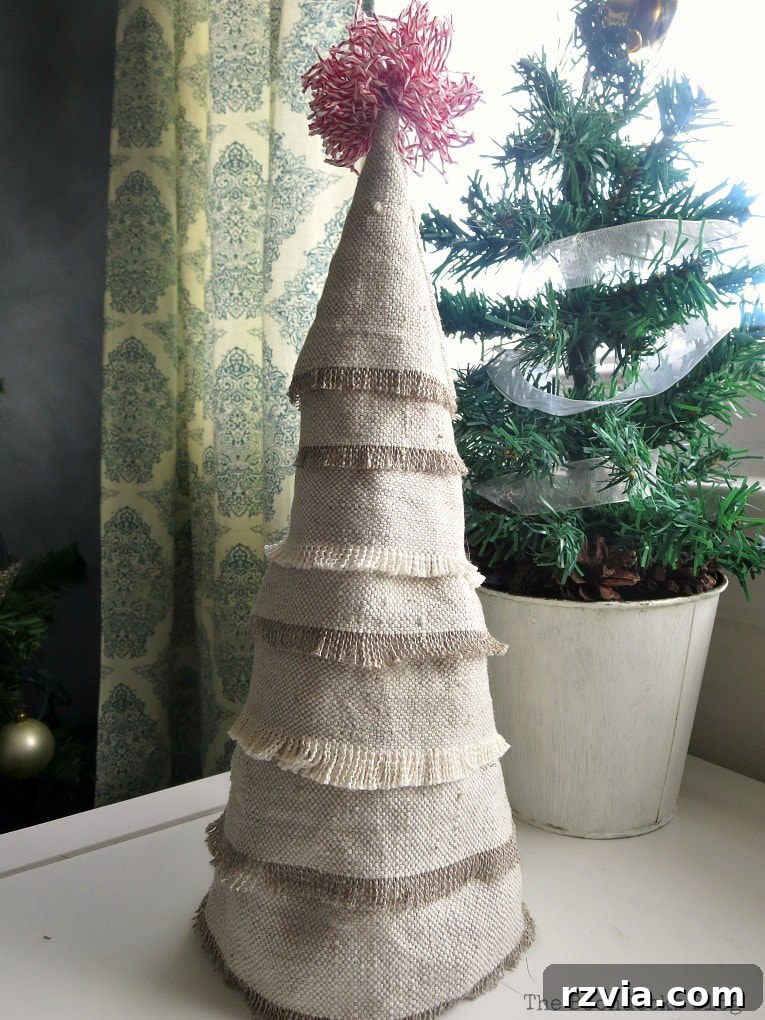
Doesn’t it look absolutely pretty? It’s the epitome of a proper boho Christmas tree – relaxed, artistic, and full of natural texture. Now, let’s briefly address the back of the tree. While the front is picture-perfect, the back, where all the fabric pieces are secured with pins, might look a little less tidy. But here’s a little secret (shhhhh!): my plan is to place this delightful tree in a corner of a bookcase, so those “sloppy” pins will be completely out of sight. Had I aimed for a truly flawless finish from every angle, I would have certainly spent more time creating a more intricate pinning pattern or perhaps even stitched the fabric in place, ensuring all closures were perfectly level and concealed. But for a charming display piece that will be viewed primarily from the front, this quick and easy method is perfectly sufficient!
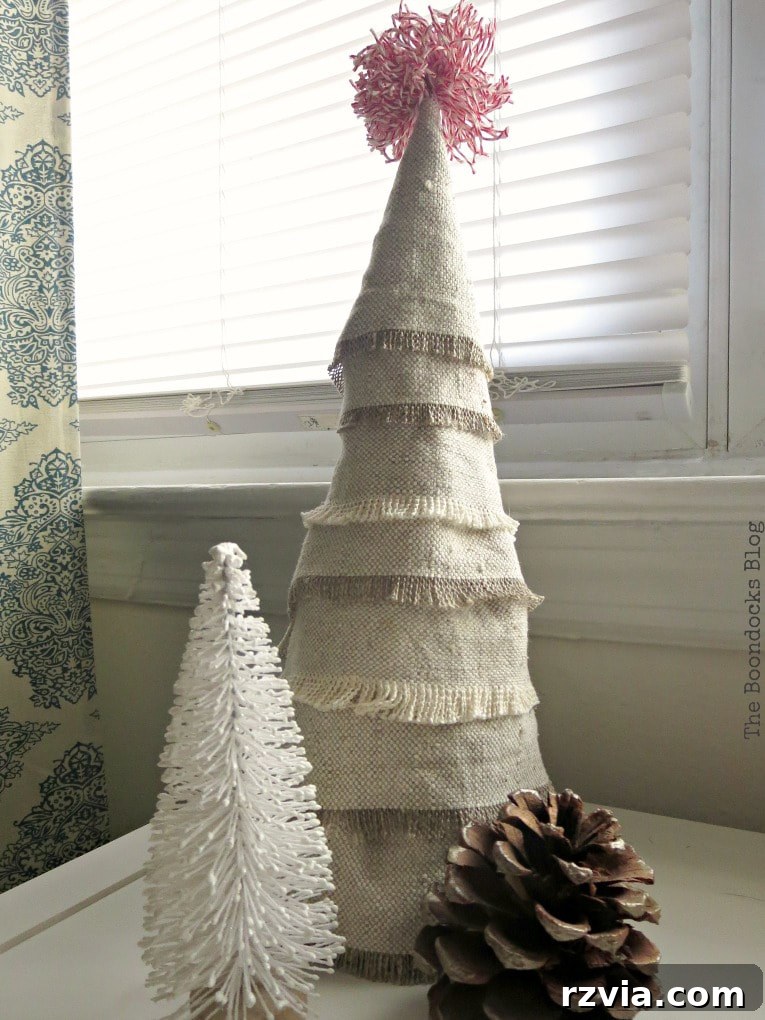
Thanks to the incredible versatility of dollar store finds and a dash of creativity, my mini tree collection has grown, bringing even more holiday cheer to my home! And the best part? I no longer have to look at that plain, uninspired tinsel tree. Would you ever guess that beneath all that beautiful fabric, there’s a shimmering tinsel tree hiding, completely transformed and reimagined?
Beyond the Basics: Customization and Styling Ideas for Your Fabric Scrap Tree
The true beauty of this DIY project lies in its infinite potential for customization. Once you’ve mastered the basic technique, you can unleash your creativity to design a mini Christmas tree that perfectly suits any aesthetic or occasion:
- Themed Trees:
- Rustic Farmhouse: Use plaid flannels, burlap, or distressed cotton. Add tiny wooden beads or miniature pine cones.
- Boho Chic: Experiment with macrame fringe, lace scraps, or fabrics with global-inspired patterns. Top with a feather or a colorful tassel.
- Modern Minimalist: Opt for solid-colored fabrics in muted tones like grey, cream, or forest green. Keep embellishments simple, perhaps a geometric star topper.
- Whimsical & Playful: Choose brightly colored fabrics or patterns like polka dots and stripes. Attach tiny felt cutouts or colorful buttons.
- Vintage Charm: Repurpose old doilies, lace trim, or floral fabrics from antique linens.
- Color Palettes: Stick to a monochromatic scheme for elegance, go vibrant with a rainbow of colors for a festive pop, or embrace soft pastels for a dreamy winter wonderland feel.
- Exciting Embellishments:
- Sparkle: Dab fabric glue and sprinkle fine glitter on the fringed edges for a subtle shimmer.
- Beads & Sequins: Hand-sew or glue on tiny beads, sequins, or small pearl clusters for added glamour.
- Miniature Ornaments: Hang tiny baubles, bells, or charms from the fabric layers.
- Lights: Weave a delicate strand of battery-operated fairy lights through the fabric for a magical glow.
- Natural Elements: Attach tiny dried flowers, sprigs of faux berries, or small cinnamon sticks for a natural, aromatic touch.
- Creative Bases/Stands: Instead of leaving the base exposed, place your finished tree in a small terracotta pot, a rustic wooden block, a vintage teacup, or a charming mason jar filled with faux snow.
- Versatile Placement Ideas:
- Mantelpiece Decor: Arrange a collection of varying sizes for a stunning focal point.
- Bookshelf Adornment: Tuck them between books for unexpected bursts of holiday cheer.
- Desk Companion: Brighten up your workspace during the festive season.
- Window Sill Display: Add curb appeal or bring cheer to an otherwise plain window.
- Table Centerpiece: Combine with candles and other natural elements for a charming dining table display.
- Thoughtful Gift Giving: These handmade mini trees make incredibly thoughtful and personalized gifts for friends, family, or teachers. Wrap them simply with a ribbon and a handmade tag.
- Seasonal Adaptations: The core technique can even be adapted for other holidays! Imagine a pastel fabric tree for Easter, an orange and black one for Halloween, or even year-round decorative trees for a child’s room.
Maximizing Your Dollar Store Finds: Creative Upcycling Tips
This project is a prime example of how you can look at inexpensive dollar store items not for what they are, but for what they *could be*. The key to successful dollar store crafting and upcycling is to approach each item with an open mind and a creative eye. See a basic tinsel tree? Imagine it covered in rich fabrics. Spot plain glass vases? Envision them painted, frosted, or wrapped. This mindset not only saves you money but also encourages sustainable practices by giving new life to otherwise overlooked items. It empowers you to craft decor that is truly unique, reflecting your personal style rather than mass-produced trends. So next time you’re browsing the aisles, ask yourself: “How can I transform this?” The possibilities are truly endless.
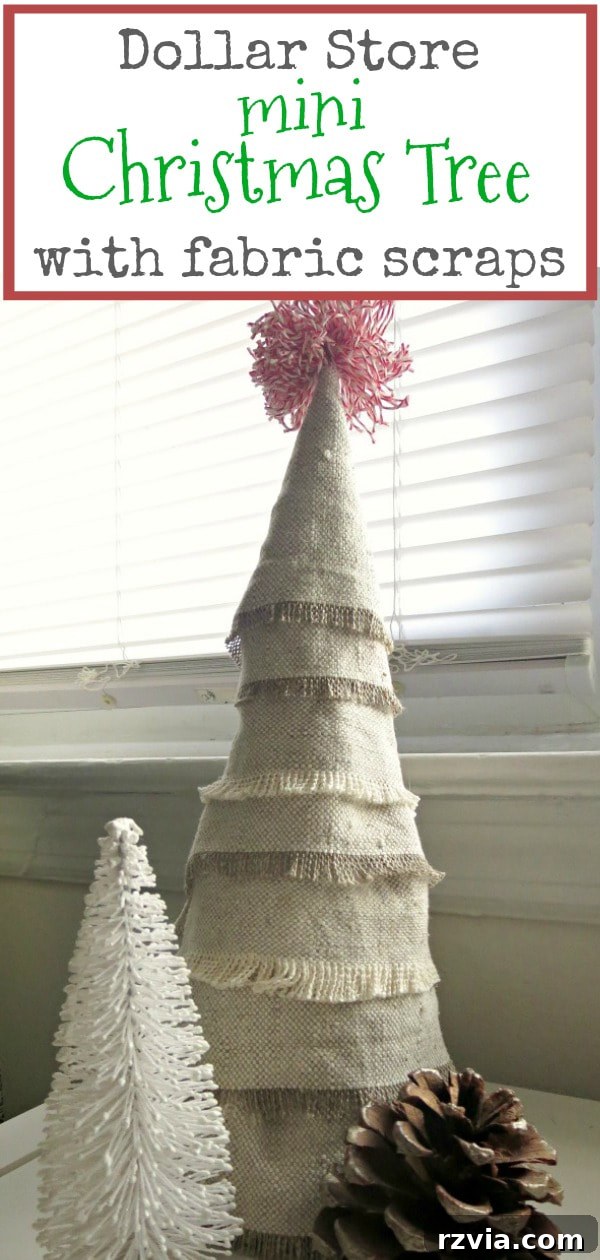
Before embarking on these delightful projects, I had never really ventured into creating any sort of mini Christmas trees. But now, with a little imagination and some readily available materials, I’m thrilled with the results. I sincerely hope that this detailed guide has inspired you to try your hand at this fun and rewarding craft. You too can easily make a charming dollar store fabric mini Christmas tree, adding a truly personal and handcrafted touch to your holiday decorations this season!
Now, don’t forget to scroll down to see the incredible holiday craft ideas my talented friends have put together for you as part of our special dollar store challenge. Get ready for even more inspiration!


My Husband Has Too Many Hobbies • Across the Blvd • The Boondocks Blog
Stone Cottage Adventures • Sew Crafty Crochet • Purple Hues and Me
Cookies, Coffee, and Crafts • Domestic Deadline • Two Chicks and a Mom
Mom Home Guide
Discover More Festive DIY Ideas!
Explore Additional Christmas Crafts You May Enjoy and Get Inspired for Your Holiday Decorating!