
From Drab to “Fabulous”: An IKEA Desk Makeover with Chalky Finish Paint
A while back, I embarked on a creative journey to refresh my older daughter’s bedroom. A true lover of all things blue, we had painted her room in a delightful shade of azure, making several charming, small adjustments to truly personalize her space. I even shared a detailed tour of her blue room with you all, highlighting the cozy corners and thoughtful touches.
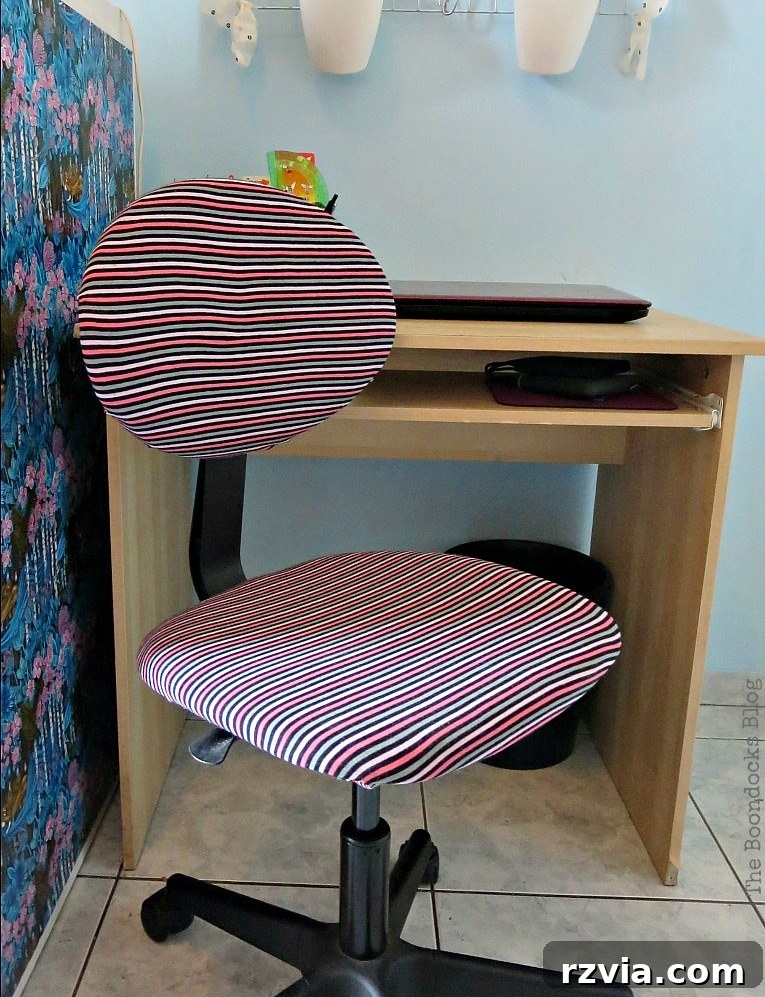
My daughter is a remarkable young woman, full of vibrant ideas and a wonderfully strong sense of personal style. She knows exactly what she likes and, more importantly, what she doesn’t. I’d previously tackled her chair, giving it a fresh look as documented in this post, and even dared to inquire if I could extend my makeover magic to her desk. Let’s just say, at that moment, my chances were slim to none.
Given her penchant for vibrant colors in her room, I was perpetually surprised that she remained content with her rather uninspired, boring desk. Despite my subtle hints and hopeful suggestions, she was adamant: “No painting!” So, you can imagine my utter astonishment, a pleasant surprise indeed, when one ordinary day, completely out of the blue, she declared, “Yes, Mom, it’s finally time to paint it.” And just like that, the vision for this Fabulous IKEA Desk Makeover with Chalky Finish Paint began to take shape.
The Humble Beginnings: Choosing an IKEA Desk for Transformation
This particular desk was a budget-friendly find from IKEA years ago. I honestly don’t even recall its specific model name, but I vividly remember it costing next to nothing and being constructed from particleboard. When we first acquired it, our primary goal was to find a compact piece that wouldn’t further overwhelm an already small and crowded room. It featured a simple, pull-out keyboard shelf underneath, which was its main functional asset. Beyond that, it was undeniably, unequivocally boring in its original finish. A true blank canvas awaiting a splash of personality.
The decision was unanimous: of course, we were going to paint it blue! It was the only fitting color for my daughter’s beloved blue sanctuary.
The Magic of Chalky Finish Paint: “Escape” into a New Hue
For this delightful makeover, I turned to my absolute favorite – Americana Decor Chalky Finish paint by DecoArt. If you haven’t tried chalk paint yet, you are truly missing out on a DIY game-changer! It’s incredibly forgiving, adheres beautifully to almost any surface (yes, even particleboard IKEA furniture!), and rarely requires any tedious sanding or priming beforehand. This makes it perfect for quick transformations, especially for projects like this where you want maximum impact with minimal fuss.
The specific shade I chose for the desk was aptly named “Escape.” Not only is it a gorgeous, serene blue that perfectly complements my daughter’s room, but the name itself seemed to perfectly capture the essence of transforming a dull object into something uplifting and inspiring. It felt like a little escape from the mundane, a journey into creativity.
The Painting Process: Layers of Transformation and Protection
After applying two smooth coats of the beautiful “Escape” blue, the desk truly began to come alive. The chalky finish provided a lovely matte depth, instantly elevating the humble particleboard into something far more sophisticated. To ensure its longevity and protect it from the inevitable wear and tear it would receive in a busy teenager’s room, I followed up with an acrylic varnish finish. This crucial step creates a durable, protective layer, safeguarding the paint from scratches, spills, and daily “abuse.” It’s a small effort that makes a huge difference in the lifespan of any painted furniture piece.
Contrasting Details: The Clean White Keyboard Shelf
To create a crisp and appealing contrast against the vibrant “Escape” blue, I painted the pull-out keyboard shelf in DecoArt Americana Decor Chalky Finish in “Everlasting.” This is a pure, simple white that provided a perfect counterpoint, adding brightness and a touch of modern elegance to the overall design. Initially, the plan was just a clean, white shelf – a subtle backdrop for the main blue desk.
A Touch of Whimsy: Decoupage and the “Fabulous” Factor
However, once the white paint was dry, I found myself feeling a little… underwhelmed. It was still too plain, too dull. I yearned to inject more personality and visual interest into that keyboard shelf. My daughter, ever so expressive, suggested I simply write the word “FABULOUS” on it. “Fabulous” is her word of the moment, after all; everything in her world, from a new outfit to a sunny day, is met with the enthusiastic declaration of being “FABULOUS.”
While her idea was sweet, I knew a single word wouldn’t be enough to satisfy my craving for a truly unique detail. That’s when inspiration struck from an unexpected source: an old Marshall’s shopping bag. I’ve always admired those bags for their distinctive character and bold designs. Casually discarded on the floor next to the desk, its graphic circles sparked an idea. “Isn’t it “FABULOUS”?” I thought, eyeing the bag and the freshly painted shelf.
The Decoupage Journey: Crafting Circles of Style (and a Few Mishaps)
Taking my cue from that charming shopping bag, I decided to decoupage its circular patterns onto the keyboard shelf. Using various plates as templates – a simple yet effective trick – I carefully drew outlines around the sections I wanted to cut out. This ensured uniformity and a pleasing aesthetic for the design.
Cutting the circles proved to be the easiest part of this entire endeavor. The real challenge began when it came to gluing them on. “Easier said than done” doesn’t even begin to cover it! I was frantically searching for my trusty Mod Podge, a staple in any crafter’s arsenal. I distinctly remembered having some in New York, but alas, I wasn’t in New York at the moment, rendering that memory utterly useless. I managed to scrounge up some other glue, but in my haste, I added far too much water, thinning it down to an ineffective consistency. No matter how many coats I applied, the paper circles simply refused to adhere properly to the shelf.
To top off this mounting frustration, the weather decided to join the party with intermittent rain. As any DIY enthusiast knows, high moisture levels are just fantastic for projects involving glue and paper – *not!* The humidity made everything more difficult, prolonging drying times and exacerbating the adhesion issues.
The Triumph: Mod Podge and Stenciled “FAB-U-L-OUS”
Finally, after much hair-pulling, muttered exasperations, and a few evil glares directed at the uncooperative shelf, I reached my breaking point. I had to venture out and acquire the European equivalent of Mod Podge. Once armed with the correct adhesive, the project finally moved forward smoothly. I applied three thorough coats, ensuring the decoupaged circles were perfectly sealed and secure. To truly make my daughter happy, and to incorporate her signature word, I also added “FAB-U-L-OUS” using DecoArt Stencils in the elegant “Whimsical Delight” font.
I have to admit, even though painting the desk was my initial goal and a relatively straightforward process, the keyboard shelf almost defeated me! The battle with the glue and the elements was a true test of patience, but the final result was undeniably worth every challenging moment.
Doesn’t that “FABULOUS” color just make you want to escape to a serene, creative space?
Disclosure: The items below are affiliate links and link to Amazon.com. If you purchase any of these products through the links, I receive a small commission, that way I can continue to provide you with lovely content. There is no extra charge to you for purchasing through my affiliate links.
Here, you can see the thoughtful detail of how I painted the brackets that support the keyboard shelf. The bracket attached to the main desk was painted in the “Escape” blue, allowing it to seamlessly blend with the desk itself. Conversely, the bracket on the shelf was painted white, ensuring it harmonized with its new, bright surface. These subtle choices in color placement contribute to the desk’s cohesive and polished appearance.
And now, finally, everyone is happy! I have my beautifully mod-podged circles, a testament to perseverance and creativity, and she has her beloved “FAB-U-L-OUS” declaration. It’s a win-win in the world of mother-daughter DIY projects.
This sweet blue color, “Escape,” is truly a perfect choice. It brings a refreshing energy and will make the ideal addition to her already vibrant and colorful room, seamlessly integrating with her existing decor while standing out as a unique, personalized piece.
It may have taken an entire week to complete this transformation, what with all the rain-induced humidity and that notorious Mod Podge mishap, but it is finally, triumphantly done. And as my daughter would undoubtedly say, with all the conviction of youth, “it is FABULOUS!!”
I wholeheartedly agree with her. This vibrant blue hue is truly remarkable; it instantly brightened our mood, even on the dreariest of rainy days. The entire process, challenges included, fostered a sense of accomplishment and brought a burst of joyful color into our home.
Reflecting on the Transformation: A Happy Ending
The newly “Fabulous” desk is now back in my daughter’s room, gleaming with its fresh coat of paint and unique, personal touches. She is thrilled with the outcome, and as a result, mama is incredibly happy too. It’s truly rewarding to see a project through to completion, especially when it brings so much joy and fits so perfectly into its intended space.
I truly believe there’s nothing that a good chalky finish paint cannot tackle. From outdated furniture to forgotten pieces, it offers an incredible pathway to transformation, making DIY accessible and enjoyable for everyone. This genuinely is a FABULOUS IKEA desk makeover, and a testament to the power of a little paint and a lot of imagination!
And now, I promise not to use the word “Fabulous” for at least the next six months… or at least I’ll try very hard! Now, be honest with me: what did you think of the mod-podged shelf? Yay or Nay? Share your thoughts in the comments below!
If you’re truly enjoying my content and adventures, I invite you to subscribe to my blog. You’ll receive my latest posts and creative journeys twice a week directly in your mailbox. The subscription form is conveniently located on the sidebar and at the top of the page. Rest assured, your email address will always be kept private and will never be shared with any third party.
Related Posts: More DIY Inspiration for Your Home
<< Sweet Inspiration Link Party #47
|
HOME
|
Green Wreath for Spring >>
Linking up to these Link Parties. This blog is for entertainment purposes only; my DIY tutorials are not professional advice. Read my full disclaimer here.
I love it when I get your comments and I will try to reply to them or visit you on your blog. Please do not add a hyperlink to your comment, otherwise we cannot publish it.