Transforming an old, rusty vintage suitcase into a stunning piece of renewed luggage is a truly rewarding DIY project. What might seem like a daunting task is actually quite achievable, and the beauty of it lies in embracing the imperfections that naturally contribute to its authentic vintage charm. This detailed guide will walk you through every step, showing you how to breathe new life into an forgotten artifact, making it a unique statement piece for your home or travels.
Unearthing a Treasure: The Discovery of My Vintage Suitcase
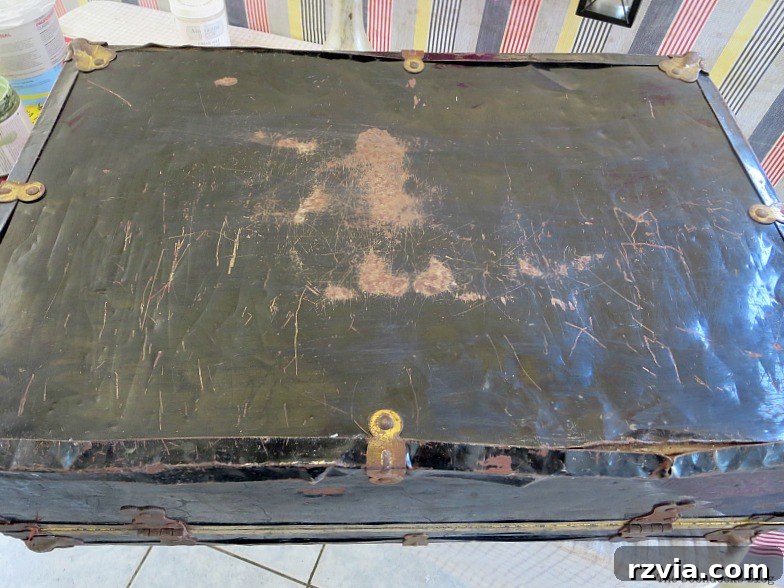
Every remarkable makeover story often begins with an intriguing discovery. For me, the journey to restore this particular vintage suitcase began in the most predictable place for those who follow my adventures: my basement. It seems my basement holds a veritable treasure trove of forgotten relics, and this old suitcase was no exception. It was in truly sorry shape, bearing the unmistakable marks of decades of neglect. Scratches marred its surface, and its metal framework, once sturdy, was bent and contorted, hinting at a tough life lived. It was clear that this was no ordinary piece of luggage; it was a canvas waiting for a passionate hand to revive its former glory.
Despite its dilapidated state, I saw potential. I thrive on a good challenge, and the thought of transforming this battered old suitcase into something beautiful and functional was incredibly appealing. This wasn’t just about painting; it was about resurrecting a piece of history. And so, with a surge of creative energy and a clear vision, I embarked on what would become a fulfilling vintage suitcase restoration project.
Disclosure: This post contains affiliate links for your shopping convenience. If you purchase any of these products through the links, we receive a small commission at no extra charge to you. You can find our full disclosure here.
Why Restore Vintage Luggage? More Than Just a DIY Project
Beyond the simple satisfaction of a successful DIY, restoring vintage suitcases offers a multitude of benefits. Firstly, it’s a wonderfully sustainable practice. Instead of discarding an item that has seen better days, you’re actively contributing to reducing waste and giving it a second life. Secondly, vintage pieces possess an unparalleled character and history that modern items often lack. Each scratch, each faded mark tells a story. By restoring them, you’re not just creating a decorative item; you’re preserving a piece of the past and making it relevant for the present.
A restored vintage suitcase can serve various purposes. It can be a stunning decorative accent in your living room, a unique storage solution for blankets or books, a charming prop for photography, or even a functional piece for light travel if its structural integrity allows. The process itself is a creative outlet, allowing you to experiment with colors, textures, and techniques. It’s a tangible representation of transforming “trash into treasure,” a philosophy deeply ingrained in the DIY community. The imperfections, as you will see, are not flaws but enhancements, adding to the authentic allure of the vintage piece.
Step-by-Step Guide: How to Paint a Vintage Suitcase and Bring It Back to Life
Embarking on a vintage suitcase makeover requires a blend of patience, creativity, and the right materials. Here’s a detailed breakdown of the steps I took to transform my rusty find into a charming piece of luggage.
1. Initial Preparation: Cleaning and Assessing the Damage
Before any paint could touch the surface, the suitcase needed thorough preparation. I started by giving it a good scrub to remove decades of dirt and grime. For vintage items, a gentle cleaner is usually best to avoid damaging the aged materials. After cleaning, I carefully assessed the bent metal framework. Some areas were significantly out of shape, and I used a hammer to gently tap them back into a more desirable form. While I aimed for improvement, I knew perfect alignment wasn’t the goal; preserving its vintage character meant embracing some of its original quirks. This crucial first step ensures a clean canvas and a solid foundation for the subsequent painting process.
2. Painting the Main Body: A Custom Shade of Enchantment
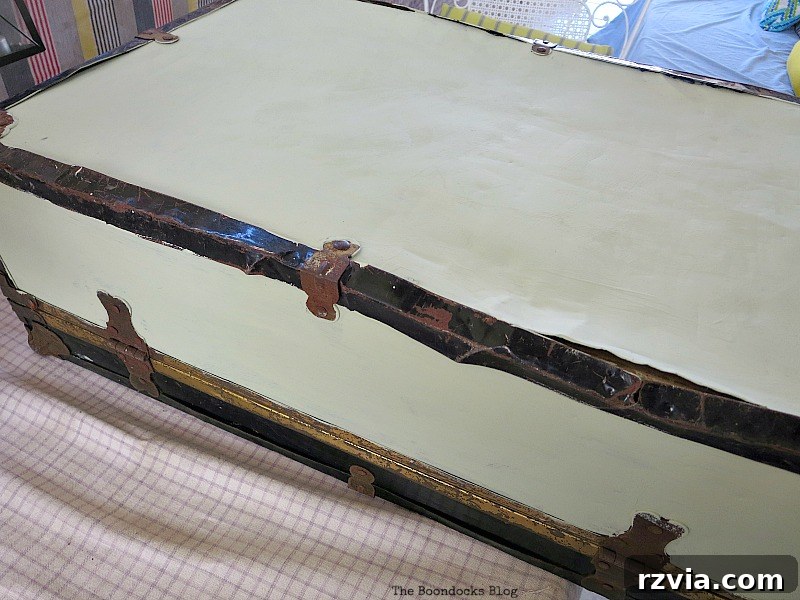
With the suitcase cleaned and basic structural issues addressed, it was time for the transformation to truly begin with the main body. I opted for Enchanted by Americana Decor Chalky Finish Paint from DecoArt, which is renowned for its smooth application and excellent coverage. To achieve a truly unique aesthetic, I decided to create my own custom color. I mixed a touch of white paint into the Enchanted shade, resulting in a beautifully soft olive green. This bespoke hue provided a subtle yet sophisticated base for the suitcase. I applied two coats of this custom chalk paint to the sides, top, and bottom, ensuring an even and opaque finish that completely masked the old, worn surface.
3. Adding Metallic Accents: Burnished Brass for Timeless Elegance
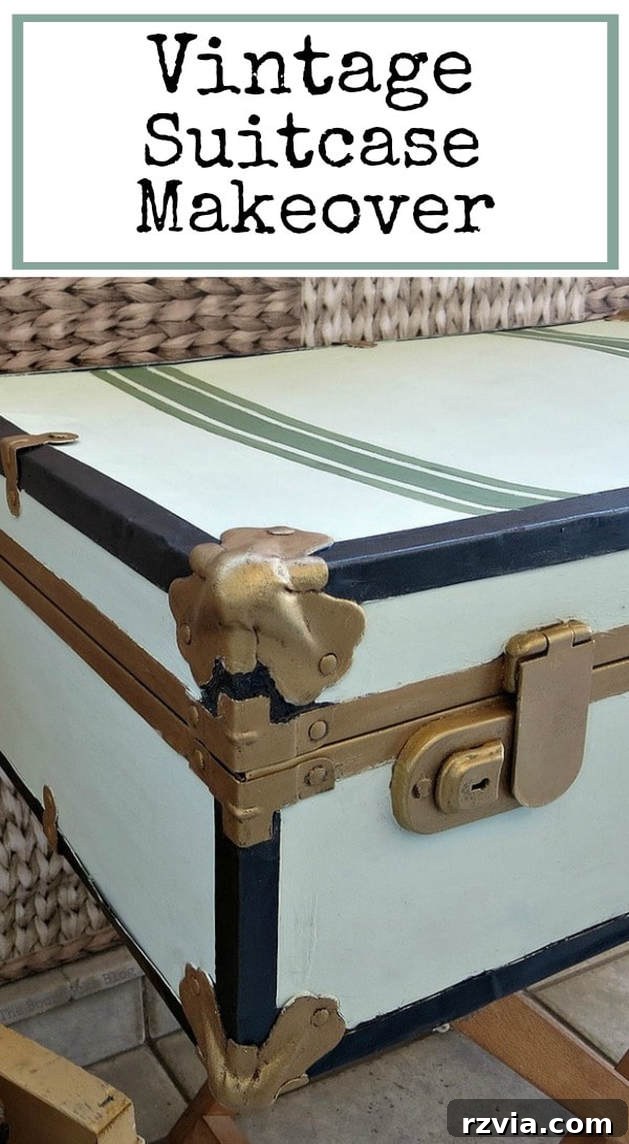
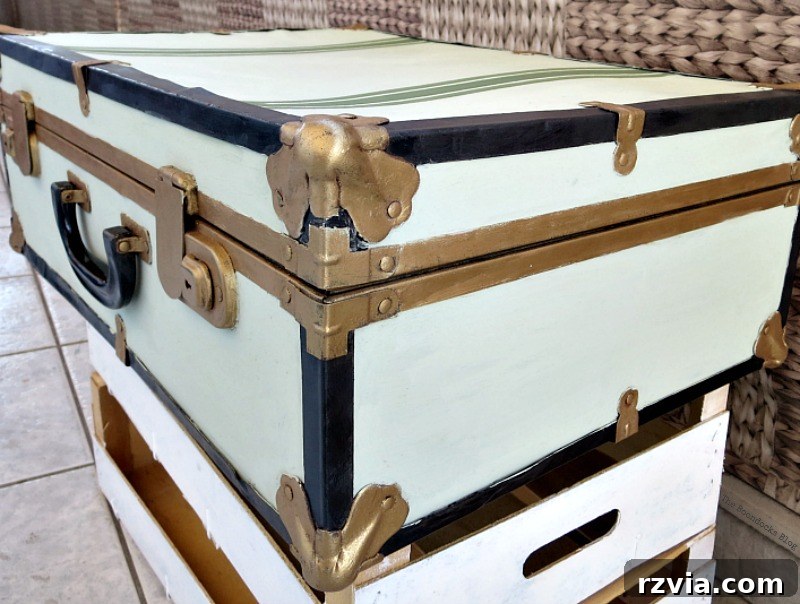
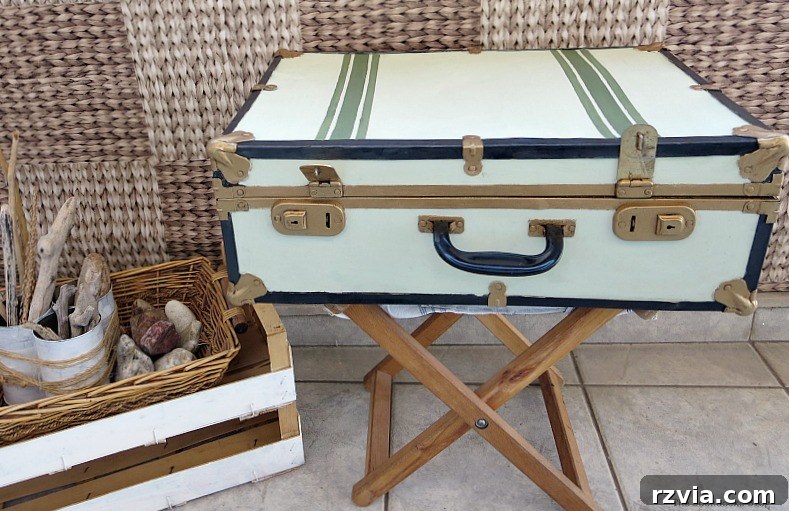
Next, I turned my attention to the metal corner bumpers, which were once an unsightly rusty brown. To elevate their appearance without making them overtly shiny, I chose DecoArt Metallic Lustre in Burnished Brass. This product is fantastic for giving a rich, aged metallic finish. I meticulously rubbed it onto each corner bumper, buffing them to a fine, warm sheen. The burnished brass offered a sophisticated glimmer, providing the perfect contrast against the soft olive green without being as overwhelming as a brighter gold would have been. This choice of metallic lustre was key in achieving that classic, antique luggage aesthetic.
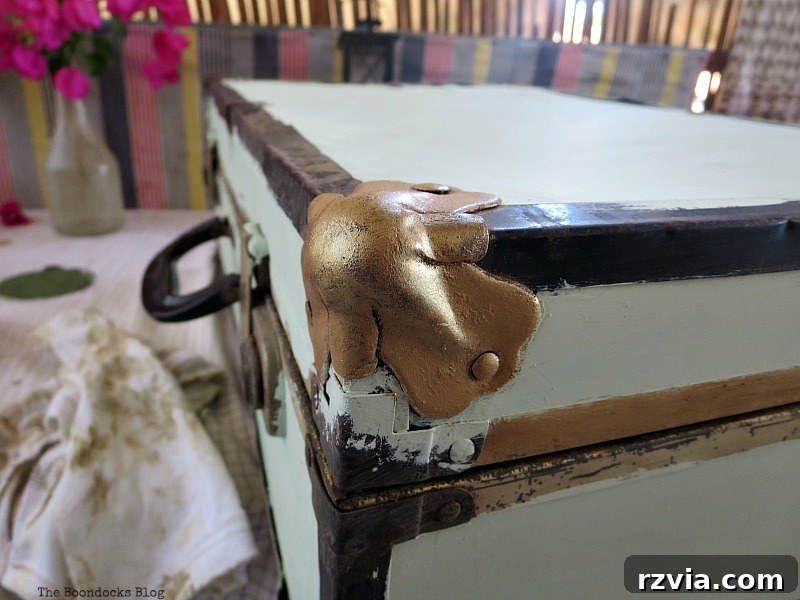
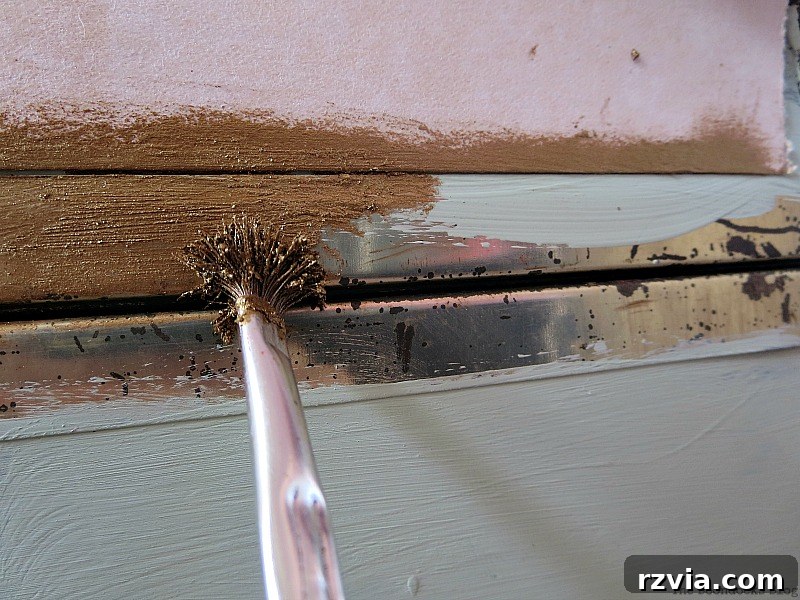
I extended the application of the same metallic lustre to the inner frame parts that secure the suitcase when closed. Achieving precise, straight lines on these delicate components required a careful hand. My trick was to press a piece of sturdy cardboard firmly against the edge of the frame, creating a barrier, and then painting along it. This simple technique ensured a clean, crisp line, making the burnished brass stand out beautifully against the painted interior.
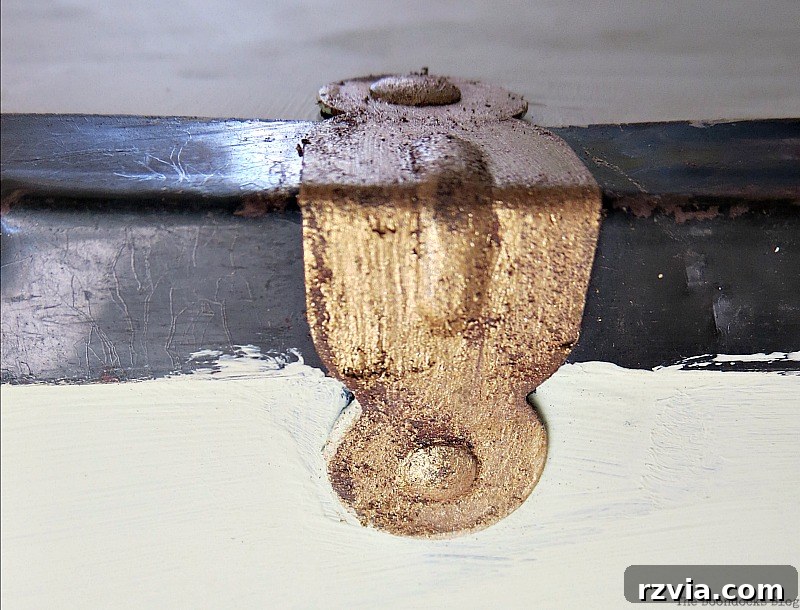
The edge clamps, crucial elements for the suitcase’s closure, also received the same burnished brass treatment. Their transformation from dull, rusted metal to gleaming, antique gold significantly contributed to the overall upscale look of the restored piece.
4. Defining Edges: A Striking Black Framework
To provide a strong, clean contrast and define the structural lines of the suitcase, I decided to refresh the outer framework with a classic black acrylic paint. This bold choice immediately drew attention to the suitcase’s sturdy construction and provided a sophisticated backdrop for the softer olive green body and the shimmering brass accents. The black frame gave the entire piece a renewed sense of strength and elegance, perfectly complementing the vintage aesthetic I was aiming for. It truly tied all the different elements together.
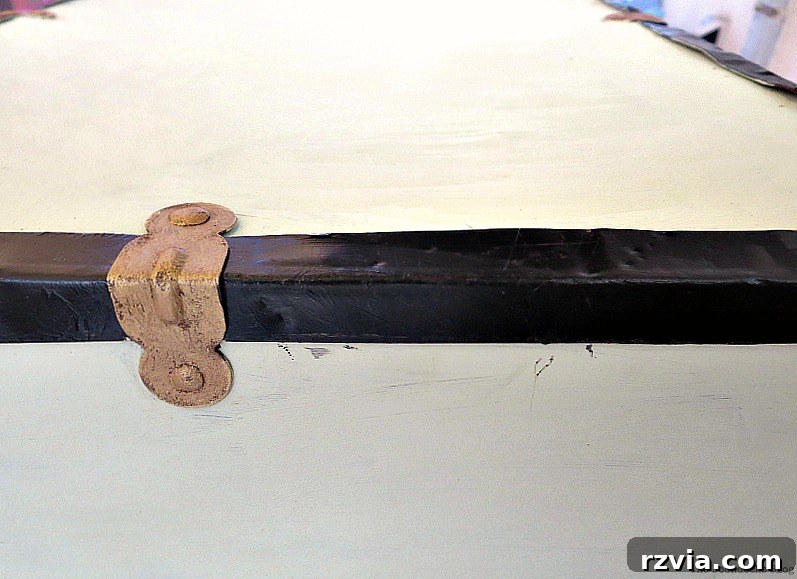
5. Crafting Faux Straps: Achieving an Old-World Charm
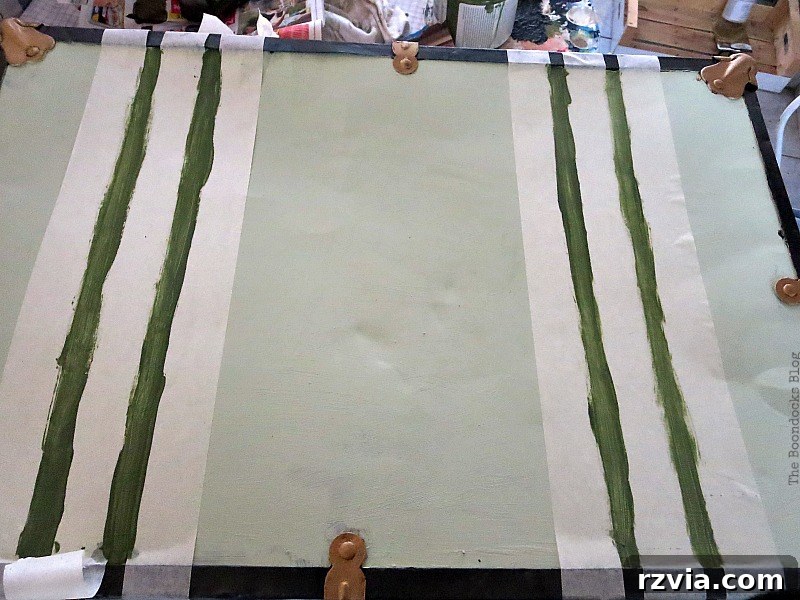
For this vintage suitcase makeover, I envisioned an old-world look, reminiscent of classic luggage adorned with sturdy leather straps. Instead of adding actual straps, which would have been complex, I decided to create the illusion of them using paint. I carefully taped off sections on the top of the suitcase to form wide, decorative stripes. These “straps” were then painted with my custom-mixed Enchanted (soft olive green) color, matching the main body. This step was physically demanding, requiring me to bend over for extended periods, resulting in a bit of a backache. However, the effort was well worth it, as these painted straps added a distinctive character and depth, truly embodying the classic travel aesthetic I desired.
6. The Art of Imperfection: Embracing Vintage Character
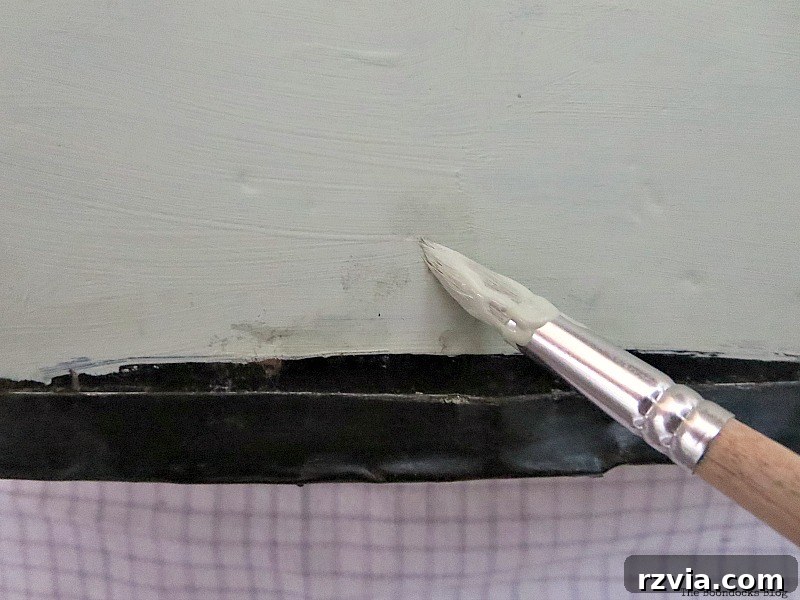
After all the primary painting was complete, I went back to touch up a few areas. I recalled taking a hammer to some of the more severely bent sections of the frame earlier in the process. As you can see in the photo, some slight irregularities remained. However, these aren’t flaws to be hidden; they are part of the suitcase’s story and its authentic vintage appeal. It’s crucial to remember that with vintage pieces, absolute perfection isn’t the goal. Trying to make it look brand new would erase its character and charm. The minor bends and slight imperfections are what give it soul and a unique narrative. They tell you this piece has lived, traveled, and holds a history that no new item can replicate.
The Grand Reveal: My Transformed Vintage Suitcase
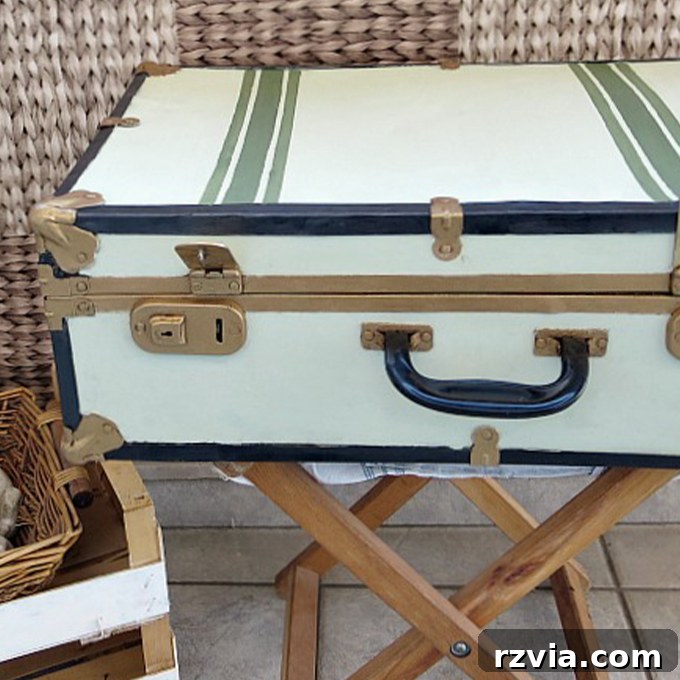
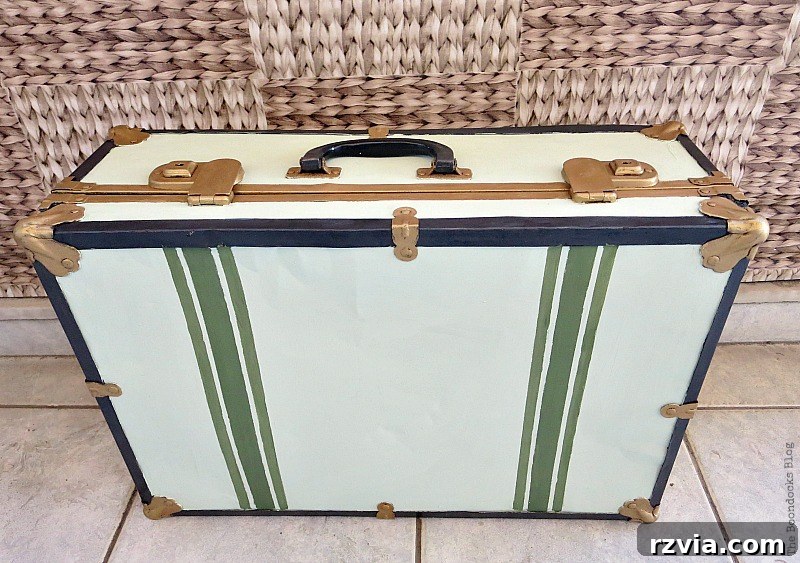
And here she is, my beautifully restored vintage suitcase, radiating a timeless elegance! The transformation from a rusty, neglected relic to this stylish piece of luggage is truly gratifying. The soft olive green body, the gleaming burnished brass hardware, and the crisp black framework come together harmoniously to create a look that is both classic and chic. This isn’t just a suitcase anymore; it’s a conversation starter, a testament to the power of upcycling and the enduring appeal of vintage design.
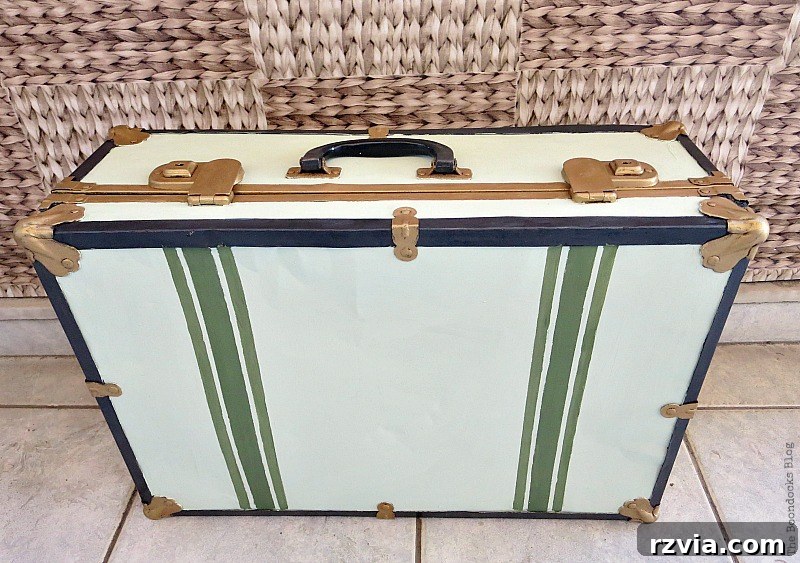
Doesn’t she look absolutely spiffy? The combination of colors and textures creates a sophisticated aesthetic that far surpasses its humble beginnings. The rich, warm tones of the burnished brass against the deep black frame are particularly striking.
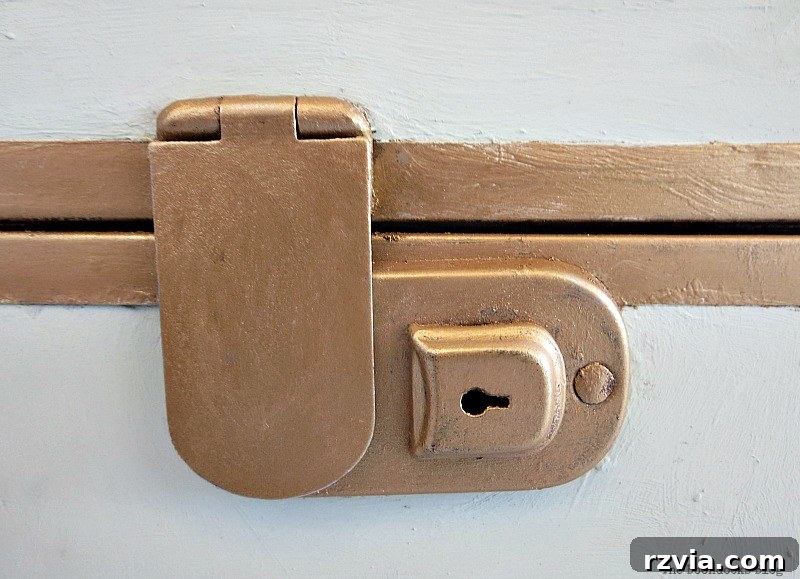
I am particularly fond of the stark yet harmonious contrast between the burnished brass clasps and the bold black frame. This interplay of light and dark, metallic and matte, adds incredible depth and visual interest to the suitcase’s design.
Design Choices and Overcoming Challenges
During the restoration process, several design decisions had to be made, some of which were influenced by the suitcase’s original eccentricities. For instance, I chose to leave the bottom of the suitcase simply painted with the main olive green color, without adding any faux straps or additional detailing. Given the effort involved in painting the entire piece, and recognizing that the bottom would largely be out of sight, this was a practical choice that saved my back from further aches!
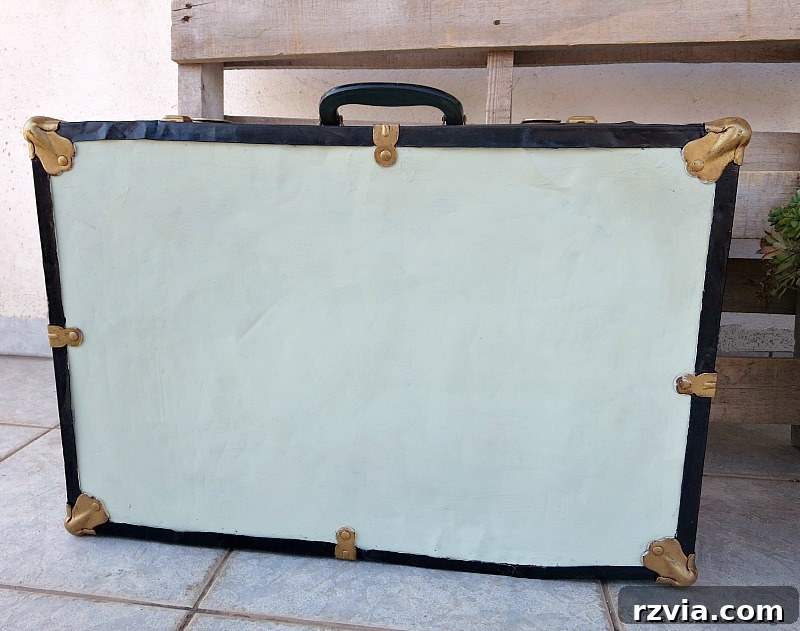
Initially, I had considered extending the painted straps all around the vintage suitcase. However, upon closer inspection, I realized that the original clasps and hardware were not symmetrically placed. They were situated at slightly different distances from the ends of the suitcase, and even the central edge clamp was visibly off-center relative to the handle, whereas the bottom clamp was aligned. Painting stripes continuously around the entire piece would have inadvertently drawn more attention to these inherent irregularities, which would have detracted from the overall polished look. By limiting the faux straps to the top, I managed to create the desired old-world effect while cleverly downplaying the suitcase’s original structural quirks.
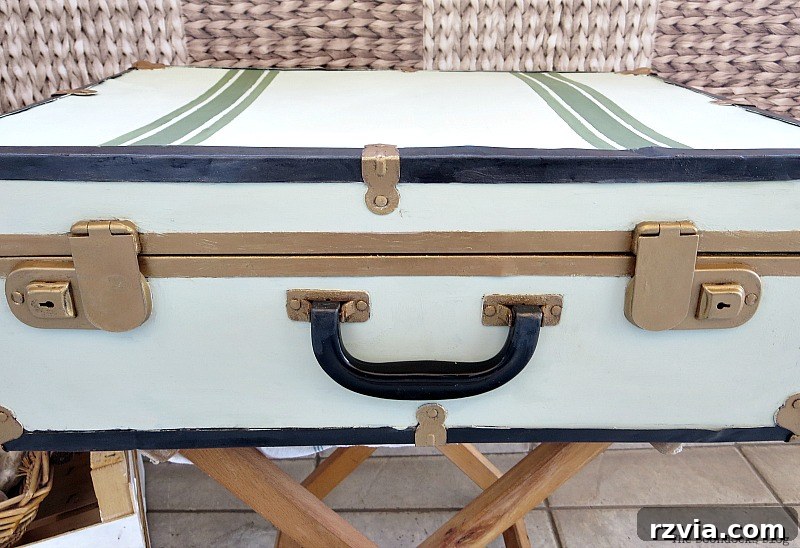
This decision was crucial for maintaining the intended aesthetic. By strategically placing the decorative elements, I ensured that the suitcase’s inherent charm and character were enhanced, rather than overshadowed, by its delightful imperfections.
Resources for Your Own Vintage Restoration Journey
Throughout this project, I stumbled upon a fantastic online resource: Brettuns Village. This website specializes in restoring trunks and old suitcases and proved to be incredibly informative. It taught me the correct terminology for various suitcase components (like “corner bumps” and “edge clamps”), which was immensely helpful. They even have a dedicated page offering valuable guidance on how to restore your own vintage pieces. Such resources are invaluable for any DIY enthusiast looking to delve deeper into the craft of antique restoration, providing both inspiration and practical advice.
Of course, the journey with this vintage suitcase isn’t quite over. While its exterior has been beautifully rejuvenated, there’s still another exciting phase to reveal. I’ll be sharing what’s inside very soon, so stay tuned for the next part of this thrilling transformation!
Final Thoughts: A Trash-to-Treasure Success Story
I genuinely adore the softness of the custom-mixed olive green color. It creates a serene backdrop that makes the metal hardware, especially the burnished brass, pop with remarkable clarity and elegance. This vintage suitcase makeover truly embodies the essence of a “trash to treasure” project, proving that with a little imagination and effort, seemingly discarded items can be transformed into cherished possessions. I’d love to hear your thoughts! Do you think I chose the colors well for this restoration? How do you feel about the burnished brass accents? And more importantly, do you have any old, forgotten pieces like this just waiting for a new lease on life? Share your own restoration stories and insights in the comments below!
And now, after all that creative work, it’s time for some much-needed rest…